Evolved Ingenuity • 602 Fountain Parkway • Grand Prairie, TX 75050 • 855.212.4047 • www.ameristep.com Evolved Ingenuity • 602 Fountain Parkway • Grand Prairie, TX 75050 • 855.212.4047 • www.ameristep.com
2 3
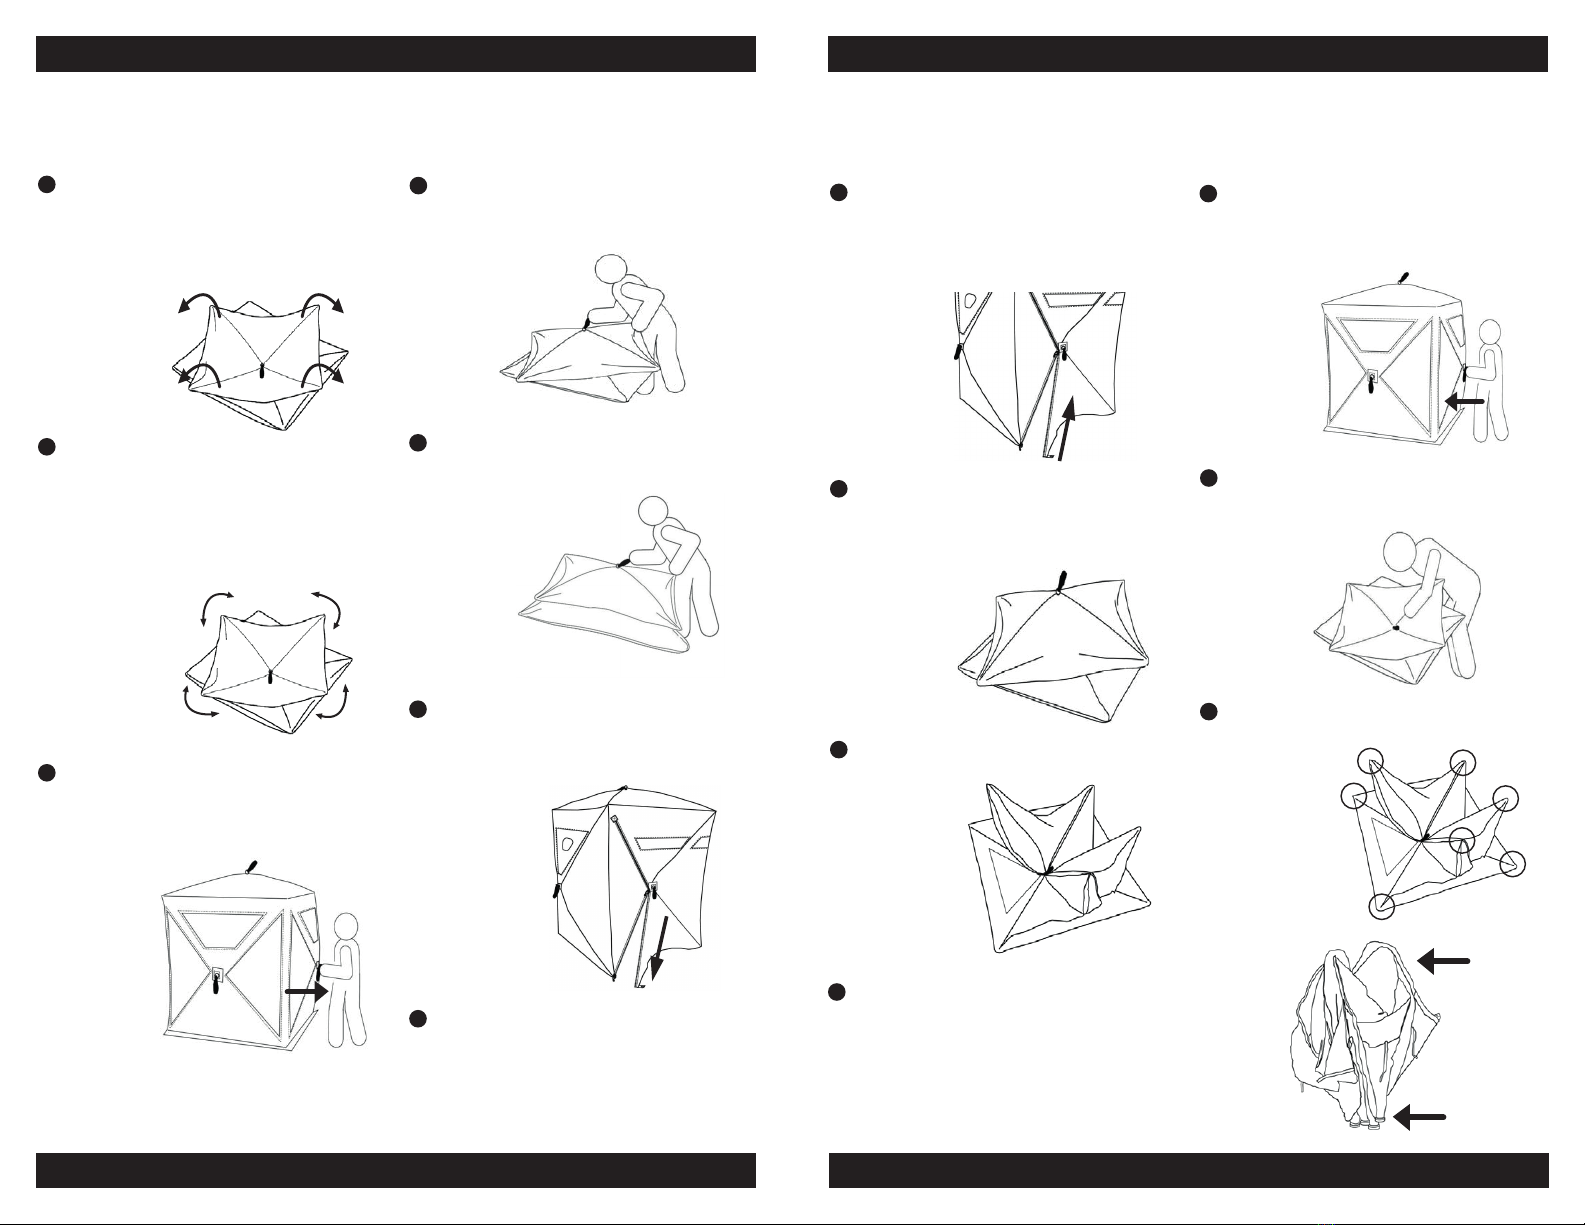
ABBAU
Drücken Sie mit der Handäche auf das
Mittelstück einer der Seitenwände, bis die
Spannung nachlässt, wie in Abbildung 2
dargestellt.
Drücken Sie mit der Handäche auf das
Mittelstück des Daches, bis die Spannung
nachlässt, wie in Abbildung 4 dargestellt.
Führen Sie alle Ecken des Zeltes wie in
Abbildung 6 dargestellt zusammen.
Anmerkung: Wenn Sie nicht alle Ecken des
Zeltes zusammenführen können, drehen Sie
die obersten Ecken vorsichtig von links nach
rechts, während Sie sie weiter zusammenfüh-
ren. Die Ecken werden spürbar „gelöst“ und
fallen in sich zusammen, wie in Abbildung 7
dargestellt.
Das Zelt sollte nun wie in Abbildung 5 darge-
stellt aussehen.
Wiederholen Sie Schritt 2 bei den restlichen
Wänden. Sobald alle Seitenwände hinein-
gedrückt wurden, fällt das Zelt in sich zu-
sammen, wie in Abbildung 3 dargestellt.
1
3
5
7
6
4
2
Schließen und sichern Sie die Fenster von innen.
Verlassen Sie das Zelt. ÖFFNEN SIE DEN
TÜRREISSVERSCHLUSS wie in Abbildung 1
dargestellt.
Abbildung 2
Abbildung 1
Abbildung 3
Abbildung 4
Abbildung 6
Mittelstücke
Weiche
Enden
Abbildung 7
Abbildung 5
WICHTIG: Entfernen Sie Gestrüpp, Schmutz und Schutt. Entfernen Sie die Heringe und
Abspannschnüre und schließen Sie ALLE Fenster, BEVOR Sie mit dem Abbau beginnen.
Modell Nr. 1RX2H046 verfügt über einen abnehmbaren Boden - dieser muss vor dem
Abbau entfernt werden, um Schäden an Ihrem Zelt zu vermeiden.
AUFBAU
Nachdem Sie das Zelt aus der Tasche ge-
nommen haben, falten Sie die Ecken nach
außen und legen Sie das Zelt ach auf den
Boden (siehe Abbildung 1). Stellen Sie sicher,
dass das Material NICHT verdreht ist oder die
Stangenenden überdeckt.
12
3
5
4
6
7
Abbildung 1
Abbildung 2
Abbildung 3
Anmerkung: Wenn Sie beim Anheben des
Zeltes in Schritt 4 die Schlaufe nicht greifen
können, drehen Sie die aufgeklappte Sei-
tenwand beim Anheben leicht von links nach
rechts wie in Abbildung 3 dargestellt. Dadurch
entfaltet sich das Zelt und Sie können die
restlichen Seitenwände an den Schlaufen in
die richtige Position ziehen.
Ziehen Sie jede Seitenwand an der Schlau-
fe heraus, bis alle Seiten außer der Türseite
wie in Abbildung 5 dargestellt aufgeklappt
sind.
Heben Sie das Zelt an, bis Sie eine andere
Schlaufe greifen können und ziehen Sie, bis
die Seitenwand wie in Abbildung 4 dargestellt
aufklappt.
Ziehen Sie fest an einer der Schlaufen au-
ßen an der Wandmitte, bis sie automatisch
aufklappt. Anmerkung: Die Türseite sollte
zuletzt aufgeklappt werden.
Das Zelt sollte nun aufgebaut sein. Befestigen
Sie das Zelt mit den Heringen am Boden. Pas-
sen Sie die Fenster an und stecken Sie Ge-
strüpp in die außenliegenden Taschen (falls
bei Ihrem Modell vorhanden), um Ihre Tarnung
zu optimieren.
WICHTIG: Stellen Sie sicher, dass die
Türreißverschlüsse vollständig geschlossen
sind, sodass die Seitenwand gespannt bleibt.
Ziehen Sie nun die TÜRSEITE heraus.
HINWEIS: Die verwendeten Bilder dienen
nur zur Illustration und können vom
Originalprodukt abweichen.
Abbildung 5
Abbildung 6
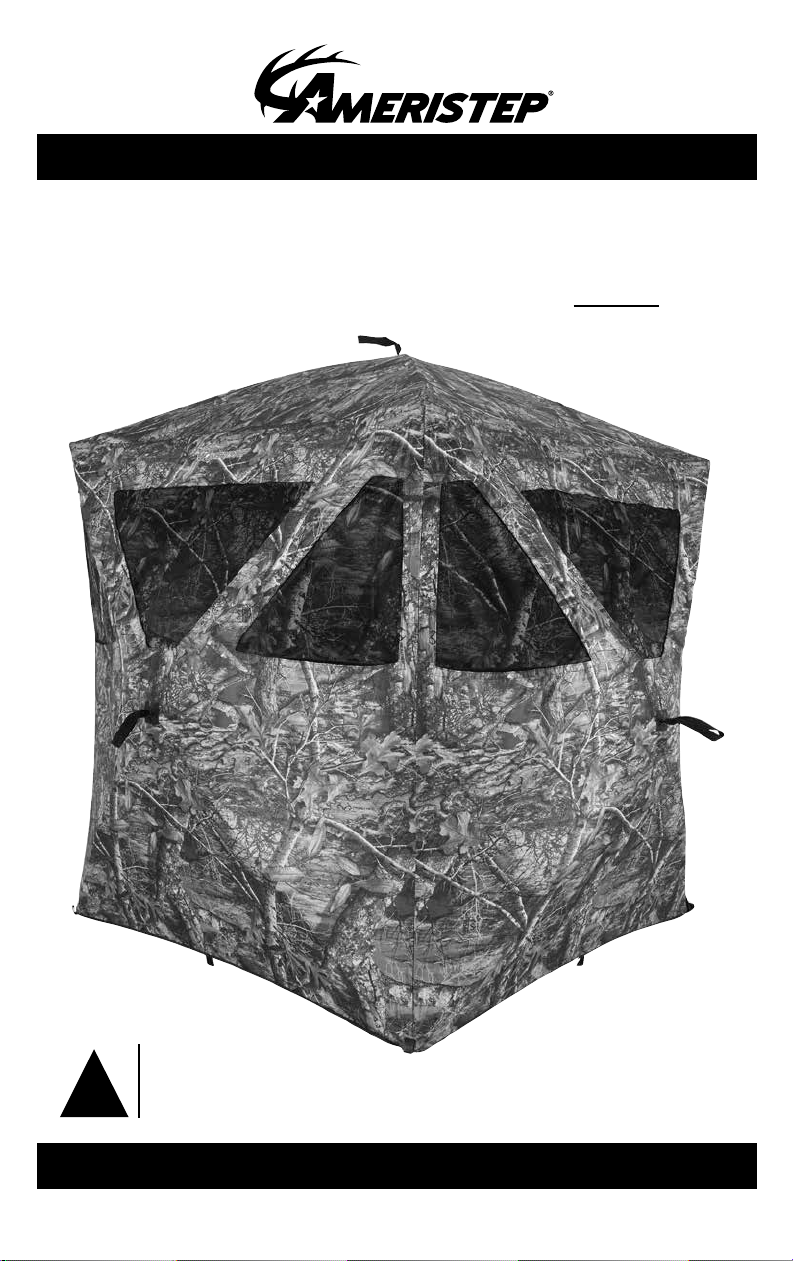
Lieferumfang:
1 Tarnzelt
1 Tragerucksack
Heringe
Abspannschnüre gegen starken Wind
Abbildung 4