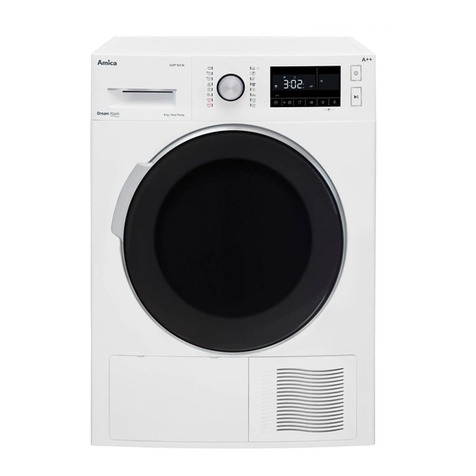
Amica WTA 14305 W User manual

DRYER
Please carefully read these Operating Instructions before using the appliance!
OPERATING INSTRUCTIONS EN
IO-WMS-0039
(11.2015/1)
WTA 14305 W

2
In accordance with European Directive 2012/19/EC and Polish legislation regarding
used electrical and electronic goods, this appliance is marked with the symbol of the
crossed-out waste container.
This marking indicates that the appliance must not be disposed of together with other
household waste after it has been used.
The user is obliged to hand it over to waste collection centre collecting used electrical
and electronic goods. The collectors, including local collection points, shops and local
authority departments provide recycling schemes. Proper handling of used electrical and
electronic goods helps avoid environmental and health hazards resulting from the presence of danger-
ous components and the inappropriate storage and processing of such goods.
CONTENTS
Basic Information........................................................................................................................3
Safety instructions...................................................................................................................4
Install the dryer.......................................................................................................7
Display and control panel........................................................................................11
Troubleshooting..............................................................................................................14
Maintenance and Cleaning.......................................................................................16
Specification..............................................................................................................18
Product fiche..........................................................................................................19

3
BASIC INFORMATION
Dear customer,
From today, DRYING will be easier than ever before. Your Amica DRYER is exceptionally
easy to use and extremely efcient. After reading these Operating Instructions, operating the
appliance will be easy.
Before being packaged and leaving the manufacturer, the appliance was thoroughly checked
with regard to safety and functionality. After these tests some moisture or water may remain
in the appliance.
Before using the appliance, please carefully read these Operating Instructions
By following these instructions carefully you will be able to avoid any problems in using the
appliance.
It is important to keep these Operating Instructions and store them in a safe place so that
they can be consulted at any time.
Follow these instructions carefully in order to avoid possible accidents.
Important!
This dryer is intended for household use only for drying textiles and clothing.
Level the appliance before connecting it to a wall socket.
The manufacturer reserves the right to introduce changes, which do not affect operation of
the appliance.
Use
l Carefully read the instructions below before using the appliance.
l Never use the appliance outdoors or anywhere the temperature may fall below freezing.
l The appliance should not be operated by children or anyone who has not read the
instructions.
Important! Temperatures below 0°C can damage the appliance!
In the event of the appliance being stored or transported in sub-zero temperatures, it should
be left to acclimatise in a temperature above 0°C for 8 hours before being used.
Manufacturer’s Declaration
The manufacturer hereby declares that this product meets the requirements of the follow-
ing European directives:
l Low Voltage Directive 2014/35/EU,
l Electromagnetic Compatibility (EMC) Directive 2014/30/EU,
and has been marked with the symbol and issued with a declaration of compliance
made available to market regulators.

4
NOTES ON SAFETY
1. Unique and luxury design: Uniquely styled front loading
dryer.
2. Electronic Controls: Simple and convenient operation
thanks to electronic controls. The appliance will automati-
cally adjust the temperature when drying.
3. Large door opening: Observe the drying process clearly
through the door window.
4. Open the door 180°: It is very convenient to put in and
take out laundry thanks to wide opening angle.
5. Clever design: Suitable capacity and unique appear-
ance with anti-dust, anti-humidity, anti -vibration features
to ensure , long life and low noise operation.
6. Do not tumble dry laundry cleaned with industrial chem-
icals.
7. Regularly clean the lint lter.
8. Lint must not to be allowed to accumulate around the
tumble dryer.
9. Adequate ventilation must be provided to avoid the back
ow of gases into the room from appliance burning other
fuels, including open res.
10. Do not dry unwashed items in the tumble dryer.
11. Items that have been soiled with substances such as
cooking oil, acetone, alcohol, petrol, kerosene, spot re-
movers, turpentine, waxes and wax removers should be
washed in hot water with an extra amount of detergent
before being dried in the tumble dryer.
12. Items such as foam rubber (latex form), shower caps,
waterproof textiles, rubber-lined articles and clothes or
pillows lled with foam rubber pads should not be dried in
the tumble dryer.

5
NOTES ON SAFETY
13. Fabric softeners, or similar products, should be used
as specied by the fabric softener instructions.
14. The nal part of a tumble dryer cycle occurs without
heat (cool down cycle) to ensure that the items are cooled
down to a lower temperature and they will not be dam-
aged.
15. WARNING: never stop a tumble dryer before the end
of the drying cycle unless all items are quickly removed
and spread out so that the heat is dissipated.
16. The exhaust air must not be discharged into a ue
which is used for exhausting fumes from appliance burn-
ing gas or other fuels.
17. The appliance must not be installed behind a lockable
door, a sliding door or a door with a hinge on the opposite
side to that of the tumble dryer in such a way that a full
opening of the tumble dryer door is restricted.
18. Oil-affected items can ignite spontaneously, especially
when exposed to heat sources such as in a tumble dryer.
The items become warm, causing an oxidation reaction in
the oil. Oxidation creates heat. If the heat cannot escape,
the items can become hot enough to catch re. Piling,
stacking or storing oil-affected items can prevent heat from
escaping and so create a re hazard.
19. If it is unavoidable that fabrics that contain vegetable
or cooking oil or which have been contaminated by hair
care products be placed in a tumble dryer, they should
rst be washed in hot water with extra detergent. This will
reduce, but not eliminate, the hazard.
20. The appliance should not be overturned during normal
use or maintenance.
21. Remove all objects from pockets such as lighters and
matches.
6
NOTES ON SAFETY
22. This appliance can be used by children aged 8 years
and older or persons with physical, mental or sensory
handicaps, or those who are inexperienced or unfamiliar
with the appliance, provided they are supervised or have
been instructed how to safely use the appliance and are
familiar with the associated risks. Ensure that children do
not play with the appliance. Children should not be al-
lowed to clean or maintain the appliance.
Children less than 3 years of age shall be kept away unless
continuously supervised.
23. For appliances with ventilation openings in the base, a
carpet must not obstruct the openings.
24. If the power cable is damaged, it must be replaced by
the manufacturer, its service agent or similarly qualied
persons in order to avoid a hazard.
25. This appliance is for indoor use only.
26. The openings must not be obstructed by a carpet.

7
INSTALL THE DRYER
I. Install the appliance
Features and components
1. Top board
2. Control panel
3. Door
4. Front panel
5. Side panel
6. Filter
7. Flexible tube
8. Power plug
9. Switch
10. Tumbling drum

8
INSTALL THE DRYER
II. Before you use the appliance
The rst step: Power source and grounding.
The dryer is powered by alternating current of rated voltage and frequency. When the volt-
age uctuates between 6% of rated voltage, the dryer can operate normally. For conveni-
ence and safety connect the dryer to a dedicated wall power socket beside the dryer. The
gure below shows the connection method.
To ensure safety, please make modications and improvements as soon as possible ac-
cording to the rules and suggestions mentioned above.
Notices:
To prevent incorrect installation or use of the socket and to guarantee the safe use of
electricity, the socket and the grounding wire must be installed by an electrician. The dryer
power wire of employs Y connection. If the supply cord is damaged, it must be replaced by
the manufacturer, its service agent or similarly qualied persons in order to avoid a hazard.
Never connect the grounding wire with the neutral wire, otherwise the body of the appli-
ance will be charged, which is likely to cause the danger of electric shock.

9
Dry Normal Not tumble dry
normal
Do not dry
Line dry/hang to
dry
Drip dry Dry at Dry in the shade
Dry clean Do not dry clean Dry clean normal
cycle with any
solvent
Dry clean normal
cycle petroleum
solvent only
INSTALL THE DRYER
III. Connect to power supply
This product is type I electronic appliance. Please take note of the following safety
guidelines:
1. The appliance must be connected to a grounded power line that does not interfere with
any public utility systems such as gas pipe or water pipe etc. Make sure the individual
wires are connected properly.
2. Please use socket complying with the national standards that can with stand 10A
current.
To ensure safety, please make the necessary modications and improvements as soon as
possible according to the rules and suggestions mentioned above.
Please pay attention to labels on the laundry that prohibit the use of tumble dryer or they
contain the following symbols:

10
INSTALL THE DRYER
IV. Simple installation
Step 1: Dryer should be placed in a ventilated area with not
less than 10 cm distance from the wall. If placed in a room
such as bath room, make sure there are no obstacles within
1,5 m in front of dryer. Keep the dryer well entilated.
Step 2: The horizontal adjustment:
Tie a heavy object on the string on the front and two sides of
the dryer. Please refer to the gure below. If A=A’, B=B’, the
dryer is placed horizontally.
The heavy object
Notice:
If dryer cannot be placed horizontally (the
tilt angle exceeds 2°), the dryer will operate
unbalanced or may stop working.
Notes on installationNotice when
installing:
• Do not install the dryer outdoor or a place
exposed to rainfall;
• Do not place the back of dryer near a curtain;
• Do not place the dryer near gas or near ammable asub-
stances.
Step 3: Install the exible tube:
• Connect one side of the exible tube to the vent and ,
tighten.
• Connect the other end of ex tube to outdoor ue. Please refer to the gures below for
correct installation method.

11
DISPLAY AND CONTROL PANEL
1
2
3
4
56
1. On/Off
2. Start/Pause
3. Program (Mix/Cotton/Synthetic/1 hour)
4. Dryness Level (Extra/Standard/Less)
5. Delay (9H/6H/3H)
6. Anti-Crease
5 + 6. Child Lock
Note:
1. Press the [ Program ] button to select the desired programme.
2. Press the [Dryness Level] button to select the desired programme.
3. Press the [Anti-Crease] button to start Anti-Crease function.
4. Press the [Start/Pause] button.
5. Press the [Delay] button to delay the drying cycle.
6. If needed, press and hold [Anti-Crease] and [Delay] buttons simultaneously for 3
seconds to activate the child lock function.
7. You will hear a beep when drying cycle is nished. Press the [On/Off] button and unplug
the power cable.
8. Clean the lter, cabinet and inner tube.
9. [ ] This symbol indicates the most energy efcient “standard cotton programme”,
which is most suitable to dry normal cotton laundry at rated load capacity.
10. After the dryer stops, clean the lint lter when the “Filter” light is ashing.
5 6
+

12
DISPLAY AND CONTROL PANEL
Operate your appliance
1. Before drying, thoroughly spin the laundry in washing machine. High spin speed can
reduce the drying time and save energy consumption.
2. For uniform drying results, sort the laundry according to fabric type and drying pro-
gramme.
3. Before drying, please close zips, hooks and eyelets, button up, tie fabric belts, etc.
4. Do not over dry the clothes, because over dried clothes can easily get creases.
5. Do not dry the articles containing rubber or similar elastic materials.
6. The door can only be opened when the programme completes. This prevents the user
from being scalded by hot steam or over heated air.
7. Clean the lint lter and empty condensed water container after each use to avoid exten-
sion of drying time and energy use.
8. Do not dry clothes after a dry-cleaning process.
The reference weight of dry clothes
Coats
(approx. 800 g)
Jackets
(about 800g cotton)
Jeans
(approx. 800 g)
Quilts
(about 900g cotton)
Sheets
(about 600g cotton)
Working clothes
(upper and lower)
(about 1120g cotton)
Pyjamas
(approx. 200g)
Shirts
(about 300g cotton)
T-shirts
(about 180g cotton)
Briefs, panties
(about 70g cotton)
Socks
(about 50g ber mix)

13
DISPLAY AND CONTROL PANEL
Drying guidelines
Clothing
Type
Appro-
ximate
amount of
remaining
humidity
Capacity
(kg)
Programs Dryness
Level
Note
Cotton 70% 7/3.5 Cotton Extra Please
select the
most suita-
ble Program
and
Dryness
Level de-
pending on
the size and
type of load.
60% 7/3.5 Cotton Standard
Mix 70% 7/3.5 Mix Extra
60% 7/3.5 Mix Standard
Synthetic 50% 3.5/1 Synthetic Extra
40% 3.5/1 Synthetic Standard
Cotton ----- 1 1Hr -----
Note:
1. Cold wind function means there is only cold wind for circulating before nishing heating
3 minutes.(Except 1 hour program which runs 10 minutes cold wind.)
2. If Anti-Crease option is selected, the anti-crease process will enlarge to 2 hour, otherwi-
se it keeps 30min without this option.
3. Ambient temperature and humidity will affect drying time.
4. Check the label attached to clothing and select the right temperature and drying time
according to the guidelines.
Suggestion: When the load does not exceed 1kg, please select a 1-hour drying
programme.

14
TROUBLESHOOTING
Problem Cause Solution
Appliance will not
start
Power outage.
The power plug is not plugged in cor-
rectly.
The load is too big.
The temperature safety device is ac-
tuated.
Wait until power is
restored.
Check the power socket,
make plug is inserted
correctly.
The laundry to be dried
must be spun in a wash-
ing machine and load
weight must not exceed
6kg.
Rest the temperature
safety device.
Appliance over-
heats
The lint lter is dirty or clogged.
Air intake or exhaust duct is dirty or
clogged.
Clean the lint lter.
Clean the exhaust duct.
Laundry too dry The clothes in machine are too full.
The laundry is left in the drum after
the drying cycle completes.
The laundry is not sorted properly.
The temperature is set too high.
Make sure the clothes
are not too full.
Take out the laundry im-
mediately when the dry-
ing cycle completes.
Observe the care labels
on clothing.
Laundry shrinks Laundry too dry Observe the care labels
on clothing. Take out the
clothes when still slightly
damp and hang out to
dry.
Pilling on clothes It is normal for pills to form on some
synthetic bres. This is caused by
fabrics rubbing against one another.
Use fabric softener to
lubricate the bre, please
spray settled gule on cuff
and neckline when iron
clothes. Turn the sarcen-
et out for reducing rub.
Typical noises made by the operating appliance.
• Noise due to vibration: heavy wet laundry turning in the drum will make noise.
• Thumping: when drying, the machine will generate steam which comes out from pipe and
this will cause thumping noises.

15
TROUBLESHOOTING
Error codes
Error code Description Cause Result Failure indication
E3 Temperature
Sensor error
Break in
temperature
sensor cir-
cuit or PCB
is faulty
Program stops
and the appli-
ance enters fault
state
3H and 6H LEDs
ashing
E4 Temperature
Sensor error
Tempera-
ture sensor
is shorted
or PCB is
faulty
Program stops
and the appli-
ance enters fault
state
3H and 6H LEDs
ashing

16
MAINTENANCE AND CLEANING
Clean the lter
1). Clean the lint lter before each use. Remove by pulling straight up.
2). Clean the lter
Wipe the lter with a cloth.
3). Install lter
If you clean the lter with a damp cloth or wash it in the water, thoroughly dry the lter be
installing.
Clean the appliance body and its drum
Use a soft damp cloth to wipe the appliance body and its drum.
1. Do not rinse with a direct jet of water.
2. Do not use any scouring powders to clean the appliance.
3. Do not use petrol or alcohol to wipe the appliance.
When you have cleaned the drum leave the front door open to allow fresh air in.

17
MAINTENANCE AND CLEANING
Safety reset
1. These dryers have a temperature activated safety cut out switch.
2. The safety reset button can be found on the backboard. If your dryer does not heat you
need to push this button before the dryer will operate again. You may need to wait 10 min-
utes for the appliance to cool down.
3. A clogged lint lter is the most common reason for the dryer to overheat.
Clean the lint lter after each drying cycle to prevent overheating.
It is will only be necessary to press the safety reset button if the dryer does not heat. Allow
at least 10 minutes for the dryer to cool down before you press the button . Press and
hold the white button in until you feel a click. Cleaning the lter after each drying cycle will
prevent repetitive actuation of the safety cut out switch.
The cut out switch may operate for the following reasons:
1. A clogged lint lter.
2. Exhaust outlets blocked at the back of the dryer.
3. Poor ventilation in the room open a window or door.
4. Lightweight garment eg. handkerchief, sucked in and blocking the lter.
Safety cut out switch reset button
Use your nger or a pencil to press the button in until you feel it click.

18
SPECIFICATION
-Type WTA 14305 W
-Rated voltage 220-240V / ~ 50Hz.
-Rated power 2000 W
- Ambient temperature + 5°C ~+ 35°C
- Maximum Load max 7 kg
- Dimensions Height x Depth x Width 840/595/550 [mm]
- Weight 33 kg
Meets the requirements of EU legislation, EN- 61121 standard
Note:
1. The rated capacity is the maximum capacity. Make sure the dry clothes loaded into the appliance
never exceed the rated capacity.
2. Do not install the tumble dryer in a room where there is a risk of freezing temperature as the appli-
ance may not operate properly.

19
PRODUCT SHEET
Supplier's name or trade mark Amica
Type WTA 14305 W
Rated load 7.0 kg
Energy efciency class1)2) C
Dryer Type vented
Annual weighted average energy consumption AEc
3) 519.7 kWh / year
Energy consumption of the standard cotton drying pro-
gramme:
- At full load Edry 4.44 kWh
- At partial load Edry1/2 2.31 kWh
Power consumption in the off-mode Po0.49 W
Power consumption in standby mode PI0.49 W
Duration of the left-on mode: 10 min
Condensation efciency class on a scale from G (lowest
efciency) to A (highest efciency)1)
-
The weighted duration of the standard cotton pro-
gramme at full and partial load Tt
105 min.
Duration of the standard cotton programme at full load
Tdry
145 min.
Duration of the standard cotton programme at partial
load Tdry1/2
75 min.
Sound level in the standard cotton program at full load
Lwa
69 dB (A) re 1 pW
Equipment designed for tting No
Automatic tumble dryer No
(In accordance with Commission Delegated Regulation (EU) No. 392/2012 of 1 March 2012 supplementing Directive 2010/30/EU of the
European Parliament and of the Council with regard to energy labelling of household tumble dryers).
1) Energy efciency class on a scale from A+++ (more efcient) to D (least efcient)
2) "Standard cotton drying programme" is the programme referred to on label and in the datasheet — it is suitable for drying cotton at
normal humidity levels and is the most energy efcient programme for drying cotton.
This programme is suitable for drying normal, wet cotton products.
It is the most energy efcient cotton drying programme.
3) Estimated weighted annual energy consumption based on 160 standard cotton drying cycles at full and partial load and power
consumption in standby and off modes.
Actual energy consumption depends on how the appliance is used.
The dryer is equipped with a power management system. Standby time 1 minute.

Table of contents
Other Amica Dryer manuals

Amica
Amica WTP 14323 W User manual

Amica
Amica ACD8WH User manual

Amica
Amica WTP 477 030 User manual

Amica
Amica WTP 489 030 User manual

Amica
Amica ADC 8B LCW User manual

Amica
Amica ADV 7C LCW User manual

Amica
Amica WTK 487 030 User manual

Amica
Amica SUPF 822 W User manual

Amica
Amica AHD8WH User manual

Amica
Amica WTK 14312 W User manual