Amica WTP 14323 W User manual

DRYER
Please carefully read these Operating Instructions before using the appliance!
OPERATING INSTRUCTIONS EN
IO-WMS-0355
(08.2016/1)
WTP 14323 W

2
In accordance with European Directive 2012/19/EU and Polish legislation regarding
used electrical and electronic goods, this appliance is marked with the symbol of the
crossed-out waste container.
This marking indicates that the appliance must not be disposed of together with other
household waste after it has been used.
The user is obliged to hand it over to waste collection centre collecting used electrical
and electronic goods. The collectors, including local collection points, shops and local
authority departments provide recycling schemes. Proper handling of used electrical and
electronic goods helps avoid environmental and health hazards resulting from the presence of danger-
ous components and the inappropriate storage and processing of such goods.
CONTENTS
Basic Information..................................................................................................................3
Safety instructions.....................................................................................................4
Install the dryer.......................................................................................................8
Understanding the symbols on clothes labels...............................................................12
Display and control panel.....................................................................................................13
Using the appliance................................................................................................17
Table of programmes..............................................................................................................18
Troubleshooting.......................................................................................................19
Maintenance and Cleaning.......................................................................................21
Specification......................................................................................................22
Service and Warranty..................................................................................................22
Product fiche..............................................................................................23

3
BASIC INFORMATION
Dear customer,
From today, DRYING will be easier than ever before. Your Amica DRYER is exceptionally
easy to use and extremely efcient. After reading these Operating Instructions, operating the
appliance will be easy.
Before being packaged and leaving the manufacturer, the appliance was thoroughly checked
with regard to safety and functionality. After these tests some moisture or water may remain
in the appliance.
Before using the appliance, please carefully read these Operating Instructions
By following these instructions carefully you will be able to avoid any problems in using the
appliance.
It is important to keep these Operating Instructions and store them in a safe place so that
they can be consulted at any time.
Follow these instructions carefully in order to avoid possible accidents.
Important!
This dryer is intended for household use only for drying textiles and clothing.
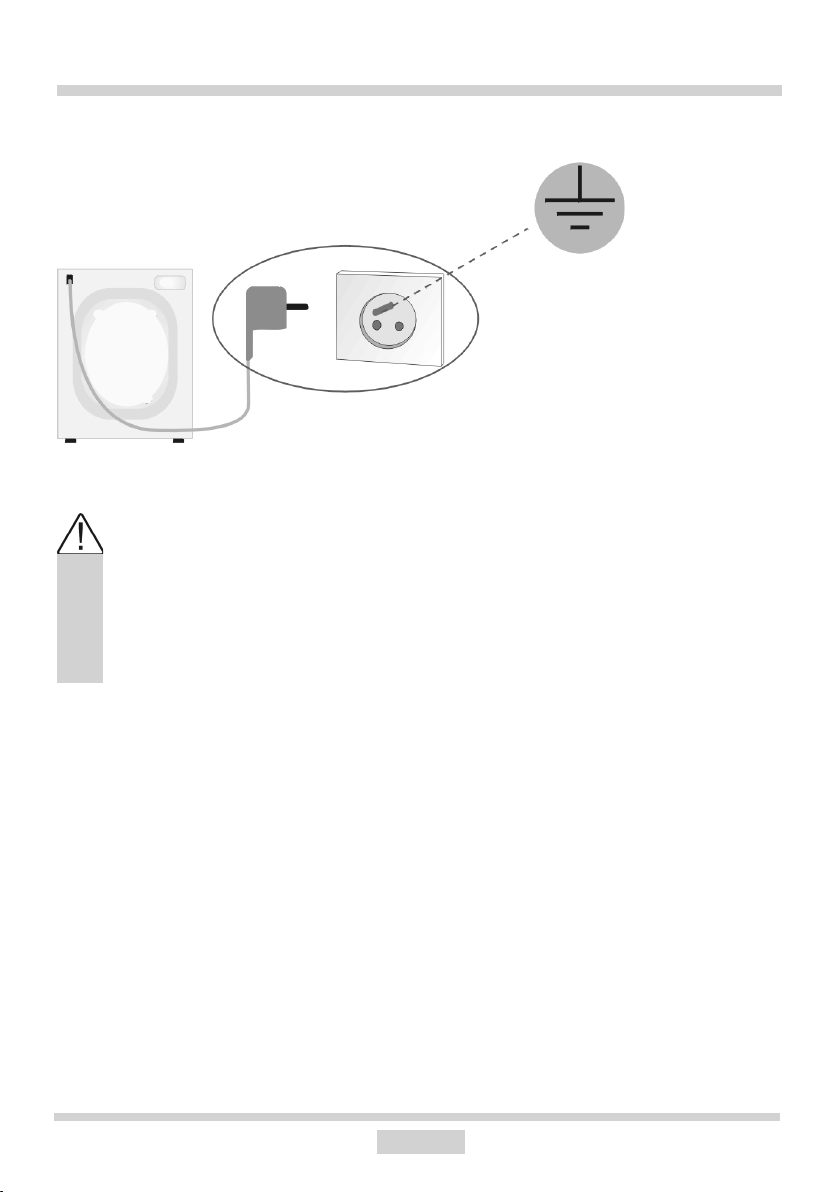
Level the appliance before connecting it to a wall socket.
The manufacturer reserves the right to introduce changes, which do not affect operation of
the appliance.
Use
lCarefully read the instructions below before using the appliance.
lNever use the appliance outdoors or anywhere the temperature may fall below freezing.
lThe appliance should not be operated by children or anyone who has not read the instruc-
tions.
Important! Temperatures below 0°C can damage the appliance!
In the event of the appliance being stored or transported in sub-zero temperatures, it should
be left to acclimatise in a temperature above 0°C for 8 hours before being used.
Manufacturer’s Declaration
The manufacturer hereby declares that this product meets the requirements of the follow-
ing European directives:
l Low Voltage Directive 2014/35/EU,
l Electromagnetic Compatibility (EMC) Directive 2014/30/EU,
l Directive RoHS 2011/65/EU,
and has been marked with the symbol and issued with a declaration of compliance
made available to market regulators.

4
NOTES ON SAFETY
l This product is an electrical appliance that is used
exclusively for indoor drying fabrics washed in water. Use
of safe power supply during the operation!
l The power source must be grounded. The ground-
ing cable must be buried underground and must not be
connected to the utilities network, such as water pipe or
gas pipe. Grounding and neutral wire and must be distin-
guished and may not be connected together.
l The power cord must comply with IEC standards
and withstand current greater than 10A. If these require-
ments are not met, you should immediately adapt your
domestic electrical system to ensure the safety of your
household.
l The appliance can dry up to 8 kg of washed laundry.
l Do not dry chemically cleaned clothes in the dryer
l Do not dry dirty laundry.
l Laundry contaminated with substances such as
cooking oil, acetone, alcohol, petrol, kerosene, stain
removers, turpentine, wax and wax removers must be
washed in warm water with detergent before drying in the
dryer.
l Do not attempt to dry the foam rubber (latex foam),
bathing caps, waterproof textiles, rubber-lined clothing or
pillows tted with rubber pads in your tumble dryer.
l Fabric softeners or similar products should be as
specied in the relevant directions for use.

5
NOTES ON SAFETY
l Laundry is not heated in the last part of the drying
cycle. It is the cooling cycle to make sure the laundry is
not damaged and has the right temperature.
l Filters should be cleaned each you use the appli-
ance.
l Always keep the appliance clean.
l The room where the appliance is used must have
adequate ventilation. Do not install the appliance in the
same room where you use other appliances that produce
exhaust fumes and other combustion gases.
l CAUTION: Do not turn off the dryer before the dry-
ing cycle ends unless the laundry will be quickly removed
and hung out in order to dissipate heat.
l Air from the appliance must not be discharged to a
chimney used for discharging ue gas from combustion
appliances that burn gas or other fuels.
l The appliance must be installed in such a way as to
ensure unlimited access to it and the dryer door may be
fully opened.
l Keep pets away from the machine.
l Laundry contaminated with oil may ignite sponta-
neously, especially in the heat generated in a tumble dry-
er. Heating oil causes oxidation reaction. The oxidation
produces additional heat. If the heat cannot dissipate,
the laundry can become hot enough that ignition occurs.
Stacking fabrics soiled with oil can prevent heat dissipa-
tion and create a re hazard.

6
NOTES ON SAFETY
l If you cannot avoid tumble drying fabrics soiled with
vegetable oil, cooking oil or dirty hair care products, you
must rst wash dirty laundry in hot water with detergent. In
this way you can reduce, but not eliminate the risk.
l Do not overturn the appliance during normal use
and maintenance.
l Before drying, make sure there are no foreign ob-
jects such as coins, lighters, matches, etc in clothing
pockets.
l This appliance can be used by children aged 8
years and older or persons with physical, mental or sen-
sory handicaps, or those who are inexperienced or unfa-
miliar with the appliance, provided they are supervised or
have been instructed how to safely use the appliance and
are familiar with the associated risks. Ensure that children
do not play with the appliance. Children should not be
allowed to clean or maintain the appliance.
Children less than 3 years of age shall be kept away unless
continuously supervised.
l If the power cord is damaged it must be replaced
to prevent danger. The power cord can be replaced by a
service centre authorized by the manufacturer or by other
suitably qualied person.
l This appliance is intended solely for indoor use.
l Make sure aby dryer ventilation openings are not
blocked by the carpet.

7
NOTES ON SAFETY
l If the appliance excessively heats up, immediately
remove the plug from the wall outlet.
l Do not pull the power cord when removing the plug
from the wall outlet.
l Do not insert or remove the plug from the wall outlet
with wet hands.
l Do not damage the cord or plug.
l Do not install or disassemble the dryer before you
carefully read the operating instructions.
l Do not place the dryer on top of the washing machine
without a special kit (You must purchase the stacking kit to
install the dryer on top of the washing machine. To avoid the
danger hair the dryer must by installed the manufacturer's
service technician or other suitably qualied person).
l Do not lean on the open dryer door.
l Do not place objects such as candles or electric stove
on the dryer.
l Do not exceed the maximum appliance load.
l Do not use the dryer without the lter base and its
cover.
l Do not dry wet laundry that has not been spun.
l Do not expose the dryer to direct sunlight. The appli-
ance is designed for household use only.
l Do not install dryer in rooms with high humidity.
l Unplug the appliance from the wall outlet before any
cleaning and maintenance. Do not clean the appliance with
water jet.
l Do not dry laundry contaminated with flammable
substances, such as oil or alcohol. This could result in an
explosion.

8
INSTALL THE DRYER
lFor convenience, it is recommended to place the appliance near
a washing machine.
lDo not place the appliance on a carpet!
lThe dryer must be installed in a clean place, where dirt does not
accumulate. There must inow of fresh air near the appliance.
Do not block the front air inlet or air intake grilles at the back of
the appliance.
lThe oor surface should not be either concave or sloping!
lPay attention to the shape of the oor surface, and make sure the
entire appliance weight of the rests on its legs (not its body)!
I. Position and level the appliance
l Place the appliance on a solid, even surface.
l Level the machine by adjusting the legs (1)
After positioning and levelling the appliance,
check that it is stable by pressing down each
corner and ensuring it does not move!

9
Normally condensed water drains
into the container in the upper left
corner of the dryer. Optionally, you
can use the drain hose in the ac-
cessory bag and connect it to the
dryer. Connect the hose as shown
here.
II. Water drain (option)
INSTALL THE DRYER
Installation Steps:
Quick Start:
Using pliers remove the drain tube from the
connector Insert the external drainage hose
1. Make sure the connec-
tion and lters are clean
2. Open the door and load
the laundry
4. Connect the device to the power
supply and turn on using the [on/off]
button
3. Close the door
5. Select the drying programme
7. When programme is complete
remove the laundry
6. Press the [Start/ Pause] button
8. Turn off the appliance
using the [on/off] button
10. Unplug the appliance.
9. Clean the lters and
empty the tank

10
INSTALL THE DRYER
lThe appliance's mains connection (electrical wall socket) should be in
a visible and accessible place!
lOnly plug the appliance into a properly installed socket with an earth pin!
lDo not connect the appliance through any extension cord or an adapter!
lIn the event of the power cord being damaged, it must be replaced by
an authorised technician.
lThe electrical system to which the appliance is to be connected must be
protected with a 10 A fuse.
III. Connect to power supply

11
INSTALL THE DRYER
IV. Tips
1. Spin the laundry in the washing machine before tumble drying. The high spin speed can
reduce the drying time and save energy.
2. To make sure the drying effects are uniform, sort the laundry by fabric type and drying
program.
3. Before the drying close the locks, hooks and buttons, etc.
4. Do not over-dry clothes, as they can easily crease or shrink.
5. Do not dry articles such as raincoats, bike covers or similar exible materials containing
rubber parts.
6. The appliance door can be opened only once the drying programme has completed.
Do not open the door during the drying programme as this may result in scalding by hot
appliance parts or hot clothing.
7. To avoid extended drying cycles and increased energy consumption, clean the appli-
ance lters after each use. Remember to empty the container with water discharged during
drying.
8. Use only the dedicated programme to dry woollen garments.
9. Recommended load depending on the kind of laundry to be dried.
Coats
(approx. 800 g)
Jackets
(about 800g cotton)
Jeans
(approx. 800 g)
Quilts
(about 900g cotton)
Sheets
(about 600g cotton)
Working clothes (up-
per and lower)
(about 1120g cotton)
Pyjamas
(approx. 200g)
Shirts
(about 300g cotton)
T-shirts
(about 180g cotton)
Briefs, panties
(about 70g cotton)
Socks
(about 30g ber mix)

12
UNDERSTANDING THE SYMBOLS ON CLOTHES LABELS
Before drying pay attention to the symbols on the apparel label.
Failure to follow the symbol instructions may damage or destroy clothes to be dried.
The symbols are explained in the following table:
Dry Tumble dry Do not tumble dry Do not dry
Line dry/hang to
dry
Drip dry Dry at Dry in the shade
Dry clean Do not dry clean Dry clean normal
cycle with any
solvent
Dry clean normal
cycle petroleum
solvent only

13
DISPLAY AND CONTROL PANEL
1. Programme selector dial
2. Display
3. Delay Start button
4. Drying time button
5. Drying intensity / Favourite (press and hold for 3 sec.)
6. Interior Lighting button
7. Acoustic signal button
8. Anti-Crease button
7+8. Child Lock
1 2
■
■
7
34 5 6
■■
■■■
8
■
78
+
■

14
2. Display
The display shows the following symbols:
Delay Start indicator
Child Lock indicator
The remaining time indicator / error
message
Programme progress symbols
Soiled lter indicator
(caution)
Water tank full indicator
(caution)
Drying intensity indicators
(Four steps)
Interior lighting indicator
Acoustic signal indicator
Anti-Crease indicator
3. Delay Start button
Press this button to set the delay time for starting programme. The setting range available
is from 0-24 hours. Press the button to set the time after which drying is to commence.
NOTE: If there is a power outage during Delay Time, countdown will NOT resume imme-
diately after the power is restored. You must re-set the program and the delayed start.
4. Drying Time button
When you selecting 1 of 3 Flex Time programmes (refresh, cold, warm). The drying
time may be adjusted in increments of 10 minutes.
The maximum drying times depending on the programme are given in table of pro-
grammes.
DISPLAY AND CONTROL PANEL
1. Programme selector dial
Choose the appropriate drying programme as required, depending on the type and
amount of laundry loaded, which ensures better results and more effective drying. Once
the drying programme is started, turning the programme selector knob to another posi-
tion is possible, however it does not change the previously selected programme.

15
Intense drying
Normal drying
Medium drying
Gentle drying
Choose your favourite programme (press and hold for 3 sec.)
To set the Favourite programme turn the knob on any programme and set the additional
programme features. Then, press and hold down the Drying Intensity for about 3
seconds to conrm the Favourite programme setting. The default is the program Cotton –
hanger dry.
6. Interior Lighting button
The drum interior light will come on for about 3 minutes when you press the button
or automatically for 1 minute when the programme ends and the door is opened.
7. Acoustic signal button
By default the acoustic signal is on. Press the button to turn on/off the acoustic signal.
If the acoustic signal is on:
(A) The dryer will beep when you press an additional programme feature button.
(B) When you turn the programme selection dial during the drying cycle the appliance
will beep to remind you it is not allowed choice.
(C) The appliance will beep when the drying programme has ended.
DISPLAY AND CONTROL PANEL
5. Drying intensity / Favourite (press and hold for 3 sec.)
Use this function to adjust clothes drying intensity. There are four intensities
Drying intensity:
The drying intensity can set before the start of the programme only.

16
DISPLAY AND CONTROL PANEL
8. Anti-Crease button
Once the programme has ended, the Anti-crease function operates for 30 minutes (default)
or 120 minutes (when selected).
When you select the [Anti-Crease] function its indicator will come on. This feature prevents
creases in clothing. The laundry can be removed during this phase the exception of pro-
grammes: [Cool], [Refresh] and [Wool].
This function can be selected in all programs.
START/PAUSE button
Press Start/Pause to start or pause a programme.
During the drying cycle the corresponding drying programme phase symbol is displayed.
When Paused, the symbols are lit . You can use Pause to add laundry for drying.
7+8. Child Lock
This function locks function buttons to prevent settings being changed or operation inter-
rupted by children. Pres and hold Acoustic signal and Anti-Crease button for 3 seconds
to activate the Child Lock during a drying cycle. When child lock function is set, the display
will show icon and only [On/Off] button can be used. To disable Child Lock, press and
hold Acoustic signal and Anti-Crease buttons for 3 seconds.
Important! If the Child Lock function is activated, the display will show the symbol.
Important! When you turn off or unplug the dryer or the drying cycle ends,
the Child Lock function will deactivate.

17
USING THE APPLIANCE
II. Set Delay Start
The delayed start function may be used when, for example, taking advantage of dis-
counted electricity tariffs.
Procedure:
1. Close the appliance door.
2. Set the programme selector knob to the desired programme (see the table further on).
3. Select additional functions or drying cycle parameters as required.
4. Press the Delay Start button.
5. Select time ranging from 0 to 24 hours. The display will show the setting from 0H to
24H.
6. Press the [Start/ Pause] button. The appliance will be set in delay mode. Drying cycle
will commence immediately after the delay time has elapsed.
Note: If you set delay start, the display will show the time remaining to start the drying
program.
III. End of drying cycle
1. Once the programme is complete drum will stop rotating and the display shows "0:00".
The last programme phase indicator will ash. If you do not remove clothes from the
dryer with a specied time, the appliance will start the [Anti-Crease] programme. Press
[On/Off] and remove the plug from the wall outlet.
2. If the appliance suddenly stops during the drying programme and displays an error
message, follow the information in the "Troubleshooting" section.
IV. Cancel or modify programme
Press the On/Off button to interrupt the programme. Then press on/off button again to
turn on the appliance and select the desired drying programme.
I. Select Programme
1. Press [On / Off]. When the LED display lights up turn the programme selection dial and
select the desired programme
2. Select the additional option [Delay Start], [Drying Time], [Drying Intensity] or [An-
ti-Crease] — if the programme allows you to select additional options.
3. Press the [Start/ Pause] button

18
TABLE OF PROGRAMMES
Note: 1. [ ] This symbol indicates a programme used to determine the energy efciency of the "standard cotton
fabrics drying programme", which is suitable for drying cotton fabrics at normal humidity level. It is the most energy
efcient cotton drying programme.
Note: 2. Recommended applications of these programmes are indicative only. The user can select the desired
program, according to own preferences. Thick and multi-layered fabrics, eg. linens, jeans and denim clothing, are
difcult to dry.
Programme name Weight
(max)
kg
Additional functions available
Recommendations Time
[h:min]
Energy consumption
[kWh]
Delayed
start
Drying time Drying inten-
sity
Anti-Crease
Cotton
Cupboard Dry 8 Option - Option Option For drying cotton, coloured cotton or linen laundry
at the following drying levels: Cupboard Dry, Hanger
Dry, Iron Dry
03:22 2.1
Hanger Dry Option - Option Option 02:58 1.9
Iron Dry Option - Option - 02:40 1.5
Delicate
Delicate 1.0 Option - Option - For drying delicate fabrics that you can tumble dry or
for drying fabrics hand washed at low temperature.
00:50 0.4
Synthetics
Cupboard Dry 3.5 Option - Option Option For drying thick or layered synthetic fabrics 01:20 0.7
Hanger Dry - Option Option For drying thin synthetic fabrics that do not require ironing,
such as crease free t-shirts, tablecloths, baby clothes, socks.
01:10 0.6
Iron Dry - Option - For drying thin synthetic fabrics, like sweaters, shirts
(Iron Dry).
00:50 0.5
Wool
Wool 1.0 Option - - - Note: Do not tumble dry woollen fabrics if the cloth tag
prohibits.
00:25 0.15
Time-ex
Refresh 1.0 Option Option - - To refresh clothes kept in closed containers for a long time,
from a minimum of 20 minutes to a maximum of 150 minutes.
(In steps of 10 min.).
00:20 0.15
Cool - - - To air the laundry with cool air for 10 minutes to a maximum of
30 minutes. (In steps of 10 min.).
00:10 0.05
Warm - - - To heat the laundry for 10 minutes to a maximum of 120 min.
(In steps of 10 min.).
00:10 0.15
Special
Shirts 3.0 Option -Option Option For crease free clothing such as: shirts and blouses
made of fabrics that are easy to iron. Place clothes
loosely in the dryer. After drying, hang on a hanger.
01:00 0.5
Sport 3.0 -Option Option For drying sportswear, thin fabrics, polyester fabrics,
which will not be ironed.
02:00 0.9
Mix 3.5 -Option Option Select mix if you can not determine the fabric. 01:40 1.2
Jeans 8.0 -Option Option For drying jeans or recreational clothing spun at high
speed in the washing machine.
03:20 2.2

19
TROUBLESHOOTING
Problem Probable cause/Solution
No information on the display - Make sure the plug is properly inserted into the wall outlet.
- Check the main power supply.
The dryer does not start - Check if the Start / Pause button is pressed.
- Make sure the door is properly closed.
The door opens spontaneously - Push the door in until it clicks shut.
- Make sure the dryer is not overloaded.
The laundry is not sufciently dry
or drying time is too long
- Clean the top and bottom lter.
- Select the appropriate programme.
- Do not block the air intake.
Note:
If you can not correct the problem yourself, ask for assistance:
1. Press [On / Off].
2. Unplug the appliance and call service.

20
TROUBLESHOOTING
Appliance error codes
Display indica-
tion
Reason Solution
Water container is
full
Empty the container
Water pump failure
or water level sensor
error
If the problem persists, contact the SERVICE CENTRE
E32
Humidity sensor
failure
E33
Temperature sensor
failure
The lter is clogged
or the ambient tem-
perature is too high
Clean the lter and check the ambient temperature
If the problem persists, contact the SERVICE CENTRE
The tumble drier indicates error codes to help locate minor operating faults and identify their
cause. The ERROR CODES help locate and determine the cause.
Detected errors are indicated as shown in the following table:
When an error occurs, the appliance beeps
(if active).
Table of contents
Other Amica Dryer manuals

Amica
Amica WTP 477 030 User manual

Amica
Amica WTP 14321 W User manual

Amica
Amica WTP 488 030 User manual

Amica
Amica ACD8WH User manual

Amica
Amica ADH 82 LCW User manual

Amica
Amica WTP 489 031 User manual

Amica
Amica ADV 7C LCW User manual

Amica
Amica WTP 489 030 User manual

Amica
Amica SUPF 822 W User manual

Amica
Amica WTK 487 030 User manual
Popular Dryer manuals by other brands

Asko
Asko T753 Specifications

Fisher & Paykel
Fisher & Paykel DE6060P Installation instructions & user guide

Bosch
Bosch WTH8307LSN Installation and operating instructions

Frigidaire
Frigidaire GLEQ642CAS2 Wiring diagram

Bosch
Bosch WQG245DCFG User manual and installation instructiions

Bosch
Bosch WTW85S49SN Installation and operating instructions