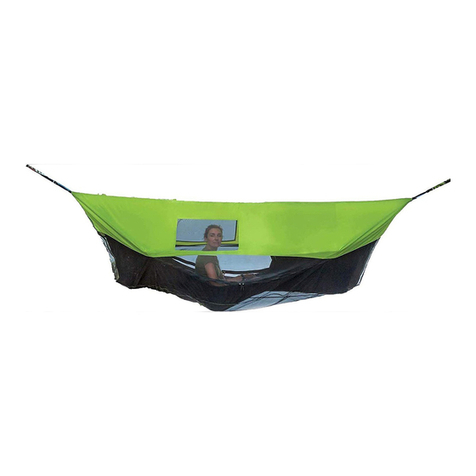
Amok DRAUMR 3.0 User manual

WARNING
RIGHT LEFT
Ridgeline
Bug net pocket
Foot box
Knee adjuster
Back adjuster
USE AT OWN
RISK
WRONG USAGE COULD RESULT IN INJURY OR DEATH:
• Never hang more than 1 m (3 feet) above ground.
• Never hang from dangerous objects, above cliffs, steep slopes etc.
• Always hang from sturdy and healthy trees.
• Enter the hammock carefully and pay attention to the trees and suspension
- make sure it is safe.
• Only ONE (1) person in the hammock.
• Never exceed maximum capacity - 150 kg (330 lbs)
• Never let small children use unattended.
• Never swing, stand or jump in the hammock.
• Never pull suspension straps taut! Allow for a 30° angle towards trees.
• Never use for trips where you might expect harsh conditions and bad
weather - this is not an expedition tent!
• Never use a damaged product - inspect before every use!
www.amokequipment.com
DRAUMR
™
3.0
USER MANUAL
This manual is decent, but our YouTube videos kick ass... Scan the QR code above or search for
“Amok Equipment” online to get the most out of your Amok Draumr
™.

Find two sturdy trees 3-6 m (10-20 feet) apart with a clear and safe space between them. Open
the bag and pull out the suspension straps. Attach the GREEN carabiner around the RIGHT tree
(seen from inside hammock), so that the tree straps have an angle of about 30° when in use. Stretch out
the ridgeline and the remaining suspension strap. Untangle and untwist webbing. Attach RED carabiner
around the LEFT tree. Do NOT make the mistake of tightening as much as possible to make the hammock
“more at” - aim for 30° as shown above.
1
Inate your sleeping pad (required in hammock for structure and insulation). Unzip zipper in the
head end of the hammock. Insert sleeping pad. There is a hole on the opposite side, the foot end,
for pulling the sleeping pad towards you. Once the sleeping pad is all the way in - prevent the pad from
moving by folding one of the two “stoppers” above the pad. The inner one is for small pads and the outer
for large pads. A large pad (198x65cm) will give more comfort, especially for tall people.
Close the zipper after locking the sleeping pad under the “stopper”.
2
Fold the foot end over itself - the tip should be aligned with the grey side pockets. Sit down
carefully on top of the fold while holding on to the ridgeline. Your feet should touch the ground
- if not, adjust the suspension to lower the hammock. Hold on to the ridgeline, lean back, raise your legs
and let the foot end unfold. Put your feet inside the foot box, without shoes. Adjust your balance point
by pressing down with your hands and moving your body further up or down.
3
3 - 6m (10 - 20 feet)
RIGHT LEFT
30°
30°

If you lie at, but lean towards one of the sides (right picture), you need to adjust the suspension
straps. This can be done by tightening/loosening the two metal buckles, and/or lowering/raising
the tree straps. Adjust until you lie at without tilting sideways. The ridgeline should now be horizontal
at 0° (left picture). Again - avoid tightening the tree straps too much - 30 degree angle!
4
So you ignored all the warnings about tightening the tree straps too much, and now the buckle
won´t release because of the high tension... Pull the grey loop handle towards the hammock
while lifting and pushing the hammock corner towards the tree. After having “ipped” the metal buck-
le - pull both hands towards you to release the straps. Next time, attach the tree straps higher.
5
0°
Chair mode: The adjustment straps inside
the hammock can be used to adjust your
sleeping position. They can also turn your ham-
mock into a sun bed, recliner or chair: Lift your
knees and tighten both the knee adjusters. Note -
your bottom has to be in the middle - where the
grey pockets are, and you have to lean backwards!
After raising the knees, lean forward and tighten
the back adjusters in the same manner. Release all
the tension in both straps - “bed mode” - before
entering or exiting the hammock!
6
Knee adjuster

Bug net: You will nd a bug net attached inside a pocket in the left corner. Attach the small
carabiner to the ridgeline before using the zipper. On the inside, towards the top, there are two
cord adjusters. One is for lifting the entire bug net towards the ridgeline the other for tightening it when
in chair mode. There is also an elastic guyline in the head end. This can be attached to a nearby object
and adjusted from the inside. It will keep the bug net away from your face.
Important: Avoid sitting on top of the bug net while entering. It will tear.
7
Tarp setup: Find the seam in the middle of the tarp and take out the guy lines at each end. Attach
the small carabiners to the same trees as the hammock . Loosen or tighten the lines so the tarp
is centered above the ridgeline. Pull out the six corners and attach the guylines to the ground (pegs are
included) or nearby trees. It is advisable to pull the tarp slightly towards the foot end, as the hammock
is longer here.
If you lie down and have the text “Stay hungry. Stay foolish Stay wild” in front of you - the tarp is mount-
ed correctly, as the outer seam will not collect water.
8
BaD weatHeR oR HiGH winDS: Choose a sheltered campsite. Hang hammock as low as possible. Con-
sider letting it rest on top of your backpack or other gear to prevent it from swinging. Pitch the tarp as
close as possible and let it rest on the ridgeline.
Hammock GuYLineS: Draumr has an optional guyline point at the foot end. Elastic guyline can be at-
tached here to prevent the hammock from swinging (do not tighten too much!). Elastic guylines from
this point up to the ridgeline or suspension points can also prevent your feet from tilting down if you use
the hammock without an inatable sleeping pad (or if you have a small pad).
1
2
12
Table of contents
Other Amok Hammock manuals