CLD1-AC INSTALLATION HANDBOOK
Box Contents
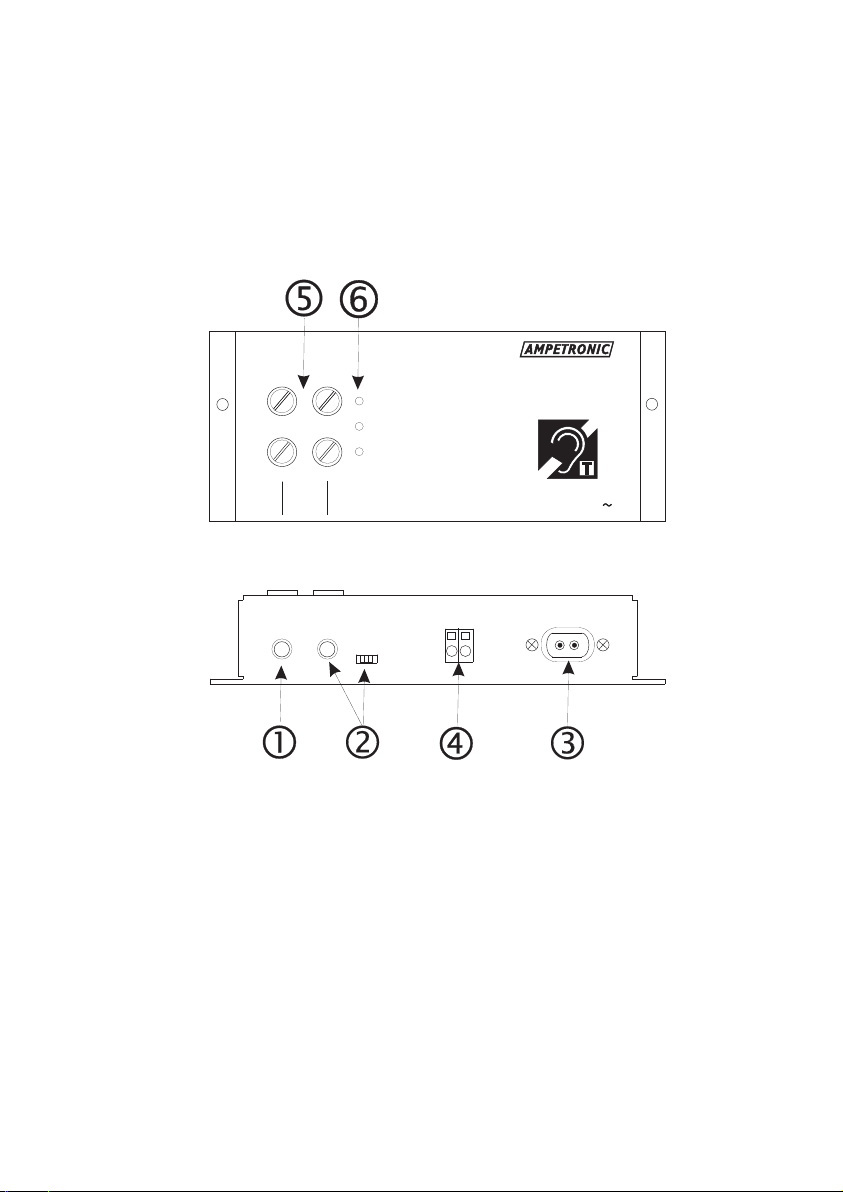
1 x CLD1-AC
1 x AC power cable
1 x A6 Induction loop logo
1 x 'CLD1-AC Installation Handbook'’
1 x Loop coil and fixings (if requested)
1 x Microphone option (if requested)
Handbook Contents
!
!Introduction
!Quick Start
!Installation
!Troubleshooting
!Technical Specification
!Warranty
!Declaration Of Conformity
Safety
This symbol is used to alert the user to important
operating or maintenance instructions.
The Lightning bolt triangle is used to alert the user
to the risk of electric shock.
SAFETY
1. It is important to read these instructions, and to follow them.
2. Keep this instruction manual in an accessible place.
3. Clean only with a dry cloth. Cleaning fluids may effect the equipment.
4. Do not cover or obstruct ventilation of this unit. Install in accordance with
the manufacturer’s instructions.
5. Do not install near any heat sources such as radiators, heating vents, or other
apparatus that produces heat.
6. Refer all servicing to qualified personnel. Servicing is required when the
apparatus has been damaged in any way, such as a power supply cord or
plug is damaged, liquid has been spilled or objects have fallen into the
apparatus, the apparatus has been exposed to any rain or moisture, does not
operate normally or has been dropped.
7. WARNING - To reduce risk of fire or electric shock, do not expose this
apparatus to rain or moisture. The apparatus shall not be exposed to
dripping or splashing and no objects filled with liquids, such as vases,
shall be placed on the apparatus.
TO PREVENT ELECTRIC SHOCK DO NOT
REMOVE THE COVER. THERE ARE NO
USER SERVICEABLE PARTS INSIDE.
REFER SERVICING TO QUALIFIED
PERSONNEL.
RISK OF ELECTRIC SHOCK
DO NOT OPEN
CAUTION