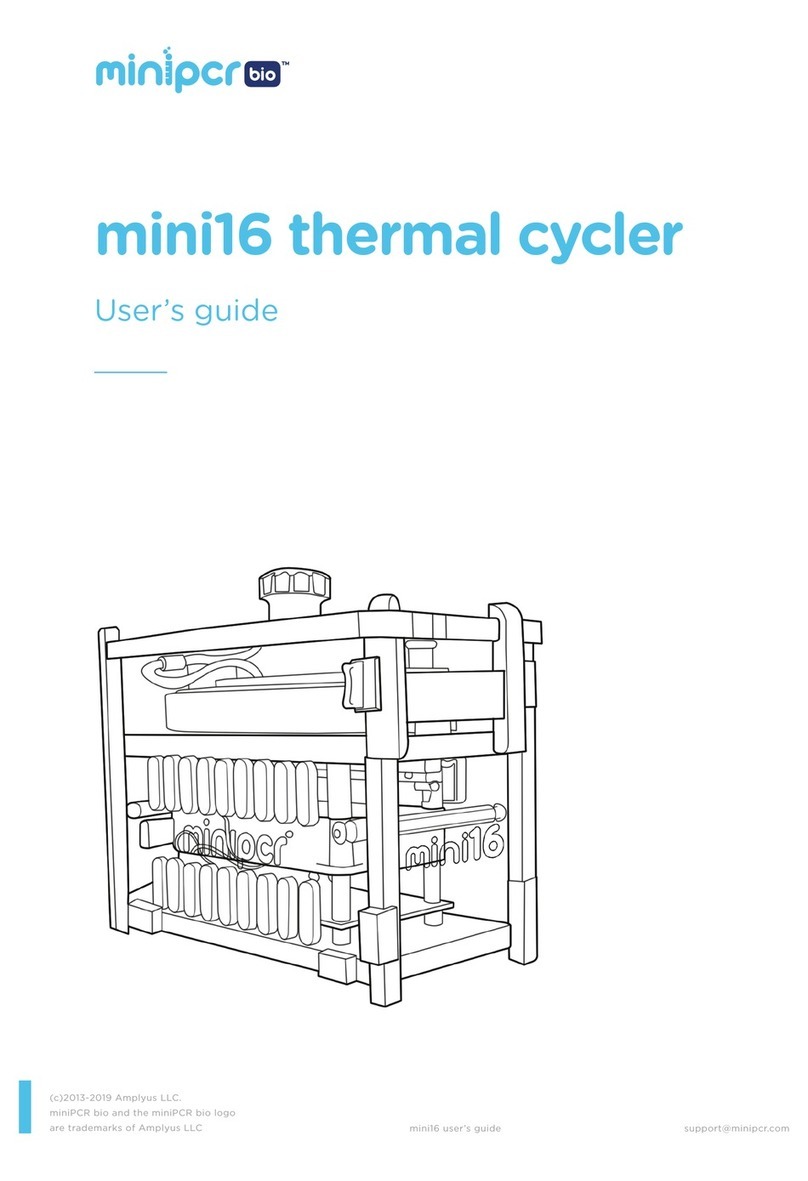
Amplyus miniPCR mini16 User manual

©2013-2020 Amplyus LLC.
miniPCR bioTM and the miniPCR bio logo
are trademarks of Amplyus LLC mini16 user’s guide support@minipcr.com
mini16 thermal cycler
User’s guide

02. support@minipcr.com
mini16 user’s guide
TABLE OF CONTENTS
Quick start guide
Warranty
Overview
Features
Technical specifications
What’s included
Components
Optional accessories
Getting started
Download
Connect
Software operation
Creating and saving protocols
Protocol options
Running and monitoring protocols
Hardware operation
Loading your samples
Quickguide to LED interface
Troubleshooting and maintenance
Troubleshooting
Care & maintenance
Operating conditions
03
04
05
05
05
06
07
07
08
08
09
12
12
15
16
18
18
19
20
20
21
22
INDEX

03. support@minipcr.com
mini16 user’s guide
Download software from minipcr.com/downloads
Connect mini16 to your device using USB or Bluetooth®> Devices tab
Create a PCR, heat block, linear ramp or FLEX program > Library tab
Run by clicking the play symbol to upload the program and start the run
View status > Monitor tab
QUICK START GUIDE
1 --
2 --
3 --
4 --
5 --
QUICK START GUIDE

04. support@minipcr.com
mini16 user’s guide
WARRANTY
This Limited Warranty covers defects in materials and workmanship for a period of 24 months
from the date of purchase under the following conditions:
Amplyus will repair or replace any defective items upon factory inspection of the item claimed.
Amplyus will cover shipping charges if the claim is initiated within 30 days from purchase.
After 30 days from the date of purchase, end users of the Product will be responsible for
shipping charges to and from the Amplyus facility for assessment and repair under the terms
of this Limited Warranty.
This Limited Warranty does not cover wear and tear to components resulting from normal
use of the Product, nor does it cover failures caused by incorrect use, negligence, alterations,
or damage caused by intentional or accidental misuse of equipment. This Limited Warranty
also excludes damage caused during any shipment/transport/movement of the product
following its initial receipt by the customer.
Amplyus’ sole liability, under this Limited Warranty, for failure to repair or replace miniPCR
thermal cyclers after a reasonable number of attempts, is limited to the replacement of
the Product or, at Amplyus’ sole discretion, the refund of the original purchase price of the
Product.
This 24-month warranty is valid from the date of purchase of miniPCR thermal cyclers
(the “Product”).
This Limited Warranty covers the original purchaser of the Product and shall not
extend in its validity to third parties without the written agreement of Amplyus LLC
(“Amplyus”).
This Limited Warranty covers only the Product and any original accessories provided
with it. It excludes software, documentation, consumables, or related items.
This Limited Warranty will maintain its validity only as long as the Product is operated
in the manner, conditions, and with the care described in its User’s Guide or Manual.
This Limited Warranty will be voided by improper or unauthorized maintenance of
the Product, or by improper attachment of electrical adapters and power supplies not
supplied by Amplyus or its authorized representatives.
This Limited Warranty will be voided by any failure to meet requirements for the
operation of a thermal cycler in laboratory conditions as described in the User’s Guide.
WARRANTY

05. support@minipcr.com
mini16 user’s guide
Dual Bluetooth®and USB conectivity
Programmable via Windows, Mac, iPhone, iPad, Android and Amazon Fire
PCR, touchdown PCR, heat block, linear ramp and FLEX programming modes
FLEX mode allows for user-defined combinations of up to 15 programming steps
Portable and durable construction
16 x 0.2 ml PCR tube capacity (strip compatible)
On-device microprocessor runs autonomously
Universal voltage power adaptor 100-240V
Compatible with Battery/solar power operation for full autonomy (not included)
SPECIFICATIONS
FEATURES
OVERVIEW
Sample format: 16 x 0.2ml PCR tubes (8-strip compatible)
Max Heating Ramp Rate: 3°C / sec
Heated Lid: Independent lid heater up to 120°C, PID control
Max Cooling Ramp Rate: 2°C / sec
Program Sharing and Backup: Unlimited libraries, .plf file
Temperature control: Resistive Heating; assisted cooling
Device Connectivity: Dual USB and Bluetooth®Low-Energy (BLE)
Programming Modes: PCR, Linear Ramp, Heat Block, and FLEX
TECHNICAL SPECIFICATIONS

06. support@minipcr.com
mini16 user’s guide
SPECIFICATIONS
miniPCR®mini16 thermal cycler
Universal voltage power adapter (2AA73)
US-style AC cord (QP-1000-07)
6 ft USB Cable (QP-1000-09)
Drawstring travel pouch (QP-1000-12)
WHAT’S INCLUDED
Control System: Embedded thermistors, adaptive PID algorithm
Temperature Range: Ambient – 99°C
Dimensions: 2” x 5” x 4” (5.1 cm x 12.7 cm x 10.2 cm)
Weight: 1 lb. (450 g) approx.
Internal Memory: Stores current program
Power Supply: AC 100-240 V, 50-60 Hz, 90 W
Battery: Optional Li-Ion miniPCR™ Power Pack (not included)
Adjustable Lid: Compatible with flat or domed caps
CE Conformity Mark
TECHNICAL SPECIFICATIONS (Cont.)

07. support@minipcr.com
mini16 user’s guide
miniPCR™ Power Pack, 20,000 mAh Li-Ion Battery (QP-1000-13)
Portable solar panel (contact team@minipcr.com)
OPTIONAL ACCESSORIES
SPECIFICATIONS
COMPONENTS
Lid adjustment knob
Sample-holding
block for 16 x 0.2 ml
microtubes
Lid safety latch (pinch
both sides to open)
LED status indicators
Heated Lid

08. support@minipcr.com
mini16 user’s guide
GETTING STARTED
miniPCR App v2.0 or higher is needed to run mini16.
Visit www.minipcr.com/downloads and select your platform of choice (Windows, Mac,
iOS, Android, Amazon Fire). Minimum system requirements are listed on the website.
iOS users: visit Apple App Store.
Windows 10 users: unzip the file and run the miniPCR installer.
Mac OS users: Double click and move App to the folder of your choice. If the operating
system will not let you open the software “miniPCR can’t be opened because it was not
downloaded from the Mac App Store”, you will need to authorize installation in Security
and Privacy setting in your system preferences
Android users: visit the Android Play Store.
Amazon Fire users: click on ‘Get app’ from the Amazon web store.
Chromebook users: install the Chromebook Beta version (available through Google
Play only).
Open the App by double-clicking or tapping on the miniPCR icon
DOWNLOAD THE miniPCR®APP
(FREE DOWNLOAD)
GETTING STARTED
1 --
2 --

09. support@minipcr.com
mini16 user’s guide
CONNECT
GETTING STARTED
Establishing a Bluetooth®(BLE) connection (iOS, Windows, Mac, Android,
Amazon Fire and Chromebook)
Note: make sure Bluetooth®is turned on on your device.
Turn on the mini16 using the on/off switch on the back of the unit. A flashing blue LED
on the front of the mini16 indicates that it is ready to connect to your device.
Click the Devices tab (Win/Mac) or the icon (mobile, top center of the screen). mini16
units within BLE range will be listed. Click on the BLE symbol of the mini16 unit
you would like to connect to.
Successful pairing is indicated in the App “Devices” tab by green text “Connected” and
and by the blue LED staying on solid.
You are ready to use your miniPCR®thermal cycler.
1 --
2 --
3 --
Windows* / Mac / Chromebook
c- Device is connected
b- Bluetooth®symbol
a- Devices tab
Android / iOS / Amazon Fire
* Windows 10 users may need to consult the Bluetooth
pairing guide available at minipcr.com/downloads

10. support@minipcr.com
mini16 user’s guide
Establishing a USB connection (Windows, Mac, Android and Amazon Fire)*
Win / Mac
Connect the mini16 to your computer, using a USB-C to USB-A adapter and the
original USB cable provided with the miniPCR. The mini16 will connect automatically
and be ready to use.
Using: micro-USB OTG (‘On the go’) adapter required.
Android and Amazon Fire
1- First connect the OTG into your device and only then connect the miniPCR USB
cable into OTG adapter and the mini16 unit.
2. The mini16 will connect automatically.
The three LEDs on the front of your miniPCR®machine will blink several times during
two seconds.
The mini16 will be listed under the Devices or tab of your software.
You are ready to use your miniPCR®thermal cycler.
1 --
2 --
3 --
2nd. Connect OTG
to miniPCR
USB Cable
1st. Connect
OTG to Android
device
Using: USB-C USB-C OTG adapter required.
Android
1. With software closed, connect the mini16 to your Android using a USB-C OTG
adapter and the original USB cable provided with the miniPCR.
2. The App will open and the mini16 will connect automatically. If the software
fails to recognize the mini16, close the App and open it again.
GETTING STARTED
CONNECT (continued)
Using: USB-A USB-A to USB-A cable supplied
Connect the miniPCR supplied USB cable to the computer and the back of the mini16.
* USB connection not supported for Chromebook.

11. support@minipcr.com
mini16 user’s guide
Changing device name (optional)
The default name of your miniPCR is its serial number located on the back of the device.
Navigate to the Devices tab or screen and click on the icon of the device’s
name to edit. Press Save.
1 --
GETTING STARTED
OPTIONAL CONFIGURATIONS
Establishing connections to multiple miniPCR units
Go to Devices to see the list of available mini16 units. Note: it is possible to connect
mini8 and mini16 units simultaneously*.
All units connected through USB will automatically appear as ‘Connected’ and be ready
to program.
To connect multiple units over BLE follow the steps in the Establishing a Bluetooth®
(BLE) connection on page 9.
1 --
2 --
2 --
3 --
This procedure works for both BLE and USB connections.
* Feature not available for Chromebook.

12. support@minipcr.com
mini16 user’s guide
SOFTWARE OPERATION
CREATING AND SAVING PROTOCOLS
SOFTWARE OPERATION
miniPCR App v2.0 or higher is needed to run mini16*.
Open the miniPCR™ App in your device and remain on the “Library” tab.
Click on the button on the top right corner.
Select the “Protocol Type” from the menu on the top of the right pane (Win/Mac/
Chromebook) or screen (Android / iOS / Amazon Fire).
• PCR: for thermal cycling reactions
• Heat Block: for incubations
• Linear Ramp: for heating or cooling reactions at a steady rate
• Flex: touchdown PCR and any combination of the above
1 --
3 --
2 --
You can program mini16 in four different modes: PCR, heat block, linear ramp and FLEX
(includes touchdown PCR)
Enter a protocol name; for example “GeneX PCR”.
Enter protocol parameters (Read below for details on protocol inputs.)
4 --
5 --
Protocol selection dialog
Click “Save” or “Save and Run” to store your new protocol
• Your protocol is now ready to use and available in the Library.
• Tip: clicking “Save and Run” instead of “Save” will bring up a dialog in which you can select
the miniPCR machines to which you will upload the program. Run will start immediately.
6 --
Win / Mac Mobile / iOS / Amazon Fire
* Chromebook users: Beta version available on Google Play.

13. support@minipcr.com
mini16 user’s guide
SOFTWARE OPERATION
PCR mode
Input temperatures up to 99 °C, step times up to 9999 and cycles up to 99. Heated lid
is turned on by default. This setting mantains the lid at approximately 105 °C to prevent
condensation on the caps of the tubes.
CREATING AND SAVING PROTOCOLS (cont.)
Heat block mode
Input temperatures up to 99 °C and time up to 167 hours.
Select from preset temperatures (37 °C, 42 °C, 55 °C, 65 °C, 72 °C, 95 °C) or use the dialog
box to enter any temperature between 30 °C and 99 °C.
Use the slider to select times between 1 and 180 minutes or the dialog box to input any
number between 1 and 9999 minutes (mobile), or 166 h 59 m, 59 s.
Heated lid is turned on by default. This setting mantains the lid at approx 10 degrees above
the target temperature to prevent condensation on the caps of the tubes.
Win / Mac Mobile / iOS / Amazon Fire

14. support@minipcr.com
mini16 user’s guide
SOFTWARE OPERATION
Linear ramp mode
Select the initial and final temperatures and the ramp time between the two. A heating or
cooling ramp can be programmed. Heated lid is turned on by default. This setting mantains
the lid at approximately 10 degrees above the current temperature.
CREATING AND SAVING PROTOCOLS (cont.)
Flex Mode
In FLEX mode, you can create a program containing a combination of PCR, heat block, linear
ramp and touchdown PCR steps. Heated lid is turned on by default.
Note: PCR, heat block and linear ramp protocols have a cool down step that brings the block to 37 °C. When creating
a FLEX program, the final cooling step can be toggled on and off.
Win / Mac
Win / Mac
Mobile / iOS / Amazon Fire

15. support@minipcr.com
mini16 user’s guide
PROTOCOL OPTIONS
Click or tap on the desired protocol from your Library to show available options: Run,
View/Edit, Copy, Delete . Click View/Edit.
Editing protocols
Update protocol parameters (e.g. change the number of cycles, temperature, etc.)
Click “Save Only” to store the updated protocol parameters or “Save and Run” to store
changes and start the protocol.
You can create a copy of an existing protocol by clicking “Copy”. A new protocol will
be created (“Protocol Name (2)”). The original protocol will be preserved.
Press the icon to delete the protocol.
Copying protocols
Deleting protocols
1 --
2 --
3 --
SOFTWARE OPERATION
Win / Mac Mobile / iOS / Amazon Fire
Warning: this action cannot be undone.

16. support@minipcr.com
mini16 user’s guide
RUNNING AND MONITORING
Set the Auto Start on or off according to your needs (see ‘Auto Start feature’ section
below).
Move the power switch on the back of the mini16 to the ON position.
Connect your miniPCR®thermal cycler via USB cable or Bluetooth®.
Tip: You can simultaneously monitor multiple miniPCR machines with one device. Each
miniPCR®will appear as a separate tab in the “Now running” (Mac/Win) or “MONITOR”
(mobile) tab.
Tip: If using a USB connection, external power is not needed at this step; the power
switch may remain in the OFF position.
In Windows and Mac each miniPCR will appear as a separate tab in the Monitor tab. In
Android, iOS, or Amazon Fire each miniPCR will appear highlighted as a blue bar at the
bottom of the Library tab.
1 --
2 --
3 --
SOFTWARE OPERATION
Select the desired protocol from your Library.
Click the “Run” button. The run will automatically begin, signaled by the green LED
turning on.
4 --
Starting the run
Win / Mac /Chromebook Mobile / iOS / Amazon Fire
Tabs

17. support@minipcr.com
mini16 user’s guide
Autonomous run feature
• It is not necessary to maintain a USB or Bluetooth®connection during a run. The
miniPCR will keep running the protocol while the power switch remains in the ON
position.
Tip: The end of a run will be signaled by the green, yellow and red LEDs staying ON.
SOFTWARE OPERATION
Auto Start feature
The Auto Start feature controls whether a run will start automatically when the power switch
is flipped to the ON position. This feature is set for each mini16 unit in the Devices tab. The
Auto Start selection remains in the mini16 memory until it is changed from the software.
Auto Start OFF (default)
• A program run will only start once RUN is clicked in the Library tab. Connection to a
device is required. This is the suggested setting for routine laboratory use.
Auto Start ON
The run will start immediately after the power switch is flipped to the ON position. This the
suggested setting for field use or when a programming device is not readily availalble.
• From power OFF position: Connect to AC power, turn the power switch ON. The
last protocol that was progammed in the mini16 will immediately start. Connection to
software is not required.
• From power ON position: Cycle the power switch OFF, then ON. Your last protocol
will begin automatically.

18. support@minipcr.com
mini16 user’s guide
SOFTWARE OPERATION
1 --
Monitoring the run
Click on “[miniPCR name]” tab (Windows/Mac) or the highlighted active protocol in
the Library tab (iOS, Android, Amazon Fire) to monitor run status.
• Protocol name and parameters
• Status: Running, Stopped, Paused, Cool down, Finished and No power.
Note: If status ‘No power’ is indicated please turn the switch on the back of the unit to
the ON position and make sure that the LED indicator on the power supply is turned on.
• Current step, cycle, and time in step
• Elapsed time (left), remaining time (right)
You can Pause , Stop or Restart your reaction at any time
Win / Mac / Chromebook
Mobile / iOS / Amazon Fire
Status
Status
Alarm
Progress
Protocol
name and
parameters
Alarm
Temperature
vs
time plot
Temperature
vs
time plot
Protocol
parameters
Animation
corresponding to
current step
Theoretical
number of DNA
copies according
to cycle number
Animation
corresponding
to current
step
Theoretical
number of
DNA copies
according to
cycle number

19. support@minipcr.com
mini16 user’s guide
SOFTWARE OPERATION
IMPORT / EXPORT LIBRARY - EXPORT DATA -
LANGUAGE
Import / export data. The protocol library includes all saved protocols and can be shared
among users and devices by exporting and importing it. The libraries are stored with
extension ‘.plf’.
Export data. Run data (temperatures and times) can be exported to a CSV file.
Language. The language dialog presents the available languages. Restarting the application
is required for the change to go into effect.
Win / Mac / Chromebook Mobile / iOS / Amazon Fire

20. support@minipcr.com
mini16 user’s guide
LOADING YOUR SAMPLES
HARDWARE OPERATION
Open the lid by pinching the side tabs on the front plate of your miniPCR®machine
(indicated by arrows). Use your thumb and index fingers to pinch, and lift the lid with
your other hand. Load the PCR tubes in the metal block.
Fully untwist (counterclockwise) the adjustment knob and press the lid down until the
lid clicks shut. Tighten the adjustment knob (clockwise) until you feel light resistance
from the tube caps. Be careful not to over-tighten.
1 --
2 --
Turn knob to adjust
lid height
Pinch both tabs to release lid
HARDWARE OPERATION
Other manuals for miniPCR mini16
1
Table of contents
Other Amplyus Laboratory Equipment manuals
Popular Laboratory Equipment manuals by other brands

Westlab
Westlab 4500RPM Max manual

Excelitas Technologies
Excelitas Technologies X-Cite XLED1 Guide

Atie Medical Industries
Atie Medical Industries PS-140 user manual

SKC
SKC 249-01 operating instructions

Mocom
Mocom S Classic 17 User's quick start guide

NEW BRUNSWICK SCIENTIFIC
NEW BRUNSWICK SCIENTIFIC BioFlo 4500 Guide to operations