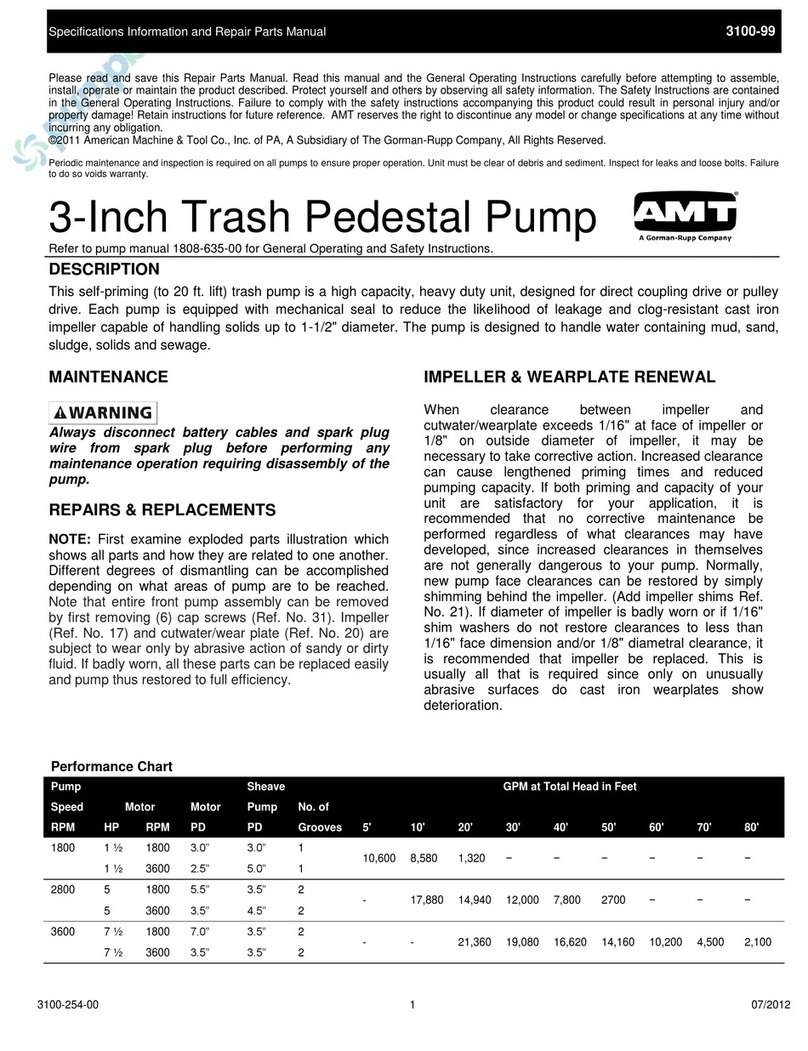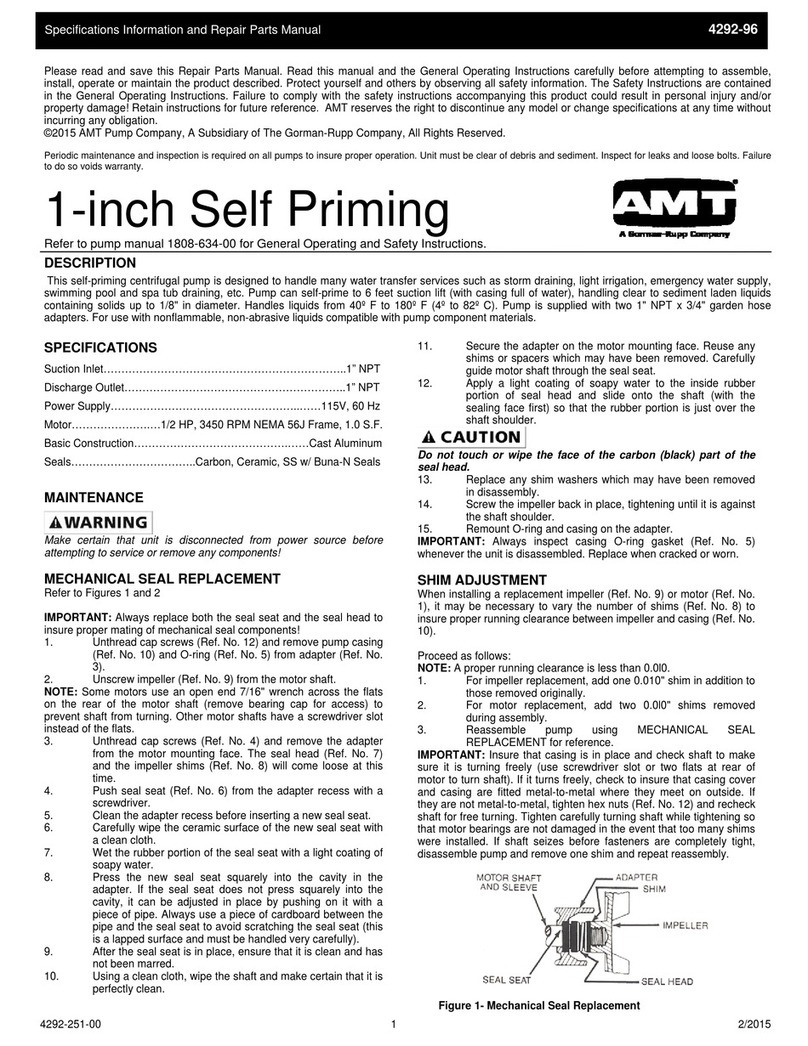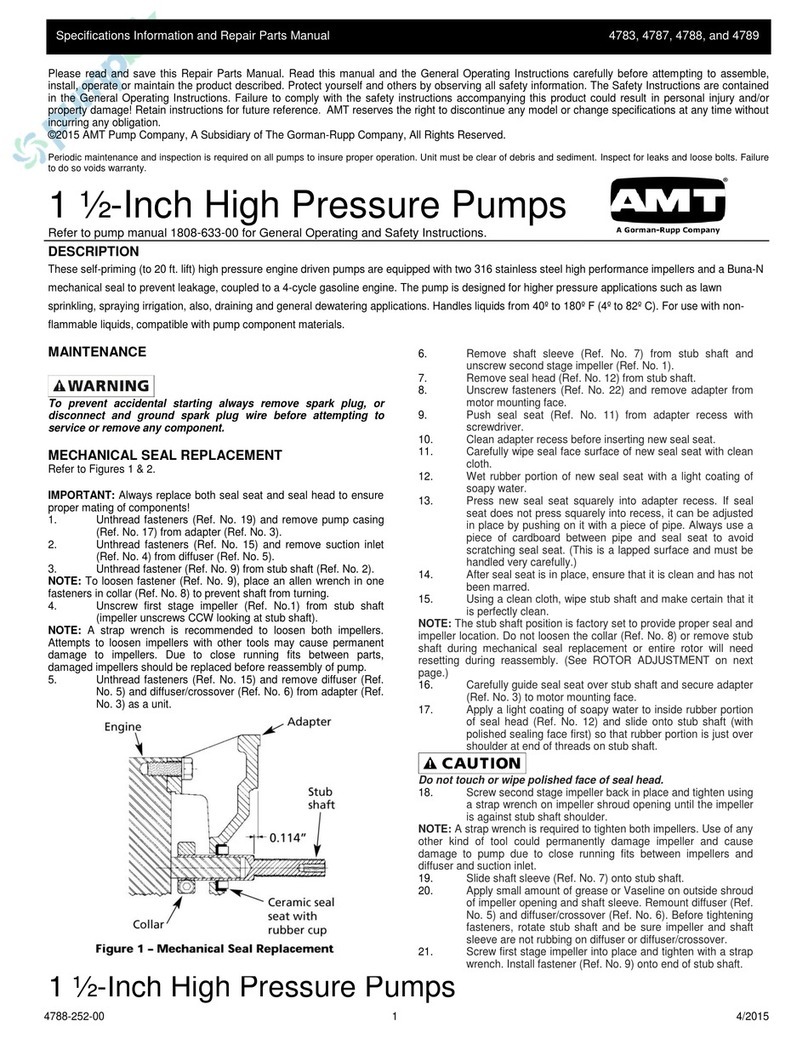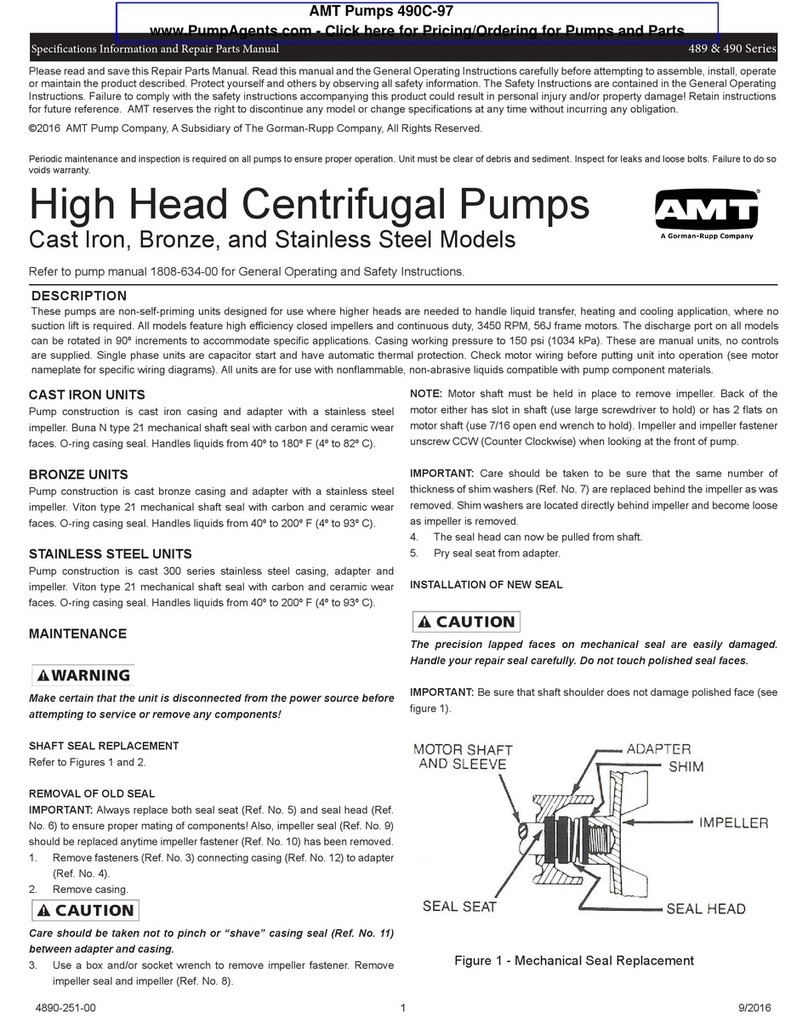
Specifications Information and Repair Parts Manual 3682, 3694, and 3704
3682-251-00
2
Small Straight Centrifugal Pedestal Pumps
MAINTENANCE
Make certain that unit is disconnected from power source before
attempting to service or remove any components!
MECHANICAL SEAL REPLACEMENT
Refer to Figure 1.
IMPORTANT: Always replace both seal seat (Ref. No.8) and seal
head (Ref. No. 7) to insure proper mating of components! Also,
impeller seal (Ref. No. 10) should be replaced anytime impeller
fastener (Ref. No. 11) has been removed.
1. Remove fasteners (Ref. No. 14) connecting casing (Ref. No.
13) to pedestal (Ref. No. 5).
2. Remove casing and casing seal (Ref. No. 12).
Care should be taken not to "pinch" or "shave" casing seal
between pedestal and casing.
3. Use a box and/or socket wrench to remove impeller fastener.
Remove impeller seal and impeller (Ref. No. 9). Seal seat
can now be pried from impeller.
IMPORTANT: Care should be taken to ensure that same number and
thickness of shim washers (Ref. No. 8A) are replaced behind impeller
as was removed. Shim washers are located directly behind impeller
and become loose as impeller is removed.
4. To free shaft assembly (Ref. No. 4), see “Bearing Housing
Service”.
5. After shaft assembly is removed, press seal head from
pedestal.
The precision lapped faces on mechanical seal are easily
damaged. Handle your replacement seal carefully. Do not touch
polished seal faces.
IMPORTANT: Be sure that shaft shoulder does not damage polished
seal face.
6. Thoroughly clean all surfaces of seal seat cavity in pedestal
and impeller.
7. While wearing clean gloves or using a clean light rag, press
seal head squarely into pedestal recess, use cardboard
washer (usually supplied with new seal), place over polished
surface and use a piece of pipe or dowel rod to press in
firmly, but gently. Avoid scratching polished face.
8. Dispose of cardboard washer. Check again to see that
polished surface is free of dirt and all other foreign particles
and that it has not been scratched or damaged.
9. Wet rubber portion of new seal seat with a light coating of
soapy water. While wearing clean gloves or using a clean
light rag, press seal seat squarely into impeller recess, use
cardboard washer (usually supplied with new seal), place
over polished surface and use a piece of pipe or dowel rod
to press in firmly, but gently. Avoid scratching polished face.
NOTE: A short "run-in" period may be necessary to provide completely
leak free seal operation.
10. Replace any shim washers which may have been removed
in disassembly.
11. Screw impeller back in place, tightening until it is against
shaft shoulder. Install impeller seal and impeller fastener.
12. Remount casing seal and casing on pedestal.
IMPORTANT: Always inspect casing seal (Ref. No. 12) whenever unit
is disassembled. Replace when cracked or worn.
IMPORTANT: After pump is completely assembled it is necessary to
rotate pump shaft by hand to check for striking of impeller. If striking or
rubbing occurs, adjust impeller shims as required (see “Shim
Adjustment”).
BEARING HOUSING SERVICE
1. Remove casing (Ref. No. 13) and impeller (Ref. No. 9) as
described under “Mechanical Seal Replacement”.
2. Remove shaft assembly (Ref. No. 4) by first removing snap
ring (Ref. No. 1) and shims (Ref. No. 2). Push shaft
assembly out of pedestal by rapping on threaded end of
shaft with a soft mallet, or block of wood and a hammer.
Slinger washer (Ref. No. 6) will come loose at this time.
3. Replace shaft assembly by sliding assembly into pedestal
(be sure to align slinger washer), threaded end first. Push
assembly completely in by gently tapping on keyway end of
shat with a soft mallet. Replace shims and snap ring.
4. Reassemble pump as described under “Mechanical Seal
Replacement”.
SHIM ADJUSTMENT
When installing a replacement impeller (Ref. No. 9) or shaft assembly
(Ref. No. 4), it may be necessary to adjust number of shims (Ref. No.
8A) to ensure proper running clearance between impeller and casing
(Ref. No. 13). Proceed as follows:
NOTE: A proper running clearance is less than 0.010".
1. For impeller replacement, add one 0.010" shim in addition to
those removed originally.
2. For shaft assembly replacement, add two 0.010" shims in
addition to those removed during disassembly.
3. Reassemble pump using “Mechanical Seal Replacement”
for reference.
IMPORTANT: Be sure that casing is snugly in place and check shaft
to make sure it is turning freely. If it turns freely, check to be sure that
pedestal (Ref. No. 5) and casing are fitted "metal to metal" where they
meet on outside. If they are not "metal to metal" tighten fasteners (Ref.
No. 14) and recheck shaft for free turning. Tighten carefully turning
shaft while tightening so that bearings are not damaged in the event
that too many shims were installed. If shaft seizes before fasteners are
completely tight, disassemble pump and remove one 0.010" shim and
repeat reassembly.

