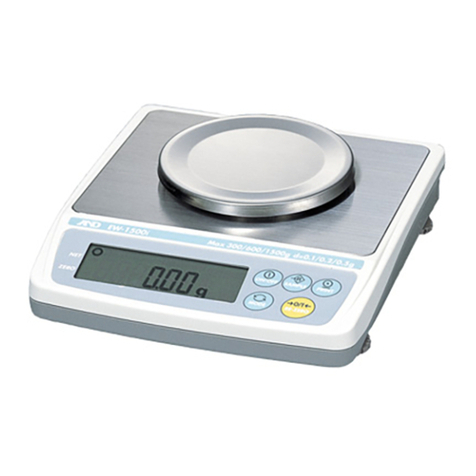
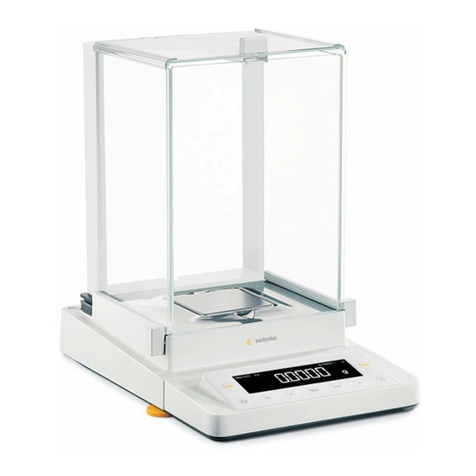
AND BA-TE Series User manual

BA-6TE
BA-6DTE
BA-225TE
BA-225DTE
BA-125DTE
1WMPD4004296

© 2021 A&D Company Ltd. All rights reserved.
No part of this publication may be reproduced, transmitted, transcribed, or translated into
any language in any form by any means without the written permission of A&D Company
Ltd.
The contents of this manual and the specifications of the instrument covered by this
manual are subject to change for improvement without notice.
Windows, Word and Excel are registered trademarks of the Microsoft Corporation.

3
Contents
1. Quick Start Guide ........................................................................................................................... 4
1.1. Detailed Manuals ....................................................................................................................... 4
2. Assembly and Installation ............................................................................................................... 4
2.1. Unpacking .................................................................................................................................. 5
2.2. Assembly ................................................................................................................................... 6
3.
Installation Considerations, Weighing Preparation and Precautions
.................................................................... 9
3.1. How to adjust the level of the balance ....................................................................................... 9
4. On-Screen Buttons and Key Panel (Basic Operation) .................................................................. 10
5. IR sensors and Automatic Doors .................................................................................................. 12
5.1. IR sensors ................................................................................................................................ 12
5.2. Automatic doors ....................................................................................................................... 12
6. Check Function ............................................................................................................................. 13
7. Sensitivity Adjustment / Calibration Test ....................................................................................... 14
7.1. Automatic sensitivity adjustment .............................................................................................. 14
7.2. Sensitivity adjustment using the internal mass ........................................................................ 14
8. Typical Errors (Error Codes) ......................................................................................................... 15
9. Ionizer (AX-ION-25) ...................................................................................................................... 17
9.1. Using the Ionizer ...................................................................................................................... 17
10. Specifications ................................................................................................................................ 18
11.Compliance ................................................................................................................................... 19
11.1. Compliance with FCC Rules .................................................................................................... 19
11.2. IC ............................................................................................................................................. 19

4
1. Quick Start Guide
Thank you for purchasing an A&D BA-TE series analytical balance. This quick start guide describes how
to install the BA-TE series balance, and it covers the basic functions and main operations of the balance.
For further information about the BA-TE series balance, please refer to the separate instruction manuals
listed in "1.1. Detailed Manuals".
1.1. Detailed Manuals
Detailed manuals are available for download from the A&D website (https://www.aandd.jp):
BA-TE Series Instruction Manual
This is the manual to help you understand the functions and operations of the BA-TE series in detail and
make full use of them.
Ionizer (static eliminator) Instruction Manual
This is the manual describing the functions of the AX-ION-25 ionizer and instructions on use.
2. Assembly and Installation
Caution
A BA-TE series analytical balance is a precision instrument, and it should be carefully unpacked.
It is advisable to store the packing materials so that they can be used when transporting the balance.
The contents of the package vary depending on the product. Refer to the illustration of the packing
contents and make sure that everything is included.
Do not connect the AC adapter to the balance until the balance is assembled and installed.
When the balance is ready, connect the AC adapter. An operation check will be performed
automatically.
Use the dedicated AC adapter specified for the balance.
Do not connect the included AC adapter to other devices.
If you use the wrong AC adapter, the balance and other equipment may not work properly.
Make sure that the AC adapter is unplugged before you connect the ionizer.
The BA-TE series analytical balance is composed of the weighing unit and display unit. It is not
possible to replace just one of the units.

5
2.1. Unpacking
Packing contents common to BA-TE series
Packing contents for BA-6TE / BA-6DTE
Packing contents for BA-225TE / BA-225DTE / BA-125DTE
Pan A, Φ25 Pan support A Breeze break front glass Breeze break unit
Dust plate A Breeze break ring A
Small glass breeze break set
Side panes (3 pieces) Top pane Base stand
Aluminum round pans for analysis (10 pieces each)
Large pan,
Φ15, 0.8 mL
Medium pan,
Φ12, 0.3 mL
Breeze break doors
Small pan,
Φ8, 0.05 mL
Pan A, Φ25 Breeze break ring A
Dust plate B
Breeze break front glass Breeze break doors Breeze break unit
Weighing unit Display unit protection cove
r
Breeze break
top door
Breeze break
bottom plate
Display unit Tweezers
Cable A Cable B
Cable C
USB cable Ionize
r
A
C adapte
r
AC adapter ID labels This document
A
ttach the AC adapter labels to the adapter.

6
2.2. Assembly
The BA-6TE is used here for the example of assembly. Other models can be assembled in the same way.
Step 1 Pull out the breeze break
locking handles.
Step 2 Place the breeze break unit on
the weighing unit.
Step 3 Push in the breeze break
locking handles to secure the
units to each other.
Step 4 Assemble the weighing pan.
For BA-6TE / BA-6DTE,
assemble the five parts of the
weighing pan in the correct
position by referring to the
cross-sectional view.
For BA-225TE / BA-225DTE /
BA-125DTE, assemble the four
parts of the weighing pan in the
correct position by referring to
the cross-sectional view.
Breeze break unit
Step 1
Step 3
Step 2
Weighing unit
For BA-225TE / BA-225DTE / BA-125DTE
For BA-6TE / BA-6DTE
Pan A
Pan support A
Breeze break ring A
Dust plate A
Pan B
Breeze break ring B
Dust plate B
Breeze break
bottom plate
Cross-sectional view
BA-6TE / BA-6DTE
Cross-sectional view
BA-225TE / BA-225DTE
BA-125DTE

7
Step 5 Assemble the glass breeze
break.
Assemble the BA-6TE / BA-
6DTE glass breeze break in the
weighing chamber. Align the
side panes with the notch of the
base stand.
Step 6 Insert the breeze break top door
from the handle side.
Step 7 Assemble the breeze break
doors on the left and right sides.
7a Insert the breeze break doors
on the left and right sides.
7b Secure the breeze break doors
with the latches.
Step 8 Assemble the breeze break
front glass.
8a Insert the breeze break front
glass.
8b Secure the breeze break front
glass with the latches.
Notch
Example of the small breeze
break with the right side open.
Base stand
Step 5
Top pane
Side panes
(3 pieces)
Base stand
Side pane
Step 7a
Step 6
Step 8b
Step 7b
Step 8a
Step 7a
Step 8b
Step 7b

8
Step 9 Using the included cable A and cable B, connect the "weighing unit" and "breeze break unit" and
the "display unit" and "weighing unit" respectively, paying attention to the direction of the arrow
on each cable.
Step 10 Connect the breeze break unit and ionizer with the included cable C.
Caution The ionizer operates when the AC adapter is connected to the balance.
Step 11 Connect the included AC adapter to the balance.
.
BA-225TE / BA-225DTE / BA-125DTE
BA-6TE / BA-6DTE
Breeze break unit
Display unit
Weighing unit
Ionize
r
Step 9
Step 11
A
C adapte
r
Step 10

9
3. Installation Considerations, Weighing Preparation and Precautions
Prepare the following installation conditions in order to bring out the full performance of the balance.
Install the balance in an environment where the temperature and humidity are not excessive. The
best operating temperature is about 20°C ±2°C at about 45% to 60% RH relative humidity.
Install the balance where it is free of dust.
The weighing table should be solid. (An anti-vibration table or stone table is ideal)
Place the balance on a horizontal table, and make sure that it is not tilted.
Install the balance in a stable location, avoiding vibration and shock. Corners of rooms on the first
floor are best, as they are less prone to vibration.
Install the balance where it is not affected by heaters or air conditioners.
Install the balance where it is not exposed to direct sunlight.
Install the balance away from equipment which produces
magnetic fields.
Level the weighing unit with the leveling feet and bubble spirit
level. Refer to “3.1. How to adjust the level of the balance”.
Be sure to warm up the balance before use for at least an hour, or at least four hours for BA-6TE /
BA-6DTE, with the AC adapter connected to the power supply.
Perform sensitivity adjustment of the balance before using it for the first time or after having moved it
to another location so that accurate weighing can be performed. For details, refer to the detailed
instruction manual listed in “1.1. Detailed Manuals”.
Caution Do not install the balance where flammable or corrosive gas is present.
3.1. How to adjust the level of the balance
Level the balance by adjusting the leveling feet so that the bubble of the bubble spirit level is centered
in the red circle.
When the bubble is off to the left.
Turn the leveling foot on the front right in the
clockwise direction.
When the bubble is off to the right.
Turn the leveling foot on the front left in the
clockwise direction.
When the bubble is off to the backward
position.
Turn both leveling feet on the front in the
clockwise direction at the same time.
When the bubble is off to the forward
position.
Turn both leveling feet on the front in the counter
clockwise direction at the same time.
Leveling foot
Bubble spirit level
Bubble
spirit level
Up Down
Leveling
foot
The balance is level
(Correct weighing)
Leveling
foot
The balance is tilted
(Inaccurate weighing). Up Down BubbleRed circle

10
4. On-Screen Buttons and Key Panel (Basic Operation)
Standby screen
Weighing screen
ON/OFF key
9. CAL button
1 P-TEST button
2. Application button 10. Communication device
setting button
3. Left IR sensor function
change button
11. Right IR sensor function
change button
12. Right IR senso
r
4. Left IR senso
r
5. Stabilization indicato
r
6. ON:OFF key 14. LOG-IN key
7. HOME key 15. MENU key
8 PRINT button 16. RE-ZERO button
13. Alert

11
Key / button operation
1 P-TEST button
Runs a quick performance test.
The quick performance test automatically checks the performance of
the balance by loading and unloading the internal mass. For details,
refer to the separate instruction manual listed in “1.1. Detailed
Manuals".
2 Application button Displays the application setting screen. For details, refer to the separate
instruction manual listed in “1.1. Detailed Manuals".
3 Left IR sensor function
change button
Changes the operation set for the IR sensors.
At factory setting, the button opens/closes the breeze break door.
4 Left IR sensor
This is one of the IR sensors (touchless sensor).
When you bring your hand close to it, it reacts and the assigned breeze
break door opens/closes. For details, refer to “5.2. Automatic doors”.
6 ON:OFF key
Turns the screen display on and off. The ON:OFF key is active
during any operation.
When the displayed screen is turned off, the standby screen appears.
When the screen display is turned on, the weighing screen appears.
7 HOME key Displays the weighing screen. The HOME key is active during any
operation.
8 PRINT button Outputs data to the device connected to the balance. For details, refer
to the separate instruction manual listed in “1.1. Detailed Manuals".
9 CAL button Displays the sensitivity adjustment / calibration screen. For details, refer
to the separate instruction manual listed in “1.1. Detailed Manuals".
10 Communication device
setting button
Displays the communication device setting screen.
Configures the settings of the connected communication device.
11 Right IR sensor
function change button
Changes the operation set for the IR sensors.
At factory setting, opens/closes the breeze break door.
12 Right IR sensor
This is one of the IR sensors (touchless sensor).
When you bring your hand closer, it reacts and the assigned breeze
break door opens/closes. For details, refer to “5.2. Automatic doors”.
14 LOG-IN key
Displays the log-in screen.
The LOG-IN key is active at any time, and pressing this key during
operation always displays the log-in key. For details, refer to the
separate instruction manual listed in “1.1. Detailed Manuals".
15 MENU key Displays the MENU screen. The MENU key is active at any time
when the key is in operation.
16 RE-ZERO button Sets the displayed value to zero.
Alert Name Description Display
priority
13
Static
elimination
recommended
Displayed when the humidity inside the balance is 45% or
less. (Lights up for about 30 seconds after the start of
weighing)
Higher
Door
open/close Displayed when the breeze break door is open. Lower

12
5. IR sensors and Automatic Doors
5.1. IR sensors
BA-TE series analytical balances are equipped with IR sensors that allow operation without directly
touching the balance display. At factory setting, the IR sensors on the left and right of the display are
assigned to open and close the breeze break doors. You can set / to turn the left and
right IR sensors on and off, or change them to operate other functions.
5.2. Automatic doors
BA-TE series analytical balances are equipped with automatic doors that allow you to open/close the
breeze break without touching the doors.
The IR sensors on the left and right of the display are assigned settings to open/close the breeze break
doors on the right and left respectively.
At factory setting, each breeze break door opens to the position it was previously opened to.
It is also possible to change which sensors the breeze break doors are assigned to and for the doors to
be fully open or partially open in the function table of the balance.
For details, refer to the separate instruction manual listed in “1.1. Detailed Manuals”.
Opening the breeze break door
Step 1. If you want to open the breeze break door on the left side (or on the right side) when it is closed,
hold your hand over the right IR sensor (or the left IR sensor).
Step 2. The detection buzzer sounds and the breeze break door on the left (or right) side opens.
Caution With BA-6TE / BA-6DTE, the breeze break doors stop at the partially-open position
at factory setting.
Closing the breeze break door
Step 1. If you want to close the breeze break door on the left side (or on the right side) when it is open,
hold your hand over the right IR sensor (or the left IR sensor).
Step 2. The detection buzzer sounds and the breeze break door on the left (or right) side closes.
Operation overview
The left IR sensor opens/closes the door on the right.
Example of BA-6TE / BA-6DTE
The right IR sensor opens/closes the
door on the left.

13
6. Check Function
The check function performs daily inspections and regular inspections.
Additionionally, whether or not the balance's performance is being exhibited can be easily checked by
checking the repeatability with the internal mass.
The check function can be selected from the menu screen. For details, refer to the separate instruction
manual listed in “1.1. Detailed Manuals”.

14
7. Sensitivity Adjustment / Calibration Test
7.1. Automatic sensitivity adjustment
The sensitivity of the balance is automatically adjusted using the internal mass according to ambient
temperature change, set time, or interval time. For details, refer to the separate instruction manual listed
in “1.1. Detailed Manuals”.
7.2. Sensitivity adjustment using the internal mass
The sensitivity adjustment / calibration test screen is displayed with the button on the weighing
screen.
Name Description
1 External sensitivity
adjustment
Your external calibration weight is used to adjust the balance.
Instructions are displayed on the screen for how to adjust the
sensitivity.
2 Internal sensitivity
adjustment The internal mass is used to automatically adjust the balance.
3 Internal calibration test
The internal mass is used to check the accuracy of weighing, and
the result is output.
Note that the balance is not adjusted.
4 External calibration test
Your external calibration weight is used to check the accuracy of
weighing, and the result is output.
Note that the balance is not adjusted.
Do not allow vibration or drafts to affect the balance during sensitivity adjustment / calibration test.
For details, refer to the separate instruction manual listed in “1.1. Detailed Manuals”.
2. Internal
sensitivity
adjustment
3. Internal
calibration
test
1. External
sensitivity
adjustment
4. External
calibration
test

15
8. Typical Errors (Error Codes)
Display Error code Description and possible countermeasure
Error 1 EC,E11
Stability error
Weighing value is unstable and "zero display", "sensitivity
adjustment", "calibration test", etc. cannot be executed. Check
around the pan. Refer to the separate instruction manual listed in
“1.1. Detailed Manuals”. Improve the environment of the installation
location (vibration, drafts, static electricity, etc.).
Error 2
Out of the setting range
The value to be set exceeds the setting range. Set again within the
setting range.
Error 3
Malfunction of the internal memory element of the balance
If this error continues to be displayed, repair is necessary. Please
contact your local dealer for repair.
Error 6 EC,E16
Internal mass error
Applying the internal mass does not yield a change in the mass value
as specified. Confirm that there is nothing on the pan and perform the
operation from the beginning.
Error 7 EC,E17
Internal mass error
The internal mass application mechanism does not function properly.
Perform the operation from the beginning.
Error 8
Abnormality in the internal memory data of the balance
If this error continues to be displayed, repair is necessary.
Please contact your local dealer for repair.
Error 9
Abnormality in the internal memory data of the balance
If this error continues to be displayed, repair is necessary.
Please contact your local dealer for repair.
Con Err
Weighing unit error
Data from the weighing unit has not been received. Check the
connection between the weighing unit and the display unit, and turn
the power off and then on again.
door Err
Breeze break unit error
Communication with the breeze break is not possible. Reconnect the
cable between the breeze break unit and the weighing unit.
S/N Error
Serial number error
The serial numbers of the weighing unit and the display unit do not
match. Reconnect with the correct combination.
CAL E EC,E20
Calibration weight error (Positive value)
The calibration weight is too heavy. Check around the pan. Check the
calibration mass value.
-CAL E EC,E21
Calibration weight error (Negative value)
The calibration weight is too light. Check around the pan. Check the
calibration mass value
Weighing
display
E
Overload error
A sample beyond the balance weighing capacity has been placed on
the pan. Remove the object from the pan.

16
Display Error code Description and possible countermeasure
Weighing
display
-E
Weighing pan error
The mass value is too light. Check that the weighing pan is installed
correctly. Set the weighing pan correctly. Calibrate the balance.
rtc PF
Clock battery error
The clock backup battery has been depleted. Set the time and date.
Even if the clock backup battery is depleted, the clock and calendar
function works normally as long as the balance is powered with the
AC adapter. If this error appears frequently, contact your local dealer.
LoWVoLt
Power supply voltage fault
The voltage supplied from the AC adapter is abnormal.
Please check if the problem is the AC adapter supplied with the
balance.
SD Error
MW Error
Repeatability error
With the minimum weighing warning function, the standard deviation
(SD) of repeatability exceeded 50 digits. Review the installation
environment of the balance. For details, refer to the separate
instruction manual listed in “1.1. Detailed Manuals”.
“SD Error” appears in repeatability display.
“MW Error” appears in minimum weighing value (reference value).
EC,E00
Communications error
A protocol error occurred in communications. Check the format, baud
rate, and parity.
EC,E01 Undefined command error
An undefined command was found. Check the transmitted command.
EC,E02
Not ready
The received command cannot be executed:
(e.g.) Q command was received when not in weighing mode.
(e.g.) Q command was received while rezeroing.
Adjust the delay time to transmit a command.
EC,E03
Timeout error
With the command timeout setting, there was a wait time of
approximately 1 second or more while receiving command
characters. Check the communication.
EC,E04
Character length error
The number of characters in the received command has exceeded
the limit. Check the command to transmit.
EC,E06
Format error
The description of the received command is incorrect:
(e.g.) The number of digits of numerical values is incorrect.
(e.g.) There are alphabet characters among the numerical values.
Check the transmitted command.
EC,E07
Parameter setting error
The value of the received command has exceeded the allowed value.
Check the setting range of the numerical value of the command.

17
9. Ionizer (AX-ION-25)
The AX-ION-25 ionizer removes static electricity by irradiating the target object with positive or negative
ions, which are generated from four discharge electrodes by DC corona discharge. Ordinarily, insulators
such as powders, filters, and weighing paper tend to be charged when the humidity is 45% RH or less,
and an error of a few milligrams may occur during weighing. By removing static from the weighing object
with the ionizer, it is possible to eliminate the error in the weighing value due to charging, and correct
weighing can be performed. For details, refer to the separate instruction manual in "1.1. Detailed
Manuals".
9.1. Using the Ionizer
Step 1. Make sure that the AC adapter of the balance is not connected, and then connect the balance
and the ionizer (as noted in "2. Assembly and Installation").
Step 2. Connect the AC adapter, plug it in, and then turn on the power. The power lamp of the ionizer
lights up.
Step 3. Place the target object within the effective range of static elimination.
Step 4. Hold your hand over the IR sensor (touchless infrared proximity sensor) on the front of the
ionizer to start static elimination. The ION lamp indicating that static elimination is in progress
lights up.
Step 5. Refer to the figure below for the effective range of static elimination, and perform static
elimination. At factory setting, when 3 seconds have passed from the start of static elimination,
the ION lamp indicating that static elimination is in progress turns off and static elimination stops.
Effective range of static elimination
Top view
0 cm 5 cm 7 cm 10 cm
Distance
Side view
1 sec 1.5 sec 3 sec
Static elimination time
Figure. Static elimination range
Effective range of
static elimination
Effective range of
static elimination
Ionizer
(AX-ION-25)
IR SENSOR (touchless infrared proximity sensor)
Power lamp (lights up when the power is turned on)
ION lamp (lights up during static elimination)

18
10. Specifications
BA-6TE BA-6DTE
Weighing capacity 6.2 g 6.2 g
2.1 g
Maximum display 6.200084 g 6.20008 g
2.100009 g
Readability 0.001 mg 0.01 mg
0.001 mg
Repeatability
(Standard deviation)
0.0010 mg (1 g)
0.0030 mg (6 g)
0.01 mg (6 g)
0.0025 mg (1 g)
Linearity ±0.010 mg ±0.02 mg
±0.010 mg
Display 5-inch WVGA TFT LCD color display
Operation Touchscreen and key switches
Communication
RS-232C (printer, PLC, etc.)
USB type A (USB drive, for data storage), USB type B (PC)
LAN (TCP/IP), Stereo jack (external switch), Bluetooth (PC, etc.) *
BA-225TE BA-225DTE BA-125DTE
Weighing capacity 220 g 220 g 120 g
51 g 51 g
Maximum display 220.00084 g 220.0008 g 120.0008 g
51.00009 g 51.00009 g
Readability 0.01 mg 0.1 mg 0.1 mg
0.01 mg 0.01 mg
Repeatability
(Standard deviation)
0.015 mg
0.03 mg
(50 g)
(200 g)
0.1 mg (200 g) 0.1 mg (100 g)
0.025 mg (50 g) 0.030 mg (50 g)
Linearity ±0.15 mg ±0.20 mg ±0.20 mg
Display 5-inch WVGA TFT LCD color display
Operation Touchscreen and key switches
Communication
RS-232C (printer, PLC, etc.)
USB type A (USB drive, for data storage), USB type B (PC)
LAN (TCP/IP), Stereo jack (external switch), Bluetooth (PC, etc.) *
* Bluetooth® communication capability is disabled for regions where the balance is not certified as being
compliant with local laws regarding use of Bluetooth® communication.

19
11. Compliance
11.1. Compliance with FCC Rules
This device contains transmitter module FCC ID: RYYEYSHCN
This device complies with Part 15 of the FCC rules. Operation is subject to the following two conditions:
(1) this device may not cause harmful interference, and (2) this device must accept any interference
received, including interference that may cause undesired operation.
(FCC = Federal Communications Commission in the U.S.A.)
FCC warning
Changes or modification not expressly approved by the party responsible for compliance could void
the user’s authority to operate the equipment.
Note: This equipment has been tested and found to comply with the limits for a class A digital device,
pursuant to part 15 of the FCC rules. These limits are designed to provide reasonable protection
against harmful interference when the equipment is operated in a commercial environment. This
equipment generates, uses, and can radiate radio frequency energy and, if not installed and used in
accordance with the instruction manual, may cause harmful interference to radio communications.
Operation of this equipment in a residential area is likely to cause harmful interference in which case
the user will be required to correct the interference at his / her own expense.
11.2. IC
IC RADIATION EXPOSURE STATEMENT FOR CANADA
This device complies with Industry Canada license-exempt RSS standards. Operation is subject to the
following two conditions: (1) this device may not cause interference, and (2) this device must accept any
interference, including interference that may cause undesired operation of the device.
This device contains transmitter module IC: 4389B-EYSHCN.

MEMO
This manual suits for next models
5
Table of contents
Other AND Scale manuals
