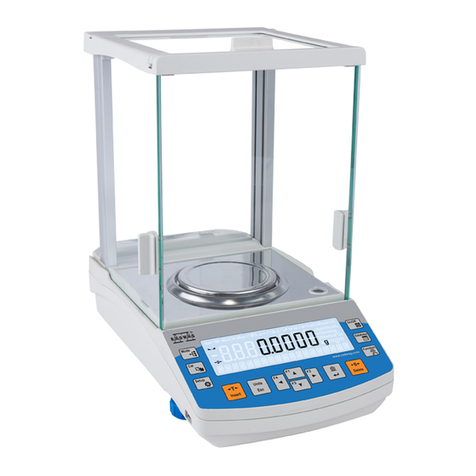
AND GR Series User manual

GR-120
GR-200
GR-300
GR-202
1WMPD4000280A

Th is a hazard alert mark.
NOTE
This manual and/or the GR series balances may be changed at any time to improve the product without
notice.
© 2001 A&D Company Ltd. All rights reserved.
No part of this publication may be reproduced, transmitted, transcribed, or translated into any language in
any form by any means without the written permission of A&D Company, Ltd.
The contents of this manual and the specifications of the instrument covered by this manual are subject to
change for improvement without notice.
Product names and company names mentioned in this manual are trademarks or registered trademarks of
their respective companies in Japan or other countries and regions.

3
Contents
1. Introduction ..........................................................................................................................................5
1.1. Features ............................................................................................................................................5
1.2. Compliance with FCC Rules.............................................................................................................5
2. Caution.................................................................................................................................................6
2.1. Precautions for Installing the Balance ..............................................................................................6
2.2. Cautions during Use (To Get Best Performance) .............................................................................7
2.3. Take Care of Your Balance ...............................................................................................................8
2.4. Power Supply....................................................................................................................................8
3. Unpacking Your Balance......................................................................................................................9
3.1. Installing Your Balance ...................................................................................................................10
3.2. Display Symbols and Key Operation ..............................................................................................10
4. Weighing Units ...................................................................................................................................11
5. Weighing ............................................................................................................................................12
5.1. Basic Operation (Gram Mode)........................................................................................................12
5.2. Counting Mode (PCS).....................................................................................................................13
5.3. Percent Mode (%) ...........................................................................................................................13
6. Response Adjustment ........................................................................................................................14
6.1. Automatic Response Adjustment....................................................................................................14
6.2. Manual Response Adjustment ........................................................................................................15
7. Calibration ..........................................................................................................................................15
7.1. Automatic Self Calibration ..............................................................................................................17
7.2. Calibration Using the Internal Weight .............................................................................................17
7.3. Calibration Test Using the Internal Weight......................................................................................18
7.4. Calibration Using an External Weight .............................................................................................19
7.5. Calibration Test Using an External Weight .....................................................................................20
7.6. Correcting the Internal Weight Value ..............................................................................................21
8. Function Switch and Initialization.......................................................................................................22
8.1. Permission or Prohibition................................................................................................................22
8.2. Initializing the Balance ....................................................................................................................23
9. Function Table....................................................................................................................................24
9.1. Display and Keys of the Function Table..........................................................................................24
9.2. Details of the Function Table ..........................................................................................................25
9.3. Explanation of Item "Environment, Display" ...................................................................................27
9.4. Explanation of Item "Data output mode".........................................................................................28
9.5. Explanation of Item "Data format"...................................................................................................29
9.6. Examples of Data Format .............................................................................................................31
10. ID Number and GLP Report...............................................................................................................33
10.1. Main Objectives ..............................................................................................................................33
10.2. Setting the ID Number ....................................................................................................................33
10.3. GLP Output .....................................................................................................................................34
11. Data Memory Function.......................................................................................................................39
11.1. Use and the Method of Storing Data ..............................................................................................39
11.2. Preparation of the Function Table...................................................................................................40
11.3. Enabling data memory function ......................................................................................................40

4
11.4. Output of Data from Memory ..........................................................................................................40
11.5. Deleting All Data at One Time.........................................................................................................41
12. Underhook .........................................................................................................................................41
13. Specific Gravity (Density) Measurement ...........................................................................................42
14. Input and Output Interface .................................................................................................................46
14.1. RS-232C Interface ..........................................................................................................................46
14.2. External Contact Input ....................................................................................................................47
15. Connection to Equipment...................................................................................................................48
15.1. Connection to AD-8127 Printer .....................................................................................................48
15.2. Connection to AD-8121B Printer...................................................................................................48
15.3. Connection to Computer ...............................................................................................................50
16. Commands.........................................................................................................................................52
16.1. Command List.................................................................................................................................52
16.2. Commands to Request Weighing Data ..........................................................................................53
16.3. Commands to Control the Balance.................................................................................................54
16.4. Commands to Request Memory Data ............................................................................................55
16.5. Acknowledge Code and Error Codes .............................................................................................56
16.6. Control using CTS and RTS ...........................................................................................................56
16.7. Related Settings..............................................................................................................................56
16.8. Command Examples.......................................................................................................................57
17. Maintenance ......................................................................................................................................60
17.1. Treatment of the Balance................................................................................................................60
17.2. Error codes .....................................................................................................................................60
17.3. Other Display ..................................................................................................................................61
18. Specifications.....................................................................................................................................62
18.1. External Dimensions .......................................................................................................................63
18.2. Optional Accessories ......................................................................................................................64

5
1.Introduction
THANK YOU FOR YOUR A&D PURCHASE
This manual will tell you in simple language how this balance works and how to get the most out of it in
terms of performance.
1.1. Features
Built-in Calibration Weight (internal weight), used to calibrate and verify the calibration of your
balance.
Automatic Self Calibration, using the built-in weight, adapting to changes in temperature.
Automatic Response Adjustment, adapting to vibration and drafts in the environment.
Data Memory Function, storing 200 weighing data.
Interval Memory Mode, storing weighing data periodically.
Good Laboratory Practices (GLP) data output using a serial interface.
Under Hook, for measuring specific gravity and magnetic substances.
The balance is equipped with the specific gravity measuring mode to calculate the specific gravity
(density) of a solid.
Multiple Weighing Units, with most of the common units used around the world.
RS-232C serial interface, for transmitting data and controlling your balance.
Windows communication tools software (WinCT) to allow easy communication with a computer
using Windows. The current version of the WinCT can be downloaded from the A&D website.
Door Control Lever, a front mounted door control can easily open and close one of the side doors
if connected using the door joint.
1.2. Compliance with FCC Rules
Please note that this equipment generates, uses and can radiate radio frequency energy. This
equipment has been tested and has been found to comply with the limits of a Class A computing device
pursuant to Subpart J of Part 15 of FCC rules. These rules are designed to provide reasonable
protection against interference when equipment is operated in a commercial environment. If this unit is
operated in a residential area it might cause some interference and under these circumstances the user
would be required to take, at his own expense, whatever measures are necessary to eliminate the
interference.
(FCC = Federal Communications Commission in the U.S.A.)

6
2.Caution
2.1. Precautions for Installing the Balance
To ensure that you get the most from your balance, please try to follow these conditions as closely as
possible:
The best operating temperature is about 20°C / 68°F at about 50% Relative Humidity.
Try to ensure a stable power source when using the AC adapter.
Please warm-up the balance for at least one hour. Plug-in the AC
adapter as usual.
The weighing room should be free of dust.
The weighing table should be solid and free from vibration, drafts
(such as frequently opening doors or windows) and as level as
possible.
Keep the balance level by using the bubble spirit level.
Don’t install the balance near heaters or air conditioners.
Don’t install the balance in direct sunlight.
Don’t use the balance near other equipment which produces
magnetic fields.
Corners of rooms are best as they are less prone to vibrations.
Calibrate the balance before using and after moving it to another
location.
Do not place or use the balance where there is flammable or
corrosive gas present.
OK NG
Bubble
spirit
level
Leveling
foot

7
2.2. Cautions during Use (To Get Best Performance)
For precise and accurate weighing, please take notice of the following.
Weighing errors may occur due to the influence of static electricity.
Note that if the ambient humidity drops below 45%RH, insulators
such as plastics are liable to have static electricity. Ground the
balance and perform the following as needed.
Eliminate the static electricity using the optional AD-1683A.
Increase the relative humidity at the place where the balance
is installed.
Weigh the sample in a conductive metal container or the like.
Wipe off charged materials such as plastic with a damp cloth
to suppress static electricity.
Influence of magnetism may cause weighing errors. When
measuring magnetic materials (iron, etc.), keep the sample away
from the balance main body by means such as underhook weighing.
Weighing errors may occur if there is a difference between the
ambient temperature and temperature of the sample (and the
container). For example, when the room temperature is 20°C,
convection occurs around a Petri dish or watch glass that is 40°C and
the balance displays a value lighter than the actual weight. Before
weighing the sample and the container, try to acclimatize them to the
ambient temperature. Use tweezers when handling the sample.
Perform the weighing operation carefully and quickly. If
measurement takes a long time, error-inducing factors will
increase due to changes in temperature and humidity in the
weighing chamber, air turbulence or reaction/humidity absorption
by the sample. It is advisable to use long tweezers to avoid
inserting your hands into the weighing chamber.
For weighing with 0.01 mg readability using the GR-202, it is
adavisable to install the fine range breeze break ring in place of the
breeze break ring. (Refer to “3. Unpacking your balance”.) By installing
it, the influence of air flow can be minimized.
When placing a sample on the weighing pan, do not drop it, or do not
place a sample greater than the balance weighing capacity. Place the
sample in the center of the weighing pan.
When pressing keys, do not press with a sharp object such as a pen.
Instead, press the center of the key with your finger.
Be sure to press the RE-ZERO key before weighing in order to
eliminate measurement errors.
Measurement results include error from air buoyancy. The buoyancy
of air varies depending on the sample volume, atmospheric pressure,
temperature, and humidity. Correct the buoyancy for the most precise
measurement.
Prevent foreign substances such as powder, liquid, and metal pieces
from entering the balance.
Ground
Charged
material
Metal case
Magnetic
material
Convection
40°C
20°C
Fine range
breeze break

8
2.3. Take Care of Your Balance
Don’t disassemble the balance. Contact your local A&D dealer if your
balance needs service or repair.
Don’t use solvents to clean the balance. For best cleaning, wipe with a dry
lint free cloth or a lint free cloth that is moistened with warm water and a
mild detergent.
When you transport the balance, hold it as shown in the right illustration.
Never lift the balance using the weighing chamber frame.
Keep magnetic substance away from the balance.
Avoid mechanical shock to your balance.
Avoid dust and water so that the balance weighs correctly. Protect the
internal parts from liquid spills and excessive dust.
Remove and clean the floor plate of the weighing chamber.
Use the special shipping box supplied for transportation.
2.4. Power Supply
Do not remove the AC adapter while the internal mass is in motion, for example, right after the AC
adapter is connected, or during calibration using the internal mass.
If the AC adapter is removed under the conditions described above, the internal mass will be left
unsecured, that may cause mechanical damage when the balance is moved.
Before removing the AC adapter, press the ON:OFF key and confirm that zero is displayed in
weighing mode.
When the AC adapter is connected, the balance is in the standby mode if the standby indicator is
on (see "3.2. Display Symbols and Key Operation "). This is a normal state and does not harm the
balance. We recommend that you plug in your balance for at least an hour before use so it can
warm up.

9
3.Unpacking Your Balance
Unpack the balance carefully and keep the packing material if you want to transport the balance again in the
future. In the carton you should find this manual plus:
Note
Please confirm that the AC adapter type is correct for your local voltage and receptable type.
Please use the dedicated AC adapter specified for the balance.
If you use the wrong AD adapter, the balance and other equipment may not operate properly.
External
Contact Input
Serial Interface
(RS-232C)
Grounding Terminal
AC Adapter
Jack
Step
Card
Step
Card
Step Card
AC Adapter ID Lables
AC Adapter
Weighing
Chamber
Breeze
Break Ring
Dust Plate
Floor Plate
Door Control Lever
Door
Joint
Levelling
Foot
Bubble Spirit
Level
Display
Keys
A side door can be opened and closed
using the Door Control Lever when the
Door Joint is connected to a side door.
Weighing
Pan

10
3.1. Installing Your Balance
Step 1 Consider the section "2. Caution" for installing your balance.
Step 2 Assemble the "Dust Plate", "Breeze Break Ring / Fine Range Breeze Break Ring" and "Weighing Pan" on
your balance. There is a reference illustration on the previous page.
Step 3 Adjust the level of the balance using the leveling feet.
Step 4 Connect the AC adapter to the balance. Warm up the balance for at least one hour with nothing on the
weighing pan.
3.2. Display Symbols and Key Operation
There are two types of key operations: “press and release” and
“press and hold”. The function of each key changes depending
on how the key is pressed. Do not press and hold a key unless
necessary.
Key
Press (press and release) the key
Press and hold the key
Display ON / OFF key. The stand-by indicator is displayed, when the balance is turned off
with this key. Weighing data is displayed, when the balance is turned on with this key.
Readability of weighing data is
changed.
The function table menu is displayed. Refer to
section "9. Function Table".
Units are changed (selected from the
function table). Refer to section "4.
Weighing Units".
Response adjustment is performed.
This key performs calibration of the
balance using the internal weight.
Other items of the calibration menu are
displayed.
Weighing data is stored in the balance
(Factory setting) or is output to the RS-
232C interface. This key functions
according to the function table.
Data memory menu or GLP menu is
displayed. This key functions according to
the function table. Factory setting is "not
used".
The key sets the display to zero. This key returns a weighing value to the center of zero
when the weighing pan is empty, and can also tare (cancel) the weight of container and/or
sample. Please use this key before each weighing to cancel possible error.
Stand-by indicator of
interval memory function
Active indicator of interval
memory function
Displayed data number
Automatic self
calibration notice
Stabilization indicator
Stand-by indicator
The amount of stored data
with memory data function
Processing indicator
Response indicator
Weighing data or
stored data
Blinking indicators
Press
(Press and release)
Press and
hold

11
4.Weighing Units
The most common unit of weight used around the world is grams, but there is often a need to shift to an
alternative unit specific to the country where the balance is used or to select modes such as counting or
percent.
The unit can be select by the function table. The units are as follows (if some are missing, please refer to your
dealer):
If a mode (or unit) of weight has been turned off, the sequence will be missing that mode or unit. There are
also the various Tael that can be included if necessary. (Tael is selected as a unit from four units installed at
the factory)
Note
If the law in your area permits, you may use all of the units, or at this software level you can disable the
weighing units you don't regularly use. Also, some dealers may initially turn OFF units which are not regularly
used, but you may want to turn them back on.
Conversion table
Abbrev.
Name
Conversion
mg
Milli-gram
0.001 g
oz
Ounce (Avoir)
28.349523125 g
ozt
Troy Ounce
31.1034768 g
ct
Metric Carat
0.2 g
mom
Momme
3.75 g
dwt
Pennyweight
1.55517384 g
GN
Grain (UK)
0.06479891 g
TL
Tael (HK general, Sing.)
37.7994 g
TL
Tael (HK, jewelry)
37.429 g
TL
Tael (Taiwan)
37.5 g
TL
Tael (China)
31.25 g
t
Tola (India)
11.6638038 g
mes
Messghal
4.6875 g

12
Operation of unit selection
The unit can be selected in the function table. The sequence of displaying the unit can be arranged so as to
fit the frequency of use in the function table. According to the sequence of displaying unit, the units can be
changed with the MODE key at the weighing mode.
Selecting a unit and arranging the sequence of display
Step 1 Press and hold the RANGE key to bASFnc of the function table.
Step 2 Press the RANGE key several times to display Unit.
Step 3 Press the PRINT key to enter into unit selection.
Step 4 The unit can be selected using the following keys.
The unit display sequence is in the order of pressing the RE-ZERO key.
MODE key: The key to sequentially display the units.
RE-ZERO key: The key to select a unit. The indicator is displayed at unit selected.
Step 5 Press the PRINT key to store the units. Then the balance displays next menu id of the function
table.
Step 6 Press the CAL key to exit the function table. Then the balance returns to the weighing mode.
5.Weighing
Cautions for the weighing operation
Operate your balance gently.
Press the RE-ZERO key to prevent possible error before placing material on the pan (weighing
material) each time.
Shorten the operation time as much as possible. (Opening and closing door, placing and removing
material)
Temperature changes during measurement may cause weighing error.
Use a pair of tweezers (pincette) to avoid a temperature change that is due to having your hand in
the weighing chamber.
Calibrate your balance periodically to maintain weighing accuracy. Refer to section “7. Calibration”.
Electrified material or magnetic body may cause a weighing error.
Do not press keys with a sharp instrument (such as a pencil or ball point pen).
Do not drop things on the pan, or place a weight on the pan that is beyond the weighing range of
the balance.
Keep the area clean and dry.
Consider section "2. Caution” for weighing operation.
5.1. Basic Operation (Gram Mode)
Step 1 Calibrate your balance before use. (Refer to section “7. Calibration”)
Step 2 Place a container on the weighing pan, if necessary.
Press the RE-ZERO key to cancel net weight. The balance displays zero.
Container: A vessel placed on the pan, but not to be included in the weighing data.
Step 3 Place material on the pan or in the container.
Step 4 Wait for the stabilization indicator to be dislpayed and read the value.
Step 5 Remove the material and container from the pan.

13
5.2. Counting Mode (PCS)
Selecting the counting mode
Step 1 Select the unit "pcs" using the MODE key. If the counting mode can not be selected, refer to
section "4. Weighing Units". (pcs : pieces)
Storing a unit weight
Step 2 Press the RANGE key to enter the sampling mode.
Step 3 If you want to select the number of items to be used for the sample, press the RANGE key (several
times). It may be set to 10, 25, 50 or 100.
Step 4 Place a container on the weighing pan, if necessary. Press RE-ZERO key to cancel this weight.
ex. 25 pcs is displayed in the case of 25 items.
Step 5 Place items on the pan. This number of items is the same quantity as the number displayed (10,
25, 50 or 100).
Step 6 Wait for the stabilization indicator to come on. Press the PRINT key to calculate the unit weight
and store it.
Counting items
Step 7 You are now able to count the items by placing them on the pan.
Counting mode using the ACAI function
ACAITM (Automatic Counting Accuracy Improvement) is a function that improves the accuracy of
the unit weight.
tep 8 If you add a few more items, the ACAI indicator turns on. (The ACAI indicator turns off if in
overload)
Step 9 The balance re-calculates the unit weight while the ACAI indicator is blinking. Wait and do not
touch the items on the pan until the ACAI indicator turns off automatically.
Step10 You are now able to count items with a more accurate unit weight.
Step11 If you add a few more items, proceed to step 8.
The balance re-calculates a more accurate unit weight.
5.3. Percent Mode (%)
Selecting the unit of percent mode
Step 1 Select the unit % using the MODE key. If the percent mode can not be selected, refer to section
"4. Weighing Units". ( %: percent)
Storing 100% weight
Step 2 Press the RANGE key to enter the sampling mode.
Step 3 Place a container on the weighing pan, if necessary.
Press the RE-ZERO key to cancel the container weight and possible error.
The balance displays 100 0 ..
Step 4 Place the item of 100% weight on the pan or in the container.
Step 5 Press the PRINT key to store this 100% weight.
Step 6 Remove the item from the pan.

14
Reading percentage
Step 7 You are now able to read the percentage based on the stored 100% weight.
6.Response Adjustment
This function stabilizes the weight value, reducing the influence on weighing that is caused by drafts
and/or vibration at the place where the balance is installed. This function adjusts by automatically
analyzing the environment or by hand-operation. The function has three stages as follows:
Indicator Function
table
Summaries
FAST
Cond 0
Fast response, Sensitive value
MID.
Cond 1
SLOW
Cond 2
Slow response, Stable value
Note
If the automatic response adjustment is too awkward, perform "Manual Response Adjustment".
The response adjustment can be changed at "Condition (Cond)" of "Environment & Display (bAsfnc)" in
the function table. Refer to "9. Function Table".
6.1. Automatic Response Adjustment
This way automatically updates the response adjustment by analyzing the influence of the environment
on the weight data.
Operation
Step 1 Press and hold the MODE key until RESPONSE is displayed, and then
release the key.
Step 2 The balance analyzes the influence and updates the response
adjustment. If you want to cancel this update, press the CAL key.
Caution
Do not allow vibration or drafts to affect the balance.
Step 3 The balance returns to the weighing mode automatically and displays
the updated response indicator.
Response Indicator

15
6.2. Manual Response Adjustment
This way updates the response adjustment manually.
Operation
Step 1 Press and hold the MODE key until RESPONSE is displayed.
Press the MODE key immediately.
Step 2 Select a stage of the response adjustment using the
MODE key. Either FAST or MID. or SLOW can be
selected.
Step 3 The balance automatically returns to the weighing mode after
a few seconds of inactivity.
7.Calibration
The GR series has the following modes concerning calibration and calibration test.
Automatic Self Calibration
Calibration using the internal weight
Calibration using an external weight
Calibration test using the internal weight
Calibration test using an external weight
Correction of the internal weight value
Note
Calibration is controlled by the parameters of "Permission or prohibition". Refer to section "8.
Function Switch and Initialization".
The weight which can be used for calibration is called "the calibration weight". The weight which
can be used for calibration test is called "the target weight". The weight which you have is called
"the external weight".
Caution
This calibration achieves the adjustment for accurate weighing. It is necessary to perform calibration
in the following case.
• When the balance is installed for the first time.
• When the balance has been moved.
• When the ambient environment has changed.
• For periodical calibration.
Prevent vibration, drafts, and ambient temperature changes from the influence for the balance
during calibration.
This indicator means "the balance is measuring calibration data". Do not allow
vibration or drafts to affect the balance while this indicator is displayed.
Press and hold
Press
again
Select
Wait

16
The data for GLP (Good Laboratory Practice) can be output using the RS-232C interface, when the
"GLP output (info)" of "Data output (dout)" is set to "1" or " 2". Refer to section "9. Function
Table".
Caution using an External Weight
The accuracy of an external weight can influence the accuracy of weighing.
Product
Usable external weight
Adjustable range
GR-120
100 g, 50 g
+15.9 mg – -15.0 mg
GR-200
200 g, 100 g
GR-300
200 g, 300 g
GR-202
200 g, 100 g

17
7.1. Automatic Self Calibration
This function automatically calibrates the balance, when the balance detects an ambient temperature
change.
When the balance detects a change in ambient temperature, this indicator blinks
and automatic self calibration is required. If the balance is not used for several
minutes with this indicator blinking, the balance preforms automatic self
calibration. The environment will affect the time that the indicator blinks.
This display means "the balance is measuring calibration data". Do not allow
vibration or drafts to affect the balance while this indicator is displayed.
Advice
You can use the balance while the indicator blinks. But, it is recommended that to maintain the best
accuracy, stop using the balance and confirm that there is nothing on the pan when the indicator starts
blinking.
Caution
Do not place anything on the weighing pan during automatic calibration.
Control of Automatic Self Calibration
Automatic self calibration is controlled by a parameter in "Permission or prohibition". Refer to section "8.
Function Switch and Initialization".
7.2. Calibration Using the Internal Weight
This function calibrates the balance using the internal weight.
Step 1 Connect the AC adapter and warm up the balance for at least one hour with nothing on the
weighing pan.
Step 2 Press the CAL key to start calibration.
Step 3 The balance displays Cal in and performs calibration. Prevent vibration and drafts from
affecting the balance.
Step 4 If the "GLP output (info)" of the "Function Table" is set to "1" or "2", "Calibration Report" is output
from RS-232C interface.
Step 5 The balance will automatically return to the weighing mode after calibration.
Step 6 Test the accuracy of weighing using the calibration test function or by using a certified test weight.
Control of this Calibration
Calibration using the internal weight is controlled by a parameter in "Permission or prohibition". Refer to
section "8. Function Switch and Initialization".

18
7.3. Calibration Test Using the Internal Weight
This function tests the balance accuracy using the internal weight.
Operation
Step 1 Connect the AC adapter and warm up the balance for at least
one hour with nothing on the pan.
Step 2 Press and hold the CAL until displaying CC in and then
release the key.
Step 3 The balance measures the zero point.
Prevent vibration and drafts to affect the balance.
Step 4 The measured zero point data is displayed.
Step 5 Ready for the internal weight measurement.
Step 6 The balance measures the internal weight.
Prevent vibration and drafts to affect the balance.
Step 7 The internal weight data is displayed.
Step 8 The balance informs you when the calibration test is finished. If
the "GLP output (info)" of the "Function Table" is set to "1" or
"2", "Calibration Test Report" is output by the RS-232C interface.
Step 9 The balance will automatically return to the weighing mode after
the calibration test is finished.
G
LP output
Press and hold

19
7.4. Calibration Using an External Weight
This function calibrates the balance using an external weight. The weight to be used for calibration is
called "the calibration weight". The weight which you have is called "the external weight".
Operation
Step 1 Connect the AC adapter and warm up the balance for at least one hour
with nothing on the pan.
Step 2 Press and hold the CAL key until displaying Calout and then
release the key
Step 3 The balance displays CAl 0 .
If you want to change the calibration weight value,
proceed to step 4.
If you use the stored calibration weight value in the
balance, proceed to step 5.
Step 4 Press the RANGE key and adjust the calibration weight value
using the following keys.
RE-ZERO key...
The key to set the value of the digit selected.
RANGE key ......
The key to select the digit to change value.
PRINT key ........
The key to store a new weight value and
return to step 3.
Even if the AC adapter is removed, the data is
maintained in non-volatile memory.
CAL key............
The key to cancel this change and return to step 3.
Product
Usable weight
Adjustable range
GR-120
100 g, 50 g
+15.9 mg –
-15.0 mg
GR-200
200 g, 100 g
GR-300
200 g, 300 g
GR-202
200 g, 100 g
Note Digits cyclically change using the RE-ZERO key.
ex. 0 mg+15 mg-15 mg0 mg
Step 5 Confirm that there is nothing on the pan and press the PRINT
key. The balance measures the zeropoint. Prevent vibration and
drafts from affecting the balance.
Step 6 Place the displayed calibration weight on the pan and press
the PRINT key. The balance displays the measured calibration
weight. Prevent vibration and drafts from affecting the balance.
Step 7 Remove the weight from the pan after the balance displays End.
Step 8 If the "GLP output (info)" of the "Function Table " is set to "1" or
"2", "Calibration Test Report" is output by the RS-232C interface.
Step 9 The balance will automatically return to the weighing mode after
calibration.
Step10 Test the accuracy of weighing using the calibration test function with
a certified test weight.
Control of this Calibration
Calibration using an external weight is controlled by a parameter in "Permission or prohibition". Refer
to section "8. Function Switch and Initialization".
Press and hold
GLP output
ex. calibration weight
value = 200.0017g

20
7.5. Calibration Test Using an External Weight
This function tests the balance for the accuracy using an external weight. A weight which is used for the
calibration test is called "the target weight". The weight which you have is called "the external weight".
Operation
Step 1 Connect the AC adapter and warm up the balance for at least one
hour with nothing on the pan.
Step 2 Press and hold the CAL key until displaying Cal out and
then release the key.
Step 3 The balance displays CC 0 .
If you want to change the target weight value, proceed to
step 4.
If you use the stored target weight value in the balance,
proceed to step 5.
Step 4 Press the RANGE key and adjust the calibration weight value using
the following keys.
RE-ZERO key...
The key to set the value of the digit selected.
RANGE key ......
The key to select the digit to change value.
PRINT key ........
The key to store a new weight value and
return to step 3.
Even if the AC adapter is removed, the data is
maintained in non-volatile memory.
CAL key............
The key to cancel this change and return to step 3.
Product
Usable weight
Adjustable range
GR-120
100 g, 50 g
+15.9 mg –
-15.0 mg
GR-200
200 g, 100 g
GR-300
200 g, 300 g
GR-202
200 g, 100 g
Note Digits cyclically change using the RE-ZERO key.
ex. 0 mg+15 mg-15 mg0 mg
Step 5 Confirm that there is nothing on the pan and press the PRINT key.
The balance measures the zeropoint and displays it. Prevent
vibration and drafts from affecting the balance.
Step 6 Place the displayed target weight on the pan and press the PRINT key.
The balance displays the measured target weight and displays it. Prevent
vibration and drafts from affecting the balance.
Step 7 Remove the weight from the pan after the balance displays end .
Step 8 If the "GLP output (info)" of the "Function Table " is set to "1" or
"2", "Calibration Test Report" is output by the RS-232C interface.
Step 9 The balance will automatically return to the weighing mode after
calibration.
Target weight
Press and hold
GLP output
ex. target weight
value = 200.0017g
This manual suits for next models
4
Table of contents
Other AND Scale manuals

AND
AND UC-321 User manual
AND
AND HV-CWP Series User manual
AND
AND HR Series User manual
AND
AND PLUSCONNECT UC-350CNBLE User manual
AND
AND GX-M Series User manual
AND
AND UC-352BLE User manual
AND
AND AD-4212F Series User manual
AND
AND EK-ilEW-i Series User manual
AND
AND SJ-WP Series User manual
AND
AND FZ-i Series User manual
Popular Scale manuals by other brands
Rice Lake
Rice Lake MB Series manual

Setra Systems
Setra Systems Super II Supervisor and technical manual
MSI
MSI Port-A-Weigh MSI-4260 user guide

VOLTCRAFT
VOLTCRAFT PS-100 operating instructions

Health O Meter
Health O Meter 500KLWA User instructions

Weight Watchers
Weight Watchers WW910F Instructions for use
