ANFIM Pratica User guide

EN
Original instrucon manual
Single Espresso Grinder Praca

2
1
2
3
4
5
6
9
10
11
12
13
14
15
16
7
8
17
A
SINGLE ESPRESSO GRINDER
Overview

3
8
10
C
2
19
20
18
B
Praca | EN

4
13
D
13
21
E
SINGLE ESPRESSO GRINDER

5
15
16
G
4
F
Praca | EN

6
3
H
13
I
SINGLE ESPRESSO GRINDER

7
Praca | EN
Scope of delivery
No. Name
1Bean container (incl. lid)
2Bean container intake
3Controller
4Grinding degree lock
5On/O switch
6Release buon (thermal overcurrent circuit-breaker)
7Power cable
8Screw for adjusting the portafilter support (left and right), 2×
9Drip tray
10 Portalter support
11 Start buon
12 Portalter intake
13 Outlet
14 Display
15 Grinding degree slide
16 Grinding degree scale
17 Clip for the type of bean used
18 Rubber ring
19 Locking screw for the bean container
20 Sliding valve
21 Outlet guide

8
SINGLE ESPRESSO GRINDER
Praca
Contents
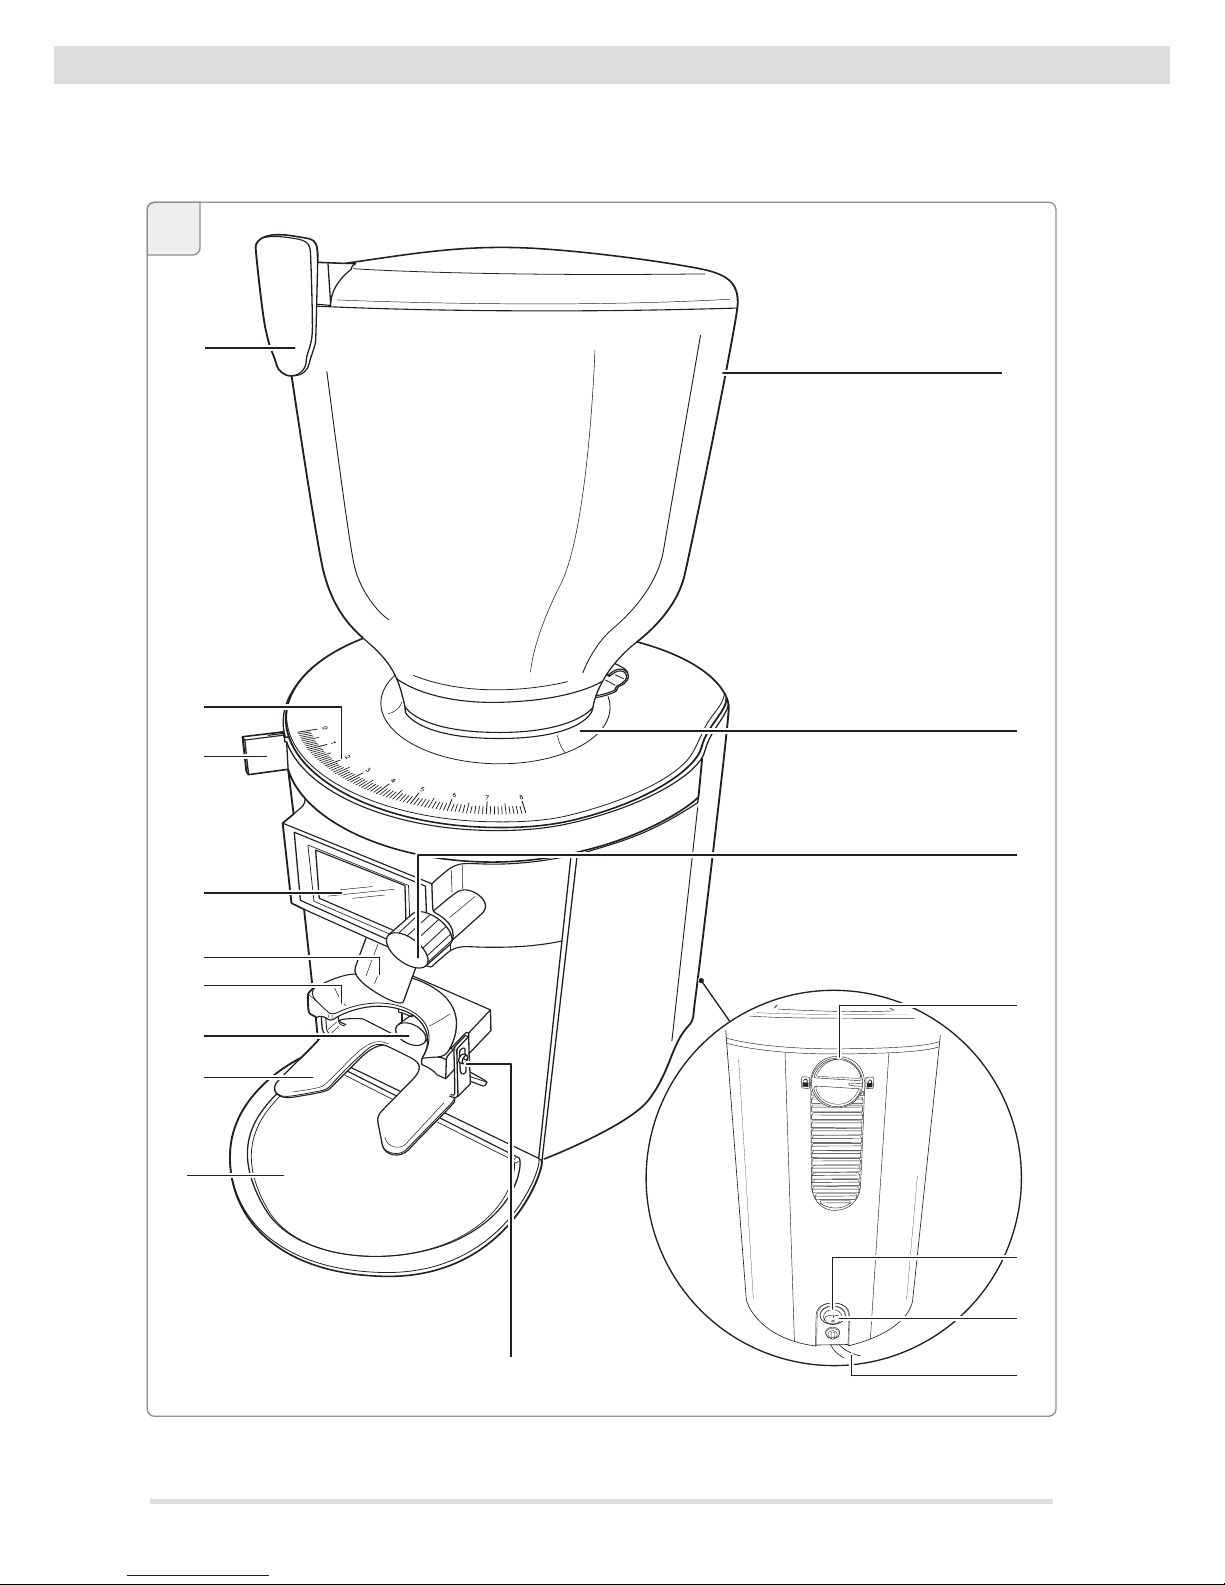
Overview ............................. 2
Scope of delivery ................. 7
General informaon ............ 9
Reading and storing the
instrucon manual ........................ 9
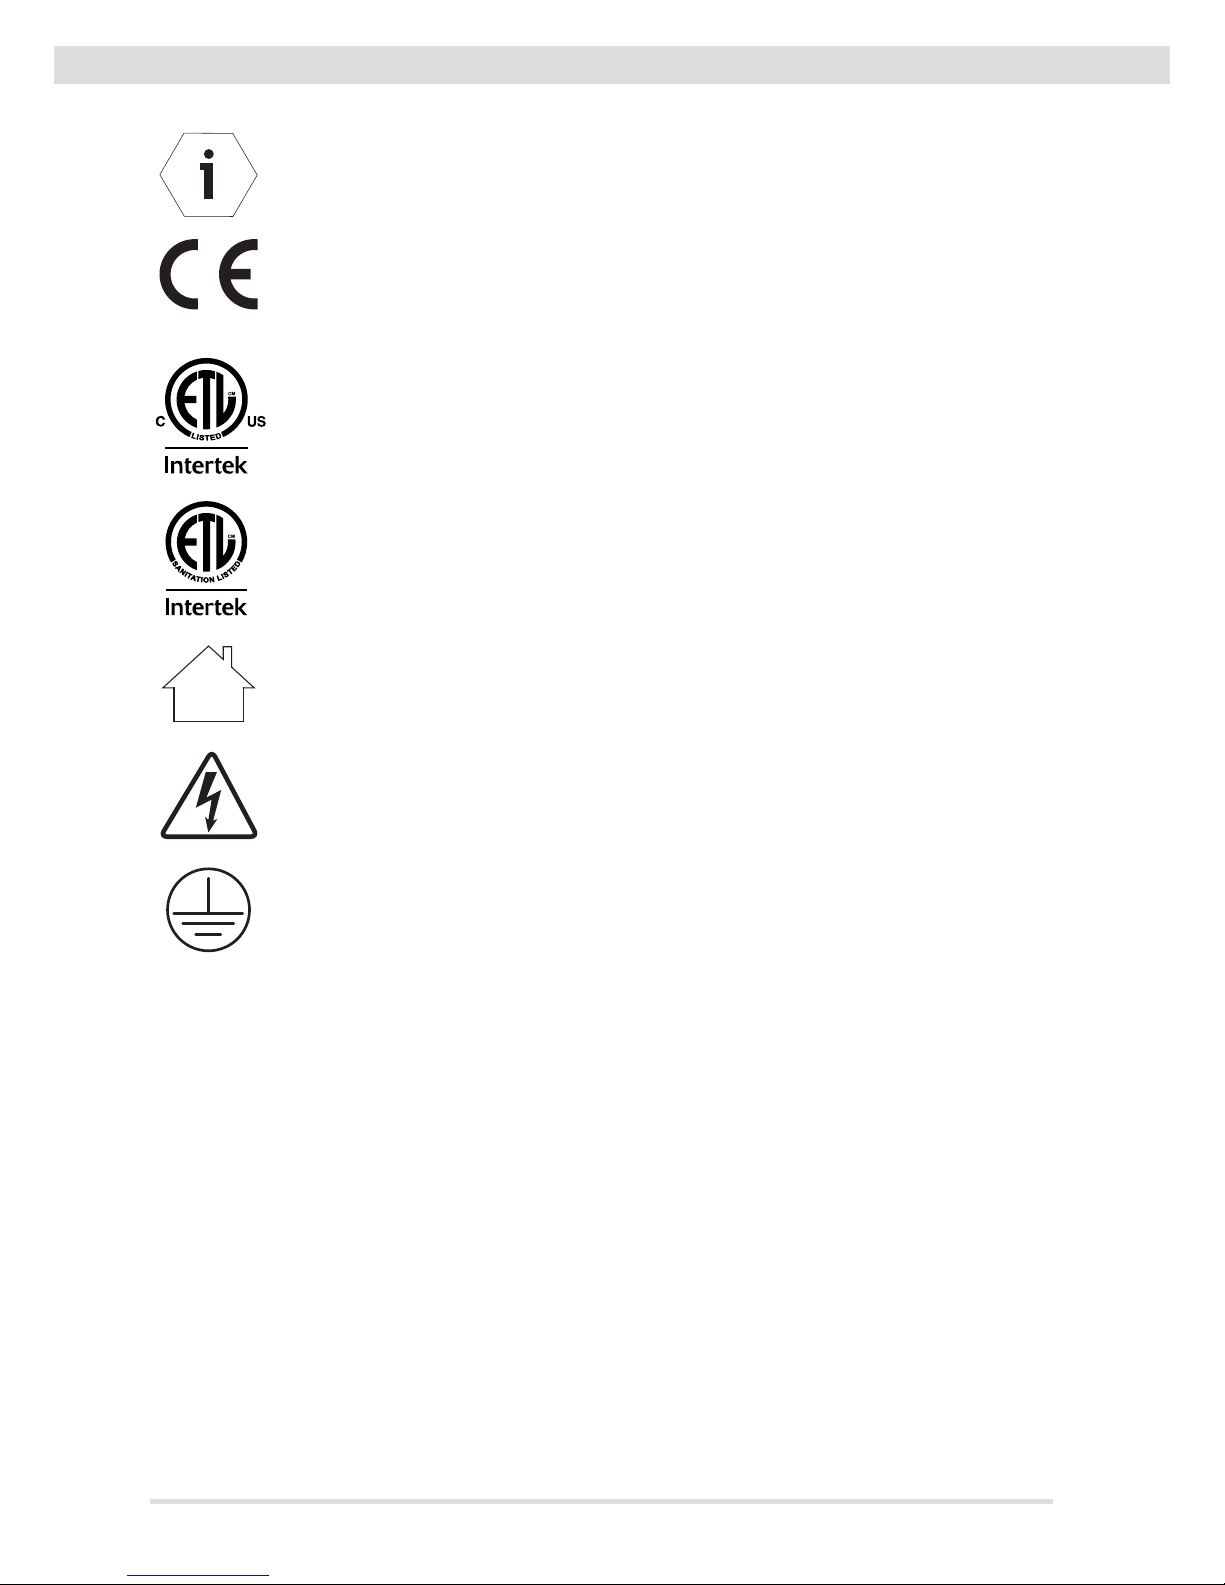
Explanaon of symbols used ........ 9
Safety................................. 11
Intended use ............................... 11
Safety informaon ...................... 11
Before using for the
rst me ............................ 14
Funconing and basic sengs ... 14
Checking the grinder and
scope of delivery ......................... 14
Seng up the grinder and
inserng the bean container ...... 15
Seng the portalter support
and outlet .................................... 16
Operaon .......................... 17
Adding espresso beans ............... 18
Switching on the grinder ............ 18
Seng the grinding degree ........ 18
Selecng the recipe/grinding
me ............................................. 19
Seng or changing the
recipe/grinding me ................... 19
Grinding espresso beans
– Grinding according to a recipe .... 20
Grinding espresso beans
– Manual grinding ....................... 20
Suspending grinding
(break funcon) .......................... 20
Changing the type of
espresso beans ........................... 21
Using the main menu ........ 22
Display/navigaon symbols ........ 22
Opening and using
the main menu............................ 23
Cleaning............................. 24
Cleaning the surface on which
the grinder stands ....................... 25
Cleaning the casing ..................... 25
Cleaning the outlet system ......... 25
Cleaning the bean container ...... 26
Cleaning the grinding mechanism . . 27
Troubleshoong ................ 28
Technical data.................... 31
Disposal ............................. 32
Disposing of the packaging ......... 32
Disposing of the grinder ............. 32
Maintenance and service .. 33
Notes ................................. 34

9
Praca | EN
General informaon
Reading and storing the instrucon manual
Before you start using the Praca Espresso Grinder, carefully read
through this original instrucon manual and the safety informa-
on. Only then will you be able to use the Single Espresso
Grinder safely and without danger. The original instrucon
manual is based on the standards and regulaons in force in the European
Union. Please also note the guidelines and laws that apply in your country.
For greater clarity, the Praca Single Espresso Grinder will be referred to
below simply as the “grinder”.
Please keep this original instrucon manual safe for subsequent quesons.
Please also pass this original instrucon manual on to subsequent owners
and users of the grinder.
Explanaon of symbols used
The following symbols and signal words are used in this original instrucon
manual and may appear on the grinder or on the packaging.
WARNING!
This signal word/symbol indicates a moderate risk, which, if
it is not avoided, can lead to death or serious injury.
CAUTION!
This signal word/symbol indicates a low risk, which, if it is
not avoided, can lead to minor or moderate injury.
NOTE!
This signal word warns of possible material damage.

10
SINGLE ESPRESSO GRINDER
This symbol provides you with useful informaon about opera-
on or handling.
Declaraon of Conformity (see “Declaraon of Conformity” secon):
Products marked with this symbol fulll all applicable community
provisions of the European Economic Area.
ETL Listed seal of approval:
Products marked with this symbol meet the requirements for
electrical product safety in the United States of America.
Products marked with this symbol meet the required criteria of
the NSF (Naonal Sanitaon Foundaon) regarding cleanliness
and hygiene in the food industry.
Products marked with this symbol are only permied for use
indoors.
This symbol indicates a risk of electric shock.
This symbol indicates that the grinder conforms to protecon
class I.

11
Praca | EN
Safety
Intended use
The grinder is suitable only for grinding whole roasted espresso beans. Do
not use the grinder to grind other products or objects. It is intended for com-
mercial use and may only be serviced by trained personnel. It may, however,
be operated by other persons in a place where its use is supervised.
Any other use is not considered to comply with intended use and can result
in material damage or even personal injury. Do not make any changes to the
grinder. Neither the manufacturer nor the supplier can accept liability for any
injury or damage resulng from failure to comply with the safety informaon.
Safety informaon
WARNING!
Risk of electric shock!
Improper use, incorrect electrical installaon or a voltage that is too
high can all lead to electric shock.
– Connect the grinder only if the mains voltage of the socket com-
plies with the informaon indicated on the type plate.
– Only connect the grinder to a socket with good accessibility so
that you can disconnect it quickly from the power supply in the
event of a malfuncon.
– Do not use the grinder if you noce any visible damage or if the
power cable or plug is faulty.
– If the grinder power cable is damaged, it must be replaced by
the manufacturer or by qualied personnel in order to avoid
hazards.
– Connect the grinder only to a power supply with a 16 A-slow
fuse. If the power connecon at the installaon locaon of the
grinder is not protected in this way, have a 16 A-slow fuse ed
by a qualied electrician.
– Install the grinder only in locaons where its use can be super-
vised by trained personnel.

12
SINGLE ESPRESSO GRINDER
– Do not operate the grinder above an altude of 2,000 meters.
– Do not immerse the grinder, the power cable or the power plug
in water or any other liquids.
– Do not clean the grinder with a water jet.
– Do not clean the grinder with compressed air
(e.g. with a compressed air blow gun).
– Never touch the power plug with wet hands.
– Never unplug the power plug from the wall socket by pulling on
the power cable; always grip the power plug.
– Never use the power cable to carry the grinder.
– Keep the grinder and power cable / power plug away from open
ames and hot surfaces.
– Do not posion the power cable in such a way that it could cre-
ate a tripping hazard.
– Do not bend the power cable and do not place it over sharp
edges.
– Use the grinder in indoor areas only. Never operate the grinder
in damp areas or in the rain.
– Keep children away from the grinder.
– Make sure that children do not insert any objects into the grinder.
– If you are not currently using or cleaning the grinder or if there
is a malfuncon, switch the grinder o and remove the power
plug from the socket.
– Do not open the grinder casing; leave repairs to the experts. If
repairs are required, please contact a specialist workshop. If un-
authorized repairs are carried out, the connecon is not made
correctly or the grinder is operated incorrectly, all liability and
warranty claims are excluded. Only parts that comply with the
original appliance specicaons may be used for repairs. This
grinder contains electrical and mechanical parts that are essen-
al for protecon against potenal hazards.

13
Praca | EN
WARNING!
Danger for children and persons with reduced physical, sensory or
mental capacies (e.g. parally disabled persons, elderly persons
with limited physical and mental capacies) or a lack of experience
and knowledge (e.g. older children).
– This grinder may be used by children older than eight years and
by persons with reduced physical, sensory or mental disabilies
or a lack of experience and knowledge if they are supervised or
instructed on the safe use of the grinder and have understood
the resulng dangers. Children are not permied to play with
the grinder. Cleaning and user maintenance may not be carried
out by children without supervision.
– Do not leave the grinder unsupervised when in operaon.
– Do not let children play with the packaging lm. Children can
become entangled in it and suocate while playing.
– Do not let children play with small parts. They can be life-
threatening if swallowed.
CAUTION!
Risk of pping and injury!
Incorrect handling of the grinder can result in injury.
– Posion the power cable so that nobody can become entangled
in it and cause the grinder to fall.
– Place the grinder on a level and stable surface to prevent it from
falling o.

14
SINGLE ESPRESSO GRINDER
Before using for the rst me
Funconing and basic sengs
The shot sizes, i.e. the volume of grounds per serving, are dened by the
grinding me in the Praca grinder.
The user can specify up to six dierent recipes (grinding mes) and also has
the opon to control the grinding me manually (manual grinding).
The grinding process is started automacally when the portalter is inserted
and either stops automacally aer the dened grinding me has elapsed or
when the portalter is removed (manual grinding).
On delivery, 2 recipes/shots and manual grinding are set as
defaults:
Single shot: 2 seconds (approx. 8 g*)
Double shot: 4 seconds (16 g*)
Manual grinding: ends automacally on
removal of the portalter from the portalter intake.
* The quanty of ground coee depends on the espresso bean type
selected, the grinding degree selected and the mains frequency
(see “Technical data” secon).
Checking the grinder and scope of delivery
NOTE!
Risk of damage!
The grinder can be damaged if the packaging is opened carelessly with
a sharp knife or other pointed object.
– Be very careful when opening.
1. Remove the grinder from its packaging.
2. Check that the delivery is complete (see Fig. A, B and E).
3. Check for damage to the grinder or any of the individual parts.
If this is the case, do not use the grinder. Contact your supplier (see
“Maintenance and service” secon).

15
Praca | EN
Seng up the grinder and inserng the bean container
You will need a slot screwdriver to x the bean container (not
supplied).
1. Place the grinder on a level and stable surface that does not vibrate.
2. Ensure that the outlet (13) is pushed as far upwards as possible and en-
gages securely in the outlet lock (see Fig. D).
3. Make sure that the grinder is switched o (On/O switch (5) to “0” posi-
on) and connect the grinder to the power supply by inserng the power
plug into a properly installed earthed socket.
4. Place the drip tray (9) into the corresponding casing recess below the
outlet.
5. Make sure that the rubber ring (18) has been properly inserted in the
bean container intake (2) and is lying at (see Fig. B).
6. Posion the bean container (1) on the bean container intake.
When posioning the bean container intake, ensure that the nose of
the bean container is located in the corresponding recess in the bean
container intake.
7. Push the bean container down slightly into the bean container intake and
rotate the bean container clockwise to lock it in place on the grinder.
If the bean container cannot be xed in place by rotang it, it may not
be posioned correctly. Align the bean container correctly (see step 6)
and try again to x it in place by rotang it (see also “Troubleshoong”
secon).
8. Use a slot screwdriver to ghten the locking screw (19) for the bean
container clockwise.
The grinder switches o automacally when the bean container
is not inserted.

16
SINGLE ESPRESSO GRINDER
Seng the portalter support and outlet
You will need a slot screwdriver to adjust the portalter support
(not supplied).
Adjust the portalter support (10) to the size of your espresso machine’s
portalter (see Fig. C):
1. Make sure that the grinder is switched o (On/O switch (5) to posion 0).
2. Loosen the screws (8) for adjusng the portalter support (le and right)
by turning them counterclockwise using a slot screwdriver.
The portalter support lowers unl it reaches the stop.
3. Insert the portalter into the portalter intake (12).
4. Push the portalter support upwards unl the portalter ts exactly
between the portalter support and the portalter intake.
If the portalter support does not t, contact your supplier (see
“Maintenance and service” secon).
5. Hold the portalter support in posion and x it by ghtening the screws
for adjusng the portalter support (le and right) counterclockwise with
a slot screwdriver.
6. Push the outlet guide (21) up or down in the lock to posion the outlet
(13) perfectly for your portalter (see Fig. E).
Align the outlet in such a way that the coee grounds fall out of the out-
let into the center of the portalter inserted.
Reset the outlet aer every grinding degree adjustment and
every change of the type of espresso beans.

17
Praca | EN
Operaon
NOTE!
Risk of overheang!
Exceeding the maximum permissible operang cycle can cause the
grinder to overheat.
– Do not exceed the maximum operang cycle
(see “Technical data” secon).
– Observe the recommended break when the maximum permissi-
ble operang cycle is reached (see “Technical data” secon).
• The grinder has a thermal overcurrent circuit-breaker which
interrupts the electric circuit of the grinder in case of electri-
cal overload.
To use the grinder again, rst set the On/O switch (5) to
switch posion 0 (o).
Then push the release buon (6) in.
You can now switch the grinder on by seng the On/O
switch to switch posion I and resume using the grinder (see
“Troubleshoong” secon).
• The grinder also has a motor protector, which switches o
the grinder when the motor becomes too hot.
As soon as the motor has cooled down, the grinder can be
put into operaon again (see “Troubleshoong” secon).
NOTE!
Risk of damage!
The operator cannot adjust the thermal overcurrent circuit-breaker. If
the circuit-breaker has been triggered several mes, a service partner
must be contacted for advice as the motor winding may be damaged.

18
SINGLE ESPRESSO GRINDER
Adding espresso beans
1. Remove the lid from the bean container (1).
2. Pour whole roasted espresso beans into the bean container from above.
• The maximum lling quanty should be approx. 1 cm below
the edge of the bean container.
• The minimum lling quanty should not fall below approx.
2 cm in order to ensure that there are no dispensing uctua-
ons.
3. Place the lid back onto the bean container.
4. If necessary, open the bean container by pulling out the sliding valve (20)
(see Fig. B).
Using the clip (17) on the lid of the bean container, you can
aach a label or similar to the grinder to indicate the type of
espresso beans you are currently using.
Switching on the grinder
1. Ensure that the power plug is inserted into a properly installed earthed
socket.
2. Switch on the grinder by moving the On/O switch (5) to posion “I”.
The grinder is ready for operaon as soon as the recipe last selected or
the symbol for manual grinding appears on the display (14).
Seng the grinding degree
• The lock for the grinding degree adjuster locks the grinding
degree slider (15) to prevent accidental adjustment of the
grinding degree.
• When the grinding degree lock (4) is open, the grinding
degree slide can be moved connuously along the grinding
degree scale (16). The nest seng is “0” and the coarsest
seng is “8”.
1. If necessary, release the lock on the grinding degree adjuster by rotang
the grinding degree lock (4) counterclockwise to the posion (open)
(see Fig. F).
2. Move the grinding degree slide (15) to the posion required so that the
groove on the slider shows the grinding degree required on the grinding
degree scale (16) (see Fig. G).

19
Praca | EN
• Reduce the grinding degree only while the grinder
is in operaon.
• In order to avoid/eliminate imbalances in seng the grinding
degree, it is advisable rst to set a coarser grinding degree
(about one level/unit above the grinding degree required)
and only then move the grinding degree slide down from
there to the ner grinding degree required.
3. Fix the grinding degree seng as necessary by turning the grinding degree
lock clockwise to the posion (closed) (see Fig. F).
Selecng the recipe/grinding me
–Rotate the controller (3) to select the recipe/grinding type required
(see Fig. H).
The display (14) shows the symbol for the selected recipe, the corres-
ponding grinding me and the recipe number highlighted in white.
Seng or changing the recipe/grinding me
Proceed as follows if you want to set up the grinding me for a new recipe or
change the grinding me of an exisng recipe:
1. Turn the controller (3) to select the recipe required (see “Selecng reci-
pe/grinding me” secon).
2. Press and hold the controller (see Fig. H).
The grinding me set ashes.
3. Rotate the controller to set the grinding me required.
4. Conrm the grinding me set by pressing and releasing the controller 1×.
If you do not adjust any sengs for longer than 5 seconds (by
rotang/pressing the controller), the seng/change to the
grinding me will be cancelled.

20
SINGLE ESPRESSO GRINDER
Grinding espresso beans – Grinding according to a recipe
1. Turn the controller (3) to select the recipe required (see “Selecng
recipe/grinding me” secon).
2. Insert the portalter between the portalter intake (12) and the portal-
ter support (10) unl it touches the start buon (11).
The grinder starts the grinding process automacally, runs for the set
grinding me and then stops. During the grinding process, the remaining
grinding me is counted down on the display (14).
3. Remove the portalter from the portalter intake once the grinding pro-
cess is complete.
Grinding espresso beans – Manual grinding
1. Insert the portalter between the portalter intake (12) and the portal-
ter support (10) unl it touches the start buon (11).
The grinder starts the grinding process automacally when the start but-
ton is triggered. During the grinding process, the symbol appears on the
display and the current grinding me is shown.
2. Remove the portalter from the portalter intake when you want to end
the grinding process.
Suspending grinding (break funcon)
The break funcon automacally suspends grinding when you remove the
portalter from the portalter intake (12) and connues grinding when you
insert the portalter into the portalter intake again and trigger the start
buon (11).
1. Remove the portalter from the portalter intake during grinding to in-
terrupt grinding and stop the grinding me. The symbol for the selected
recipe ashes.
2. Reinsert the portalter between the portalter intake and the portalter
support (10) before the set abort me elapses.
The suspended grinding process is connued automacally unl the
grinding me has elapsed.
• If you do not want to connue with the grinding process,
press and release the controller (3) 1×.
The display jumps directly to the selected mode and the pre-
viously suspended me is deleted.
• The length of the abort me can be set on the menu.
Other manuals for Pratica
1
Table of contents
Other ANFIM Coffee Grinder manuals

ANFIM
ANFIM Pratica User guide

ANFIM
ANFIM BEST ON DEMAND ELECTRONIC User manual

ANFIM
ANFIM Caimano On-Demand Display User manual

ANFIM
ANFIM SP- II User manual

ANFIM
ANFIM KS User manual

ANFIM
ANFIM AE 65 V User manual

ANFIM
ANFIM CAIMANO SPECIAL450 BARISTA User manual

ANFIM
ANFIM Caimano - II User manual

ANFIM
ANFIM Luna User manual

ANFIM
ANFIM BEST ON DEMAND ELECTRONIC User manual