5
What is Ultrasound and why does it work for pregnancy detection?
Ultrasound as defined in Webster Dictionary is “Vibrations of the same physical nature as sound
but with frequencies above the range of human hearing.” For all practical purposes, ultrasound is
a sound wave that has penetrative properties. When an ultrasound signal is directed into an
animal it will penetrate skin, muscle, fat and fluids and some organs. Ultrasound signals will not
travel through air or gas, but will travel through liquids and solids. Ultrasound signals will reflect
back to its source any obstacle that the signal passes through. At each interface or obstacle, the
signal being reflected or “echoed” back to the source is measured and then reproduced in the
Pregscan as a column of lights indicating how far the signal has traveled before it came to the
tissue interface or other obstacle. The denser the tissue interface the stronger the signal. This is
represented by the height of the signal and is reflected on the Pregscan display.
When an animal’s egg has been fertilized one of the characteristics of early pregnancy is that the
uterus begins to thicken and change “tone” to protect the embryo. This is the primary factor in
allowing the Animark Pregscan to identify pregnancy. As long as the source of the ultrasound
signal is directly pointing at the uterus, the ultrasound will either pass through an unfertilized
uterus or be reflected back in the case of the fertilized uterus. This change in tone is usually
apparent after 14 days from fertilization in horses and 22 days for cattle.
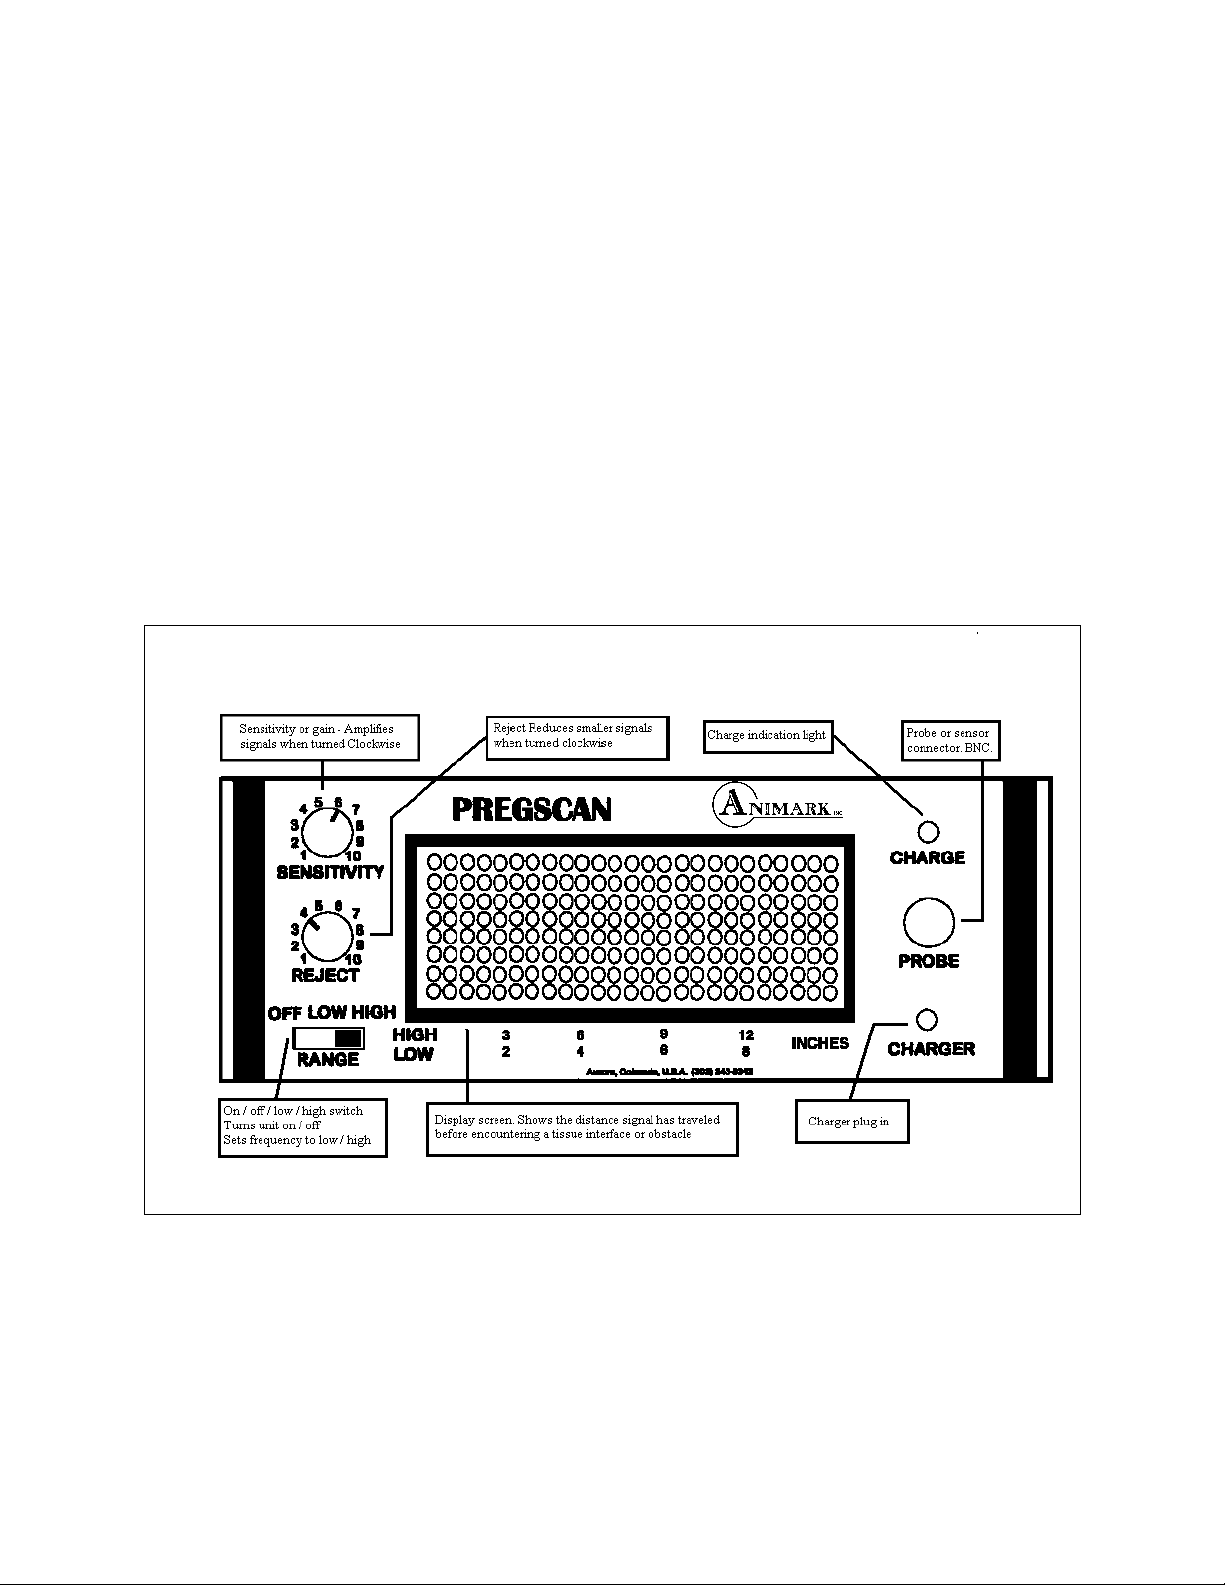
Introduction to the Pregscan
The Pregscan is an A-Scope or linear ultrasound pregnancy detector. It is typically used on
larger animals such as horses, cows, buffalo and other larger sized animals. Properly used, your
Pregscan will provide valuable information about the reproductive status of your animals,
allowing you to increase herd efficiency, decrease costs, and improve profitability. The Pregscan
is a sophisticated electronic instrument that displays a pattern of lighted lines on the face of the
instrument that show the depth the ultrasound signal has traveled before encountering a tissue
interface or obstacle. The Pregscan is specifically calibrated to identify the density changes or
tissue interfaces associated with an early pregnancy. Study this handbook carefully to ensure
correct use and interpretation of the display.
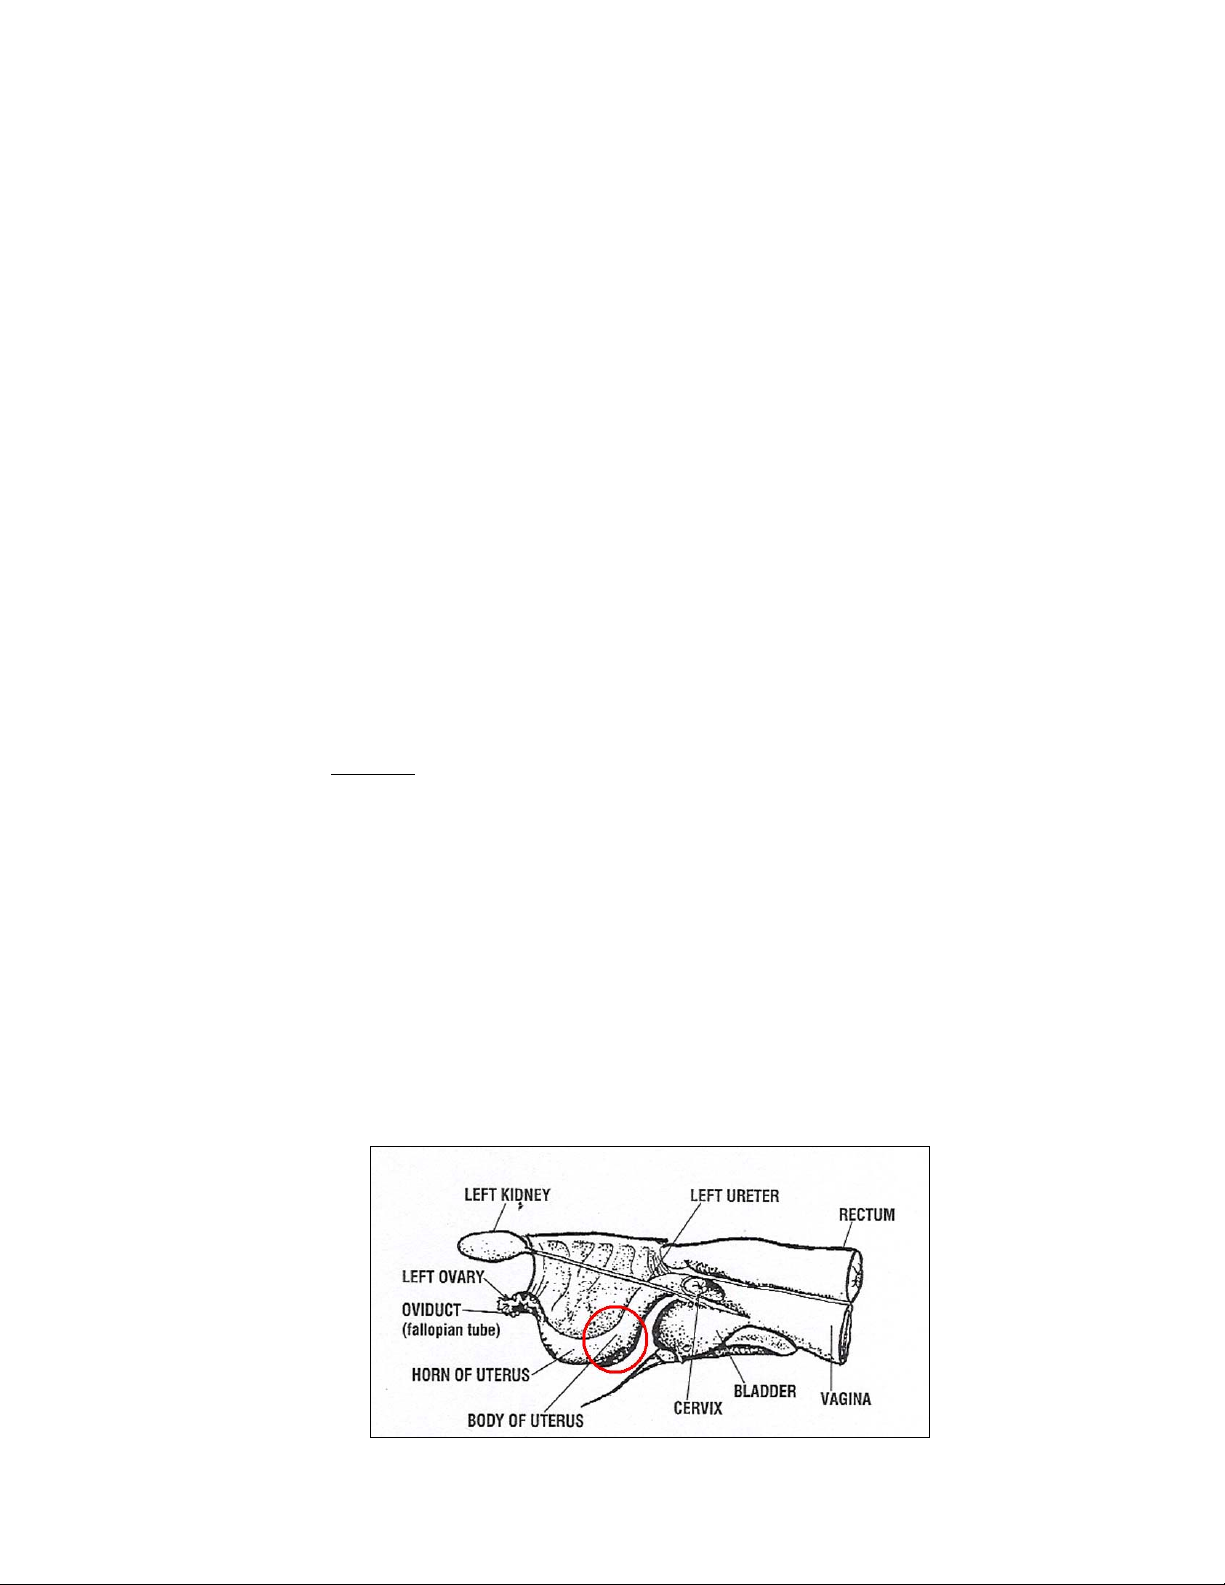
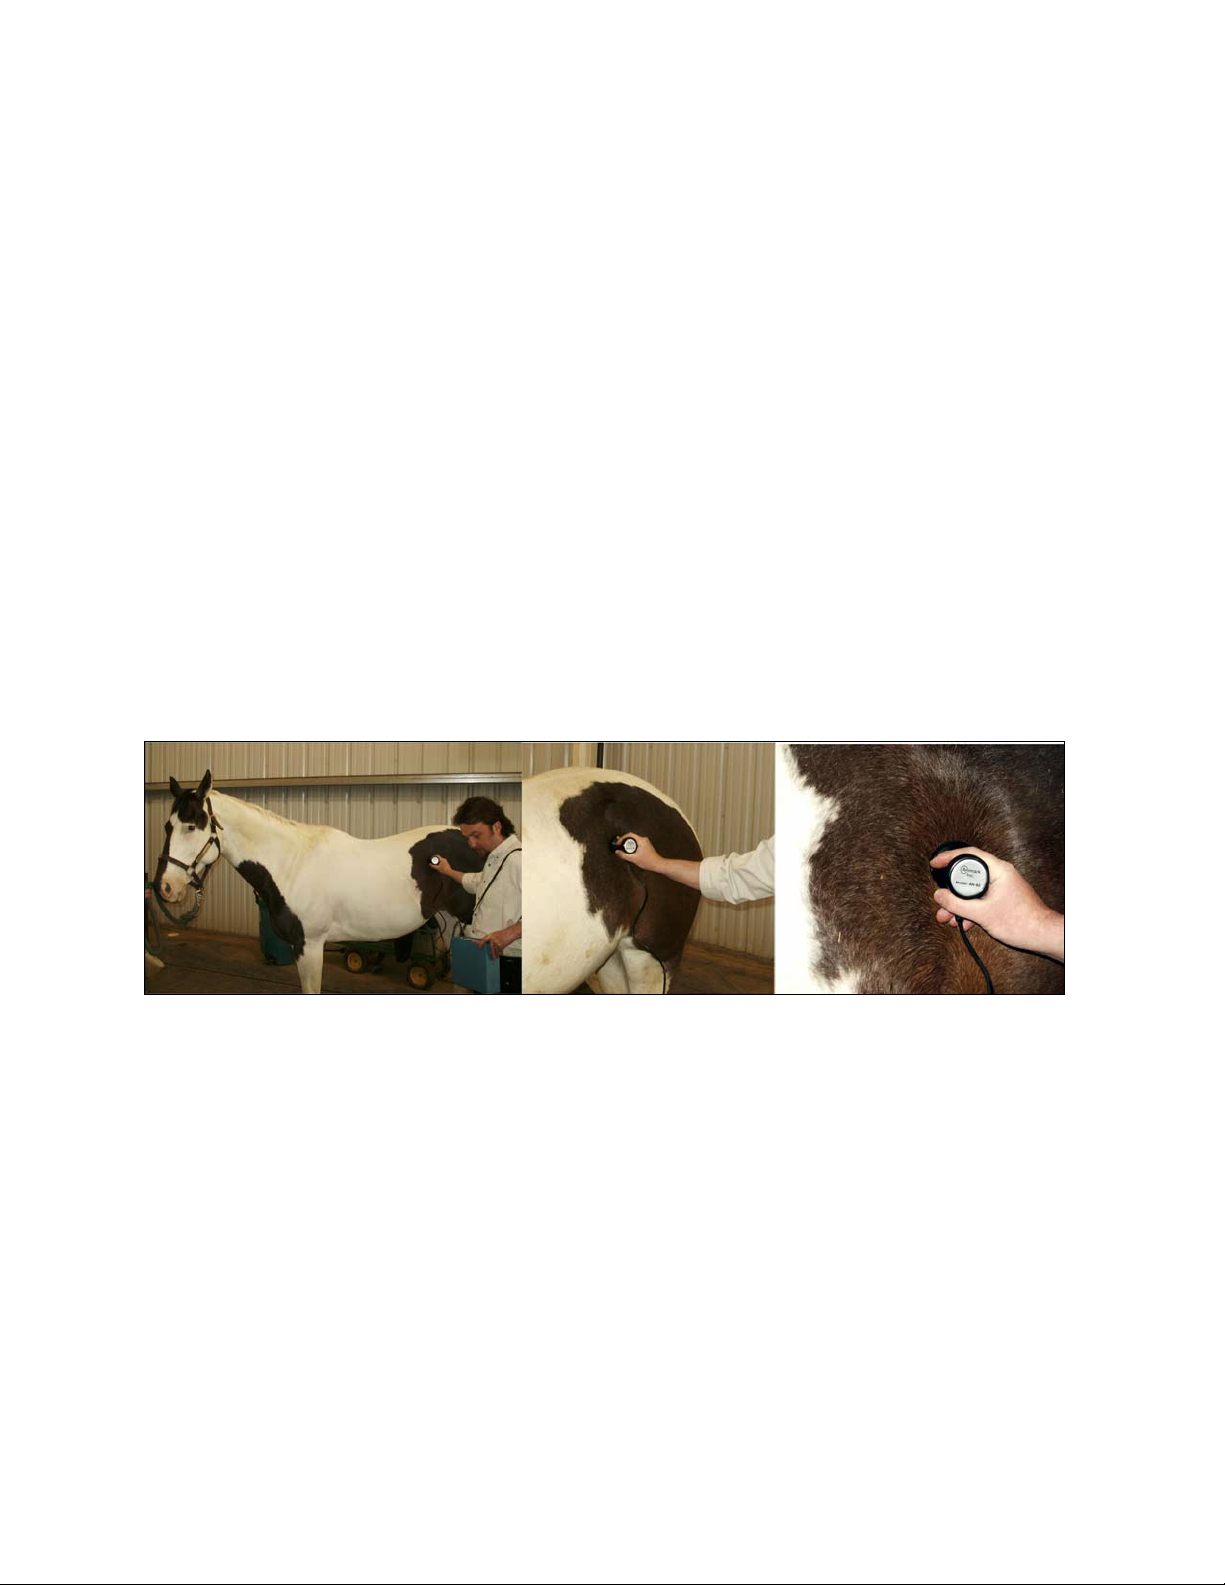
A general knowledge of the anatomy of the animal is very helpful when using the Pregscan. In
order to correctly identify the status of an animal’s uterus, the signal must be pointing directly at
the uterus. If the signal is pointed at a full bladder for example, the display is similar to that of an
early pregnancy, so care must be taken when aiming the sensor. (See Figure 1-1).
Fig 1-1
Pregscan Ultrasound for Large Animals, Z30374 • eNasco.com/farmandranch