6 7
Getting Started
Connecting Power Cable
Warning:Ensure the is in OFF position before plugin.Plugin Power on/off switch
the AC connector into the 220-240V 50Hz inlet socket in the rear panel of the unit and
the other end into the standard AC 240V wall socket.
1. Do not plug or unplug the power cable while you have wet hands.
2. To protect this apparatus from alightning storm, or when left unattended and unused for
long periods of time, unplug power cable from the wall outlet.
3. When unplugging the power cord from a wall outlet, always pull on the power plug only.
Never unplug it by pulling the power cord.
Charging the internal Battery
The speaker comes with a built-in rechargeable battery, follow the below steps
to charge it:
AC INPUT(220-240V) Charging
1. Please connect the power cable on the rear panel and plugin to the 220-240V 50Hz wall
socket to charge the speaker.
2.Please charge about 2-3hours to charged fully.
DC 5V IN Charging
1.Please connect USB charger to the DC 5V input slot, then plugin to the 220-240V 50Hz
wall socket to charge the speaker.
2.The Red charging LED indicator on the rear panel will light up, the battery is being charge.
3.If fully charged, the RED indicator light will keep flashing slowly. Unplug the power cable to
stop charging.
4.The charging time for USB input is about 4hours.
DC 12V INPUT
Connect the DC cable of the external power supply to the DC 12V IN terminals of the speaker
rear panel, please corresponding connect to the Red (+) and Black (-) indicated.
Noted: This DC input isnot for the battery charging, only supply the power to work for the
speaker.
Intrenal Battery Level indicator
1.There is a full grid battery indicator symbol keeping static on the right bottom corner of the
display screen, meaning battery capacity is full.
2.If the half grid battery indicator symbol will light on on the left bottom corner of the display
screen, meaning battery capacity is low.
3.If the half grid battery indicator symbol keeping flashing on the left bottom corner of the
display screen, meaning battery capacity is almost running out, please charge the battery
on time.
Note: please fully charge the product when it is not going to be used for a long time and
charge once a month to keep longer battery life.
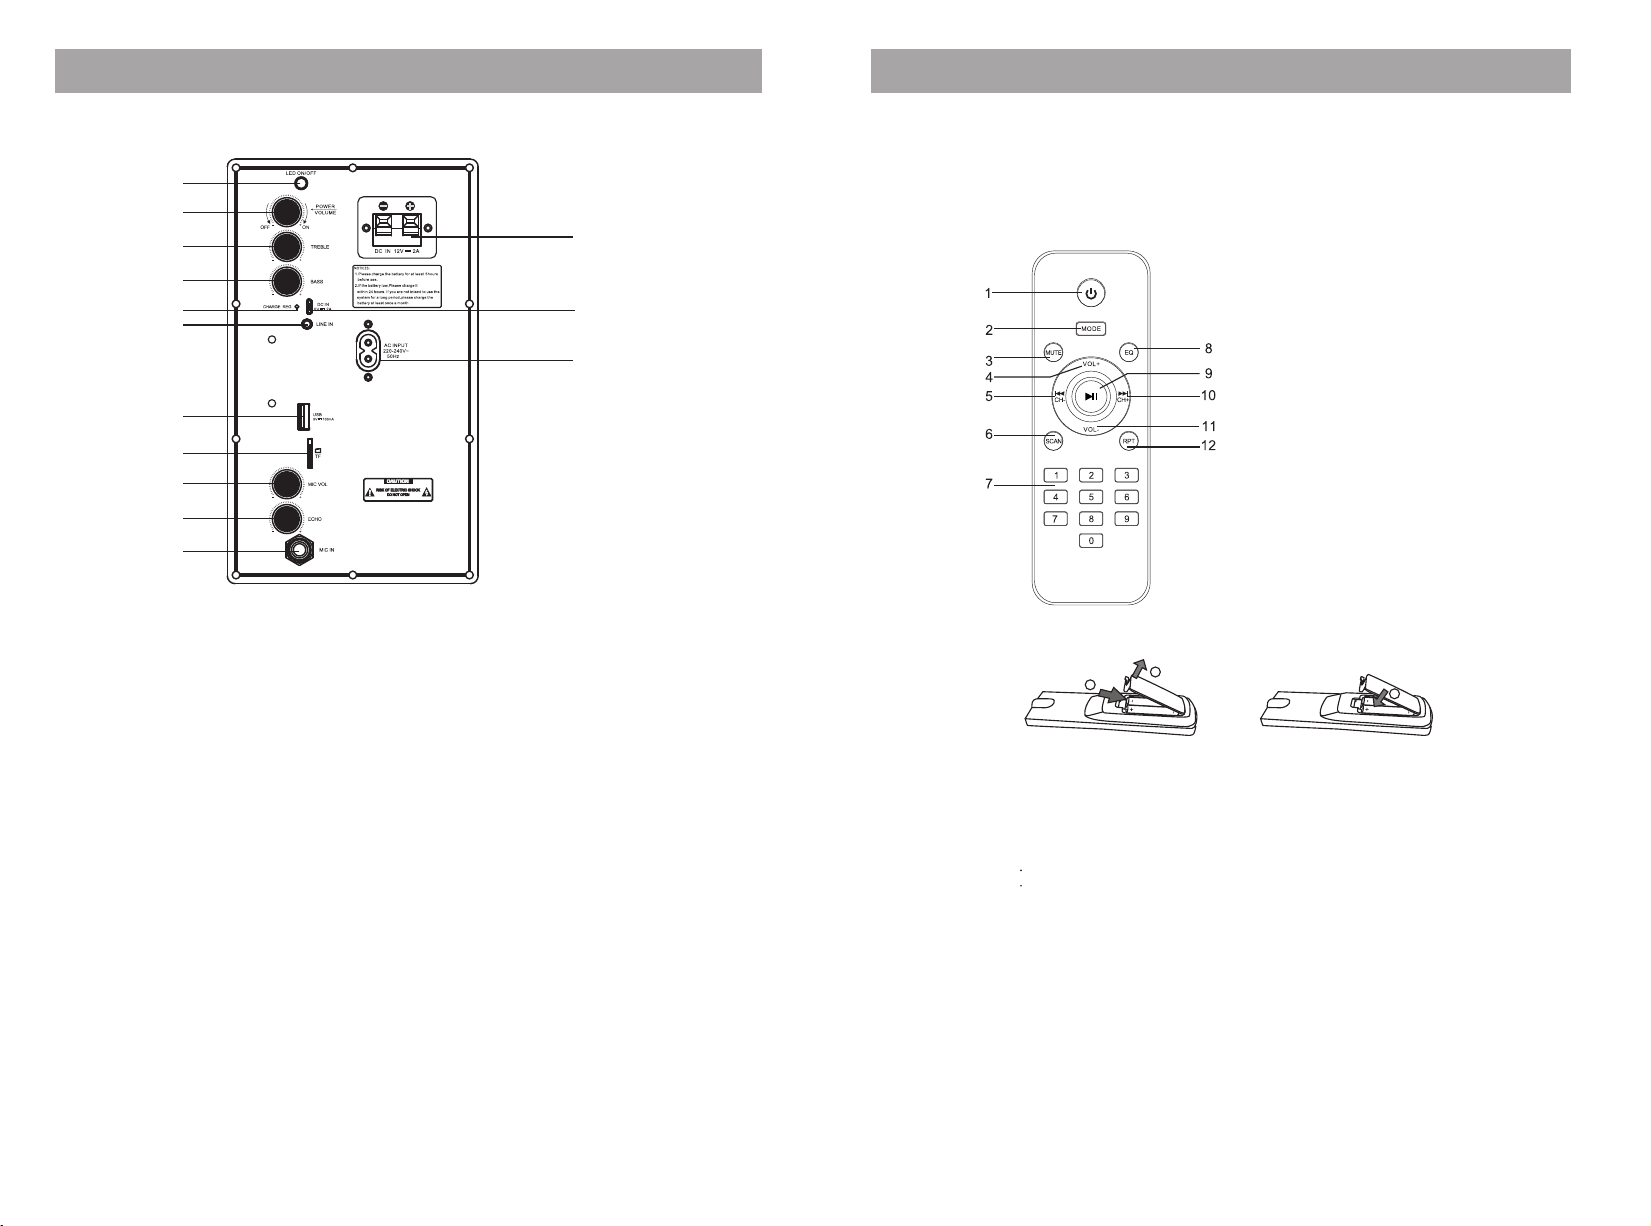
Turning ON/OFF the speaker
Turn the Power ON/OFF & Volume Knob on the rear function panel to right direction to power
on the Speaker, and turn to left direction to power off the Speaker.
Function Instructions
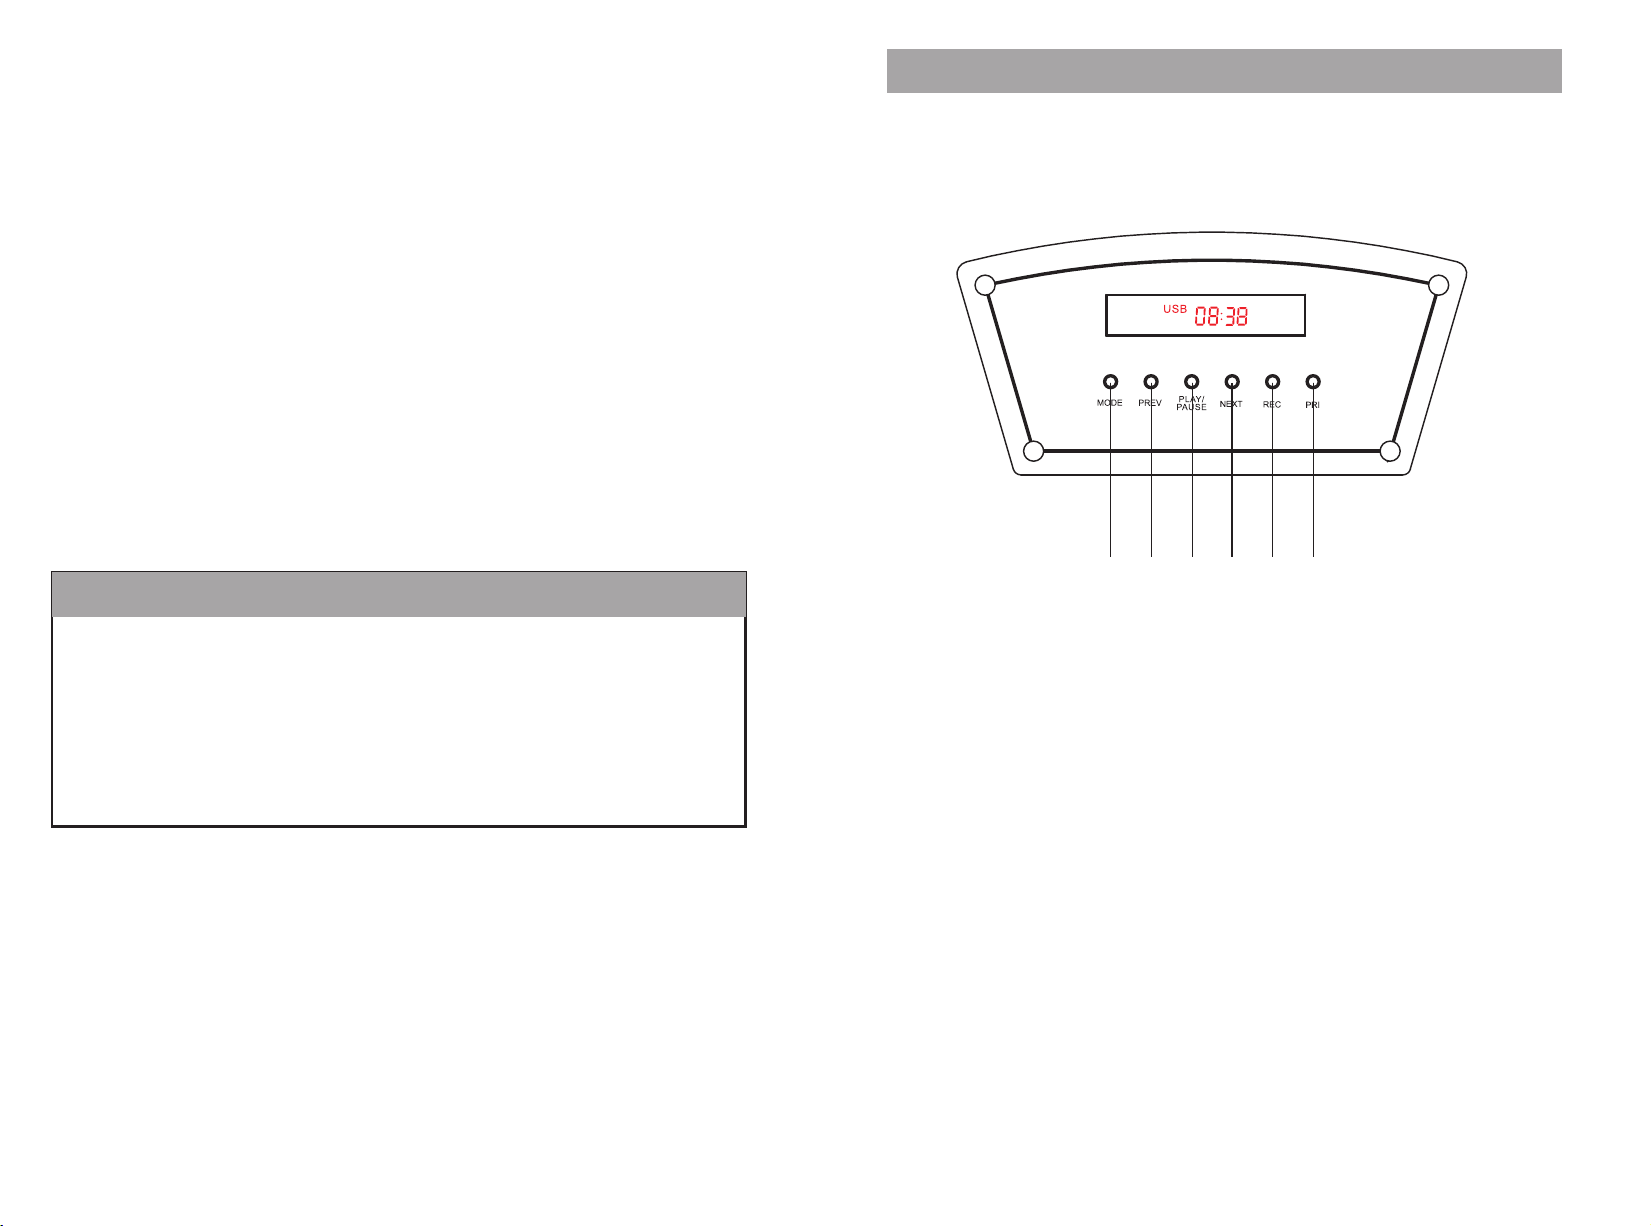
USB Operation
This unit has a USB port for play back MP3 music.
· Insert your USB device into the USB port and the unit will start playing automatically.
Press the [MODE] button to USB mode is selected.
· Press the or key to the previous or next track.
· Press the button to play or pause music
· Press button on the remote to repeat the current track, press it again to repeat all
tracks.
FM Operation
This speaker supports FM radio function.
1.Insert the Line In Cable/ FM antenna cable (supplied in the accessories) to the Line input
jack on the rear panel and extend the cable.
2.Press [ MODE ] button on the top panel or on the remote control repeatedly until FM
function is selected.
3.Short press button on the top panel to search the FM radio station automatically.
4.Press or to select the previous or next FM radio station.
Bluetooth function
1.Press [ MODE ] button on the top panel switch to the Bluetooth mode if the speaker on
other mode, there is a prompt sound.
2.Once on the Bluetooth mode," bLUE " will keep flashing on the display screen.
3.Open the Bluetooth funciton of the external device and search the Bluetooth device name
"42940197 " to pair.
4.Press connect to "PAIR" with the speaker.
5.Once connected, " bLUE " will keep static on the display screen and can hear a prompt
sound, you can play the music with the speaker.
6.You can use button or button on top panel to control the songs of the external device.
TWS Connecting
This speaker supports TWS pairing function, please buy two same speaker to enjoy this
function.
1.Turn on the Bluetooth function of the one speaker, connected the bluetooth and playing
music.
2.Long press MODE button on the function panel to open the TWS function, " " will
short display on the screen.
3.Turn on the bluetooth of another speaker and " bLUE " will keep flashing on the screen,
then long press [ MODE ] button of this speaker to open the TWS function, " " will
short display on the screen and "bLUE " will keep static.
4.Both speakers' TWS will pair automatically if above operation correct. Once TWS paired
successully, " bLUE " of both speaker will keep static.
5.Turn the volume knob on the function panel of any speaker increase or decrease the
music volume. 6.If not using the TWS function, please long press [ MODE ] to
deconnected TWS, " " will short show on the display screen, and " bLUE " will keep
flashing on another speaker.