Antari DNG-250 User manual

1
DNG-250 Low Fog Generator
-User Manual
-
中文說明書
English - 中文
© 2019 Antari Lighting and Effects Ltd.


3
Thank you for choosing Antari’s DNG-250 Low Fog Generator. The machine has some
terrific new features on top of the ones of its previous version DNG-200. With the 3.5
TFT color touch panel, users can operate more easily. The dimension is exactly the same
as DNG-200, but the output volume and continuity are comprehensively increased,
hence a total up-grate in performance. No CO2is needed for DNG-250 Low Fog
Generator; therefore, there’s no risk to human body nor environment. DNG-250 is a real
green effect machine.
Please follow these operation, safety and maintenance instructions to ensure a longer
and safe life of your DNG-250 Low Fog Generator.
Pay attention to all warning labels and instructions printed on the exterior of the machine.
Safety Instructions
Keep this device dry.
For indoor use only. Not designed for outdoor use.
The ideal operating temperature is between 5° and 40° Celsius.
Two sets of professional power cords are used by this machine. It is important to
confirm the electrical voltage before plugging the power cord into the power outlet.
Use a three plug grounded power outlet.
If the machine is moved or transported, it shall be stationed for one hour to allow the
coolant in the cooler to stabilize before using it again.
If the machine is moved horizontally, please station it for 5 minutes before starting
the operation again.
Please unplug the power cord or turn off the machine when it is not in use.
This machine is not water-proof. If moisture, water, or fog fluid gets inside the
housing, immediately unplug the unit and clean it. If the machine cannot be cleaned,
please contact a service technician or your Antari dealer before using it again.
No user serviceable parts inside. Refer to your Antari dealer or other qualified service
personnel. For adult use only. The fog machine must be installed out of the reach of

4
children. Never leave the unit running unattended.
Operate the machine in a well-ventilated area. Never cover the unit's vents. The fog
machine is best installed 1 meter away from all objects.
It is important to place the machine on a flat surface instead of a surface with slope
to prevent any moving of the machine.
Do not add any inflammable liquid in the machine.
Make sure there is no any inflammable materials around the machine while operating.
If your Antari DNG-250 Low Fog Generator fails to work properly, please turn off the
power for five minutes and turn it on again. If the problem still exists, contact your
Antari dealer for service.
Always allow the machine to cool down before attempting to clean or service it.
Please use Antari FLL Low Fog Effects Fluid only. Please do not fill in any other fluid
into the tank to ensure the quality of the fog and the life of the machine.
If any malfunction happens, please unplug the machine and stop the operation.
Contact your Antari dealer for service.
Please make sure the tank if emptied before transportation.
Fog fluid is not edible, and ingestion by mistake might jeopardize your health. Please
do keep the fog fluids in safe place indoors. Seek for doctor’s help if ingest accidently.
Unpacking and Inspection
Open the shipping carton and verify that all equipment necessary to operate the system
has arrived intact. If any shortage or damage due to transportation, please contact your
Antari dealer and send back with original packaging for inspection. The shipping carton
should contain the following items:
.
-DNG-250 Low Fog Generator
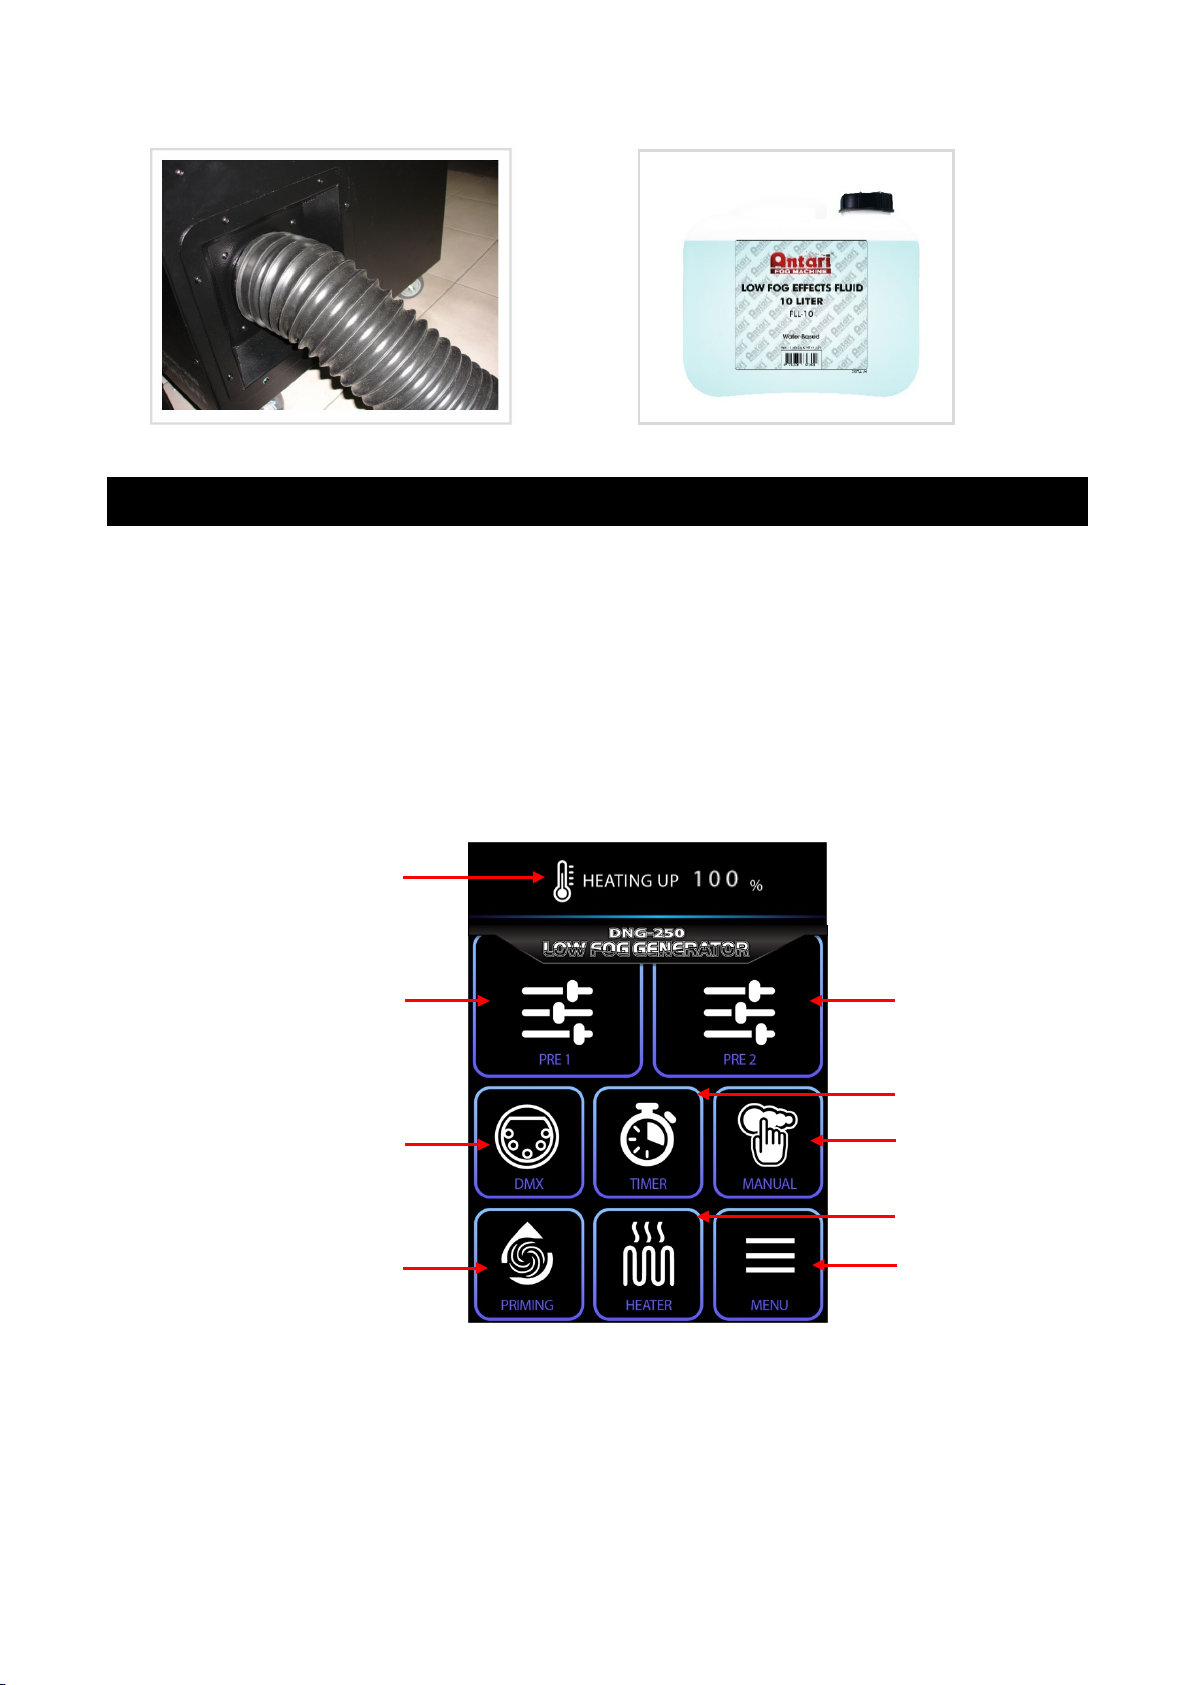
-Two power cords for connecting to Neutrik PowerCon connectors.
-3M fog conducting hose
-User's manual (item 2-4 placed in the compartment on the top of the machine)
-Water collection tray (preinstalled in the machine)
-3M PU tube, 6mmØ
Setup
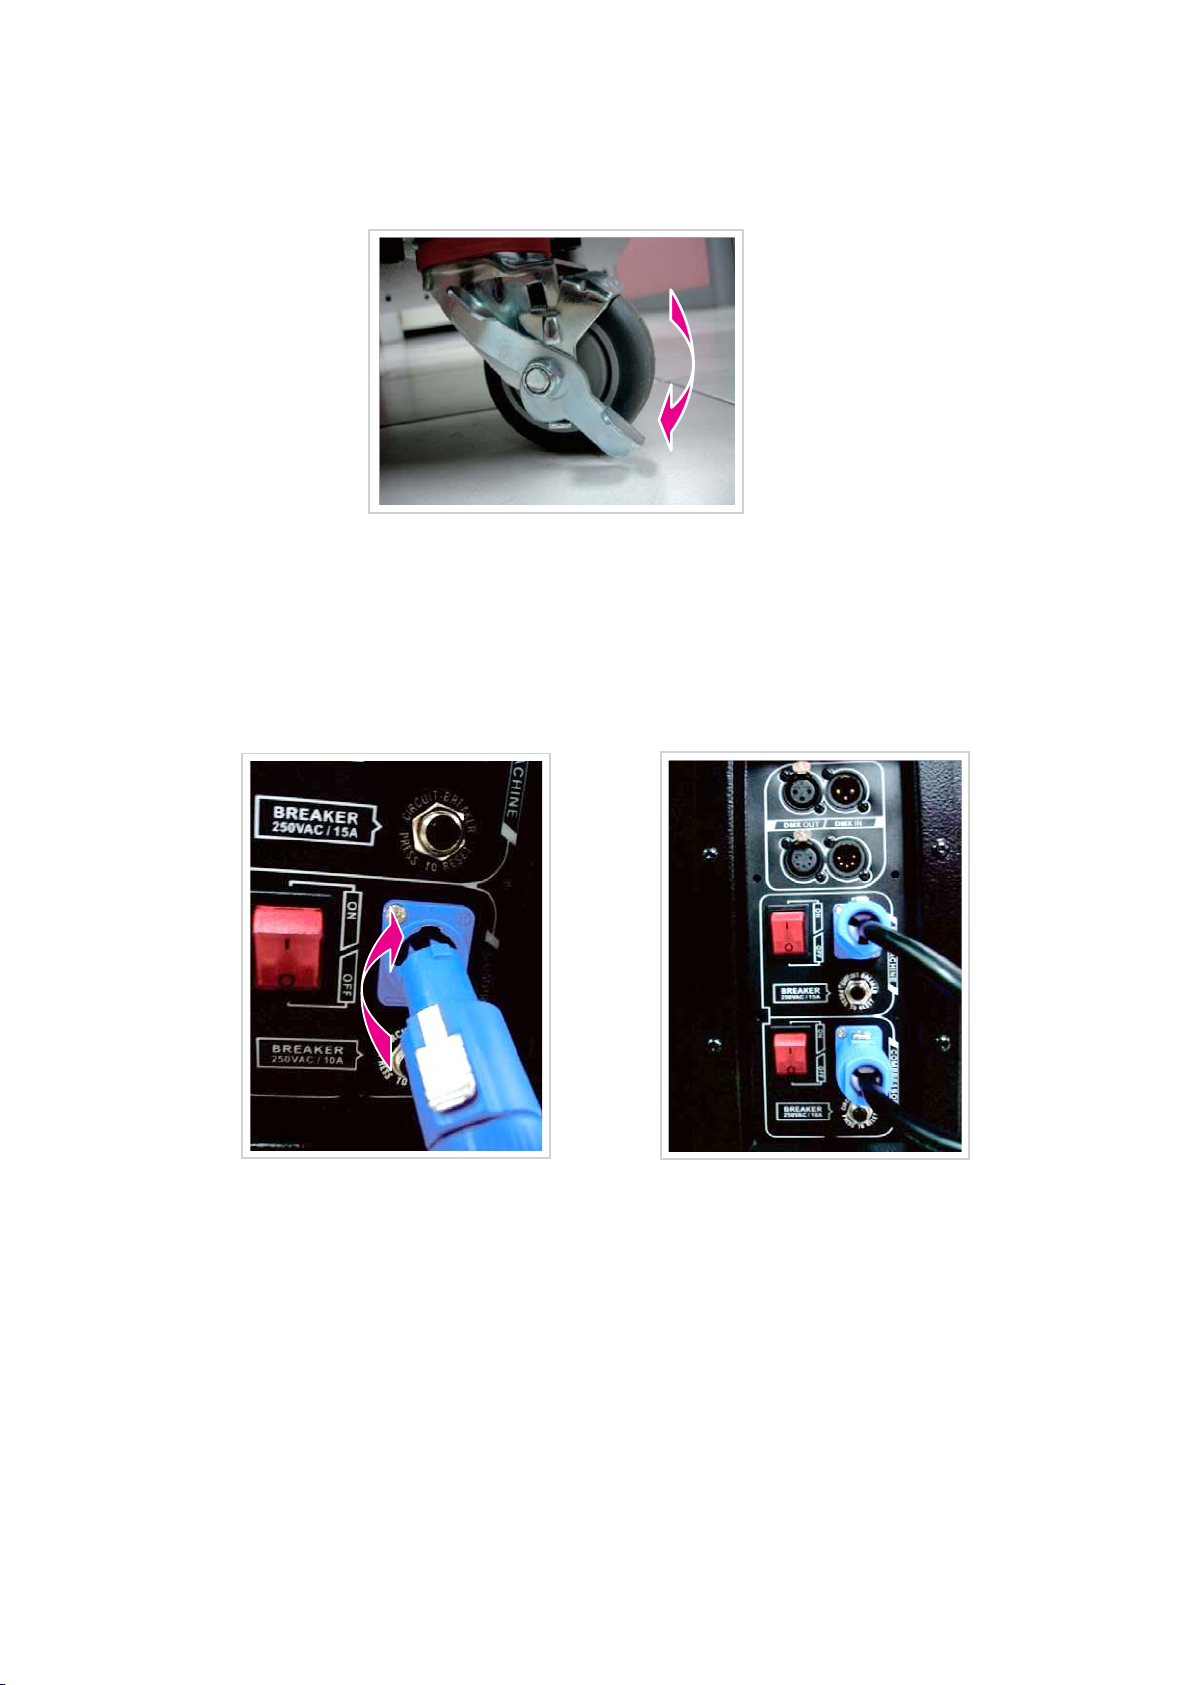
The wheels at the bottom of the DNG-250 help to move the machine; wheel fixing
mechanisms are located at the diagonal line. Position the machine at a spot, press
down the fixing mechanism to prevent it from moving. To move the machine, press
the opposite side of the fixing mechanism to release it. Please note that the machine

5
is not allowed to place on a slope due to its big size. (refer to figure 1)
Please aim the key on the PowerCon terminal of the power cord to the slot of the
connector on the machine, plug it in and turn it about 10° clockwise until the power
cord is completely fixed. The upper power cord is for the fog generator and the bottom
one is for the compressor. (refer to figure 2 and 3)
Before connecting the machine to power supply, make sure to check the needed
voltage and watt indicated on the metal plate of the machine.
Connect the machine with the black fog conducting hose; it is a three-meter pipe. The
length of the pipe can be adjusted to fit the actual need. (refer to figure 4)
Fill Antari FLL Low Fog Effects Fluid to the tank, tighten the tank cap. (refer to figure
5)
Figure 1
Figure 2
F
igure 3

6
Figure4 Figure5
Operation
1. After confirming the voltage, connect the power cord to a grounded outlet then turn
on the lower power switch and then the higher one. The warmup starts now, and the
TFT touch panel will show the percentage of the whole warmup process until 100%
that the warmup is completed.
2. TFT touch panel introduction:
2-1 Main Menu:
Manual mode
Heater status
DMX
Enforceable fluid drawing Main menu
Heater on/off
Timer mode
Preset 1 Preset 2

7
2-2 Manual mode:
2-2-1 Manual mode setting:
Continuous mode ON / OFF
Output volume 20% - 100%
2-3 Timer mode:
2-3-1 Timer mode setting:
Interval 5 secs – 200 secs
Duration 5 secs – 200 secs
Current setting of output volume
Current setting of fan speed
Manual mode setting
Start / Stop
Return
Return
Start / Stop
Current setting of
fan speed
Current setting of output
volume
Current setting of
interval time
Current setting of duration time
Timer mode setting
Return
Return
Current setting of fan speed

8
Continuous mode ON / OFF
Output volume 20% - 100%
2-4 DMX:
2-4-1 DMX setting:
DMX address setting
Return
DMX address:
DMX status
DMX setting
Heater temperature status
ConfirmCancel
Current address

9
2-5 Enforceable fluid drawing:
When the tank is refilled with fog fluid, use this to draw the fluid. Press
“Pause” once the output is back to avoid damp in fog. Default duration of the
fluid drawing is 1 min.
2-6 Heater:Heater can be activated or deactivated manually. Default setting is
activated.
Countdown
Pause
Start Return
Activate
Return
Deactivate
Heater activated Heater deactivated
Return
Return

10
2-7 Main menu:
2-7-1 DMX setting
DMX address setting. Please refer to page 8 for detail.
2-7-2 Basic information
Software version
Current working voltage (settable)
Usage time (from power on)
2-7-3 Setting
LCD brightness (Low/Medium/High/Auto)
*LCD light will shut down in 1 min when “Auto” is selected.
Action before shut down will be automatically proceeded after
warming up is finished.
Restore default setting.
Chinese/English
Software update (for Antari’s distributors’ use only)

11
DMX Connector Pin Assignment & instruction
3-1 The machine provide 3 or 5 pin XLR connector for DMX connection.
Diagram below indicate pin assignment information.
Pin Function
1 Grounding
2 Data -
3 Data +
3-2 DNG-250 DMX instruction
DNG-250 low fog generator has built-in DMX 512 function with 3 Pin and 5 Pin
sockets to choose from. After connecting to DMX, TFT touch panel can’t be used,
and all actions are controlled by DMX. Only DMX address can be entered with
TFT touch panel.
3-3 DMX 512 settings
Function
Figures
Meaning
Output Volume 0 - 4 Off
5 - 255 1 - 100%
4-1 RDM (Remote Device Management) Function
DNG-250 is equipped with RDM function which allows users to control the
unit through devices with RDM ANSI E1.20 protocol. This is a protocol
enhancement that allows bi-directional communication between a controller
and attached RDM compliant devices over a standard DMX line. Users may
set, monitor and manage the RDM supported devices and equipment in DMX
network.
RDM Function

12
4-2 RDM Directory
Other important notes
5-1A water collection tray is equipped at the rear of DNG-250. When the compressor
is running for condensed fog, some water drops will flow into the tray. Please
check the water level of the tray routinely and drain it on time to prevent overflow.
(refer to figure 6).
5-2If the machine is to be used for a long time or the water drops cannot be checked
momentarily, the water collection tray can be removed and a 6 mm PU hose can
be connected to the water draining hole located at the top of the water collection
tank to directly drain out the water drops. After completing the draining, push up

13
the upper red button to remove the hose. (refer to figure 7)
5-3 A black square metal mesh is located at the back of the machine. This is the air
inlet of the fan. Please do not block the inlet and clean it routinely to keep the
cleanness.
5-4 If the fog volume is too low, the machine generates noise during operation or the
fog cannot be smoothly sprayed, please turn off the power immediately and check
if the fog fluid is sufficient, whether the external fuse, controller connection or power
supply has any problem. If none of the above shows any problem, insert the power
plug again. If the machine still cannot normally operate, please check whether the
hose connecting to the fog fluid tank is blocked, and if any fluid is flowing. If the
cause cannot be identified, please do not allow the machine to operate to avoid
damage. Turn off the machine Immediately and let it cool down. Please contact an
Antari dealer or a designated service center. Do not disassemble the machine by
yourself.
5-5 After using the DNG-250 for a long time, there may be residue on the floor which
could be a possible cause of danger. Please note the material of the floor and pay
special attention to the safety of persons walking on it.
5-6 The DNG-250 Low Fog Generator does not use dry ice. It is very environmental
friendly and safe. However, the output fog is easily to be blown away by wind.
Please note the air flow’s impact from fan or air conditioner.
Figure 6 Figure 7

14
Maintenance of the Machine
6-1Cleaning your fog machine regularly will help reduce costly replacement and repair
charges.
6-2 Do not allow the fog fluid to become contaminated. The cap should be on the tank
at all times.
6-3 Prior to storing the machine for a longer period, clean it and drain all fog fluid from
the tank. Disconnect and store the fog pipe and power cord. Store the machine and
all parts into the parts tank located at front of the machine. Warm up the machine
once a month, to protect it from moisture.
6-4 Store the machine cool and dry.
Technical Specifications
- Input voltage
- Refrigerant
- Start current
- Rated power
- Warm-up time
- Fluid consumption
- Fluid tank capacity
- Compatible fluid
- Ambient temp. range
- Output
- Control
- DMX Channels
- Optional Accessories
- Dimensions
- Weight
EU model: AC 220-240V, 50 / 60Hz 3.8~6.5A
R-404A,1.76lb (0.8 kg)
240V / 36.1A
240V / 1600W
240V / 8 mins (approx.)
100 ml / min (100% output)
10L (2.64gal)
Antari FLL-10 Low Fog Fluid
5°C ~ 40°C (41°F ~ 104°F)
120 m2/ min
Manual and Timer Mode
DMX 512
1 channel
FDNG-250 Flight Case
L 780 W 608 H 715 mm
130 kgs (286.60 lbs)
Please save this user manual carefully

15
恭喜您擁有了這部全新的 Antari DNG-250 低煙機
感謝您選擇了 Antari DNG-250 低煙機,這部機器除了以往 Antari DNG-200 基本的煙霧冷卻功能外,我
們增加了全新的功能,使用 3.5 吋觸碰式全彩 TFT-LCD,讓使用者在操控上更簡單方便,機器大小體積跟
Antari DNG-200 一樣,但是煙霧的輸出量及持續能力都有全面性的提高,效果相較過去的 Antari DNG-
200 有顯著的提升,讓舞台空間的動線運用及表演的效果都可以更加完美。Antari DNG-250 低煙機不使用
二氧化碳,所以不會對環境及人體造成負擔,同時具有完美低霧特效及兼具環保,是一款真正的綠色特效機
器。
為確保您機器的使用及輸出效果的完美,在操作機器前,請詳細閱讀這份使用說明書,請按照說明書內的內
容操作以及維護,並注意安全說明事項,以確保 DNG-250 低煙機使用壽命可以更加延長以及操作人員能
更加安全的使用機器。
請注意印在 ANTARI 機器外部的所有警告標籤和說明。
注意事項
請保持機器乾燥。
機器設計在室內使用,請勿在戶外使用本機器。
理想的機器操作溫度,在室溫攝氏 5 度~ 40 度之間 。
這部機器使用兩組專業用電源線,在安裝好插頭要連結電源供應前,請確認您使用的電壓並使用接
地型插座以避免觸電的危險。
在上下搬運或運送過機器後,需將機器靜置 1小時,讓冷卻器中的冷煤平穩後,再開始操作機器。
若是水平的移動機器,請於機器安置定位後,靜置 5 分鐘再開始操作。
拔開機器和 AC 電源插座時,請確認機器已關機不在使用的狀態下。
本機器並未做防水設計,請勿將機器暴露在雨中或潮濕的環境,如果有液體(煙霧油)翻倒或溢出的
現象,請勿連結機器與 AC 電源,如在使用中請先關掉電源並移除 AC 電源線,並將機器擦拭乾淨
後,再重新開啟電源,如果液體進入機器內部,無法清除,請連繫 Antari 的代理商。
本機器不含任何拆解和自行維修或修改的零件在內,請勿嘗試自行維修或改裝機器,未經授權的技
術人員,可能導致機器故障或永久損壞,遇有機器問題時,請連繫 Antari 代理商。
機器限成人操作,請勿讓機器在沒有工作人員的情況下單獨運轉。
請將機器置放於通風良好的地方,不要在機器上方堆積或覆蓋物品,最好保留機器四周邊有ㄧ公尺
以上的空間。
請勿將機器安置在傾斜的斜披上,以免機器滑動。
請勿添加任何易燃物品進入機器。

16
操作機器時請確認週邊沒有任何易燃材料。
如果您的 DNG-250 出現工作異常,請先關閉電源開關,靜置 5 分鐘後,重新開啟電源,若異
常現象仍然存在,請聯繫 Antari 代理商。
在清潔或保養您的機器前,請確認機器的電源已經關閉,並且機器溫度已經冷卻。
為確保機器的使用壽命,請使用 Antari FLL低煙機煙霧水,添加其他液體可能會導致機器故障
如果機器出現故障,請移除機器插頭,立即停止工作,並請連繫您當地的 Antari 經銷商。
運送機器以前,請確認機器的油箱已完全清空。
煙霧油不能食用,吞食煙霧油可能導致損壞健康的風險,請將煙霧油存放在室內安全的地方,如果
碰觸到眼睛或誤食,請立即尋求醫生協助。
打開包裝及檢視機器
在收到機器,請立即小心地打開包裝紙箱,檢查所有內容,以確保所有零配件都有齊全收到,並處於良好的
狀態,如果有任何部件因運輸過程出現損壞或缺少,請立即連絡經銷商,並以原包裝退回檢查,機器出厰時
包含的物件有:
1台DNG-250 低煙機
2條Neutrik Powercon 接頭的電源線
1條黑色煙霧導管 3公尺
1本使用說明書(2 – 4 項 放置在機器前上方的儲存盒中)
1個集水盤(已安裝在機器上)
1條6 mm PU 管3 公尺
安裝機器的步驟
步驟 1:DNG-250 底部的輪子可以協助移動,對角線上的輪子置有固定器,將機器放置在定點,壓下固定
器以固定機器避免滑動(參考圖ㄧ),需要移動機器時,只要在反方向壓下將固定器鬆開即可移動器。
(機器週圍至少保持 1公尺以上的空間)
注意!由於機器體積龐大,請勿將機器固定於斜坡上。
圖一

17
步驟 2:將電源線帶有 Powercon 的一端連結機器(請確認電源開關在關閉/ OFF 的情況下),請將卡榫對準
機器連接座凹槽,插入後順時針旋轉約 10 度(參考圖二),將電源線完全固定為止。兩條電源線都
需要照此步驟安裝好,上方的電源線是供應煙霧機的電源,下方的電源是供應壓縮機的電源。(參考
圖二、三)
●將機器連接電源之前,請確認機器上技術銘版上標示所需的電壓及功率,是否與電源相符。
步驟 3:結合機器與黑色煙霧導管,此煙霧導管長度為三米,可依照實際需要長度伸縮使用。(參考圖四)
步驟 4:倒入 Antari FLL低煙機煙霧水至機器上的油桶中,並旋緊油桶蓋。(參考圖五)
圖四 圖五
操作說明
1. 確認電壓後,將機器電源線連接至有接地的插座上,機器背後有兩組紅色的電源開關,請先啟動下方的
壓縮器電源,再啟動上方煙霧機電源,開始溫機。此時 TFT-LCD 上方會先顯示
目前電熱管溫度百分比,到達 100%為加熱完成。
圖二
圖三

18
2. TFT-LCD 操控方式
2-1 主畫面介紹
2-2 手動:手動噴煙功能鍵
2-2-1 手動噴煙配置選單
持續噴煙模式 ON / OFF
輸出量 20% - 100%
手動噴煙 執行/設定
電熱管目前溫度狀態
自訂義 1 自訂義 2
DMX 設定/狀態
強制抽油 主選單
加熱裝置開關
定時模式
設定煙霧量出量
設定風量
開始 / 暫停
返回鍵
手動模式配置選單

19
2-3 定時:定時噴煙功能鍵
2-3-1 定時模式配置選單
間隔時間 5 秒~ 200 秒
啟動時間 5 秒~ 200 秒
持續噴煙模式 ON / OFF
輸出量 20% - 100%
2-4 DMX:DMX 功能鍵為目前 DMX 狀態及設定選項
返回鍵
開始 / 暫停
目前風量 100%
目前設定煙霧輸出量
目前設定間隔時間 目前設定噴煙時間
定時模式配置選單
返回鍵
DMX 目前地址
DMX 目前狀態
DMX 配置選單
電熱管目前溫度狀態

20
2-4-1 DMX 模式配置選單
DMX 地址設定,直接輸入要的地址數字,按下右下方確認即可。
2-5 強制抽油:當油幫浦空油時不易抽到煙霧油時,可使用此一功能抽油,當煙霧從機器出來
時請按下暫停鍵以防止煙霧過於潮溼。(預設時間為 1分鐘)
確認
取消
目前 DMX 地址數值
時間
暫停
開始 返回 返回
Other manuals for DNG-250
1
Table of contents
Other Antari Fog Machine manuals

Antari
Antari Z-390 Series User manual

Antari
Antari F-5D Fazer User manual

Antari
Antari Z-1000 III User manual

Antari
Antari B-100 User manual

Antari
Antari WiFi-800 User manual

Antari
Antari FT-20X User manual

Antari
Antari Z-1200II User manual

Antari
Antari DNG-250 User manual

Antari
Antari Fogger X-510II User manual

Antari
Antari M-1 User manual

Antari
Antari SW-250 User manual

Antari
Antari ICE-100 User manual

Antari
Antari Z-80 User manual

Antari
Antari Z-800 III User manual

Antari
Antari M-8 User manual

Antari
Antari MOBILE MB-1 User manual

Antari
Antari F-6 User manual

Antari
Antari FT-50 User manual

Antari
Antari W-508 User manual

Antari
Antari DNG250FE User manual