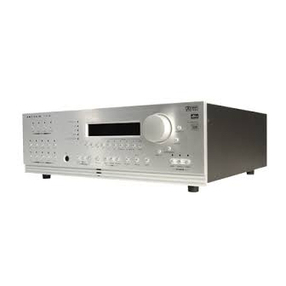
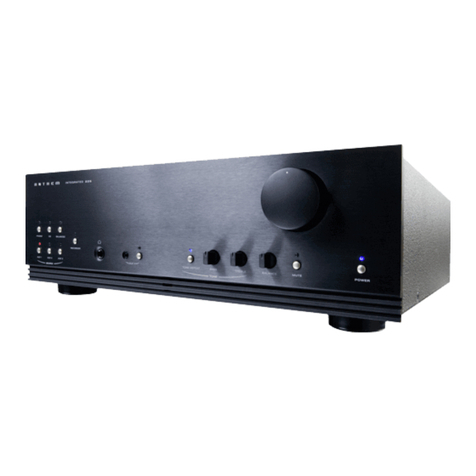
Anthem STR User manual

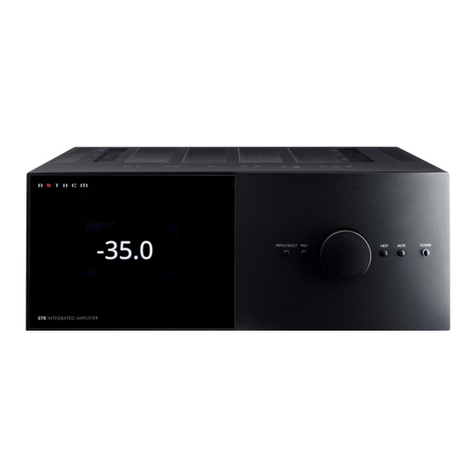
STR INTEGRATED AMPLIFIER
Operating Manual

i
CAUTION: TO REDUCE THE RISK OF ELECTRIC SHOCK, DO NOT REMOVE COVER (OR BACK).
NO USER-SERVICEABLE PARTS INSIDE. REFER SERVICING TO QUALIFIED SERVICE PERSONNEL
RISK OF ELECTRIC SHOCK DO NOT OPEN
THE LIGHTNING FLASH WITH ARROWHEAD
SYMBOL WITHIN AN EQUILATERAL
TRIANGLE IS INTENDED TO ALERT THE
USER TO THE PRESENCE OF UNINSULATED
“DANGEROUS VOLTAGE” WITHIN THE
PRODUCT’S ENCLOSURE THAT MAY BE OF
SUFFICIENT MAGNITUDE TO CONSTITUTE A
RISK OF ELECTRIC SHOCK TO PERSONS.
THE EXCLAMATION POINT WITHIN
AN EQUILATERAL TRIANGLE IS
INTENDED TO ALERT THE USER TO THE
PRESENCE OF IMPORTANT OPERATING
AND MAINTENANCE (SERVICING)
INSTRUCTIONS IN THE LITERATURE
ACCOMPANYING THE APPLIANCE.
1. Read these instructions.
2. Keep these instructions.
3. Heed all warnings.
4. Follow all instructions.
5. Do not use this apparatus near water.
6. Clean only with a dry cloth.
7. Do not block any of the ventilation openings. Install in
accordance with the manufacturer’s instructions.
8. Do not install near any heat sources such as radiators, heat
UHJLVWHUVVWRYHVRURWKHUDSSDUDWXVLQFOXGLQJDPSOLȴHUV
that produce heat.
9. Do not defeat the safety purpose of the polarized or
grounding-type plug. A polarized plug has two blades with
one wider than the other. A grounding-type plug has two
blades and a third grounding prong. The wide blade or the
third prong is provided for your safety. When the provided
SOXJGRHVQRWȴWLQWR\RXURXWOHWFRQVXOWDQHOHFWULFLDQIRU
replacement of the obsolete outlet.
10. Protect the power cord from being walked on or pinched,
particularly at plugs, convenience receptacles and the
point where they exit from the apparatus.
2QO\XVHWKHDWWDFKPHQWVDFFHVVRULHVVSHFLȴHGE\WKH
manufacturer.
12. Use only with a cart, stand, tripod, bracket or table
VSHFLȴHGE\WKHPDQXIDFWXUHURUVROGZLWKWKHDSSDUDWXV
When a cart is used, use caution when moving the cart/
apparatus combination to avoid injury from tip-over.
13. Unplug this apparatus during lightning storms or when
unused for long periods of time.
5HIHUDOOVHUYLFLQJWRTXDOLȴHGVHUYLFHSHUVRQQHO6HUYLFLQJ
is required when the apparatus has been damaged in any
way, such as power supply cord or plug is damaged, liquid
has been spilled or objects have fallen into the apparatus,
the apparatus has been exposed to rain or moisture, does
not operate normally, or has been dropped.
CAUTION
WARNING:725('8&(7+(5Ζ6.2))Ζ5(25(/(&75Ζ&
6+2&.'2127(;326(7+Ζ6$33$5$786725$Ζ125
02Ζ6785($1'2%-(&76)Ζ//(':Ζ7+/Ζ48Ζ'668&+$6
9$6(66+28/'127%(3/$&('217+Ζ6$33$5$786
CAUTION:7235(9(17(/(&75Ζ&6+2&.0$7&+:Ζ'(
%/$'(2)3/8*72:Ζ'(6/27)8//<Ζ16(57
CAUTION:)25&217Ζ18('3527(&7Ζ21$*$Ζ1675Ζ6.2)
)Ζ5(5(3/$&(7+()86(21/<:Ζ7+7+(6$0($03(5$*(
$1'92/7$*(7<3(5()(55(3/$&(0(177248$/Ζ)Ζ('
6(59Ζ&(3(56211(/
WARNING:81Ζ70$<%(&20(+27$/:$<63529Ζ'(
$'(48$7(9(17Ζ/$7Ζ2172$//2:)25&22/Ζ1*'2
1273/$&(1($5$+($76285&(25Ζ163$&(67+$7
&$15(675Ζ&79(17Ζ/$7Ζ21
IMPORTANT SAFETY INSTRUCTIONS
ii
WARNING:7RUHGXFHWKHULVNRIȴUHRUHOHFWULFVKRFNGRQRWH[SRVHWKLVDSSDUDWXVWRUDLQRUPRLVWXUH$YRLG
installing this unit where foreign objects may fall onto this unit and/or this unit may be exposed to liquid dripping or
splashing. On the top of this unit, do not place:
ȏ %XUQLQJREMHFWVLHFDQGOHVDVWKH\PD\FDXVHȴUHGDPDJHWRWKLVXQLWDQGRUSHUVRQDOLQMXU\
• Containers with liquid in them, as they may fall and liquid may cause electrical shock to the user and/or
damage to this unit.
$SSDUDWXVVKDOOQRWEHH[SRVHGWRGULSSLQJRUVSODVKLQJDQGQRREMHFWVȴOOHGZLWKOLTXLGVVXFKDVYDVHVVKDOOEH
placed on the apparatus.
'RQRWLQVWDOOWKLVHTXLSPHQWLQDFRQȴQHGVSDFHVXFKDVDFDVHRUVLPLODUΖQVWDOOLWDZD\IURPGLUHFWVXQOLJKWKHDW
sources, vibration, dust, moisture, and/or cold.
Do not cover this unit with a newspaper, tablecloth, curtain, etc. in order not to obstruct heat radiation. If the
WHPSHUDWXUHLQVLGHWKLVXQLWULVHVLWPD\FDXVHȴUHGDPDJHWRWKLVXQLWDQGRUSHUVRQDOLQMXU\
Install this unit near the AC outlet and where the AC power plug can be reached easily.
7KLVXQLWLVQRWGLVFRQQHFWHGIURPWKH$&SRZHUVRXUFHZKHQLWLVWXUQHGR7KLVVWDWHLVFDOOHGWKHVWDQGE\PRGH
In this state, this unit is designed to consume a very small quantity of power.
NOTE: 7KLVSURGXFWLVQRWDQDXWRYROWDJH$PSOLȴHU&RQQHFWRQO\WRWKHSUHVFULEHG$&RXWOHWLH9+]RU9
50/60Hz.
CAUTION: Top surface can become hot.
CAUTION: 7KHVHVHUYLFLQJLQVWUXFWLRQVDUHIRUXVHE\TXDOLȴHGVHUYLFHSHUVRQQHORQO\7RUHGXFHWKHULVNRIHOHFWULF
VKRFNGRQRWSHUIRUPDQ\VHUYLFLQJRWKHUWKDQWKDWFRQWDLQHGLQWKHRSHUDWLQJLQVWUXFWLRQVXQOHVV\RXDUHTXDOLȴHG
to do so.
CAUTION:&KDQJHVRUPRGLȴFDWLRQVWRWKLVHTXLSPHQWQRWH[SUHVVO\DSSURYHGE\3DUDGLJP(OHFWURQLFVIRU
compliance could void the user’s authority to operate this equipment.
FCC WARNING:&KDQJHVRUPRGLȴFDWLRQVQRWH[SUHVVO\DSSURYHGE\WKHSDUW\UHVSRQVLEOHIRUFRPSOLDQFHFRXOGYRLG
the user’s authority to operate the equipment.
7KLVHTXLSPHQWKDVEHHQWHVWHGDQGIRXQGWRFRPSO\ZLWKWKHOLPLWVIRUDFODVV%GLJLWDOGHYLFHSXUVXDQWWRSDUW
15 of the FCC Rules. These limits are designed to provide reasonable protection against harmful interference in a
residential installation. This equipment generates, uses and can radiate radio frequency energy and, if not installed
and used in accordance with the instructions, may cause harmful interference to radio communications. However,
there is no guarantee that interference will not occur in a particular installation. If this equipment does cause harmful
LQWHUIHUHQFHWRUDGLRRUWHOHYLVLRQUHFHSWLRQZKLFKFDQEHGHWHUPLQHGE\WXUQLQJWKHHTXLSPHQWRDQGRQWKHXVHU
is encouraged to try to correct the interference by one or more of the following measures:
• Reorient or relocate the receiving antenna.
ȏΖQFUHDVHWKHVHSDUDWLRQEHWZHHQWKHHTXLSPHQWDQGDPSOLȴHU
ȏ&RQQHFWWKHHTXLSPHQWLQWRDQRXWOHWRQDFLUFXLWGLHUHQWIURPWKDWWRZKLFKWKHDPSOLȴHULVFRQQHFWHG
• Consult the dealer or an experienced radio / TV technician for help.

iii
IMPORTANT INFORMATION FOR UK CUSTOMERS: '2127FXWRWKHPDLQVSOXJIURPWKLVHTXLSPHQWΖIWKHSOXJ
ȴWWHGLVQRWVXLWDEOHIRUWKHSRZHUSRLQWVLQ\RXUKRPHRUWKHFDEOHLVWRRVKRUWWRUHDFKDSRZHUSRLQWWKHQREWDLQDQ
DSSURSULDWHVDIHW\DSSURYHGH[WHQVLRQOHDGRUFRQVXOW\RXUGHDOHUΖIQRQHWKHOHVVWKHPDLQVSOXJLVFXWR5(029(7+(
)86(DQGGLVSRVHRIWKH3/8*LPPHGLDWHO\WRDYRLGSRVVLEOHVKRFNKD]DUGE\LQDGYHUWHQWFRQQHFWLRQWRWKHPDLQVVXSSO\
ΖIWKLVSURGXFWLVQRWSURYLGHGZLWKDPDLQVSOXJRURQHKDVWREHȴWWHGWKHQIROORZWKHLQVWUXFWLRQVJLYHQEHORZ
Ζ03257$17'2127PDNHDQ\FRQQHFWLRQWRWKHODUJHUWHUPLQDOZKLFKLVPDUNHGZLWKWKHOHWWHUȊ(ȋRUE\WKHVDIHW\
HDUWKV\PERORUFRORUHG*5((1RU*5((1$1'<(//2:
The wires in the mains lead on this product are colored in accordance with the following code:
%/8(Ȃ1(875$/
%52:1Ȃ/Ζ9(
As these colors may not correspond with the colored markings identifying the terminals in your plug, proceed as follows:
7KH%/8(ZLUHPXVWEHFRQQHFWHGWRWKHWHUPLQDOPDUNHGZLWKWKHOHWWHUȊ1ȋRUFRORUHG%/$&.
7KH%52:1ZLUHPXVWEHFRQQHFWHGWRWKHWHUPLQDOPDUNHGZLWKWKHOHWWHUȊ/ȋRUFRORUHG5('
:KHQUHSODFLQJWKHIXVHRQO\DFRUUHFWO\UDWHGDQGDSSURYHGW\SHVKRXOGEHXVHGDQGEHVXUHWRUHȴWWKHIXVHFRYHUΖILQ
doubt consult a competent electrician.

iv
CdHgPb
NOTES ON ENVIRONMENTAL PROTECTION
At the end of its useful life, this product must not be disposed of with regular household waste but must be returned to
a collection point for the recycling of electrical and electronic equipment. The symbol on the product, user’s manual and
packaging, point this out. The materials can be reused in accordance with their markings. Through re-use, recycling of
raw materials or other forms of recycling of old products, you are making an important contribution to the protection of
RXUHQYLURQPHQW<RXUORFDODGPLQLVWUDWLYHRɝFHFDQDGYLVH\RXRIWKHUHVSRQVLEOHZDVWHGLVSRVDOSRLQW
RECYCLING AND REUSE GUIDELINES (Europe)
ΖQDFFRUGDQFHZLWKWKH(XURSHDQ8QLRQ:(((:DVWH(OHFWULFDODQG(OHFWURQLF(TXLSPHQWGLUHFWLYHHHFWLYH$XJXVW
2005, we would like to notify you that this product may contain regulated materials which, upon disposal, require special
reuse and recycling processing. For this reason Paradigm Electronics Inc. (the manufacturer of Paradigm speakers and
$QWKHPHOHFWURQLFSURGXFWVKDVDUUDQJHGZLWKLWVGLVWULEXWRUVLQ(XURSHDQ8QLRQPHPEHUQDWLRQVWRFROOHFWDQGUHF\FOH
WKLVSURGXFWDWQRFRVWWR\RX7RȴQG\RXUORFDOGLVWULEXWRUSOHDVHFRQWDFWWKHGHDOHUIURPZKRP\RXSXUFKDVHGWKLV
product or go to our website at www.paradigm.com.
Please note that only the product falls under the WEEE directive. When disposing of packaging and other shipping
material we encourage you to recycle through the normal channels.
INFORMATION ABOUT COLLECTION AND DISPOSAL OF WASTE BATTERIES (DIRECTIVE 2006/66/EC OF THE
EUROPEAN PARLIAMENT AND THE COUNCIL OF EUROPEAN UNION)IRU(XURSHDQFXVWRPHUVRQO\
%DWWHULHVEHDULQJDQ\RIWKHVHV\PEROVLQGLFDWHWKDWWKH\VKRXOGEHWUHDWHGDVȊVHSDUDWHFROOHFWLRQȋDQGQRWDVPXQLFLSDO
waste. It is encouraged that necessary measures are implemented to maximize the separate collection of waste
batteries and to minimize the disposal of batteries as mixed municipal waste. End-users are exhorted not to dispose
waste batteries as unsorted municipal waste. In order to achieve a high level of recycling waste batteries, discard waste
batteries separately and properly through an accessible collection point in your vicinity. For more information about
collection and recycling of waste batteries, please contact your local municipality, your waste disposal service or the point
of sale where you purchased the items.
%\HQVXULQJFRPSOLDQFHDQGFRQIRUPDQFHWRSURSHUGLVSRVDORIZDVWHEDWWHULHVSRWHQWLDOKD]DUGRXVHHFWVRQKXPDQ
health is prevented and the negative impact of batteries and waste batteries on the environment is minimized, thus
contributing to the protection, preservation and quality improvement of the environment.
Anthem and any related party assume no liability for the user’s failure to comply with any requirements.
$QWKHP$QWKHP/RJLF$5&6RQLF)URQWLHUVDQG3DUDGLJPDUHWUDGHPDUNVRUUHJLVWHUHGWUDGHPDUNVRI3DUDGLJP
Electronics Inc. © Paradigm Electronics Inc. All rights reserved. The information contained herein may not be reproduced
LQZKROHRULQSDUWZLWKRXWRXUH[SUHVVZULWWHQSHUPLVVLRQ:HUHVHUYHWKHULJKWWRFKDQJHVSHFLȴFDWLRQVRUIHDWXUHV
without notice as design improvements are incorporated.
All other trademarks are the property of their respective owners.

v
TABLE OF CONTENTS
INTRODUCTION
1.1 Before Making Connections . . . . . . . . . . . . . 1
1.2 In-Use Notices . . . . . . . . . . . . . . . . . . . . . 1
1.3 Front Panel. . . . . . . . . . . . . . . . . . . . . . . 2
1.4 Rear Panel . . . . . . . . . . . . . . . . . . . . . . . 3
1.5 Remote Control . . . . . . . . . . . . . . . . . . . . 4
CONNECTIONS AND OPERATION
2.1 Speaker Connections . . . . . . . . . . . . . . . . . 5
2.2 Speaker Connections . . . . . . . . . . . . . . . . . 5
2.3 Analog Connections . . . . . . . . . . . . . . . . . . 5
2.4 Local Area Network . . . . . . . . . . . . . . . . . . 5
2.5 12 Volt Trigger . . . . . . . . . . . . . . . . . . . . . 5
2.6 Infra Red . . . . . . . . . . . . . . . . . . . . . . . . 5
2.7 Power . . . . . . . . . . . . . . . . . . . . . . . . . . 5
SETUP
3.1 Speaker setup . . . . . . . . . . . . . . . . . . . . . 7
3.2 Bass Management . . . . . . . . . . . . . . . . . . 8
3.3 Listener Position . . . . . . . . . . . . . . . . . . . 9
3.4 Level Calibration . . . . . . . . . . . . . . . . . . . 10
3.5 Input Setup . . . . . . . . . . . . . . . . . . . . . . 11
3.6 Analog Input Levels . . . . . . . . . . . . . . . . . 13
3.7 Preferences / Line Output . . . . . . . . . . . . . 13
3.8 Network / Remote Control . . . . . . . . . . . . . 14
3.9*HQHUDO&RQȴJXUDWLRQ . . . . . . . . . . . . . . . 15
3.10 Save/load Settings . . . . . . . . . . . . . . . . . 15
3.11 System Information . . . . . . . . . . . . . . . . 16
3.12 USB Audio . . . . . . . . . . . . . . . . . . . . . 17
ANTHEM ROOM CORRECTION (ARC™)
4.1 Before Starting . . . . . . . . . . . . . . . . . . . . 20
4.2 ARC Software Installation . . . . . . . . . . . . . 20
4.3 Microphone Stand Assembly . . . . . . . . . . . . 21
4.4 microphone Positioning. . . . . . . . . . . . . . . 21
4.5 Measurement . . . . . . . . . . . . . . . . . . . . 22
4.6 Manual Mode and Targets . . . . . . . . . . . . . 23
4.7 Advanced Subwoofer Targets . . . . . . . . . . . 26
4.8 Printing a Report. . . . . . . . . . . . . . . . . . . 26
OPERATION
5.13RZHURQ2DQG9ROXPH . . . . . . . . . . . . . 27
5.2 Input Selection . . . . . . . . . . . . . . . . . . . 27
5.3 Levels . . . . . . . . . . . . . . . . . . . . . . . . . 28
5.4 Listening Modes . . . . . . . . . . . . . . . . . . . 28
5.5 Info Display . . . . . . . . . . . . . . . . . . . . . 28
LIMITED WARRANTY . . . . . . . . . . . . . . . . . . . 33
NOTES . . . . . . . . . . . . . . . . . . . . . . . . . . . 34
TABLE OF CONTENTS

1
7KDQN\RXIRUSXUFKDVLQJWKH$QWKHP675ΖQWHJUDWHG$PSOLȴHU
All Anthem products are engineered to recreate the passion of a live musical performance and emotional involvement
experienced in the best movie theaters by utilizing the highest level of circuit design, superior parts and manufacturing
WHFKQLTXHVLQQRYDWLYHIHDWXUHVDQGLQWXLWLYHHUJRQRPLFV:HDUHFRQȴGHQWWKDWWKHLULQFOXVLRQLQ\RXUV\VWHPZLOO
VLJQLȴFDQWO\HQKDQFH\RXUHQMR\PHQWRIUHFRUGLQJVIRU\HDUVWRFRPH
1.1 BEFORE MAKING CONNECTIONS
Check that you have received all items listed below and report discrepancies to your dealer as soon as possible. In case
the unit needs to be transported in the future, keep the packing materials.
Retain the invoice that you received from your authorized Anthem dealer at time of purchase – without it,
service will not be provided under warranty.
Packing List:
ȏ ΖQWHJUDWHG$PSOLȴHU
• Operating manual
• Remote control
• 2 AAA batteries
ȏ 86%W\SH%FDEOHIRUWKH86%DXGLRLQSXW
ȏ 86%PLQL%FDEOHIRUVRIWZDUHXSGDWHVDQG$5&3&YHUVLRQ
• Dual-jack microphone
ȏ PPPLFURSKRQHFDEOHIRU$5&PRELOHDSSYHUVLRQ
ȏ Ζ(&SRZHUFRUG868.(8&1W\SHVDUHVXSSOLHGE\WKHIDFWRU\RWKHUW\SHVare normally provided
E\WKHORFDOGLVWULEXWRU
Additional items in Anthem Room Correction (ARC™) kit:
ȏ 86%0LFURSKRQH
• Microphone clip
• Telescopic stand with boom
ȏ 86%PLQL%FDEOHIRUWKHPLFURSKRQH
• CAT5 cable for connection to a router or network
1.2 IN-USE NOTICES
• Disconnect the power cord before connecting or disconnecting any components.
ȏ ΖIWKHDPSOLȴHUZDVWUDQVSRUWHGRUVWRUHGLQWKHFROGOHWLWUHDFKURRPWHPSHUDWXUHEHIRUHXVH
• Do not remove the top cover.
• Do not modify the product.
• Due to continuing advances, operational characteristics may change. If this manual contains discrepancies
please check www.anthemAV.com for the latest manual.
INTRODUCTION

2
1.3 FRONT PANEL
Display
6HWXSPHQXDFFHVVDQGVHOHFWLRQFRQȴUPDWLRQ
Previous input or item
Volume control and menu navigation
1H[WLQSXWRULWHP
Mute
Power
1
2
3
5
4
6
7
1
2 3
4
5 6 7

3
1.4 REAR PANEL
3RZHUFRUGLQOHWΖ(&&W\SH
Fuse
6SHDNHUWHUPLQDOV
86%'$&LQSXW:LQGRZV3&VQHHGWRKDYH;026GULYHULQVWDOOHG
$(6(%8GLJLWDODXGLRLQSXW
&RD[LDOGLJLWDODXGLRLQSXWV
2SWLFDOGLJLWDODXGLRLQSXWV
Factory Use Only
6RIWZDUHLQVWDOODWLRQDQG$5&YLD3&
Ethernet connection for Anthem Room Correction, software installation and control
56VHULDOFRQQHFWLRQIRUFRQWURO
12V DC / 50 mA trigger output
IR input
Phono ground terminal
Moving coil phono input
Moving magnet phono input
$QDORJ5&$LQSXWV
%DODQFHG;/5LQSXW
/LQHRXWSXWVȴ[HGOHYHOVXLWDEOHIRUDKHDGSKRQHDPSRUUHFRUGLQJGHYLFH
6XEZRRIHURXWSXWVPRQRRUVWHUHRRSHUDWLRQ
/HIW5LJKWSUHDPSOLȴHURXWSXWVYDULDEOHOHYHO
1
1
2
13
2
3
5
4
6
7
8
9
10
11
12
13
14
15
16
17
18
19
20
21
3 3
45 6 7
8
12
1415161718192021
910 11

4
1.5 REMOTE CONTROL
3RZHUȂ2Q
6HWXSPHQX
3RZHUȂ6WDQGE\
1DYLJDWLRQ
Input
ΖQIRSHUWDLQLQJWRLQSXWDQGRXWSXW
/LVWHQLQJ0RGHVPRQRVWHUHR
/HYHOVVXEEDVVWUHEOHEDODQFH
Mute
Volume
1
2
3
5
4
6
7
8
9
10
6
11
1 2 3
4
5
7
8
9
10

5
2.1 SPEAKER CONNECTIONS
Depending on the level of the input signal, the voltage at the outputs can be high enough to cause electric
VKRFNȂEHVXUHWKDWSRZHULVWXUQHGRZKHQFRQQHFWLQJRUGLVFRQQHFWLQJDQ\WKLQJ$VZHOOEHVXUHWKDWWKH
VSHDNHUVDUHUDWHGIRUXVHZLWKWKLVDPSOLȴHUȂDQRYHUGULYHQVSHDNHUFDQSRVHDȴUHKD]DUG
&RQQHFWWKHUHGFRQQHFWLRQRQWKHVSHDNHUWRWKHUHGELQGLQJSRVWRQWKHDPSOLȴHUDQGWKHEODFNȂFRQQHFWLRQRQ
WKHVSHDNHUWRWKHEODFNȂELQGLQJSRVWRQWKHDPSOLȴHUXVLQJFDEOHWKDWLVLQVXODWHGWRKDQGOHWKHPD[LPXPRXWSXWRIWKH
DPSOLȴHU'RQRWRYHUWLJKWHQWKHELQGLQJSRVWVDVWKLVPD\FDXVHGDPDJH7KHELQGLQJSRVWSDLUDFFHSWVDFRQQHFWLRQIURP
one speaker.
2.2 DIGITAL INPUT CONNECTIONS
6WHUHRGLJLWDODXGLRVRXUFHVFDQEHFRQQHFWHGXVLQJ$(6(%8FRD[LDORURSWLFDOFDEOH7KH3&0VWHUHRIRUPDWXSWR
24-bit / 192 kHz is supported by all digital inputs. If using sources that have an option for selecting between PCM and
%LWVWUHDPRU'ROE\'LJLWDODXGLRRXWSXWVHOHFW3&0
$SHUVRQDOFRPSXWHUFDQDOVREHFRQQHFWHGWRWKHDV\QFKURQRXV86%'$&LQSXW6WHUHR3&0XSWRELWN+]DQG
'6'IRUPDWXSWR0+]DUHVXSSRUWHGWKURXJKWKLVFRQQHFWLRQ6LPSO\FRQQHFW\RXUFRPSXWHUDQGXVHPHGLDSOD\LQJ
VRIWZDUHRQLWWRKDYHPXVLFSOD\LQJWKURXJK\RXUV\VWHPΖIXVLQJD:LQGRZV3&WKH86%'$&GULYHUPXVWȴUVWEH
GRZQORDGHGIURPRXUZHEVLWHDQGLQVWDOOHG:LWK0DF26MXVWSOXJDQGSOD\
2.3 ANALOG CONNECTIONS
%DODQFHG;/5FRQQHFWLRQRHUVWKHKLJKHVWDQDORJWUDQVPLVVLRQTXDOLW\SDUWLFXODUO\RYHUORQJFDEOHOHQJWKVEHFDXVHLW
UHMHFWVQRLVHDQGKXPSLFNXS2QHVXFKLQSXWLVSURYLGHGXVLQJWKHFRQYHQWLRQDOSLQSRVLWLYHFRQȴJXUDWLRQ7KHUHDUH
also four RCA line inputs.
)RUSKRQRWKHUHDUHWZRLQSXWV%HVXUHWRXVHWKHFRUUHFWRQHRWKHUZLVHOHYHOZLOOEHDHFWHGDQGWUHEOHUHVSRQVHPD\EH
altered. The MM input is suitable for turntables using moving-magnet and high-output moving-coil phono cartridges. The
MC input uses input impedance and gain tailored to low-output moving-coil cartridges. As well, connect the ground wire
from the turntable to the screw terminal next to the phono inputs to prevent excessive hum.
7KHVXEZRRIHUMDFNVDUHODEHOOHGȊ/ȋDQGȊ5ȋEXWLIWKHV\VWHPXVHVRQHVXEZRRIHULWFDQEHFRQQHFWHGWRDQ\VXEZRRIHU
output jack.
2.4 LOCAL AREA NETWORK
$QHWZRUNFRQQHFWLRQLVUHTXLUHGIRUFRQȴJXULQJ$QWKHP5RRP&RUUHFWLRQRUXVLQJΖ3FRQWURO6LPSO\FRQQHFW\RXUURXWHU
using CAT5 cable.
2.5 12 VOLT TRIGGER
ΖIDQRWKHUV\VWHPFRPSRQHQWKDVDWULJJHULQSXWLWFDQEHDFWLYDWHGE\WKH675ΖQWHJUDWHG$PSOLȴHU&RQQHFWWKH675
ΖQWHJUDWHG$PSOLȴHUȇVWULJJHURXWSXWXVLQJDFDEOHZLWKPPPLQLSOXJV7KH675ΖQWHJUDWHG$PSOLȴHUSURYLGHVȵH[LEOH
trigger options. Through the setup menu, you can specify the conditions for enabling triggers.
2.6 INFRA RED
$QH[WHUQDOΖ5UHFHLYHUDOORZVWKHUHPRWHFRQWUROWREHXVHGIURPDQRWKHUORFDWLRQLQ\RXUKRPHȂFRQQHFWWKH675
ΖQWHJUDWHG$PSOLȴHUIURPDQH[WHUQDOΖ5KXEWRWKHΖ5Ζ1MDFN0RVWVWDQGDUGΖ5UHSHDWHUNLWVFDQEHXVHGEXWWRDYRLG
problems test compatibility before installing permanently.
2.7 POWER
&RQQHFWWKHSRZHUFRUGWRWKH675ΖQWHJUDWHG$PSOLȴHUDQGWKHSRZHUVRXUFH
CONNECTIONS

6
)RURSWLPXPSHUIRUPDQFHDQGHQMR\PHQW\RXU675ΖQWHJUDWHGVKRXOGEHSURSHUO\VHWXS7KLVPLJKWVHHPOLNHDORWRI
ZRUNDWȴUVWEHFDXVHRIWKHQXPEHURIPHQXRSWLRQVEXWPRVWVHWWLQJVGRQRWQHHGWREHFKDQJHGIURPWKHGHIDXOWV
The important ones relate to your input connections and speakers. If you’re using a subwoofer or subwoofers, Anthem
Room Correction will set crossovers and levels for a perfect blend with the main speakers. The rest of the settings
mostly relate to your preferences.
HOW TO NAVIGATE IN THE SETUP MENU
• Press Setup to enter or exit
• Press Up and Down arrows to move up and down on a list or to modify a selected item
• Press Right arrow or SelectWRVHOHFWDQLWHPRUWRVDYHDPRGLȴFDWLRQ
• Press LeftDUURZWRPRYHXSRQHPHQXOHYHORUWRFDQFHODPRGLȴFDWLRQ
TIPȂPRGLI\LQJLWHPVZKLFKKDYHPDQ\RSWLRQVHVSHFLDOO\WKHDOSKDQXPHULFFKDUDFWHUV
and symbols when renaming an input, is faster using the front panel volume control.
• Press Menu/Select two times to enter and
once to exit
• Use the Volume control to move up and down on a
list or to modify a selected item
• Press Next to select an item or to save
DPRGLȴFDWLRQ
• Press Prev to move up one menu level or
WRFDQFHODPRGLȴFDWLRQ
The help line at the bottom of the display will also guide you through various menu levels.
The display shows up to four menu selections at once, though in this section of the manual all menu items are shown
together for simplicity. The top menu contains these items:
Setup Menu
Speaker Setup
Bass Management
Listener Position
Level Calibration
Input Setup
Analog Input Levels
Preferences
Network/Remote
*HQHUDO&RQȴJXUDWLRQ
Save/Load Settings
System Info
•
•
•
•
T
T
a
a
Remote Control
SETUP
Front Panel

7
3.1 SPEAKER SETUP
1RUPDOO\RQO\RQHVSHDNHUFRQȴJXUDWLRQLVQHHGHGEXWPRUHDUHSURYLGHGIRULQVWDQWUHFDOORIVWRUHGVXEZRRIHU
RU$QWKHP5RRP&RUUHFWLRQVHWWLQJV
If you will be using the personal computer version of ARC, you can skip this menu since it will be set while the program
is running.
(DFKFRQȴJXUDWLRQFRQWDLQVWKLVVXEPHQX
PROFILE NAME
8VLQJWKHQDYLJDWLRQNH\VDQGYROXPHNQREHDFKSURȴOHFDQEHUHQDPHGXSWRFKDUDFWHUVORQJ1RWHWKDWWKHSURȴOH
QDPHLVEHVWVHWLQ$QWKHP5RRP&RUUHFWLRQ7DUJHWVSDQHOEHFDXVHGXULQJȴOHXSORDGWKHQDPHLQWKHPHQXLVRYHUZULWWHQ
by the one in ARC.
SUBWOOFERS
7KH675ΖQWHJUDWHG$PSOLȴHUDOORZVRQHRUPRUHVXEZRRIHUVWREHFRQQHFWHG
Although subwoofers are often thought of as something for home theater systems, their use is recommended for music
as well. A subwoofer normally plays bass that is louder, deeper, and less distorted than that of a full-range speaker, and it
can be positioned anywhere in the room to help cure resonances that otherwise make the bass sound bloated and lacking
GHȴQLWLRQ$QWKHP5RRP&RUUHFWLRQTXLFNO\DQGHDVLO\FUHDWHVSUHFLVHFDOLEUDWLRQDQGVHDPOHVVLQWHJUDWLRQZLWKWKHPDLQ
speakers, eliminating unnatural sounding transitions which often made subwoofers and main speakers sound disconnected
from one another regardless of the amount of time spent on tweaking.
The setting options are:
2ȂVHOHFWWKLVLIWKHUHLVQRVXEZRRIHULQWKHV\VWHPRUVSHDNHUSURȴOH
0RQRȂDPRQRPXVLFVLJQDOJHWVVHQWWRDOOVXEZRRIHUMDFNV$5&ZLOOPHDVXUHDQGFRUUHFWDOOWKHVXEZRRIHUVDVD
group. This is the generally recommended setting whether using one or more subs.
0RQRȂDPRQRPXVLFVLJQDOJHWVVHQWWRDOOVXEZRRIHUVEXW$5&ZLOOPHDVXUHDQGFRUUHFWWKHPVHSDUDWHO\IRUWKH
/DQG5RXWSXWMDFNV6HOHFWWKLVLI\RXLQWHQGWRFRQWUROWKHGHOD\GLVWDQFHDQGOHYHOVHSDUDWHO\IRUHDFKVXEZRRIHU
channel.
6WHUHRȂWKHEDVVIURPWKHPXVLFVRXUFHȇVOHIWFKDQQHOZLOOEHVHQWWRWKH/VXEZRRIHURXWSXWDQGWKHEDVVIURPWKH
ULJKWFKDQQHOZLOOJRWRWKH5RXWSXW$5&ZLOOPHDVXUHDQGFRUUHFWWKH/DQG5VXEVLQGLYLGXDOO\6HOHFWWKLVLI\RXKDYH
a subwoofer next to each main speaker and would like for them to use a stereo bass signal, especially if the crossover
frequency will be set closer to upper bass where the sound becomes directional.
Speaker Setup
&RQȴJ
&RQȴJ
&RQȴJ
&RQȴJ
Speaker Edit
1DPH &RQȴJ
Subwoofers Off

8
3.2 BASS MANAGEMENT
In this menu, information about your speakers is used to optimize bass performance.
First, set your subwoofer’s frequency control to its highest frequency since the bass manager will determine how much upper
EDVVLVVHQWΖI\RXUVXEZRRIHUKDVDFRQWRXUFRQWUROVHWLWWRȵDWLI\RXZLOOEHXVLQJ$QWKHP5RRP&RUUHFWLRQΖILWKDVD
SKDVHFRQWUROVHWLWWRDQGLILWKDVDSRODULW\VZLWFKVHWLWWR1RUPDODV\RXȇOOEHDEOHWRFRQWUROSKDVHDQGSRODULW\IURP
your listening chair and hear changes instantly.
The bass manager divides the audio range into two bands suitable for subwoofer/satellite speaker systems. The result is
WKDWWKHPDLQVSHDNHUVGRQȇWQHHGWRSOD\EDVVDVORXGO\RUDVGHHSO\VLQFHLWJHWVSLFNHGXSE\WKHVXEZRRIHU1RWHWKDWD
FURVVRYHUGRHVQRWVXGGHQO\FXWIUHTXHQFLHVLQDFOLOLNHSURȴOHEXWUROOVWKHPRDFFRUGLQJWRDVORSHΖIVHWWR+]IRU
example, frequencies lower than 80 Hz are still played by the main speaker while transitioning them to the subwoofer.
+LJKOLJKWLQJ%DVV0DQDJHPHQWWKHQSUHVVLQJ6HOHFWGLVSOD\VWKLVPHQX
)RXUFRQȴJXUDWLRQVPD\EHVHWXS(DFKFRQWDLQVWKHIROORZLQJ
CROSSOVER FREQUENCY
7KHUDQJHLVWR+]LQ+]VWHSVRU2ZKLFKGLVDEOHVWKHFURVVRYHU
6HWWLQJWKHFURVVRYHUWRWKHORZHVWQXPEHURQ\RXUVSHDNHUȇVVSHFLȴFDWLRQSDJHLVXQOLNHO\WRSURYLGHWKHEHVWUHVXOW
Instead, setting it to twice this frequency or thereabout, which is an octave higher, ensures that the speaker’s woofer will still
play to its low frequency limit but at levels that present less of a struggle for it.
If you will be using the personal computer version of ARC, you do not need to select the crossover frequency since it will be
set while running the program.
SUBWOOFER POLARITY AND PHASE
Certain subwoofer positions can cause bass frequency cancellation. When the front speakers and subwoofer are out of
phase or misaligned, they work against each other resulting in weak and dislocated sounding bass. This can be corrected by
adjusting Phase and Polarity.
$VDJHQHUDOJXLGHVHW3RODULW\WR1RUPDOLIWKHVXEZRRIHULVQHDUWKHIURQWVSHDNHUVDQGWRΖQYHUWHGLIWKHVXEZRRIHULVQHDU
WKHEDFNRIWKHURRP&RPSDUH1RUPDOWRΖQYHUWHGDQGXVHWKHVHWWLQJWKDWSURYLGHVORXGHUEDVV&RQWLQXHȴQHWXQLQJWKH
crossover region using the Phase control which provides adjustment from 0 to 180 degrees in 5 degree increments.
Bass Management Edit
Crossover Off
Sub L Polarity Normal
Sub R Polarity Normal
Sub L Phase 0
Sub R Phase 0
Bass Management
&RQȴJ
&RQȴJ
&RQȴJ
&RQȴJ

9
3.3 LISTENER POSITION
Through these settings, sound coming from all speakers is coordinated to reach the listening area at the same time. This
way, proper imaging is achieved. The channel with the greatest distance setting will have no delay while channels with
shorter distance settings will be delayed accordingly.
'LVWDQFHVPD\EHVHWEHIRUHRUDIWHUUXQQLQJ$5&$5&GRHVQRWVHWGLVWDQFHV
7KHVHVHWWLQJVDUHGLVSOD\HGIRUHDFKFRQȴJXUDWLRQ
For measurement units, select feet or metres and enter the distance between your primary listening area and each speaker.
5DQJHLVWRȇȋLQLQFKLQFUHPHQWVRUWRPLQFPLQFUHPHQWV
Listener Position
&RQȴJ
&RQȴJ
&RQȴJ
&RQȴJ
Listener Position Edit
Units Feet
6XE/HIW ȇȋ
6XE5LJKW ȇȋ
)URQW/HIW ȇȋ
)URQW5LJKW ȇȋ

10
3.4 LEVEL CALIBRATION
/HYHO&DOLEUDWLRQXVHVLQWHUQDOO\JHQHUDWHGWHVWQRLVHVWRPDWFKVSHDNHURXWSXWOHYHOVDWWKHOLVWHQLQJSRVLWLRQLIXVLQJDQ
63/PHWHUIRUFDOLEUDWLRQ
If using Anthem Room Correction, you can skip this menu because levels will be calibrated during measurement.
7KHVHVHWWLQJVDUHGLVSOD\HGIRUHDFKFRQȴJXUDWLRQ
7RSOD\WKHWHVWQRLVHVHWLWWRȊ2QȋWKHQKLJKOLJKWDVSHDNHU
$VRXQGSUHVVXUHOHYHO63/PHWHUZLWK&ZHLJKWLQJLVUHFRPPHQGHGLIQRWXVLQJ$5&HVSHFLDOO\WRVHWWKHVXEZRRIHU
level because it is often set too high when calibrating by ear. Measure the sound pressure from the listening position while
SRLQWLQJWKHPHWHUXS+ROGLWDZD\IURP\RXUERG\WRSUHYHQWUHȵHFWLRQV$GMXVWHDFKFKDQQHOȇVOHYHOVRWKHPHWHUKDVWKH
same reading with all speakers.
7KHOHYHODGMXVWPHQWUDQJHLVWRG%LQG%LQFUHPHQWV<RXPD\QHHGWRDGMXVW\RXUVXEZRRIHUȇVLQSXWOHYHO
dial as a rough adjustment.
Level Calibration
&RQȴJ
&RQȴJ
&RQȴJ
&RQȴJ
Level Calibration Edit
Test Noise Off
Noise Level 0.0dB
Sub Left 0.0dB
Sub Right 0.0dB
Front Left 0.0dB
Front Right 0.0dB

11
3.5 INPUT SETUP
ΖQSXWVDQGOLVWHQLQJPRGHSUHVHWVDUHFRQȴJXUHGLQWKLVVHFWLRQ)URPWKHIDFWRU\DOOLQSXWMDFNVDUHFRQȴJXUHGDQGQDPHG
DFFRUGLQJO\EXW\RXPD\FKDQJHWKLVWRDQ\WKLQJIURPWRLQSXWFRQȴJXUDWLRQV
7RDGGDQLQSXWDWWKHHQGRIWKHOLVWKLJKOLJKW$GGΖQSXWDQGSUHVV1H[W
7RLQVHUWDQLQSXWLQWKHPLGGOHRIWKHOLVWKLJKOLJKWΖQVHUWΖQSXWDQGSUHVV1H[W7KHGLVSOD\ZLOOJXLGH\RXWKURXJKWKH
remaining steps.
7RGHOHWHDQLQSXWKLJKOLJKW'HOHWHΖQSXWDQGSUHVV1H[W7KHGLVSOD\ZLOOJXLGH\RXWKURXJKWKHUHPDLQLQJVWHSV
7KHVHVHWWLQJVDUHGLVSOD\HGIRUHDFKFRQȴJXUDWLRQWKRXJKDSKRQRLQSXWLVVKRZQKHUHEHFDXVHLWXVHVDOOPHQXLWHPV
Input Setup
&RD[LDO
&RD[LDO
2SWLFDO
2SWLFDO
AES/EBU
USB
5&$
5&$
5&$
5&$
Phono MM
Phono MC
XLR
Add Input
Insert Input
Delete Input
Input Setup Edit
Name Phono MC
Input Jack Phono MC
&RQYHUW$QDORJ
6SHDNHU3URȴOH &RQȴJ
ARC Yes
Mode Stereo
5XPEOH)LOWHU +]

12
INPUT NAME
(DFKLQSXWFDQEHUHQDPHGXSWRFKDUDFWHUVORQJ7REHJLQHGLWLQJSUHVV1H[W7KHYROXPHNQRELVWKHIDVWHVWPHDQV
RIFKDQJLQJFKDUDFWHUV8VHWKH1H[WEXWWRQWRPRYHWRWKHQH[WFKDUDFWHUDQGZKHQȴQLVKHGUHQDPLQJVHOHFWWKHJUHHQ
FKHFNPDUN7RFDQFHOHGLWLQJSUHVV3UHYWRVHOHFWWKHUHG;
([DPSOHȂ5HQDPHȊ2SWLFDOȋWRȊ6HUYHUȋ
ȏ +LJKOLJKWȊ1DPHȋDQGSUHVV1H[W7KHȴUVWFKDUDFWHUZLOOKDYHDER[DURXQGLW
ȏ 8VHWKHXSGRZQEXWWRQVRUYROXPHNQREWRFKDQJHȊ2ȋWRȊ6ȋ
ȏ 8VHWKH3UHY1H[WEXWWRQVWRPRYHWRHDFKUHPDLQLQJFKDUDFWHUDQGFRPSOHWHWKHUHQDPLQJ
• Move the box to the green checkmark to save the changes.
INPUT JACK
6HOHFWWKHFRQQHFWLRQWREHXVHGȂ&RD[LDO&RD[LDO2SWLFDO2SWLFDO$(6(%886%5&$5&$5&$5&$3KRQR00
3KRQR0&;/5
CONVERT ANALOG
%\GHIDXOWDQDORJLQSXWVDUHFRQYHUWHGWRELWN+]XVLQJDKLJKTXDOLW\$'FRQYHUWHUWRDOORZ$QWKHP5RRP&RUUHFWLRQ
EDVVPDQDJHPHQWGLVWDQFHFDOLEUDWLRQEDVVWUHEOHFRQWUROVOLVWHQLQJPRGHVDQGUXPEOHȴOWHUΖIWKLVVHWWLQJLVFKDQJHGWR1R
signal processing is bypassed and only level adjustment remains.
SPEAKER PROFILE
6HOHFWWKHSURȴOHWRXVHZLWKWKLVLQSXW
ANTHEM ROOM CORRECTION
7KH$5&PHDVXUHPHQWSURFHVVGHVFULEHGODWHUZLOOWXUQWKLVRQ7RGLVDEOHURRPHTXDOL]DWLRQDIWHUZDUGFKDQJHWKLVWRȊ1Rȋ
ΖIDPHDVXUHPHQWȴOHLVQȇWORDGHGWKLVPHQXLWHPLVJUD\HG
LISTENING MODE PRESET
%\GHIDXOWWKHRXWSXWLVLQVWHUHREXWRQHRIWKHRWKHUVHWWLQJVPD\LPSURYHWKHVRXQGRIROGUHFRUGV7KHPRGHFDQEHFKDQJHG
RQWKHȵ\EXWLQWKLVPHQX\RXFDQDVVLJQDSUHVHWDFFRUGLQJWRLQSXWFRQȴJXUDWLRQ
- StereoȂWKLVLVWKHGHIDXOWDQGGRHVQRWDOWHUWKHFKDQQHOPL[
- MonoȂWKLVEOHQGVWKHOHIWDQGULJKWFKDQQHOVDQGFDQEHXVHIXOZKHQSOD\LQJPRQRUHFRUGVZLWKDVWHUHRFDUWULGJH
:LWKRXWWKLVVWHUHRQRLVHȵDQNLQJPRQRPXVLFFDQEHGLVWUDFWLQJ
- Both = LeftȂWKLVVHQGVWKHOHIWLQSXWWRERWKFKDQQHOVDQGFDQEHXVHIXOZKHQSOD\LQJDPRQRUHFRUGZLWKDVWHUHR
cartridge when the left groove wall has less wear and sounds better than the right groove wall. This is also useful with
sources that have only one output connector.
- %RWK 5LJKWȂOLNHDERYHEXWIRUWKHULJKWFKDQQHO
- Last UsedȂVHOHFWWKLVWRGLVDEOHSUHVHWVDQGPDNHVHOHFWLRQVHQWLUHO\RQWKHȵ\
RUMBLE FILTER
8VHWKLVWRUROORORZIUHTXHQF\QRLVHEHORZWKHVSHFWUXPRIWKHPXVLFZKHQXVLQJDWXUQWDEOH6HOHFWDIUHTXHQF\IURP
WR+]LQ+]LQFUHPHQWV7RGLVDEOHWKHUXPEOHȴOWHUVHOHFW2

13
3.6 ANALOG INPUT LEVELS
Through this menu, unwanted changes in volume when switching to or from an analog source can be prevented. This is
HVSHFLDOO\XVHIXOIRUVRPH;/5VRXUFHVWKDWSURGXFHKLJKHUWKDQW\SLFDORXWSXWOHYHODQGIRUWKHSKRQRLQSXWVVLQFHFDUWULGJH
output levels vary considrerably between models.
7KHDGMXVWPHQWUDQJHIRUUDLVLQJRUORZHULQJWKHLQSXWOHYHOLVWRG%LQG%LQFUHPHQWV
3.7 PREFERENCES / LINE OUTPUT
Here you can set preferences as listed.
DISPLAY BRIGHTNESS
6HWSUHIHUUHGIURQWSDQHOEULJKWQHVVEHWZHHQ0D[+LJK0HGLXP/RZRU2
FRONT PANEL WAKE-UP
:KHQDEXWWRQLVSUHVVHGWKHGLVSOD\FDQJRWRDEULJKWHUOHYHOIRUVHFRQGVȂVHOHFW0D[+LJK0HGLXPRU/RZ
DISPLAYED INFO
%\GHIDXOWRQO\WKHYROXPHLVGLVSOD\HG6HOHFWȊ$OOȋWRDGGWKHLQSXWLQSXWIRUPDWPRGHDQG$5&VWDWXVWRWKHGLVSOD\
MUTE LEVEL
:KHQ0XWHLVSUHVVHGVRXQGFDQEHPXWHGRUORZHUHGWREDFNJURXQGOHYHO6HOHFWIURP0XWHGG%G%RUG%
MAXIMUM VOLUME
This setting allows you to limit the volume to avoid damaging equipment and/or hearing.
POWER-ON VOLUME
The volume will be at this level when the unit is turned on. To power-on at the last used volume, set the volume preset
EHORZWRPDNH/DVW8VHGDSSHDU
POWER-ON INPUT
7KHLQSXWZLOOEHWKHDVVLJQHGRQHRU/DVW8VHGZKHQWKHXQLWLVWXUQHGRQ
MUTE LINE OUT
If using a recording device, select the input that the recorder’s output is connected to. This prevents the recorder’s
output from being fed back to its input, which can result in a loud noise.
Analog Input Levels
5&$ G%
5&$ G%
5&$ G%
5&$ G%
Phono MM 0.0dB
Phono MC 0.0dB
XLR 0.0dB
Preferences
Display Brightness Medium
'LVSOD\:DNHXS +LJK
Displayed Info Volume
Mute Level Muted
Maximum Volume 6.0dB
3RZHU2Q9ROXPH G%
Power-On Input Last Used
Mute Line Out None

14
NETWORK STATUS
This displays the unit’s IP address once connected to the local area network.
DEVICE NAME
This is the name that the unit broadcasts, and can be changed using up to 8 characters.
IP CONFIGURATION
6HWWLQJVLQWKLVVXEPHQXVKRXOGRQO\EHFKDQJHGE\DQHWZRUNDGPLQLVWUDWRU
MODE
6WDWLFΖ3VHWWLQJVWDNHHHFWRQFHWKLVLVFKDQJHGWR0DQXDO
RS-232 CONFIGURATION
)RUVHULDOFRQWUROVHOHFWEDXGUDWHIURPGHIDXOWDQGVHW
ȵRZFRQWURORQRURGHIDXOW
TRIGGER CONTROL
:KHQWKHXQLWȇVWULJJHURXWSXWLVFRQQHFWHGWRWKHWULJJHULQSXWRIDQRWKHUFRPSRQHQWVXFKDVDQDPSOLȴHULWFDQEHWXUQHG
RQRURDFFRUGLQJWRWKHWULJJHUȇVVHWXS9'&PD[P$
- 7ULJJHU&RQWUROȂVHOHFW0HQXWRFRQȴJXUHWULJJHUVYLDWKHVHWXSPHQXRU56Ζ3WRFRQWUROWKHWULJJHURXWSXW
through serial or IP commands.
- PowerȂZKHQVHWWR<HVWKHWULJJHUDFWLYDWHVZKHQWKHXQLWȇVSRZHULVWXUQHGRQ:KHQVHWWR1RWKHLQSXWOLVWDSSHDUV
DQGWKHWULJJHUFDQEHFRQȴJXUHGWRDFWLYDWHWKURXJKDQ\FRPELQDWLRQRILQSXWVHOHFWLRQ
REAR AND FRONT IR
This allows you to disable each of the infra-red inputs, which can be useful when the unit is connected to an IR repeater and
is receiving too many signals.
1RWHWKDWWKHPRPHQWWKDW\RXGLVDEOHWKHIURQWΖ5LQSXW\RXZLOOQRWEHDEOHWRFRQWUROWKHXQLWWKHWUDGLWLRQDOZD\IURPWKH
remote control. Re-enable it using the front panel buttons. If your remote control appears to not be working and you have
checked the batteries, check this menu next before contacting technical support.
3.8 NETWORK / REMOTE CONTROL
Network / Remote
6WDWXV
Device Name STR Int
,3&RQȴJXUDWLRQ
56&RQȴJXUDWLRQ
Trigger Control
Rear IR Off
Front IR On
,3&RQȴJXUDWLRQ
0RGH $XWR'+&3
,3
6XEQHW0DVN
Other manuals for STR
2
Table of contents
Other Anthem Amplifier manuals

Anthem
Anthem STATEMENT A2 User manual

Anthem
Anthem PVA 7 User manual

Anthem
Anthem MCA 20, MCA 30, MCA 50 User manual

Anthem
Anthem Integrated 2 User manual

Anthem
Anthem I225 User manual

Anthem
Anthem MCA SERIES User manual

Anthem
Anthem AVM 20 User manual

Anthem
Anthem MCA SERIES User manual

Anthem
Anthem PVA Series User manual

Anthem
Anthem PVA 7 User manual

Anthem
Anthem MCA 525 User manual

Anthem
Anthem MCA 20, MCA 30, MCA 50 User manual

Anthem
Anthem AVM 30 User manual

Anthem
Anthem PVA 2 User manual

Anthem
Anthem Statement M1 User manual

Anthem
Anthem Line 1 User manual

Anthem
Anthem STR User manual

Anthem
Anthem PVA 2 User manual

Anthem
Anthem MCA 525 User manual

Anthem
Anthem STR User manual