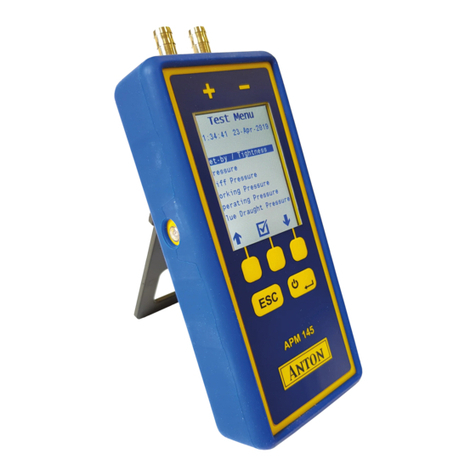
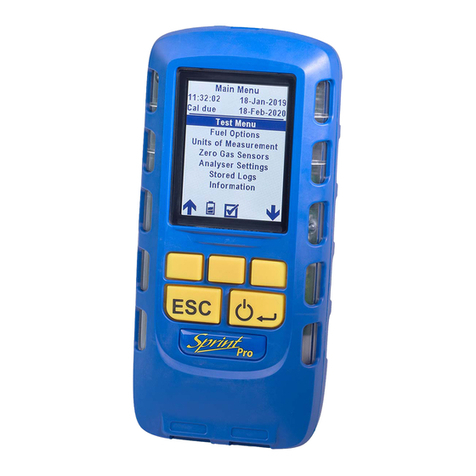
Anton Sprint eVo User manual

User Manual
M071021
July 2012
Issue 1
Multi-function Flue Gas Analyser
Tel: +44 (0) 870 428 0075
Fax: 870 428 0076
www.anton-group.com
+44 (0)
Anton Group
Tel: +44 (0) 870 428 0075
ANTON
V2.2i1.05

Safety information:
• Read and understand all instructions in the operation
section of this manual before use.
• Do not substitute components as this may impair safety
and invalidate warranty.
• Observe all warnings and instructions marked on the
unit and within this manual.
• If this product is not working properly, read the trouble-
shooting guide or call Anton.
• Ensure qualified service personnel change sensors and
provide maintenance and calibration.
Additional information:
Sprint is designed to support the working practices defined
in British Standard BS7967 and the Design Standards
EN50379, BS7927 for flue gas analysers. It is highly
recommended that users are fully conversant with BS7967
when using a flue gas analyser for servicing or installing a
boiler system.
Sprint offers a timed let-by/tightness test in accordance
with the UK's Institute of Gas Engineers' procedure IGE/11/
UP/1B.
Performing CO measurements
When performing any CO measurements ensure the unit
is zeroed in clean air in accordance with British Standard
BS7967. A suitable location for sampling clean air will be
outside of the building where the boiler system is installed.
1. Repair of this equipment and gas sensor replacement
shall be carried out by the manufacturer or certified
service centre in accordance with the applicable code
of practice.
2. If the equipment is likely to come into contact with
aggressive substances, then it is the responsibility of the
user to take suitable precautions that prevent it from
being adversely affected.
3. The equipment is designed for use in ambient tempera-
tures in the range -10°C to +50°C and should not be
used outside this range
4. Use only charger(s) supplied by Telegan/Anton.
5. Use only the appropriate Telegan/Anton supplied cables
for connection to the sockets on the instrument.
© Copyright Telegan Gas Monitoring 2012.
All rights are reserved. No part of the document may be photo-
copied, reproduced, or translated to another language without the
prior written consent of Telegan Gas Monitoring
Publication number: M071021
First edition: July 2012
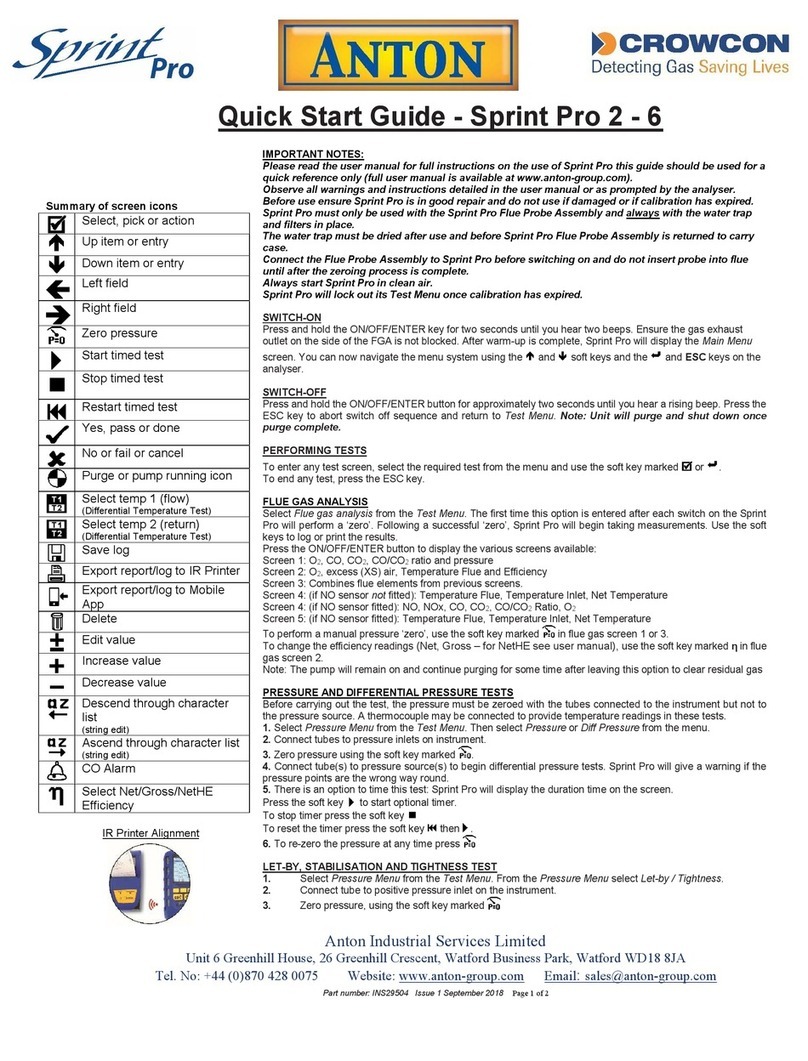
Summary of Screen Icons
þSelect, pick or action
éUp item or entry
êDown item or entry
çLeft field
èRight field
P=0 Zero pressure
u
Start
(Pressure & CO Room Safety tests)
Stop
(Pressure & CO Room Safety tests)
¢
tt
Restart
(Restart timer)
üYes, pass or done
ûNo or fail or cancel
Purge icon
Hold / pause readings
T2
T1 Select temp 1 (flow)
(Differential Temperature test)
T2
T1 Select temp 2 (return)
(Differential Temperature test)
<Save log
Print
Send XML report to Bluetooth®
(eVo3only)
Serial communications with PC in pro-
gress – please wait
Delete
>
Darker contrast
>
Lighter contrast
–
–
Restore default contrast
–
+
Edit value
+
Increment value
–
Decrement value
Decrement through character list
(String edit)
Increment through character list
(String edit)
Logging busy
CO Alarm
ηSelect Net/Gross/NetHE Efficiency
Bluetooth® is a trademark owned by Bluetooth SIG, Inc.
and licensed to Crowcon Detection Instruments Ltd

Contents
Sprint eVo Multi-function Flue Gas Analyser .........................2
Unpacking..............................................................................................2
Overview................................................................................................3
Probe connections..................................................................................4
Quickstart Guide...................................................................5
I. Operation ........................................................................14
1.1 Menu and operator button overview ..............................................14
II. Setting Up .....................................................................16
2.1 Configuration Options ...................................................................16
III. Battery Charging............................................................19
Charging the batteries..........................................................................19
IV. Maintenance and calibration..........................................20
4.1 Unit................................................................................................20
4.2 Water trap......................................................................................20
V. Specification ...................................................................21
VI. Accessories and spare parts ...........................................23
Accessory list........................................................................................23
VII. Logging ........................................................................24
VIII. Printing and Data Transfer............................................25
IX. Troubleshooting guide ...................................................26
Appendix I: Carbon Monoxide Room Safety Tests ...............28

2
Unpacking Sprint eVo1/eVo2/eVo3
Sprint eVo1, eVo2, eVo3
Multi-function Flue Gas Analyser
Thank you for purchasing the Sprint eVo1, eVo2, eVo3Multi-function Flue Gas
Analyser. Sprint has redefined flue gas analysis and will give you years of unpar-
alleled service and reliability.
There are three versions covered in this manual as follows:
Sprint eVo1Base model flue gas analyser
Sprint eVo2As eVo1with pressure and GEP capability
Sprint eVo3As eVo2with Bluetooth
Please read the instructions carefully before use. Keep the manual for future
reference.
Unpacking
Important: ensure unit is fully charged.
Remove the Sprint unit from the packaging. The Sprint accessories will be
located in the carry case. Check the contents are complete, you should have:
• Carrycase;
• Sprintunit;
• Mainsbatterychargerpowersupply;
• Flueprobe,includingwatertrap;
• A5userguide;
• UsermanualonCD;
• Certificateofcalibration;
• 2x1mtubesforpressure(Naturalgas).
Options to include:
• Gasleakprobe;
• Additionalthermocoupleprobes;
• In-carcharger;
• Infraredprinter.
Warning: Do not attempt to use any other charger power supply, with this
unit except the one(s) supplied. Failure to comply could invalidate the war-
ranty and may result in permanent damage to the unit.

3
Sprint eVo1/eVo2/eVo3Overview
Overview
USB connector
Connect gas leak
probe here.
Also used for
communications to PC
(eVo2and eVo3only)
Power jack
IR window
Printer output, senses ambient light to
control backlight.
Tip: to quickly activate backlight, cover this window
Note: eVo3has Bluetooth®communications
Exhaust exit
Warning: do not
inhale exit gas exhaust
or block exit
Thermocouple
sockets
K-type connectors
Flue sample inlet
Display
Showing start-up
splash screen
Battery icon
Three bars show
complete charge
ON/OFF/ENTER key
Press and hold button for two
seconds to switch on and switch
off Sprint unit. Use this key to
finish edits, save changes and
view next page of multiple
paged screens.
Soft keys
Use these unmarked buttons
to make selections from the
menu, start and stop tests,
print and store results.
See section Operation for more
details
ESCAPE key
Use this button to quit
tests and step back
through menus.
Pressure inlets (eVo2
and eVo3 only)
(-) (+)
Purge icon
Rotating icon shows
pump is purging
Tel: +44 (0) 870 428 0075
Fax: 870 428 0076
www.anton-group.com
+44 (0)
Anton Group
Tel: +44 (0) 870 428 0075
ANTON
V2.2i1.05

4
Probe connections Sprint eVo1/eVo2/eVo3
Probe connections
Flue gas analysis
Connect the flue probe to the flue sample inlet and the thermocouple to the
k-connector marked FLOW (Efficiency).
To measure flue draught pressure connect pressure tube to (-) Pressure inlet
marked draught. (eVo2and eVo3only)
Differential pressure, working pressure, operating pressure and let-by
and tightness test (eVo2and eVo3only)
Connect tubing to pressure inlet(s).
Differential temperature test
Connect one (or two) thermocouple probes to the k-type connectors. When
using one probe, Sprint will display a soft key option to switch between T1 and
T2 snapshot measuring points.
Room CO safety test
Connect CO room safety test probe (optional), where suitable, to the flue sam-
ple inlet.
Gas escape test (eVo2and eVo3only)
Connect gas leak probe to the USB connector.
Note: The pump may operate at different speeds or switch off depending on the test
being performed. This will vary the pitch of the sound from the pump and does not
indicate the pump is performing incorrectly.
Accessories
A magnet on the reverse of the instrument can be used to place the Sprint unit
in location on the boiler system for easy hands-free operation. WARNING:Take
care not to place items which may be sensitive to strong magnetic fields near this
magnet, eg credit cards or magnetic storage devices like computer hard drives.
Tip: see label
underneath unit
for details of probe
connections. Sprint
eVo1does not have
prssure inlets
(-) PRESSURE
(+) PRESSURE
FLUE SAMPLE
INLETS
FLOW
(EFFICIENCY)
TEMPERATURE
RETURN
(DRAUGHT)
Exhaust exit

5
Sprint eVo1/eVo2/eVo3Quickstart guide
Quickstart Guide
Switch On
Important: Please connect flue probe first before switching on your
Sprint unit, ensure the water trap is empty and is fitted in the right
direction. Do not insert probe in flue until after auto zero. Always start
in clean air. The gas exhaust outlet is not blocked.
Press and hold the ON/OFF/ENTER key for two seconds. Sprint will emit a few
rising beeps, performs a screen test and takes you directly to the Test Menu.
The instrument can now be used for Pressure and
Temperature functions. When entering Flue Gas Analysis
or CO Room Safety functions are selected the pump
switches on to purge any residual gas from the unit and
carry out a zero. On stabilisation of the instrument the
function can now be used.
Auto Zero
When entering Flue Gas Analysis or CO Room Safety options from the Test
Menu, Sprint will perform an Auto Zero. Ensure you are in clean air before
proceeding.
Tip: Auto zero Sprint outside of the building or well away from the heating appliance to avoid any
potential gases in the vicinity affecting the auto zero process.
Ensure the sensor reading is stable then press proceed þkey to begin auto
zero. The instrument will display the menu option choosen after a suc-
cessful auto zero.
Note: Sprint will switch off the pump when not performing tests or purging.
Test Menu
Fuel Options
Units of Measurement
Anayser Settings
Stored Logs
14:44:27
Cal due
Main Menu
08-Feb-2006
17-Jan-2007
Tip: see soft key
icon list on the
inside front cover
of this manual

6
Quickstart guide Sprint eVo1/eVo2/eVo3
Using the menu
From the Test Menu press the ESC key to display the Main Menu. Use the soft
keys to scroll, select and edit menu items (see icon list - inside front cover). Press
accept þto make a change or the ESC key to cancel. Press the ESC key to return
to the Main Menu.
Changing fuel, units and efficiency options
From the Main Menu select Fuel Options or Units of Measurement.
Fuel Options: select one of the following options: natural gas, LPG, heavy oil,
light oil, coal, wood, coke, Biomass, Bagasse and wood pellet dry.
Units of Measurement: select one of the following options:
Pressure units (eVo2and eVo3only):mbar, Pa, hPa, kPa, PSI, inWG,
mmWG, inHG or mmHG
Temperature scale: Centigrade or Fahrenheit
Efficiency: Net, Gross or NetHE*
*NetHE may be used for High Efficiency/Condensing boilers
NetHE not available on all fuel types
See section II. Setting up for more details.
Changing display and key pad settings
From the Main Menu select Analyser Settings and one of the following options:
Auto off timeout: use the soft keys to adjust or disable the timeout period.
Back light: use the soft keys to select one of the following options: off, dim or
bright.
Key click: use the soft keys to enable or disable audible key click.
Supervisor Settings: See below.
Changing date & time, report header and password
From the Main Menu select Analyser Settings>Supervisor settings: (if the
password has been set, enter the password now) select one of the following
options:
Set date & time: use the soft keys –and +to change units of date and time
and èto select hours, minutes, day, month and year. Press ESC to save.
Edit report header: use the soft keys éand êto select header text one or two
and
–
+
to edit text. Use the and keys to scroll through character lists

7
Sprint eVo1/eVo2/eVo3Quickstart guide
and character values. Press èto move on to the next letter in the header
text. Press ON/OFF/ENTER to delete all characters to the right. Press èto
move the cursor to the end of the text and þto accept change and return
to Edit report header screen. Press ESC to exit edit without saving changes.
Print Cal Due: Enable or disable printing of calibration due on reports.
Flue CO Alarm: During flue gas analysis a carbon monoxide alarm can be set
to activate at 300ppm of C sword: press the soft key
–
+
to edit password.
Use the and keys to scroll through character lists and character val-
ues. Press èto move on to the next letter in the password. Press èto
move the cursor to the end of the text and þto accept change and return
to Password screen. Press ENTER to store the change.
Retrieving stored logs
From the Main Menu select Stored logs and one of the following options:
Select a log: use the soft keys to scroll and select log.
Find a log by number: use the soft keys to scroll up and down the numbered
logs database.
Delete all logs: this option will delete all stored logs. Press accept þ'Are you
sure?' to clear logs or press ESC to cancel.
Switch off
Turn off unit in clean air and ensure any gas is purged from sensors. Press and
hold the ON/OFF/ENTER button for approximately two seconds. The power off
screen will be displayed and the pump will run to purge the sensors. The pump
will run for up to 30 or 40 seconds to purge unit if gas is present. Sprint will
normally switch off in 10 seconds. Press the ESC key to cancel the switch off
sequence.
Charging battery
Plug the supplied charger into the charger socket. The batteries will recharge in
four hours from flat. You may leave the unit on charge for longer periods, e.g.
overnight, without damaging the unit. A fully charged unit will give up to nine
hours of operation. A shorter charge time can be applied, such as 1/2 hour,
though it will give limited length of operation from that charge.

8
Performing tests Sprint eVo1/eVo2/eVo3
Performing tests
From the Main Menu select Test Menu. Refer to section III Operation for more
details.
1. Flue gas analysis
Before performing the flue gas analysis test, check the water trap is clean and
is upright (arrow should point in direction of gas flow). To begin test, select Flue
gas analysis from the Test Menu.
Sprint will switch carry out an auto
zero then if successful will begin
making measurements. Check the
fuel type displayed on the screen is
correct. Use the soft keys to log or
print the results.
Press the ON/OFF/ENTER button to
display the three screens available:
Screen 1: CO, CO2, CO/CO2
ratio. Pressure (eVo2and eVo3
only)
Screen 2: O2, excess (XS) air,
temperature and efficiency.
Final screen: combines elements from previous screens.
To perform a pressure zero (eVo2and eVo3only), use the soft key marked P=0
on the relevant screen
To scroll through the efficiency options, use the soft key marked η.
Warning: During testing, ensure the combined filter and water trap is not blocked or
full. Failure to do so may result in an error message.
ESC
14:44:27 08-Feb-2006
Flue Gas
15
Natural gas
CO
ppm
CO2
%
Ratio
mBar
4.8
0.003
0.00
P=0
1
Pressure
Tip: Press the
ON/OFF/ENTER
button to cycle
through the
screens.
Tip: The screen
number is
displayed here.
Tip: If # symbol
is displayed -
flue probe is
not in flue or
not connected.
Screen 1 Screen 2 Screen 3

9
Sprint eVo1/eVo2/eVo3Performing tests
Note: for personal safety a carbon monoxide (CO) alarm will activate at 300ppm. This
will deactivate when CO levels drop below 150ppm. This is to protect the user from
potential hazardous exhaust gas levels.
To end test press the ESC key.
2. Let-by and Tightness test (eVo 2 and eVo3only)
Let-by test
Before carrying out the test, the pressure must be zeroed with the tube con-
nected to the instrument but not the pressure source. Note: in these tests 'Diff
press' is the difference between start and finish pressures.
1. Select Pressure Menu from the Test Menu. From the Press Menu screen
options select Let-by / Tightness.
2. Connect tube to positive pressure inlet but not pressure source.
3. Zero pressure, use the soft key marked P=0 .
4. Connect tube to pressure source to begin pressure test.
5. Press the soft key
u
to start test. Sprint displays the duration time on
the screen.
6. To stop test press the soft key .
7. Press the soft key üto pass test and proceed to Stabilisation test.
You may fail the test by pressing the key ûto indicate test has failed
(you can print the results).
Stabilisation Test
1. Press the soft key
u
to start test. Sprint displays the duration time on
the screen.
2. To stop test press the soft key .
3. Press the soft key üto proceed to Tightness test.
14:44:27 08-Feb-2006
Let-by
Finish P2
mBar
Diff press
0.0
P=0
Start P1
mBar 0.0
Duration 00:00
mBar 0.0
14:44:27 08-Feb-2006
Let-by
Finish P2
mBar
Diff press
0.0
Start P1
mBar
0.0
Duration
00:25
mBar
0.0
14:44:27 08-Feb-2006
Let-by
Finish P2
mBar
Diff press
0.0
Start P1
mBar
0.0
Duration
00:54
mBar
0.0
Passed?
Screen 1 Screen 2 Screen 3

10
Performing tests Sprint eVo1/eVo2/eVo3
You may repeat the test by pressing the key û(you can print the
results).
Tightness Test
1. Press the soft key
u
to start test. Sprint displays the duration time on
the screen.
2. To stop test press the soft key .
3. Press the soft key üto pass test.
You may fail the test by pressing the key ûto indicate test has failed.
At the end of the tightness test you can log or print the results. Press the ESC
key to return to Press Menu.
Press ESC again to return to Test Menu.
3. Pressure, Differential Pressure, Working Pressure and
Operating Pressure tests (eVo 2 and eVo3only)
Before carrying out the test the pressure must be zeroed with the tubes con-
nected to the instrument but not the pressure source. A thermocouple may be
connected to provide temperature readings in these tests.
Screen 1 Screen 2 Screen 3 Screen 4
14:44:27 08-Feb-2006
Stabilisation
Finish P4
mBar
Diff press
0.0
P=0
Start P3
mBar 0.0
Duration 00:00
mBar 0.0
14:44:27 08-Feb-2006
Stabilisation
Finish P4
mBar
Diff press
0.0
StartP3
mBar
0.0
Duration
00:25
mBar
0.0
14:44:27 08-Feb-2006
Stabilisation
Finish P4
mBar
Diff press
0.0
StartP3
mBar
0.0
Duration
00:54
mBar
0.0
Stabilised?
Screen 1 Screen 2 Screen 3

11
Sprint eVo1/eVo2/eVo3Performing tests
1. Select Pressure Menu from the Test Menu. From
the Press Menu screen options select Pressure, Diff
Pressure. Working pressure or Operating Pressure.
2. Connect tube(s) to pressure inlet(s).
3. Zero pressure, use the soft key marked P=0 .
4. Connect tube(s) to pressure source(s) to
begin pressure test.
5. There is an option to time this test, Sprint
displays the duration time on the screen.
Press the soft key
u
to start test and timer.
6. To stop timed test press the soft key .
7. To restart test press the soft key
tt
.
To re-zero the unit, press P=0 .
Press the ESC key to return to the Press Menu screen. To perform the other
pressure tests repeat steps 2 to 7 above.
Press ESC to return to the Test Menu.
4. Differential temperature test
Sprint can perform a differential temperature test with one or two thermocou-
ple probes. To begin test, select Diff Temperature from the Test Menu. Check
the units displayed are the correct temperature scale. If no probes are con-
nected Sprint will display ####.
Two probe test
Connect both probes to the k-type connectors. See label on back of unit for
FLOW and RETURN. Place probes in position. The screen will display the tem-
perature of probe 1 and probe 2, and the differential
temperature.
Use the soft keys to log or print the results.
To end test press the ESC key.
Single probe test
When only a single probe is available, Sprint will display
an additional icon on the screen to represent the first and
second reading.
1. Place probe in position to make measurement T1.
2. Press the soft key icon T2
T1 to take a snapshot reading
of T1. (Do not remove probe until this snapshot is
taken.)
14:44:27 08-Feb-2006
Pressure
Pressure
mBar
Duration
0.0
00:00
P=0
Tip:
optional
timer
Tip: plug in the
Thermocouple
probe to view
temperature on
screen.
14:44:27 08-Feb-2006
RetT2
C
Diff temp
####
Flow T1
C####
C####
Temperature
T2
T1
T2
T1
Tip: this icon
will appear when
only one probe is
avaialble.

12
Performing tests Sprint eVo1/eVo2/eVo3
3. Move the probe into position to take second reading T2. The screen
will display the icon T2
T1 to show temperature reading T2 is being taken.
The screen will display the snapshot temperature, the live probe
temperature, and the differential temperature.
Use the soft keys to log or print the results.
To end test press the ESC key.
5. Room CO safety test
Ensure the unit has been zeroed in clean air before performing this test.
The instrument will proceed if already previously zeroed after switch on.
Note:ForfurtherdetailsonperformingRoomCOSafetyTests,seeAppendixI.
1. Select CO Room safety from the Test Menu. Sprint will display the
Appliance Menu. Select the appliance from the list.
The appliance will be displayed on the screen during the room CO
safety test.
2. Connect probe if required to the Sprint unit and place at the
recommended height. Refer to British Standard BS7967 if necessary.
3. The pump will switch on in readiness for test. Note: The sound of the
pump operating does not indicate the test has begun. Press the
u
soft key
to start test. During the test the screen will display the CO reading, peak
CO reading, duration of test and maximum allowed CO for the test.
The test will run for the required duration by appliance according to BS7967.
Sprint will emit an alarm if 30ppm (or 90ppm) threshold is exceeded. Sprint
is programmed with pass/fail criteria for this test. Refer to British Standard
BS7967 for further details on performing room CO safety tests.
When the minimum test period for an appliance has been reached (as defined
by BS 7967:2005 ) the ON/OFF/ENTER key can then be used to cycle through
12:57:24 23-Feb-2009
CO Room
4
Water heater (flueless)
CO
ppm
Peak CO
ppm
Allowed
of test
5
10
07.12
1
Duration
12:57:24 23-Feb-2009
CO Room
Time(Min)
2
12:57:24 23-Feb-2009
CO Room
3
ppm
1
2
5
4
4
of test
07.12
Duration
1
2
3
4
5
Time(Min)
4
4
####
####
####
of test
07.12
Duration
6
7
8
9
10
CO(ppm) CO(ppm)

13
Sprint eVo1/eVo2/eVo3Performing tests
the CO Room Safety screens. The test can be completed by pressing the soft
key to finish. Use the soft keys to log or print the results.
To stop test at any time, press the ESC key. Use the soft keys üor ûto select
'Quit test?'.
When printing Room CO safety test results Sprint will also provide data show-
ing for how long the recommended level of CO was exceeded. This is expressed
as hh:mm > allowed.
6. Gas escape test (eVo2and eVo3only)
Note: Battery power will be used at a higher rate under this test.
Select Gas Escape Detection from the Test Menu. Connect the Gas escape probe
(GEP) to the USB connetor, the light will illuminate on the probe. Sprint will
display a warning if the probe is not connected.
Sprint will display 'sensor stabilising' for approximately 30 seconds.
When the sensor is stable the unit will ask 'in clean air?' before zeroing.
Press üto zero the unit. Sprint will display a bar graph on the screen as gas
levels are monitored.
Place the probe in the area of inspection for several seconds before moving it
to other locations.
Sprint will emit continuous clicks like a Geiger counter. If higher gas levels are
detected the bar graph will increase in readings and the sounder will increase
in pitch.
Press ESC to quit the test.
As with many types of instrumentation the gas escape probe may be damaged
by impact. If the probe is dropped or suffers significant impact in another way
check its operation by first plugging it into the Sprint and confirming that it is
recognised by the analyser.
If this is successful select the gas escape mode and briefly apply a sample of gas,
for example from an unlit cooker ring. This will allow the user to verify whether
the sensor is working correctly or not. If the gas is not detected contact Telegan
or your local distributor to arrange for the probe to be serviced.
It is recommended good practice that the above check is carried out periodically
even if the user is not aware of the probe being exposed to impact.
If the Sprint detects a fault with the GEP it will display a warning advising that
the leak sensor is faulty and the test will be aborted.

14
Operation Sprint eVo1/eVo2/eVo3
I. Operation
Before using the Sprint flue gas analyser on any heating appliance installation,
ensure you are familiar with the working practices defined in the BS7967 stand-
ard which details how to perform certain tests and safety issues to consider.
Auto zero setting
The Sprint unit will require auto zero before performing any of the following
tests: Flue Gas Analysis and Room CO Safety test. All other options will be avail-
able on start up. Ensure all tubes and probes are connected before entering an
option that requires auto zeroing and zero outside in clean air.
Pump
Sprint runs the internal pump during purge and when certain tests are entered
into;andduringandaftersometests.Arotatingpurgeiconwillappearonthe
screen when purging. The speed and therefore the sound emitted by the
pump, may vary depending on the test being conducted. To save on the battery
life, Sprint will turn off the pump when it is not required.
When the pump is running ensure the exit gas exhaust is not blocked and do
not breath in the exhaust gases.
1.1 Menu and operator button overview
Sprint provides a large graphic LCD with blue backlight. Navigation and func-
tions are provided by three soft key buttons which change according to what
you are doing.
ESC
Use the soft keys to
navigate menus,
select, start and end
tests, change options
andselectactions.;
such as print, log
or zero
Use the escape key
to exit menus, exit
tests and step back
through screens
ON/OFF/ENTER switch.
Use this key to finish
edits, save changes
and view next page of
multiple paged screens.

15
Sprint eVo1/eVo2/eVo3Operation
After your Sprint unit has been switched on the display will show the Test Menu
screen ready for use. To display the Main Menu press the ESC key.
To enter a menu item, use the soft keys below the éand êscreen icons to
scroll the menu list and press the soft key underneath the þscreen icon to
select. Some menus also have their own submenu.
Press the ESC key to exit a menu, press ESC twice to return to the Main Menu
from a submenu.
The soft keys control the function displayed above them on the screen. These
will change depending on the test or menu, or if the ESC key is pressed.
The menu structure is shown below:
How to display unit serial number, identity and software
version
Press the ESC key from the Main Menu
Test Menu
Main menu
Flue Ga s
Analysis
Gas Escape
Detection
CO Room
Safety
Diff
Temperature
Pressure
Menu
Let-by / Tightness
Pressure
Diff Pressure
Appliance
Settings
Back light
Pressure
Units
Temperature
Logs
Select a log Find a log by number Delete all logs
Press ESC to go
to Main menu
Key clickAuto off
timeout
Supervisor
settings
Efficiency
Set date
& time
Edit report
header
Change
password
Print
Cal Due
Flue CO
alarm
evo2and eVo3only

16
Setting up Sprint eVo1/eVo2/eVo3
II. Setting Up
2.1 Configuration Options
Fuel Options:
Sprint displays the current fuel option on the screen. To change the fuel option
press the ESC key to enter the Main Menu and select Fuel Options. Use the soft
keys to scroll and select the desired fuel using ü. The new fuel option will be
displayed on the test screens.
Fuel options available are: natural gas, LPG, heavy oil, light oil, coal, wood,
wood pellet dry, coke, Biomass and Bagasse.
Note: NetHE only available for fuels natural gas, LPG, light oil and heavy oil.
From software versions i2.00, fuel types can be changed using Sprint PC Lite.
Units of measurement:
To change the units of pressure, temperature or efficiency press the ESC key to
enter the Main Menu and select Units of Measurement. Use the soft keys to
select the submenu and units for Pressure, Temperature or Efficiency.
Temperature units are: degrees Celsius (ºC) or degrees Fahrenheit (ºF).
Pressure units are: mBar, Pa, hPa, kPa, PSI, inWG, mmWG, inHG and mmHG.
Efficiency units are: Net, Gross or NetHE.
Note: the formulae and constants used for Gross and Net efficiency calcula-
tions are those specified in EN50379. In general it is Net efficiency which is
normally quoted. For modern condensing boilers the Net efficiency calculated
may exceed 100%. Sprint provides a condensing efficiency calculation via the
efficiency option NetHE. The result of this calculation takes into account the
recovered latent heat.
Analyser settings:
The Analyser settings menu allows you to alter the settings for the display, auto
off timeout, back light, key pad and Supervisor settings. To change any of these
settings press the ESC key to enter the Main Menu and select Analyser Settings.
Use the soft keys to select the submenus.
Auto off timeout
On the auto off timeout screen the number of minutes at which the unit will
automatically switch off is shown. Use the soft keys – and + to reduce or increase
the number of minutes. Press the þkey to accept the change or ESC to cancel.

17
Sprint eVo1/eVo2/eVo3Setting up
To disable Auto off timeout press – key until 'disabled' is displayed.
Back light
The back light can be set to four options: off, dim, bright or controlled. Use the
soft keys to scroll and select the option desired. Press the þkey to accept the
change or ESC to cancel.
Back light options are:
Off: switches the backlight off
Dim: lowers the light intensity
Bright: increases the light intensity
Controlled: Sprint monitors the ambient light level and adjusts the light
intensity accordingly.
Reports (eVo3only)
Allows selection of Printer (IR comms) or Bluetooth®. Use the soft keys to toggle
between these and the þkey to accept.
Key click
The Key click settings allows you to enable or disable the key pad from making
audible 'clicks' when pressed. Use the soft keys to select 'enabled' or 'disabled'
from the submenu. Press the þkey to accept the change or ESC to cancel.
Supervisor settings
Set date &time
On the Time & Date screen the current time and date are shown. Use the soft
keys – and + to alter the values of hours, minutes, day, month and year. Use the
èkey to select each unit. Press the ESC key to accept the change.
Edit report header
Use the soft keys éand êto select the report header text line one or two.
Press
–
+
key to edit text. The screen displays the character lists and highlights
the current list in use. Use the and keys to scroll through character val-
ues in each list and èto move on to the next letter in the header text. The
character lists are shown below.
Press ON/OFF/ENTER to delete characters to the right. Press èto move the cur-
sor to the end of the text and þto accept change and return to Edit report
header screen.
Print Calibration Due
Enable or disable printing of calibration due on reports.
CO Alarm
During flue gas analysis, a carbon monoxide alarm can be set to activate at
300ppm of CO or disabled.

18
Setting up Sprint eVo1/eVo2/eVo3
Change password
Press the soft key
–
+
to edit password. Use the and keys to edit or create
a password as described above in Edit report header. Press þto accept change
and return to Password screen. Press ON/OFF/ENTER to store the change.
When a password has been created, Sprint will display the Supervisor pass-
word screen on entering Supervisor settings.
! .. / !"# $% & ' ( ) * + , - _ / A .. Z Uppercase alphabet
0 .. 9 0123456789 a .. z Lowercase alphabet
: .. @ :;<=>?@ Space
Tip: It is a good idea to enter your name/company name and phone number to identify the
instrument and then set a password to prevent others changing these settings.
This manual suits for next models
3
Table of contents
Other Anton Measuring Instrument manuals