3
H
C
C
S
LED
Lampada 1 / Lamp 1 1 + |2 -
Lampada 2 / Lamp 2 3 + | 4 -
1
2
3
4
115V 230V AC
AC/DC CONNECTING BOX /
SCATOLINO DI CONNESSIONE
CAJA DE CONEXIÓN
ANSCHLUSSDOSE
BOÎTIER DE CONNEXION
СОЕДИНИТЕЛЬНАЯ КОРОБКА
manuale d’installazione - installation manual - manuel d’installation - installationsanleitung - manual de instalación - руководство по установке
Art. FILA
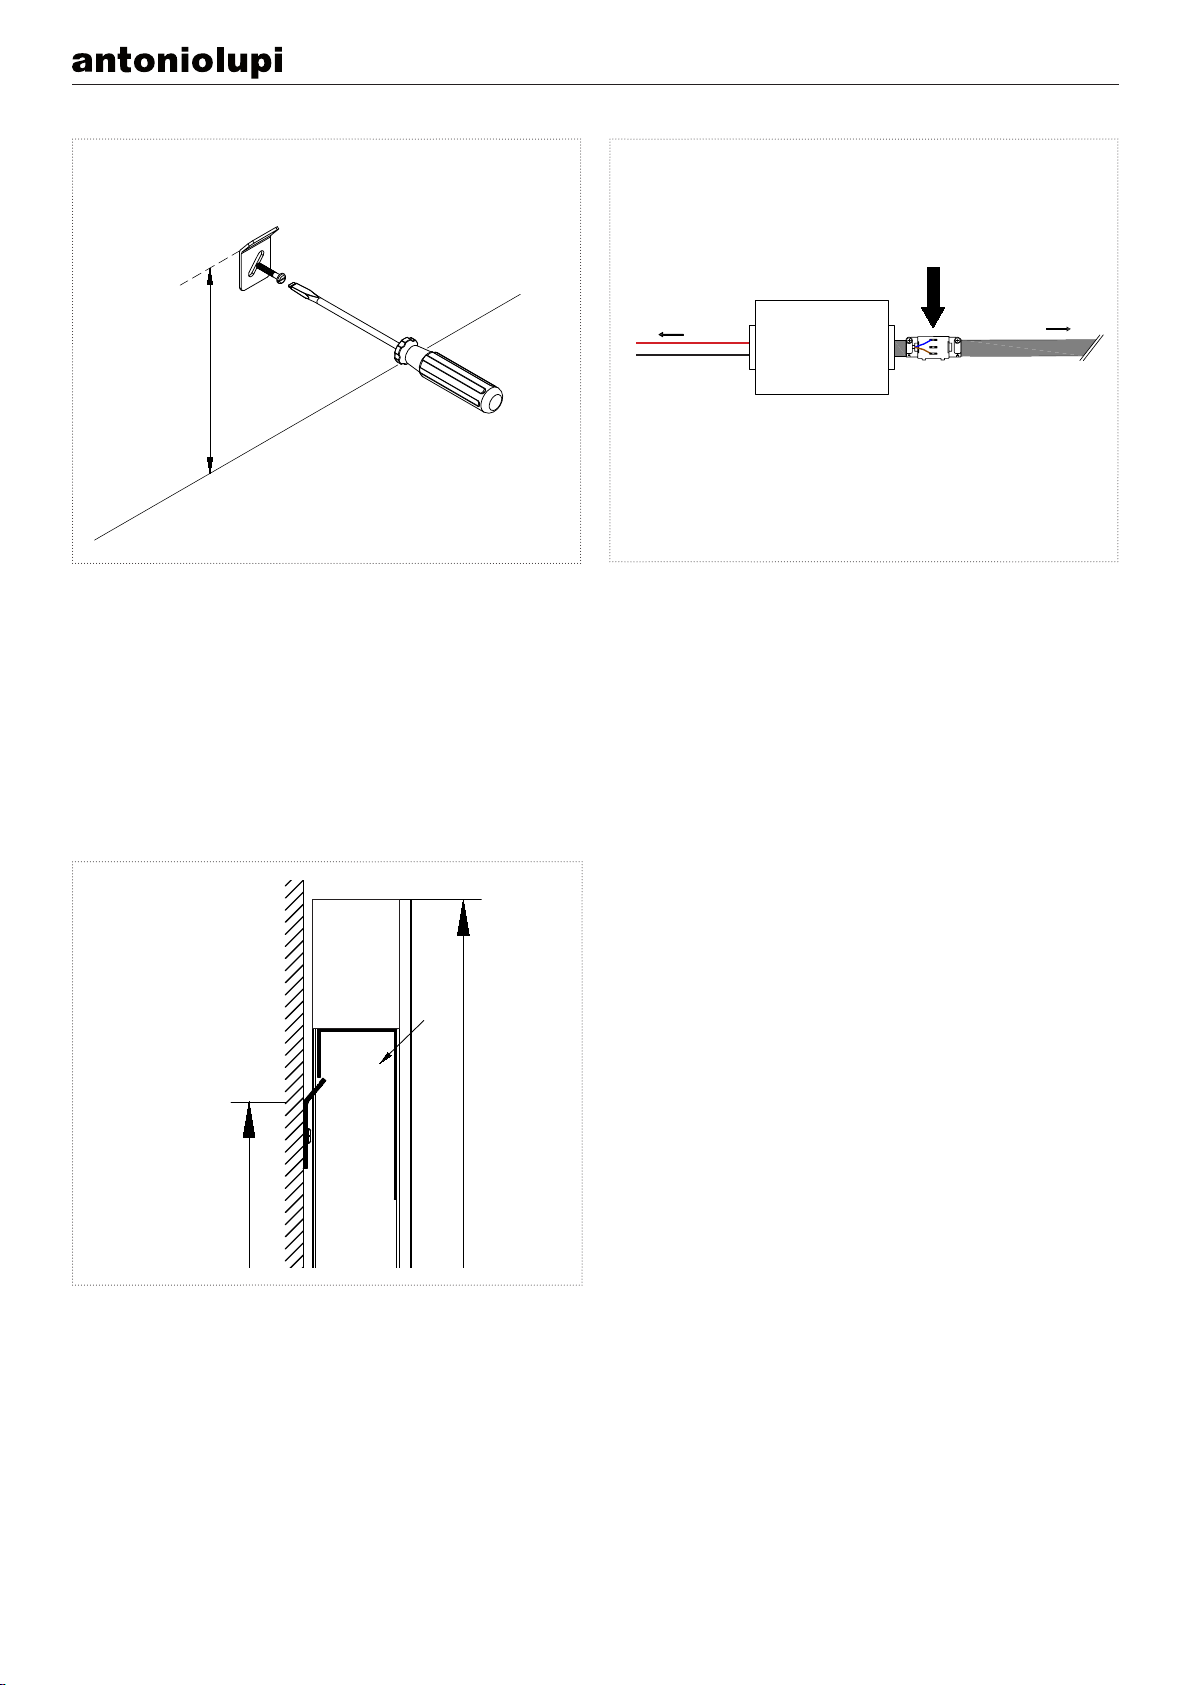
IT_3_ Eettuare il collegamento elettrico fra la rete ed il trasformatore
AC/DC, utilizzando lo scatolino di connessione in dotazione così come
indicato.
EN_3_ Make the electrical connection between the network and the AC
adapter / DC, using the small box of the supplied connection as indica-
ted.
FR_3_ Faire la connection de l’arrivée électrique au transformateur AC/
DC en utilisant la boite de connection fournie comme indiqué dans le
schéma.
ES_3_ Realizar la conexión eléctrica entre la red y el transformador AC/
DC, utilizando la caja de conexión suministrada como indicado.
DE_3_ Verbinden Sie denTransformator zum Stromnetz AC/DC verwen-
den Sie dazu die vorhandene Anschlussdose.
RU_3_ Подключите к электросети трансформатор AC/ DC, используя
соединительную коробку, которая входит в комплект так, как указано
IT_2_ Fissare la squadretta S all’altezza determinata, mettere la secon-
da squadretta a livella con la prima e ssarla a parete.
EN_2_ Fix the bracket S at the determined height, put the second bracket
in level with the rst and fasten it to the wall.
FR_2_ Installer le support S à la hauteur choisie et mettre le deuxième
support de niveau avec le premier et le xer.
ES_2_ Fijar la escuadra S a la altura marcada, nivelar la segunda escua-
dra según la posición de la primera y jarlas a pared.
DE_2_ Fixieren Sie die Platte S zur gegebenen Höhe; versichern Sie
sich, dass die zweite Platte waagerecht mit der ersten ist; befestigen Sie
beide Platten an der Wand.
RU_2_ Прикрепите кронштейн S на обозначенной высоте, выставьте
второй кронштейн по уровню с первым и прикрепите его к стене.
IT_4_ Appendere la specchiera.
EN_4_ Hang the mirror
FR_4_ Installer le miroir.
ES_4_ Colgar el espejo a pared.
DE_4_ Hängen Sie den Spiegel an die Wand.
RU_4_Повесьте зеркало.