manuals.online logo
Brands
  1. Home
  2. •
  3. Brands
  4. •
  5. ANTUMBRA
  6. •
  7. Mixer
  8. •
  9. ANTUMBRA 6MIX Instruction Manual

ANTUMBRA 6MIX Instruction Manual

Other manuals for 6MIX

1

Popular Mixer manuals by other brands

Oster FPSTSM2710 instruction manual

Oster

Oster FPSTSM2710 instruction manual

Aviom A-16II user guide

Aviom

Aviom A-16II user guide

Varimixer V30K Spare part and operation manual

Varimixer

Varimixer V30K Spare part and operation manual

Kohler Stillness K-T954 installation guide

Kohler

Kohler Stillness K-T954 installation guide

Wolf Gourmet WGSM300 Use & care guide

Wolf Gourmet

Wolf Gourmet WGSM300 Use & care guide

Team International TEAM MS 17 operating instructions

Team International

Team International TEAM MS 17 operating instructions

MULTIQUIP Whiteman WM45E Operation and parts manual

MULTIQUIP

MULTIQUIP Whiteman WM45E Operation and parts manual

KitchenAid KSM7581BZ0 Instructions and recipes

KitchenAid

KitchenAid KSM7581BZ0 Instructions and recipes

Jay-Lor 5050 owner's manual

Jay-Lor

Jay-Lor 5050 owner's manual

privileg MJ-BL1051W user manual

privileg

privileg MJ-BL1051W user manual

Fakir CULINA CHEF user manual

Fakir

Fakir CULINA CHEF user manual

Termozeta Bellacucina Instruction booklet

Termozeta

Termozeta Bellacucina Instruction booklet

Thinky ARE-250 instruction manual

Thinky

Thinky ARE-250 instruction manual

Midas XL4 manual

Midas

Midas XL4 manual

bianco PURO 4 manual

bianco

bianco PURO 4 manual

better chef IM-815WC Use and care book

better chef

better chef IM-815WC Use and care book

ALLEN & HEATH GR1 user guide

ALLEN & HEATH

ALLEN & HEATH GR1 user guide

Buffalo CP921 instruction manual

Buffalo

Buffalo CP921 instruction manual

manuals.online logo
manuals.online logoBrands
  • About & Mission
  • Contact us
  • Privacy Policy
  • Terms and Conditions

Copyright 2025 Manuals.Online. All Rights Reserved.

ANTUMBRA
6MIX
BUILDING INSTRUCTIONS
PCB V1.0
01. BUILD NOTES
Before you start building look through the build manual
so that you’ll be familiar with the building process and
you won’t run into any surprises!
02. BUILD
00. Orient the PCB as seen on the left
01. Solder the three TL072s
(Check their orientation)
02. Solder the two 1n5819 diodes
(Check their orientation)
03. Solder the 18x 100k resistors
TL072
TL072
TL072
TL072
TL072
TL072
TL072
TL072
TL072
104
104 104 104 104
104104104
104
104
104
104
104
104
104
104
104
104
00 01 02 03
02. BUILD
04. Solder the two 180R resistors
05. Solder the two 470R resistors
06. Solder the two 1k resistors
07. Solder the two 10R resistors
TL072
TL072
TL072
104
104 104 104 104
104104104
104
104
104
104
104
104
104
104
104
104
181 181
TL072
TL072
TL072
104
104 104 104 104
104104104
104
104
104
104
104
104
104
104
104
104
181 181
471
471
TL072
TL072
TL072
104
104 104 104 104
104104104
104
104
104
104
104
104
104
104
104
104
181 181
471
471
102
102
TL072
TL072
TL072
104
104 104 104 104
104104104
104
104
104
104
104
104
104
104
104
104
181 181
471
471
102
102
100
100
04 05 06 07
02. BUILD
08. Solder the three 100nF capacitors
09. Solder the two 10uF capacitors
(Make sure to match up it’s orientation with the silk-
screen drawing)
10. Turn the PCB around
11. Solder the eight SMD LEDs (this is optional)
(The marker on the LED should point to the line on
the PCB)
TL072
TL072
TL072
104
104 104 104 104
104104104
104
104
104
104
104
104
104
104
104
104
181 181
471
471
102
102
100
100
TL072
TL072
TL072
104
104 104 104 104
104104104
104
104
104
104
104
104
104
104
104
104
181 181
471
471
102
102
100
100
08 09 10 11
02. BUILD
12. Solder the 2x5 pin power header
13. Solder 1x3 pin header (this is optional)
14. Solder 2x3 pin header
15. Turn the PCB back around
TL072
TL072
TL072
104
104 104 104 104
104104104
104
104
104
104
104
104
104
104
104
104
181 181
471
471
102
102
100
100
12 13 14 15
02. BUILD
DO NOT SOLDER YET!
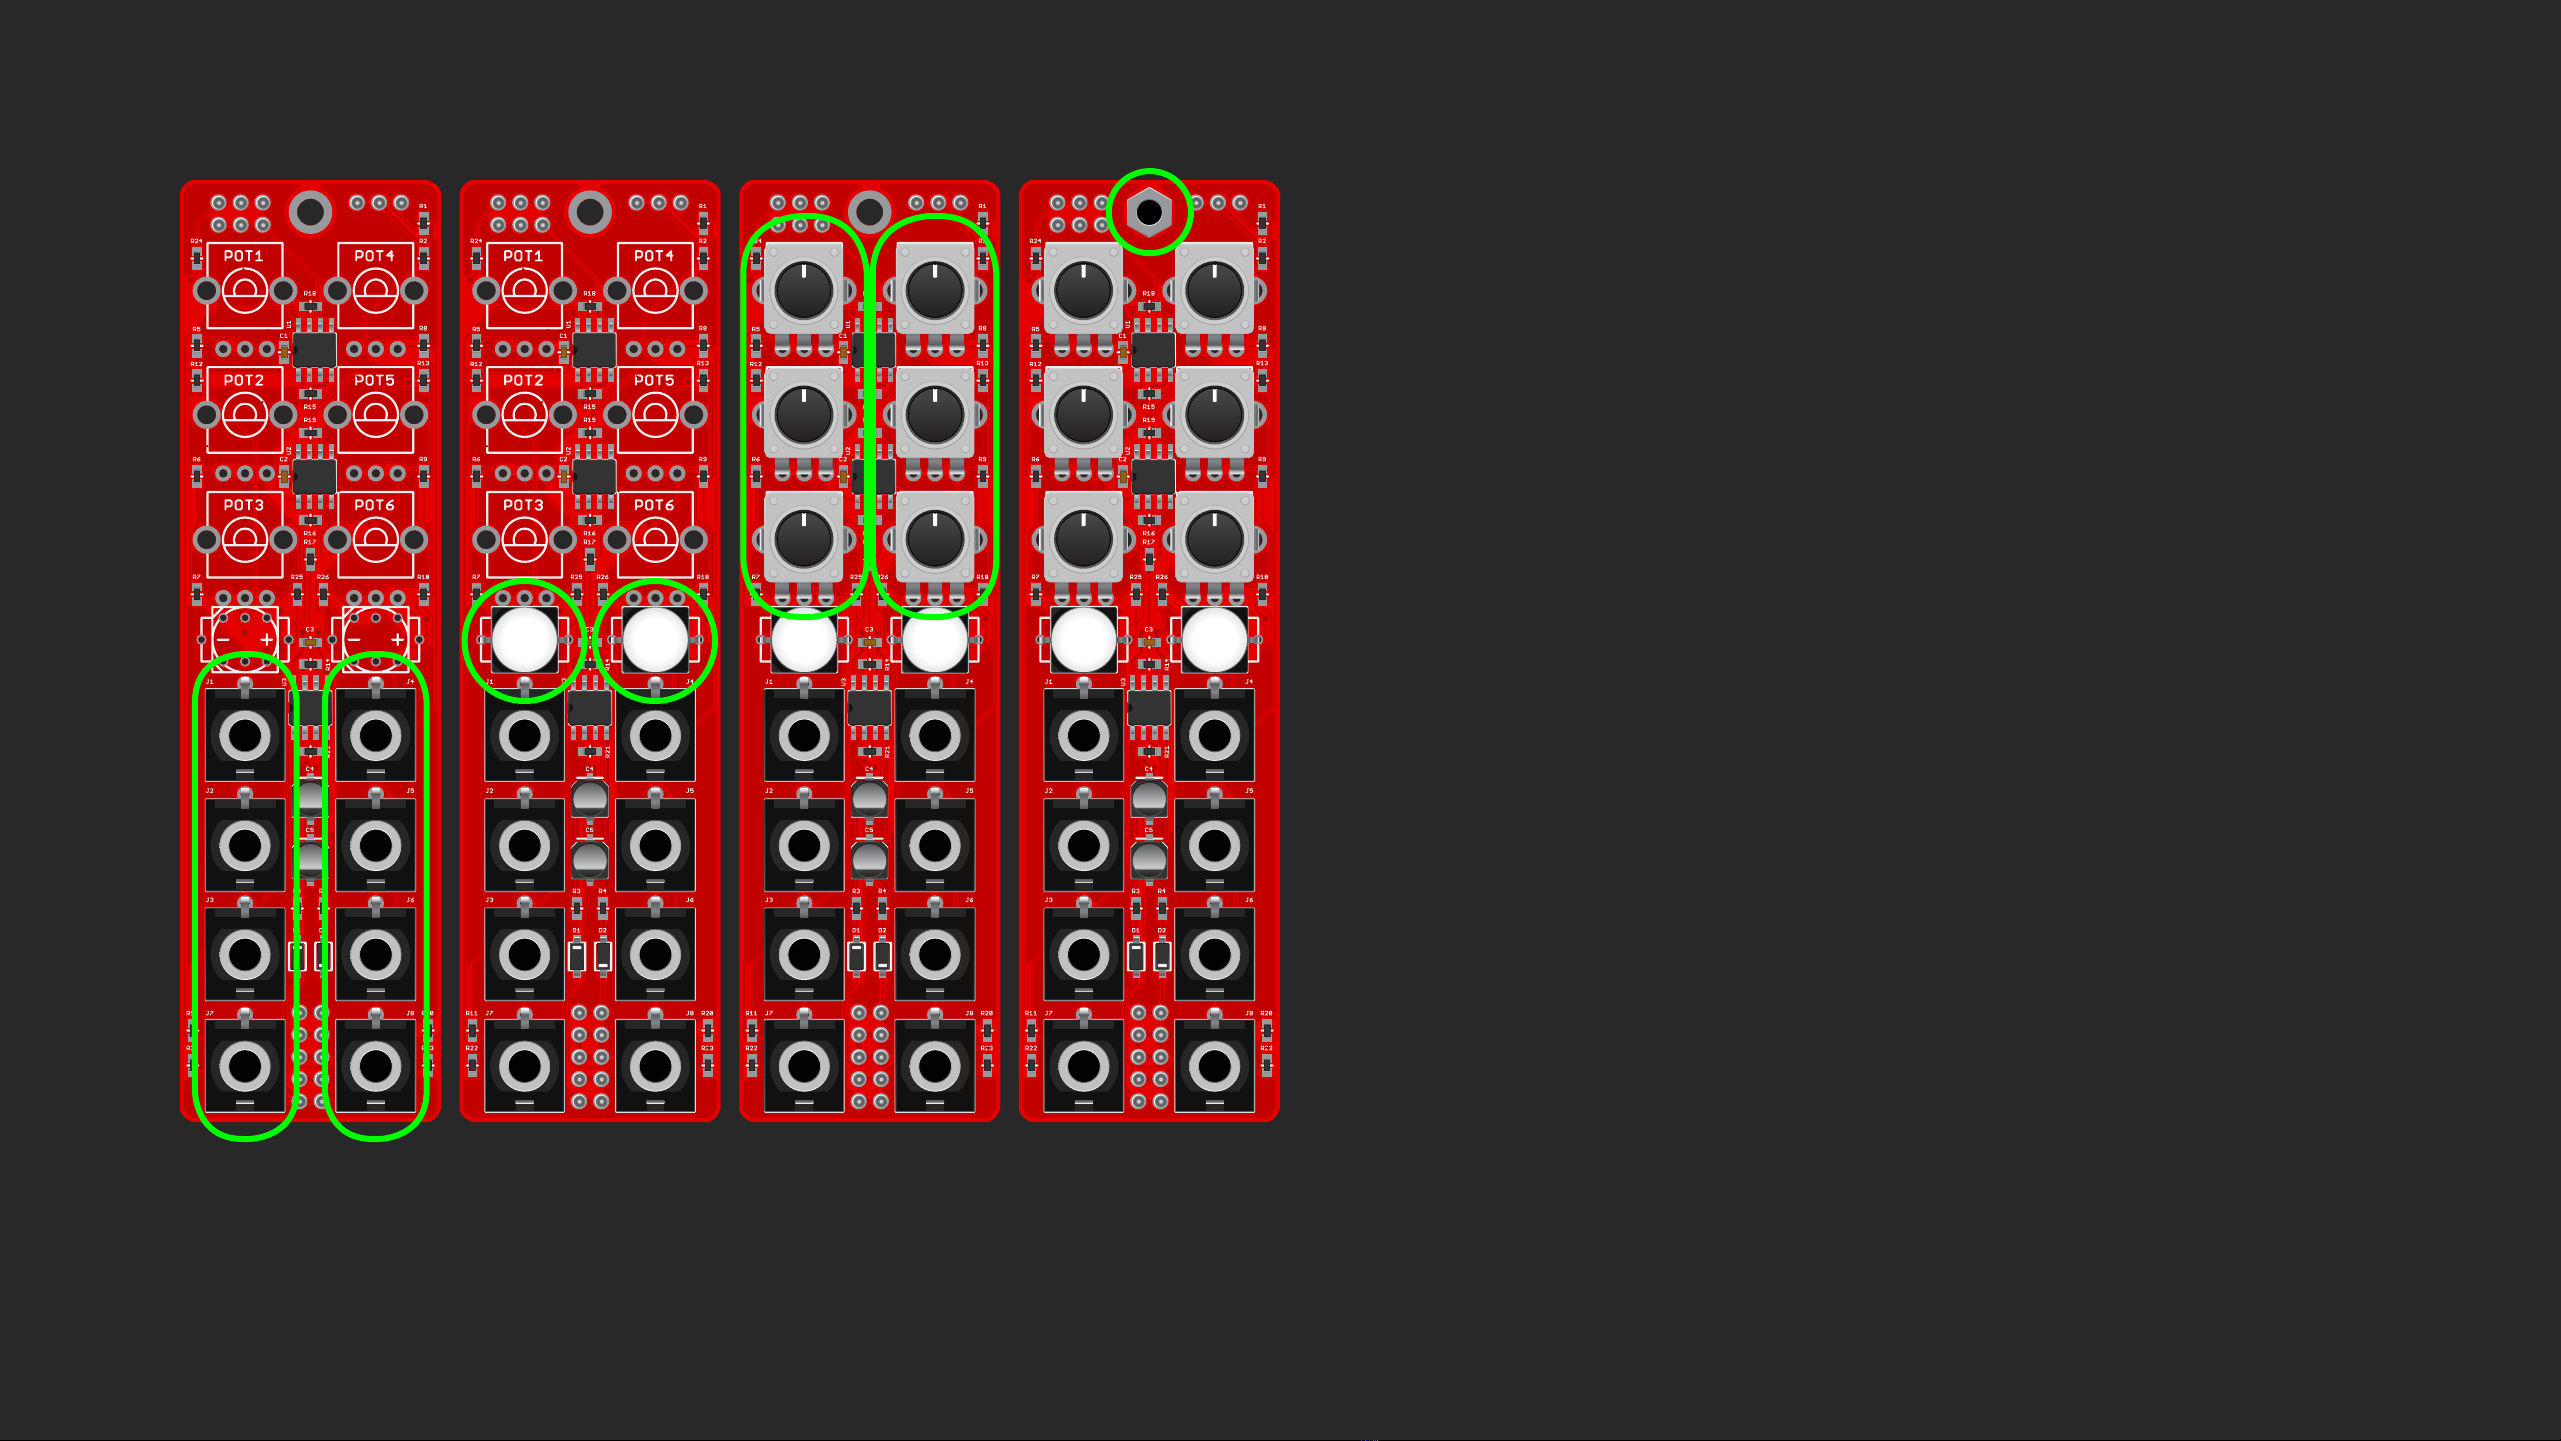
16. Place the eight jacks
17. Place the two buttons
(Their orientation is important, there are two notch-
es on one side, they should align up with the notches
on the drawing. Alternatively, the dot on it should
point towards the - sign on the PCB)
18. Place the six B10k pots
19. Place the spacer and screw a screw in it from the
other side.
TL072
TL072
TL072
104
104 104 104 104
104104104
104
104
104
104
104
104
104
104
104
104
181 181
471
471
102
102
100
100
TL072
TL072
TL072
104
104 104 104 104
104104104
104
104
104
104
104
104
104
104
104
104
181 181
471
471
102
102
100
100
TL072
TL072
TL072
104
104 104 104 104
104104104
104
104
104
104
104
104
104
104
104
104
181 181
471
471
102
102
100
100
TL072
TL072
TL072
104
104 104 104 104
104104104
104
104
104
104
104
104
104
104
104
104
181 181
471
471
102
102
100
100
16 17 18 19
02. BUILD
20. Now place the front panel on top, put the nuts on the
jacks, align everything nicely, and screw in a screw
from the front in the spacer as well. If you like how
it looks, solder everything on the other side!
You are done with building! Congratulations!
6MIX is designed by David Szebenyi under Antumbra.
www.antumbra.eu
Manual by David Szebenyi (www.aman.hu)
2018 • All rights reserved!