NOTE:
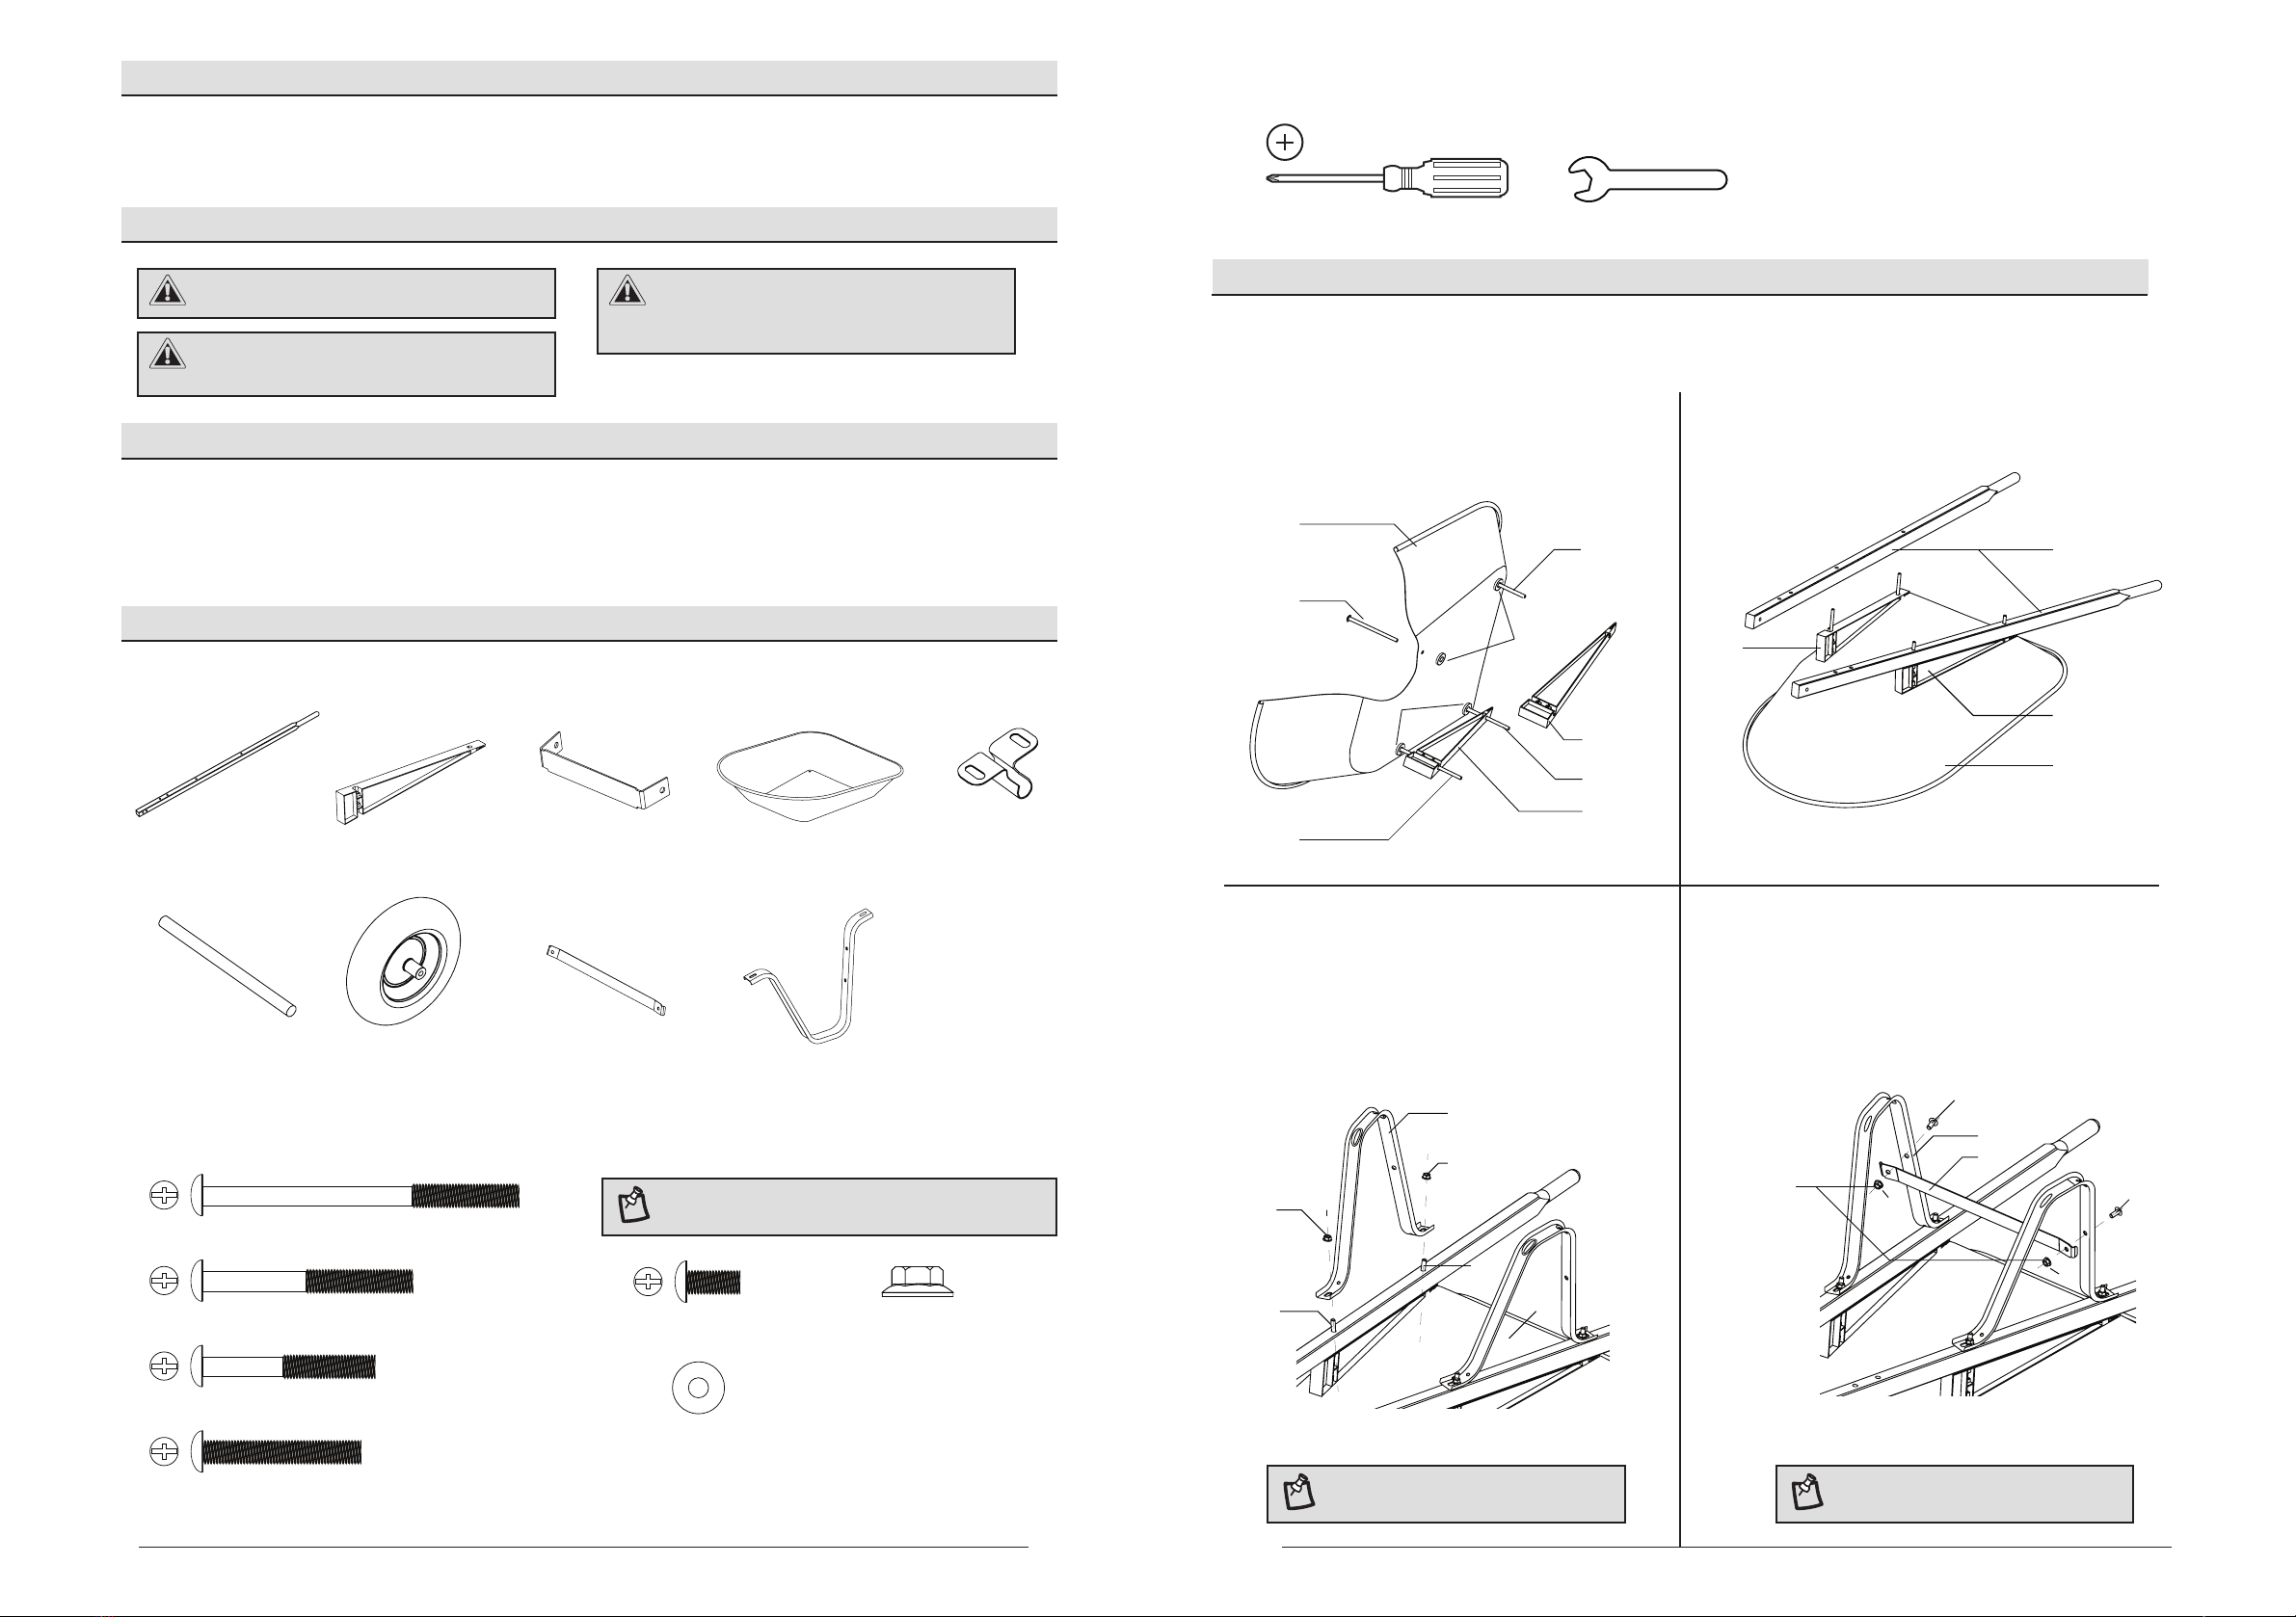
A - Handle x 2
690110-A
AA- 4 3/4 in. Bolt x 2
690110-AA
EE- 3/4 in. Bolt x 2
690110-EE
FF- Nut x 12
690110-FF
GG- EVA washer x 4
690110-GG
BB - 2 3/4 in. Bolt x 2
690110-BB
CC - 2 3/8 in. Bolt x 4
690110-CC
DD - 2 in. Bolt x 2
690110-DD
F - Axle x 1
690110-F
G - Wheel x 1
690110-G
H - Leg Brace x 1
690110-H
B - Riser x 2
690110-B
C - Wheel Guard x 1
690110-C
D - Tray x 1
690110-D
J - Leg x 2
690110-I
E - Axle Bracket x 2
690110-E
Package Contents
Hardware Content
Tools for Assembly (Not included)
Assembly
2 3
Table of Contents...................................................
Safety Information.................................................
Warranty.................................................................
Pre-Installation......................................................
Assembly.............................................................
Replacement Parts ............................................
2
2
2
2-3
3-4
5
Table of Contents
Safety Information
Tire is not for highway service.
Warranty
If within one (1) year from date of purchase, this Anvil product fails due to a defect in materials or workmanship, return the product to any Home Depot
retail store with a receipt indicating proof of purchase for replacement with an item of equal or greater value. This warranty excludes incidental/
inconsequential damages and failures due to misuse, abuse or normal wear and tear. This warranty gives you specific rights, and you may also have
other rights, which vary from state to state.
Please see store or call 1-888-527-0313.
WARNING:
Do not over inflate tire. Maximum tire
inflation = 30 psi.
WARNING:
Tire changing and/or inflation can
be dangerous and should be done by trained
personnel using proper tools.
WARNING:
#2 Phillips head screwdriver 1/2 in. wrench
Attaching risers Attaching handles
Installing legs Installing leg brace
Push bolts (AA & BB) through bottom of tray (D).
Place EVA washers (GG) between tray (D)
and riser (B).
Push riser (B) over bolts.
Repeat for second riser.
1 2
Make sure the vertical hole in leg (J) is
facing the back of the tray (D).
Place leg (J) over bolts (AA & BB) and loosely
attach with nuts (FF).
Repeat for other leg.
3
Place leg brace (H) across back of leg (J) and
loosely attach using bolts (EE) and nuts (FF).
Repeat on other leg.
4
Pre-Installation
Hardware not shown to scale.
NOTE: Don’t tighten the nuts at this time. NOTE: Don’t tighten the nuts at this time.
HOMEDEPOT.COM
Please contact 1-888-527-0313 for further assistance.
HOMEDEPOT.COM
Please contact 1-888-527-0313 for further assistance.
□
□
□ □
□□
□
Turn tray (D) over.
Place handles (A) over bolts and lower
onto risers (B).
□
□
□
□
B
BB
D
BB
B
GG
GG
AA
AA
D
B
B
A
J
FF
BB
D
FF
AA
O
O
FF
H
EE
EE
J


