Choose any program when display “START OR PRESS OK TO SET UP”
Press button, to start preset program, default time 30 min, level linkage
adjustment(Flexible adjustment stride and incline).
Press button, to set program:
Press adjust exercise intensity
11 12
Press adjust Incline
Press adjust Stride
②
③
④
⑤
⑥
⑦
⑧
⑨
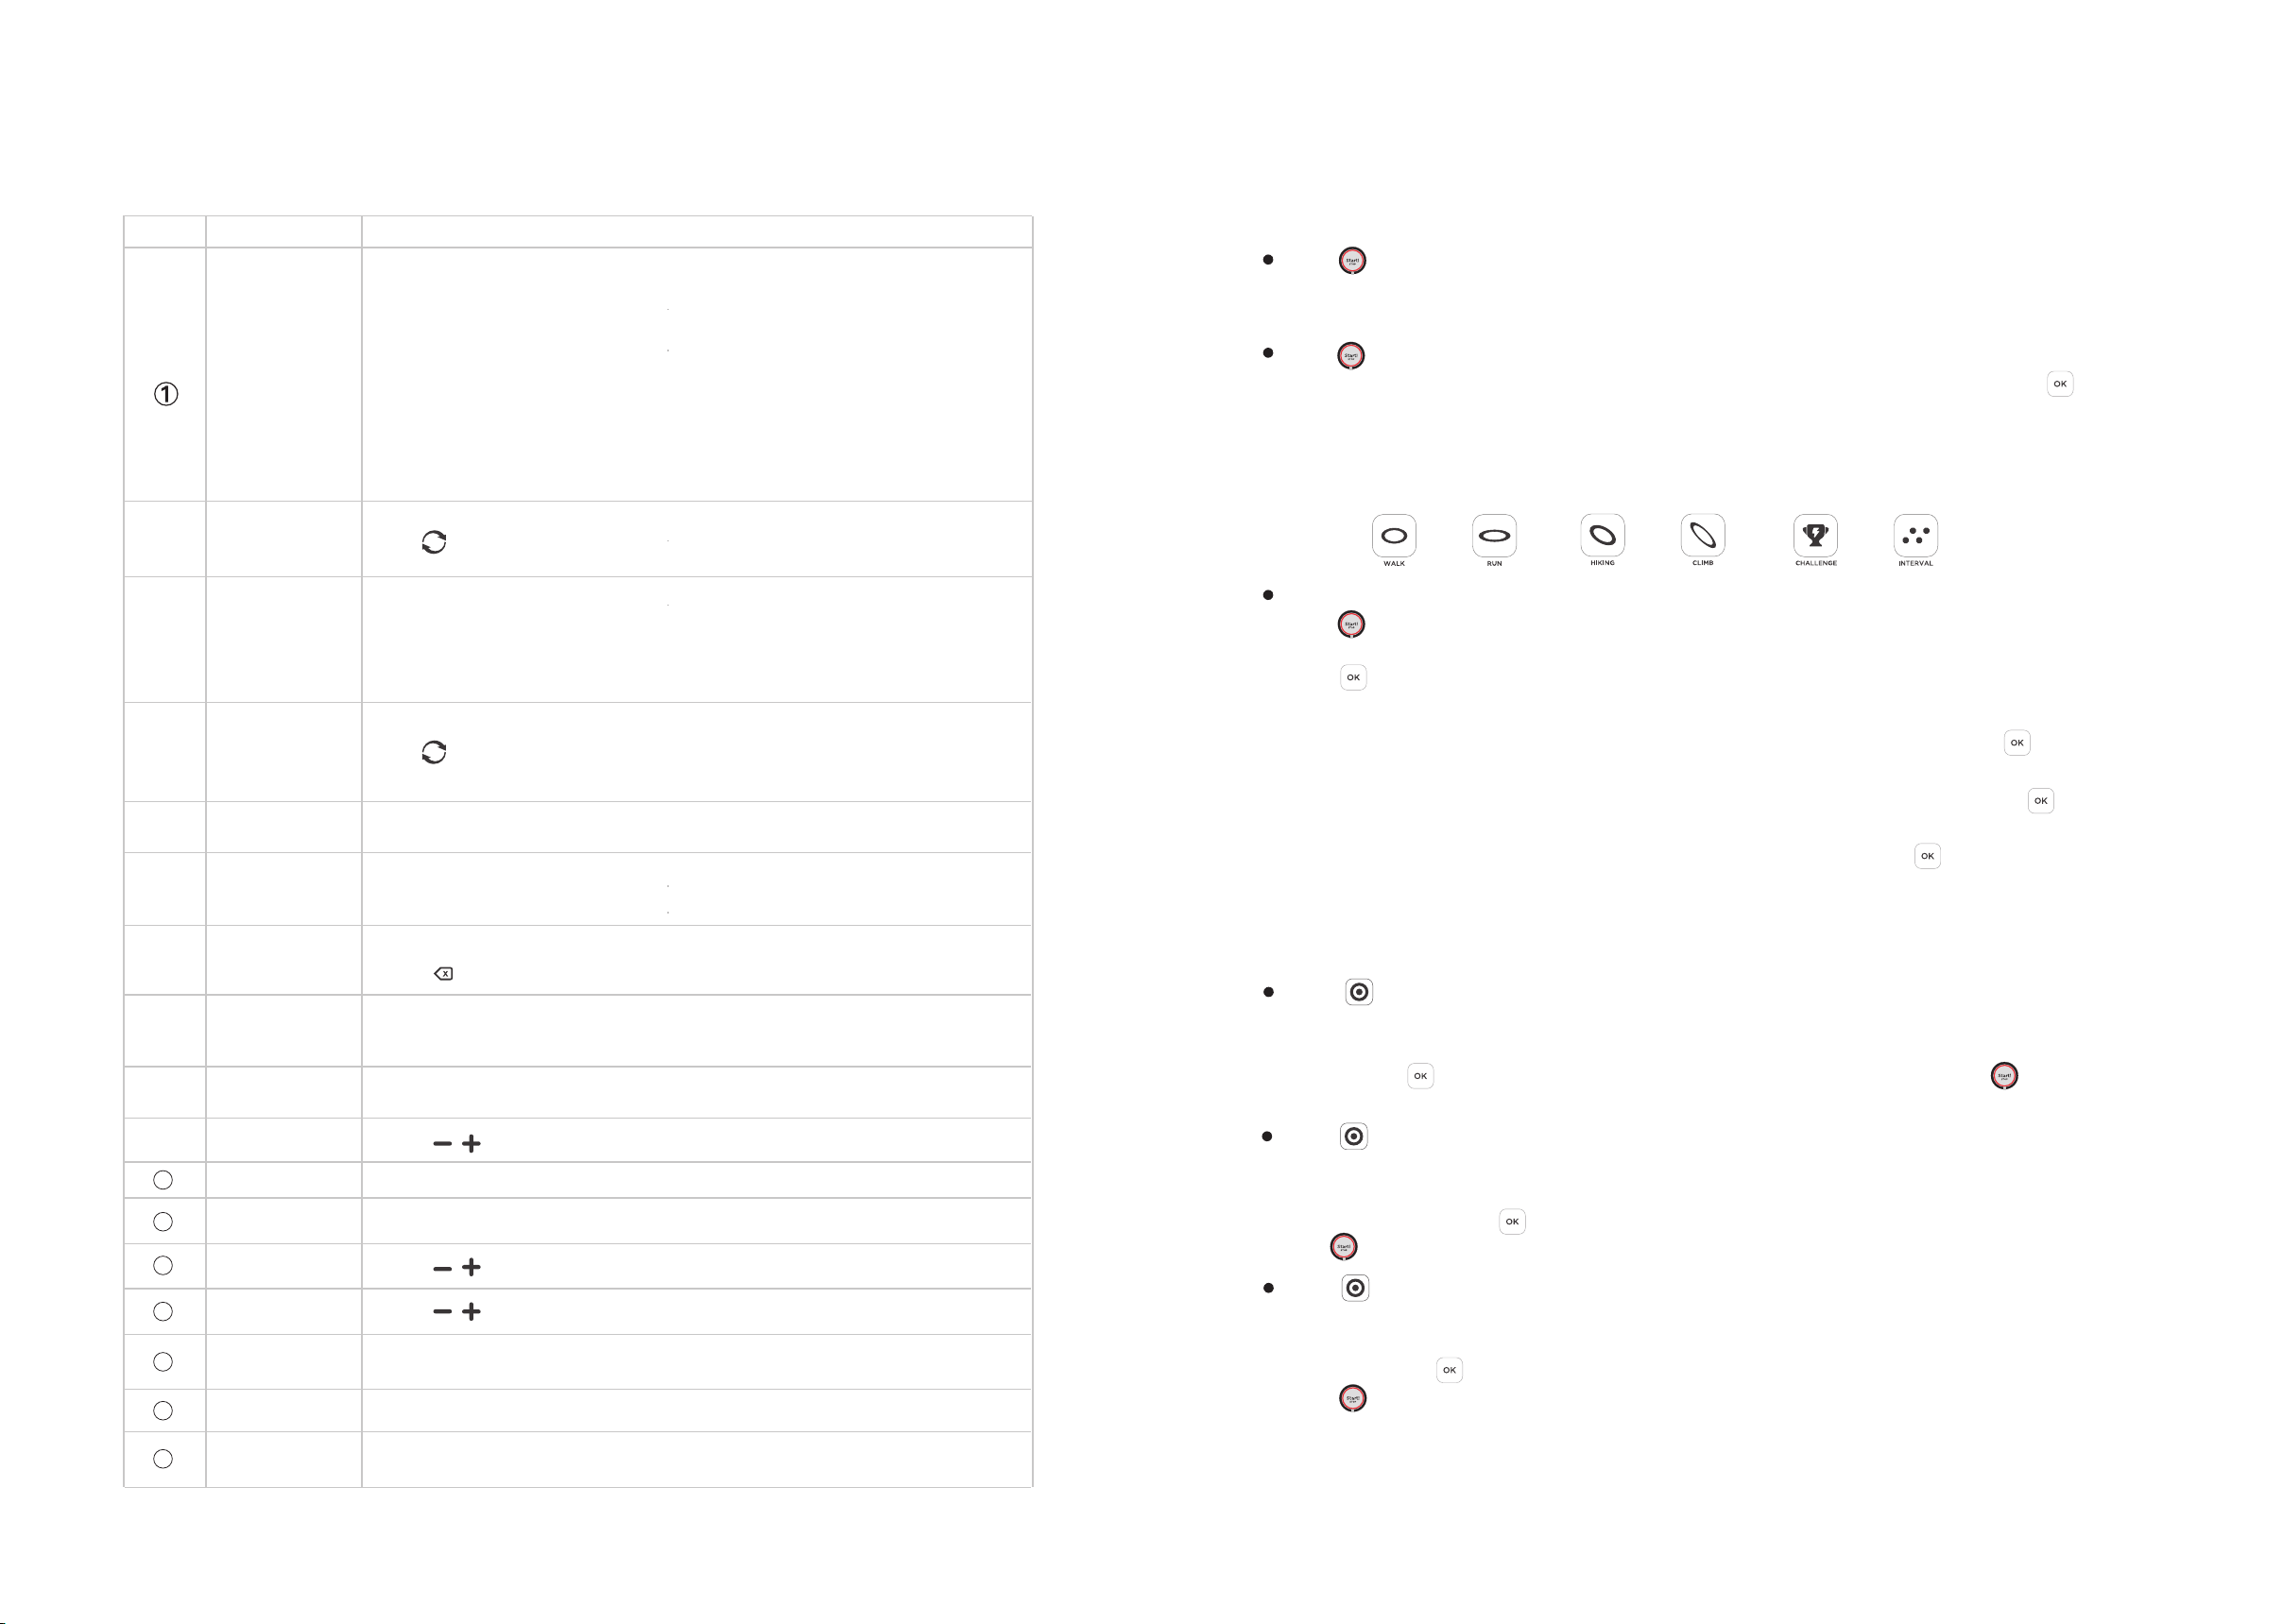
light language
LED
display
Program
View
Fan
Level
Target Program
Start/Stop
USB
NFC
Identification
Self-editing
Program
Incline
Stride
Numeric Keypad
Use button to change
Use button to change
Information about the training
6 programs, One button start
Display action guidance in programs
Adjust the speed of fan: low, high
Set self-editing program
Charging for mobile electronic devices
Identify user information(smart system version)
When unit stopped, press this button to start.
When unit running, press this button to stop.
Set exercise target, include Time, distance, Koal
After the end of the exercise, the system will automatically save the
current exercise data, click on the view to display the current exercise result data
Input the Age, weight and password etc.
Press to delete.After input the number, press OK to confirm.
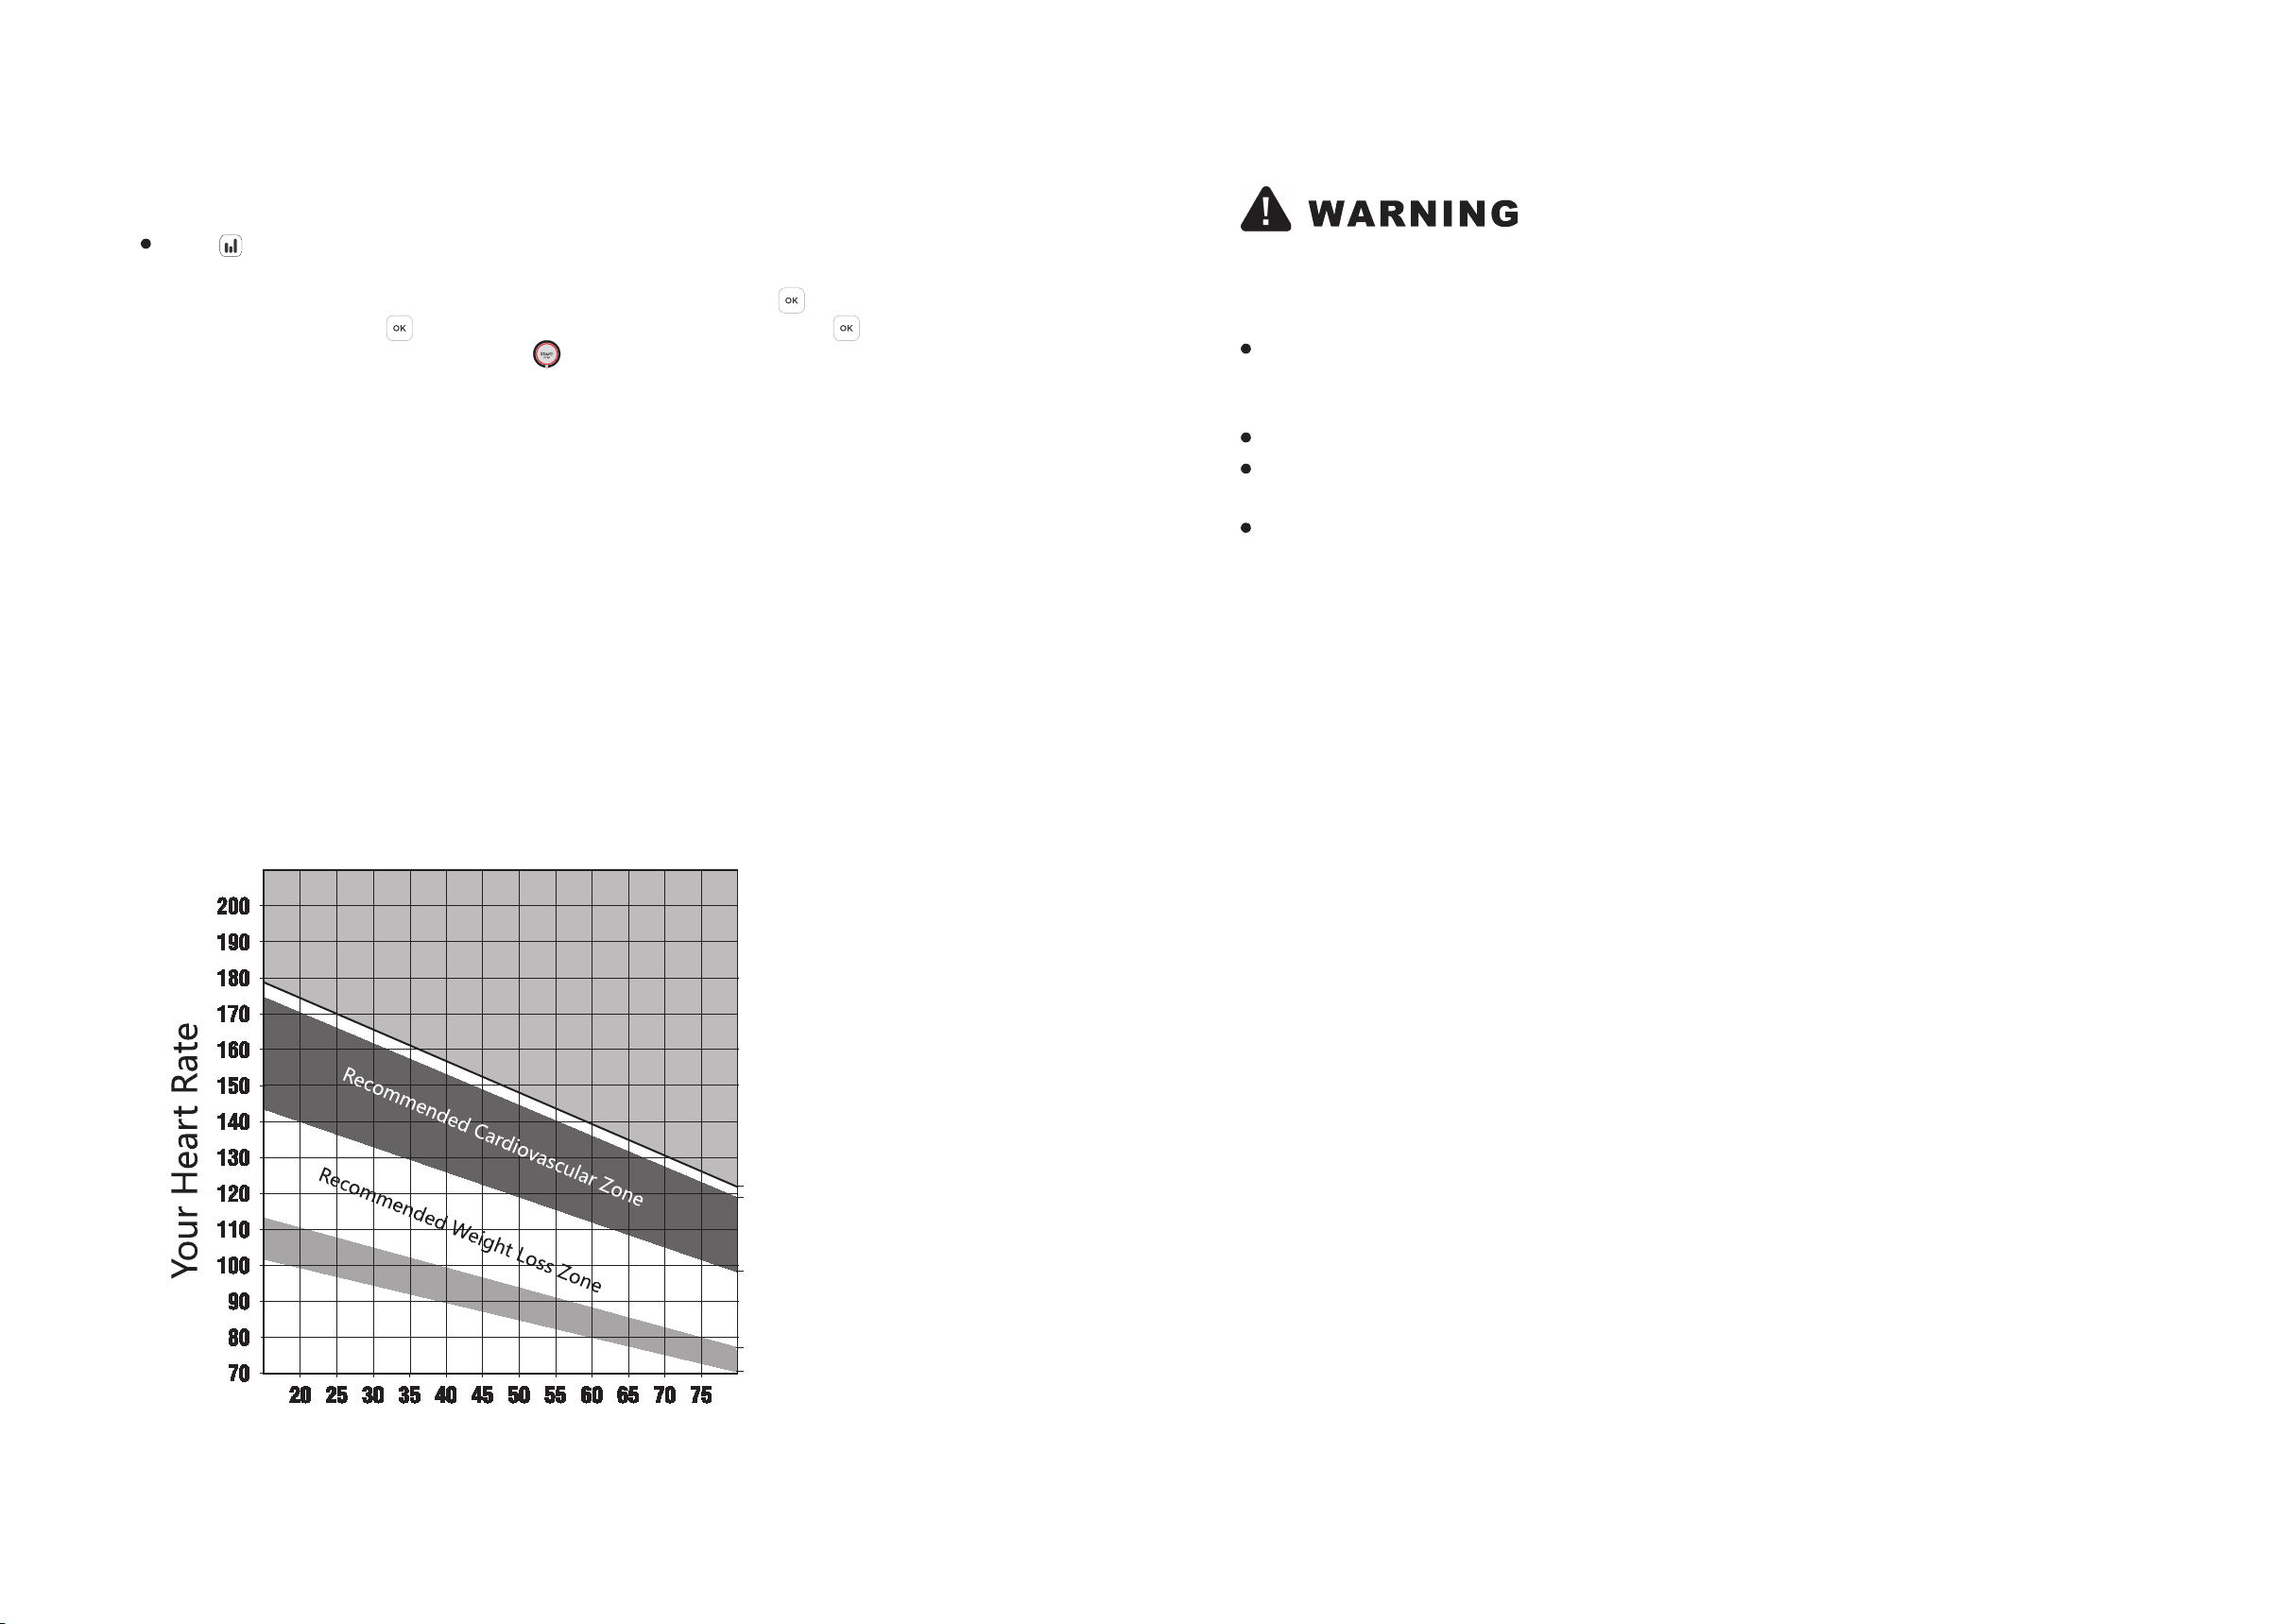
Distance
Heart Rate
Frequency
Push arm
Low speed
Pull arm
High speed
Leg Training
Reverse
Speed
Average Speed
PRM
Blue(3seconds): Power On
Breathing blue: Standby
Flashing Blue: Searching bluetooth/ Logging
into the system
Green: System login succeeded
Flashing Red(2sec): System login failed
Yellow(60seconds): Pause state
Blue(1Second):Cool Down
Red(1second):Stop
Red(2Second): Exit system
⑩
Console description
Number Name Details
2, weight Setting(30-180): display remind”Enter your weight(input your weight)
default”65”, press -+ to choose or input your weight directly, press to next step;
3, Time Setting(5-99): display remind “ENTER TIME”(imput time) default
“30min”press - + to choose or input time directly, press to“PRESS START
TO BEGIN.”
1、Age Setting(10-90): display remind”Enter your age”(input your age)
default”35”, press - + to choose or input your age directly, press to next step
Press button, all data starts counting, The bottom line of display bright.
display lights and intensity adjustment linkage; press buttons - + to adjust
intensity, the data can be switched.
Press button, to clear all the data, display remind “ANYKEY TO CONTINUE
OR PRESS OK TO QUIT”, press any key to continue use the unit, press button
to quit.
Operating instructions
Quick start
Preset program starting up
Press button, display remind”SET TIME OR ENTER THE NEXT TARGET”
same time, Time Window Flashes. Default time 30min; setting interval 5:00-99.00;
adjust with - + button, 1min each press or use numeric keypad to setting detail
time, press ,display remind“ PRESS START TO BEGIN”, press to start
the unit.
Press button, display remind”SET DISTANCE OR ENTER THE NEXT TARGET”
Same Time, Distance window flashes. Default setting1.0Km, setting interval 1-99;
setting with - + button, 1km each press, or use numeric keypad to setting detail
distance, After press , display remind”PRESS START TO BEGIN”,
pess button to start.
Target program starting up
Press button, display remind”SET CALORIES OR ENTER THE NEXT TARGET”
same time, Calories window flashes, default setting 50Kcal; Setting interval 50-990;
setting with - + button, 10Kcal each press, or use numeric keypad to setting detail
calories, press button, display remind“PRESS START TO BEGIN”,
press button to start.
11
12
13
14
15
16
17