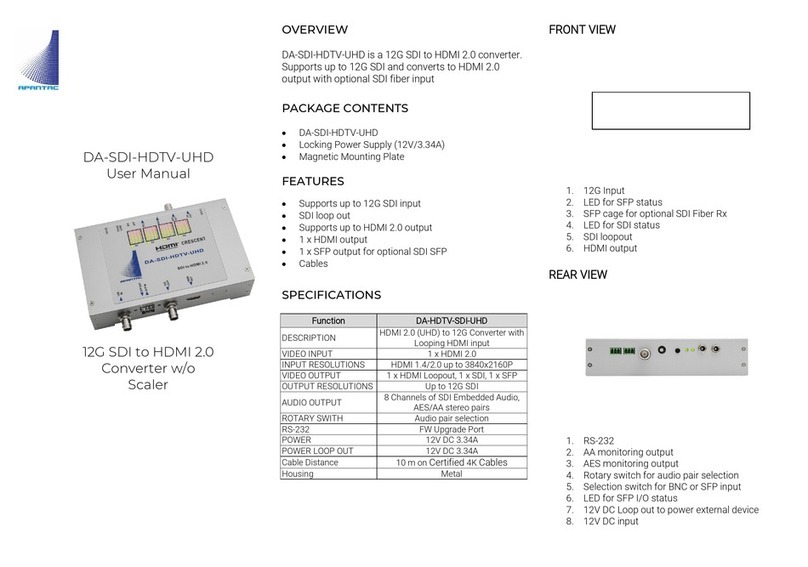
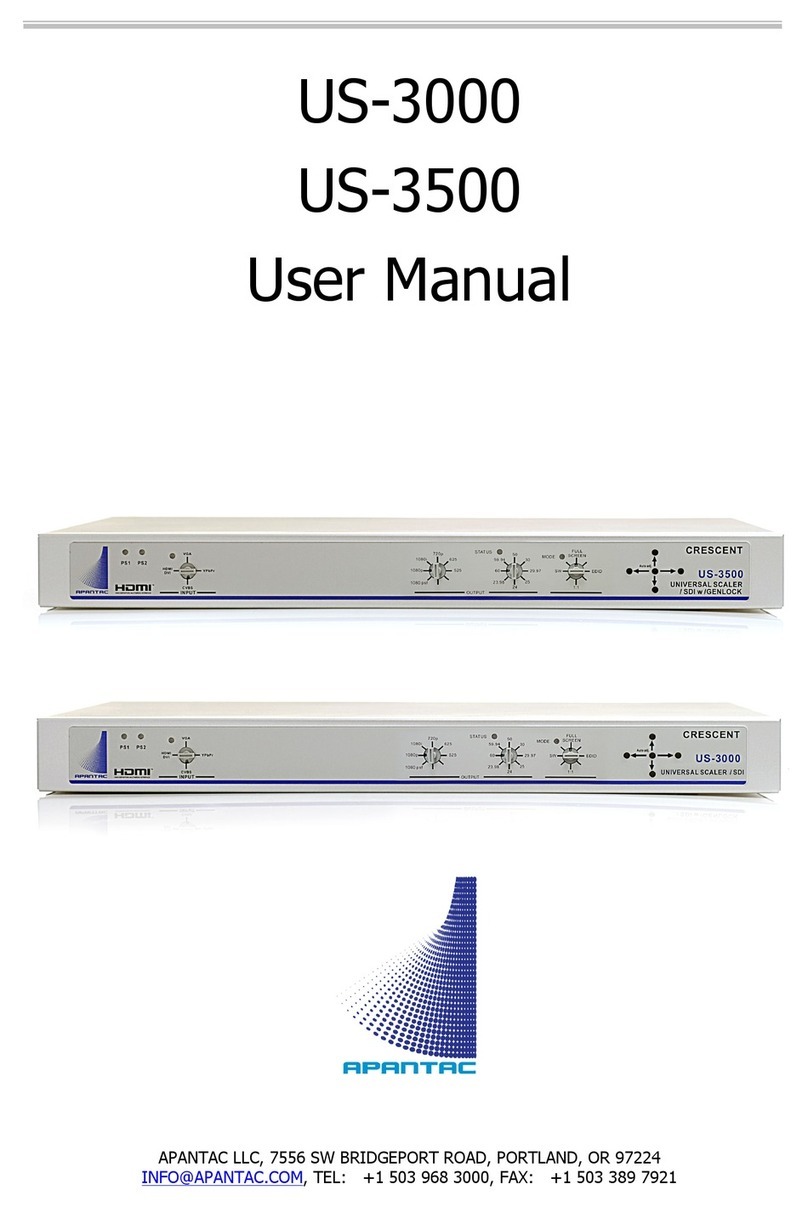
Apantac Micro-Single User manual

Micro-Single Production Quality, Compact SDI Converter / Scaler
APANTAC LLC, 10200 SW Allen Blvd. Suite C, Beaverton, OR 97005 USA
info@apantac.com, TEL: +1 503 968 3000, FAX: +1 503 389 7921
1
Table of Contents
1.0 What’s in the Box .................................................................................................... 2
2.0 Key Features ............................................................................................................. 2
3.0 Specifications........................................................................................................... 3
4.0 Hardware and Installation.................................................................................4
4.1 Front Panel ................................................................................................................4
4.2 Rear Panel ..................................................................................................................4
4.3 Installation ................................................................................................................. 5
5.0 Micro_Lite_Controller Software....................................................................... 6
5.1 Getting Started........................................................................................................ 6
5.2 Running the Micro_Lite_Controller............................................................... 6
5.3 Connecting to the Micro-Single ..................................................................... 6
5.4 Configuring the Output.................................................................................... 10
5.5 Configuring the On-Screen Elements........................................................12
5.5.1 Labels ..................................................................................................................12
5.5.2 Audio Meters...................................................................................................17
5.5.3 Border............................................................................................................... 20
5.5.4 Alarm Tags.......................................................................................................22
5.5.5 Auto Aspect Ratio........................................................................................23
5.5.6 Tally .................................................................................................................... 24
5.5.7 Safe Area.......................................................................................................... 28
5.5.8 Presets.............................................................................................................. 30
5.5.9 Front Panel Definitions .............................................................................31
5.5.10 Write to Flash.................................................................................................32
5.5.11 Quit and Exit...................................................................................................33
Copywrite & Trademark..................................................................................................... 34
Warranty Statement........................................................................................................... 34
Limitation of Liability...........................................................................................................35
Contact Apantac Technical Support ...........................................................................36

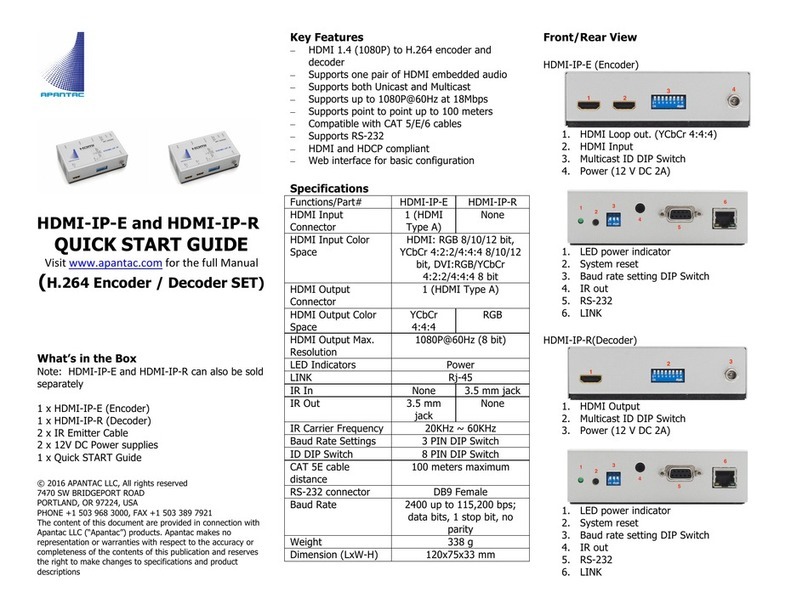
HDMI-8x8
39
1.0 What’s in the Box
•1 x Micro-Single
•1 x Mounting Plate
•1 x RJ50 to DB9 cable for GPI/Tally
•1 x DC 5V 3.2A Power Adapter
Important Note:
Default IP address: 192.168.1.151
The configuration PC must be on the same subnet as the Micro-Single, for example,
“192.168.1.1”
1024x768@60Hz for 50Hz countries to accommodate the most common display resolution.
2.0 Key Features
•Low power consumption - 12 W and silent – no fan!
•Single input SDI converters with OSD
•Accepts 3G SDI, HD SDI, SD SDI and Composite video signals
•Simultaneous HDMI and SDI outputs
•Decode/display up to 8 embedded audio per SDI input
•Ethernet port for Configuration, Dynamic Labels & Tallies interface (TSL)
•Up to 32 characters per label per window
•Text, background colors, transparency are adjustable
•Borders can be turned ON or OFF
•Visual Alarms (Tags)
•0 to 8 Embedded Audio Meters can be displayed for each Window
•Audio monitoring output – analog, HDMI
•Four front panel buttons configurable for presets
•Safe Area Markers
•Up to 4 tally levels control with TSL, 2 with GPI
•Support of the TSL protocol v. 3.1 over IP is standard
•8 x GPI contacts: Configurable for tally or ASCII protocol
•Automatic aspect ratio

Micro-Single Production Quality, Compact SDI Converter / Scaler
APANTAC LLC, 10200 SW Allen Blvd. Suite C, Beaverton, OR 97005 USA
info@apantac.com, TEL: +1 503 968 3000, FAX: +1 503 389 7921
3
3.0 Specifications
Description
Compact video quad split
Output
1 x HDMI, 1 x SDI
Total Windows
1
HDMI
800x480 to 1920x1200
(1080p) 50/59.94/60Hz
Inputs
3G/HD/SD-
SDI/Composite
SDI
Matching the HDMI
output resolution up to
3G
Serial Digital Video
SMPTE 424M, 292M,
259M
On Screen
Display
Border, Tally, Audio
meters, Alarm tags, Safe
area marker
Equalization
120m at 2.97 Gbps, 140
m at 1.48 Gbps, 400m at
270 Mbps with Belden
1694A
GPI
8 for tally or AXP (ASCII
commands)
Return Loss
>15db up to 1.485 Gbps
>10db up to 3G
IP
100 Base-Tx, TSL,
AXP_Lite
Embedded Audio
SMPTE-272M-A
Electrical
12 W, 90-250V 50/60Hz
Composite
NTSC (SMPTE-170M),
PAL (ITU624-2)
EMI/RFI
Complies with FCC Part
15, Class A, CE, EU, EMC,
C-tick
Signal Level
1V nominal
Power
DC 5V 3.2A
DC Offset
0V, ± 0.1V
Size
171 mm W x 120 mm D x
44.45 mm H
Impedance
75 Ω
Mount
Magnetic
Return Loss
40 db up to 5MHz
Option
Rack Mount

Micro-Single Production Quality, Compact SDI Converter / Scaler
APANTAC LLC, 10200 SW Allen Blvd. Suite C, Beaverton, OR 97005 USA
info@apantac.com, TEL: +1 503 968 3000, FAX: +1 503 389 7921
4
4.0 Hardware and Installation
4.1 Front Panel
•Status LEDs
•4 buttons for preset recalls
Figure 4-1 Micro-Single Front Panel
4.2 Rear Panel
•5V DC input jack
•1 x 3G/HD/SD-SDI/Composite input
•2 SDI loop outs
•100 BaseT configuration, tally and control
•8 GPI for preset recall or tally
•HDMI output up to 1080P
•Analog audio monitoring output
Figure 4-2: Micro-Single Rear Panel

Micro-Single Production Quality, Compact SDI Converter / Scaler
APANTAC LLC, 10200 SW Allen Blvd. Suite C, Beaverton, OR 97005 USA
info@apantac.com, TEL: +1 503 968 3000, FAX: +1 503 389 7921
5
4.3 Installation
4.3.1 The Micro-Single is a fan less device; therefore, it is very important the air
vents on the sides are not blocked
4.3.2 The Micro-Single can be mounted 3 different ways
•Using the standard magnetic mounting plate
•Using the optional VESA plate for mounting on the back of the monitors
•Using the optional rack mount to mount 2 Micro-Singles side by side
Figure 4-4: Micro-Single Standard Mounting Plate
Figure 4-5: Micro-Single Optional Vesa Mounting Plate
Figure 4-6: Micro-Single Optional Rack Mount

Micro-Single Production Quality, Compact SDI Converter / Scaler
APANTAC LLC, 10200 SW Allen Blvd. Suite C, Beaverton, OR 97005 USA
info@apantac.com, TEL: +1 503 968 3000, FAX: +1 503 389 7921
6
5.0 Micro_Lite_Controller Software
5.1 Getting Started
The Micro_Lite_Controller is design to allow you to quickly access all the feature sets of the
Micro-Single on a single User Interface. This section will help you get the Micro-Single up and
running with the Micro_Lite_Controller as quickly as possible.
5.2 Running the Micro_Lite_Controller
Before you can successfully run the Micro_Lite_Controller, you must first copy it from the CD
provided and place it in an appropriate location on your computer’s HDD.
Now you can run the Micro_Lite_Controller by double clicking on the “Apantac
Micro_Lite_Controller” icon.
Figure 5.1: Double click on the Apantac Micro_Lite_Controller
5.3 Connecting to the Micro-Single
To connect to the Micro-Single your PC must be connected to the same subnet as the Micro-
Single. The default IP address for the Micro-Single is 192.168.1.151

Micro-Single Production Quality, Compact SDI Converter / Scaler
APANTAC LLC, 10200 SW Allen Blvd. Suite C, Beaverton, OR 97005 USA
info@apantac.com, TEL: +1 503 968 3000, FAX: +1 503 389 7921
7
After the Micro_Lite_Controller launches, you will see this screen
Figure 5.2: Connect dialog
•Click on the IP address box, if the desired IP address is not already entered.
Figure 5.3: Save folder will create automatically
•Once the Micro_Lite_Controller connects to the Micro-Single a Save folder will be
created in the same directory

Micro-Single Production Quality, Compact SDI Converter / Scaler
APANTAC LLC, 10200 SW Allen Blvd. Suite C, Beaverton, OR 97005 USA
info@apantac.com, TEL: +1 503 968 3000, FAX: +1 503 389 7921
8
After the Micro_Lite_Controller is connected to the Micro-Single, the configuration
surface will appear.
Now you are ready to configure your layout
Figure 5.4: Micro-Single control GUI
The default settings of the on screen elements on the Micro-Single are as follows:
Labels
•Default settings
oOn
oOn top of the video
oText - <Label>
oColor – Dark blue
oFit to Text
Borders
•Default settings
oOn
oColor – Dark Blue
Audio meters
•Default settings
oOff
oWidth - 16

Micro-Single Production Quality, Compact SDI Converter / Scaler
APANTAC LLC, 10200 SW Allen Blvd. Suite C, Beaverton, OR 97005 USA
info@apantac.com, TEL: +1 503 968 3000, FAX: +1 503 389 7921
9
Alarms
•Default settings
oVideo – Off
oAudio - Off
Tally
•Default settings
oOff
oLeft LED – Red
oRight LED – Green
o
Safe area
•Default settings
oOff
oLine color – Yellow

Micro-Single Production Quality, Compact SDI Converter / Scaler
APANTAC LLC, 10200 SW Allen Blvd. Suite C, Beaverton, OR 97005 USA
info@apantac.com, TEL: +1 503 968 3000, FAX: +1 503 389 7921
10
5.4 Configuring the Output
Set Output resolution
Figure 5.5: Set output resolution
Set Output Frequency
Figure 5.6: Set output timing
Important Note: If your input sources are 59.94, the output resolution and timing must be
set to 59.94Hz.
Set HDMI/DVI Output Format
Note:
If HDMI is selected, HDMI will also carry the audio monitoring output as part of its
embedded audio.

Micro-Single Production Quality, Compact SDI Converter / Scaler
APANTAC LLC, 10200 SW Allen Blvd. Suite C, Beaverton, OR 97005 USA
info@apantac.com, TEL: +1 503 968 3000, FAX: +1 503 389 7921
11
Figure 5.7: Set output display format
Set SDI Output Format
The SDI output format must match the HDMI/DVI output timing. However, as an exception, if
the HDMI/DVI output is set to 1080p, the SDI output can also be set to 1080i.
Figure 5.8: Set output SDI format

Micro-Single Production Quality, Compact SDI Converter / Scaler
APANTAC LLC, 10200 SW Allen Blvd. Suite C, Beaverton, OR 97005 USA
info@apantac.com, TEL: +1 503 968 3000, FAX: +1 503 389 7921
12
5.5 Configuring the On-Screen Elements
5.5.1 Labels
Default Labels are on top of the video. Got to, <System> -> <Enable Label Outside> To
move the labels outside the video.
Set label properties
oPut labels inside or outside of video
oTurn on/off label
oChange label text
oChange label background color
oChange label text color
oChange label width
Change Label Width
•Fit to text: The label background will be the same width as the
text
•The maximum width is 32, which the same as the maximum
number of characters
•If the number selected is less than the number of characters on
the label text, it will default to <Fit to Text>
oChange label transparency
Change Label Transparency
100% = opaque
0% = 100% transparent
Figure 5.9: Put labels outside

Micro-Single Production Quality, Compact SDI Converter / Scaler
APANTAC LLC, 10200 SW Allen Blvd. Suite C, Beaverton, OR 97005 USA
info@apantac.com, TEL: +1 503 968 3000, FAX: +1 503 389 7921
17
5.5.2 Audio Meters
Figure 5.15: Set meters
Set Meters
o0 – 8 meters can be turned on/off
oMeter width can be set to 4 – 16 pixels
oSDI embedded audio channels can be assigned to individual meters
oOne pair of audio meters can be selected as monitor output to go to the analog
audio output or the HDMI output
Figure 5.16: Display 0 – 8 meters
Table of contents
Other Apantac Media Converter manuals

Apantac
Apantac HDMI-IP-E User manual

Apantac
Apantac DA-SDI-HDTV-UHD User manual

Apantac
Apantac HDMI-IP-E User manual

Apantac
Apantac DA-SDI-HDTV User manual

Apantac
Apantac US-3000 User manual

Apantac
Apantac OG-US-4000 Series User manual

Apantac
Apantac VD-CONV User manual

Apantac
Apantac DA-HDTV-SDI User manual

Apantac
Apantac DA-HDTV-SDI-UHD User manual

Apantac
Apantac OG-DA-HDTV-SDI User manual
Popular Media Converter manuals by other brands

HumanTechnik
HumanTechnik lisa operating instructions

Elatec
Elatec TCP3 3.0.3.1 Technical manual

Samar
Samar cdm-600 Operation manual

Miranda
Miranda picoLink Series Guide to installation and operation

Alphacool
Alphacool Core quick start guide

SignaMax
SignaMax OAM Managed Dual Rate Converter Series user guide