Apco NESTRA User manual

USER MANUAL
7 Chalamish St., Ind.Park Caesarea, 3088900 Israel
www.apcoaviation.com

P a g e | 2
Here you will find important information on using your paraglider, we strongly
recommend you to read it carefully before flying your wing for the first time, if you have any
doubts or suggestions, please, don’t hesitate to contact your APCO dealer or us at
www.apcoaviation.com.
We wish you awesome and safe flights.
TEAM APCO.
THANK YOU
We are happy to be
chosen to take you to your
future adventures.
As manufacturers of sports
aviation equipment for over
45 years, we understand how
important is to have a reliable
and durable equipment, with
this in mind, we carefully
choose the best materials
and technologies available in
the market, produce them
under the supervision of our
team with the high standards
at our own facility located in
Israel.
With this manual, we
would like to share and
introduce you to our new
paraglider model, the
“NESTRA”.
Following our philosophy,
like all of our products, this
paraglider was intensively
tested by our team to be
launched.
EN v1.4.1 25 07 2023

P a g e | 3
1MATERIALS 7
2FLEXON® BATTEN SYSTEM: 7
3DOUBLE DIAGONAL RIBS (DDR) 8
4TRIMMING 8
5HARNESS 8
6EMERGENCY PARACHUTE 8
7SPEED SYSTEM 9
8RISERS 10
9GENERAL INSPECTION 12
10 ANNUAL / PERIODICAL AIRWORTHINESS INSPECTION 12
11 BEFORE THE FIRST FLIGHT 14
12 PARAGLIDING 15
13 PACKING 23
14 MAINTENANCE & CLEANING 23
15 BUTT HOLE II (AUTO DEBRIS RELEASE VALVES) 24
16 STORAGE 24
17 DAMAGE 25
18 THREE YEAR WARRANTY 25
19 GENERAL ADVICE 26

P a g e | 4
THE BEST THAT MAN CAN GET
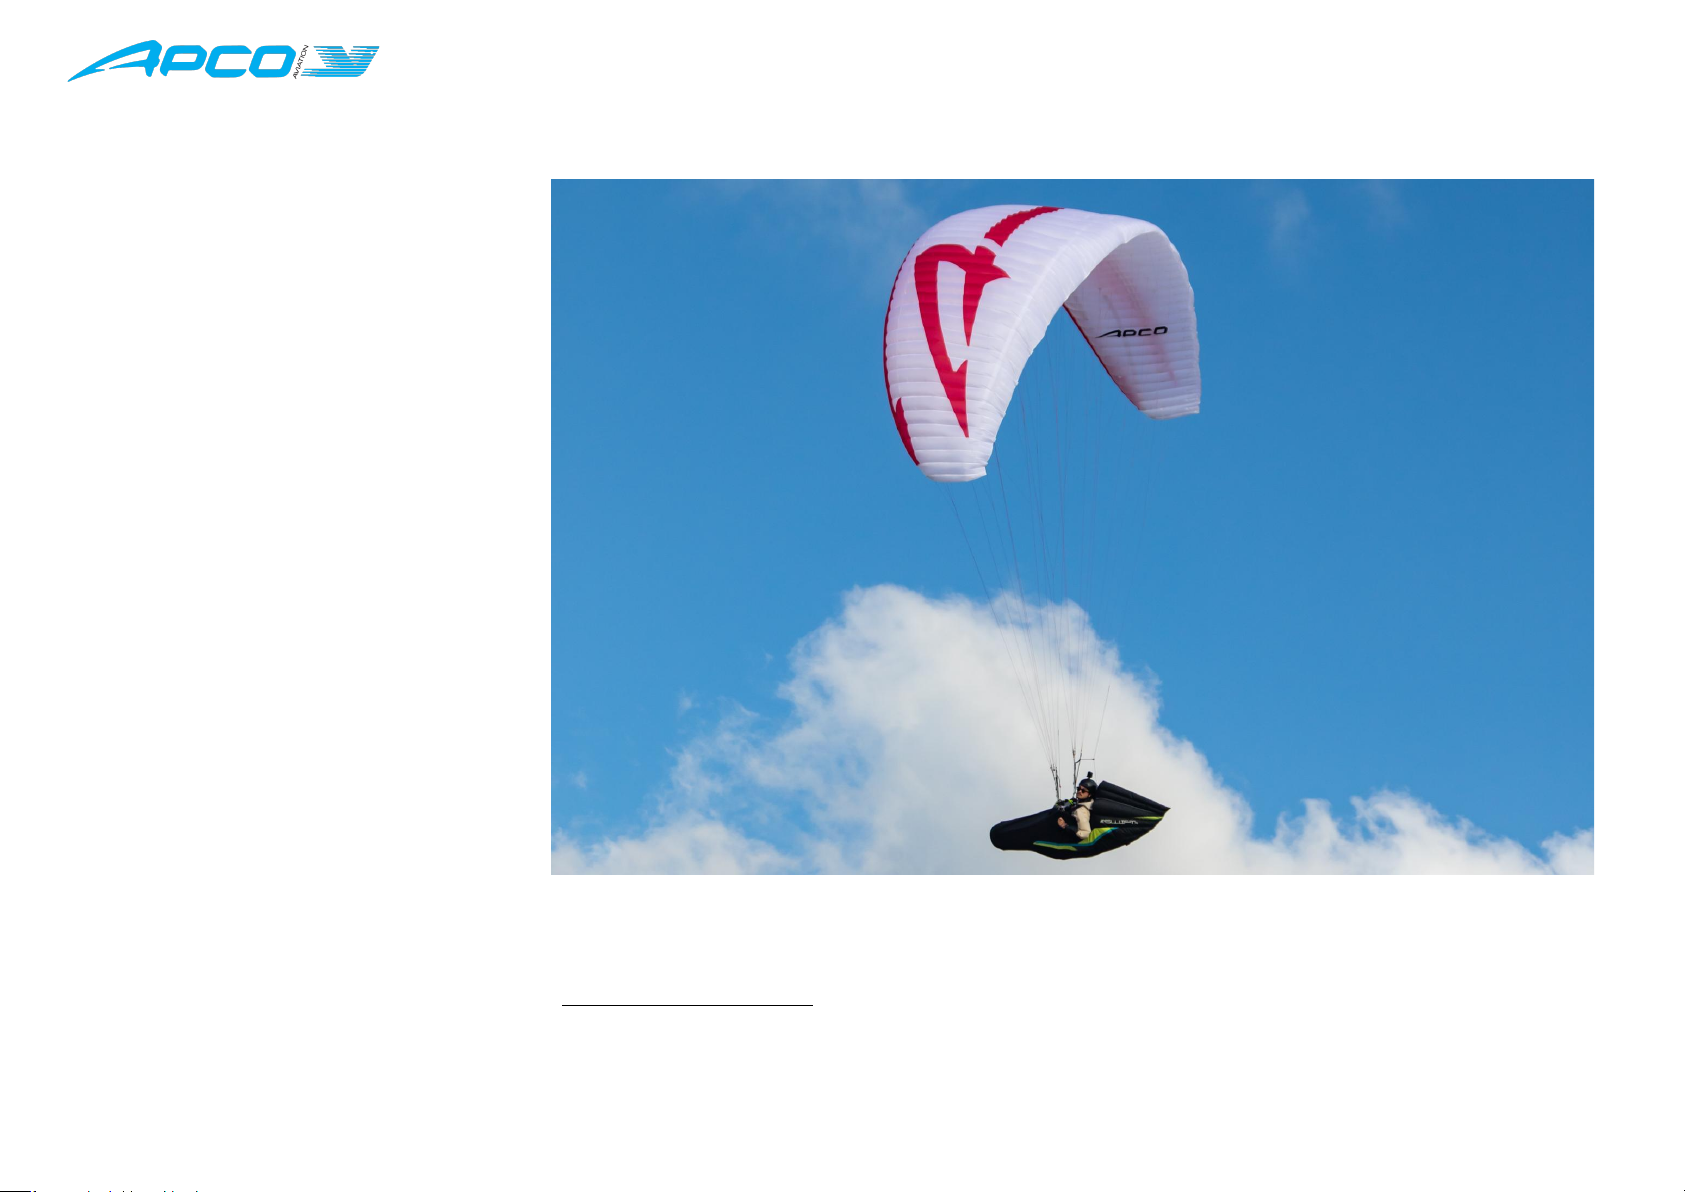
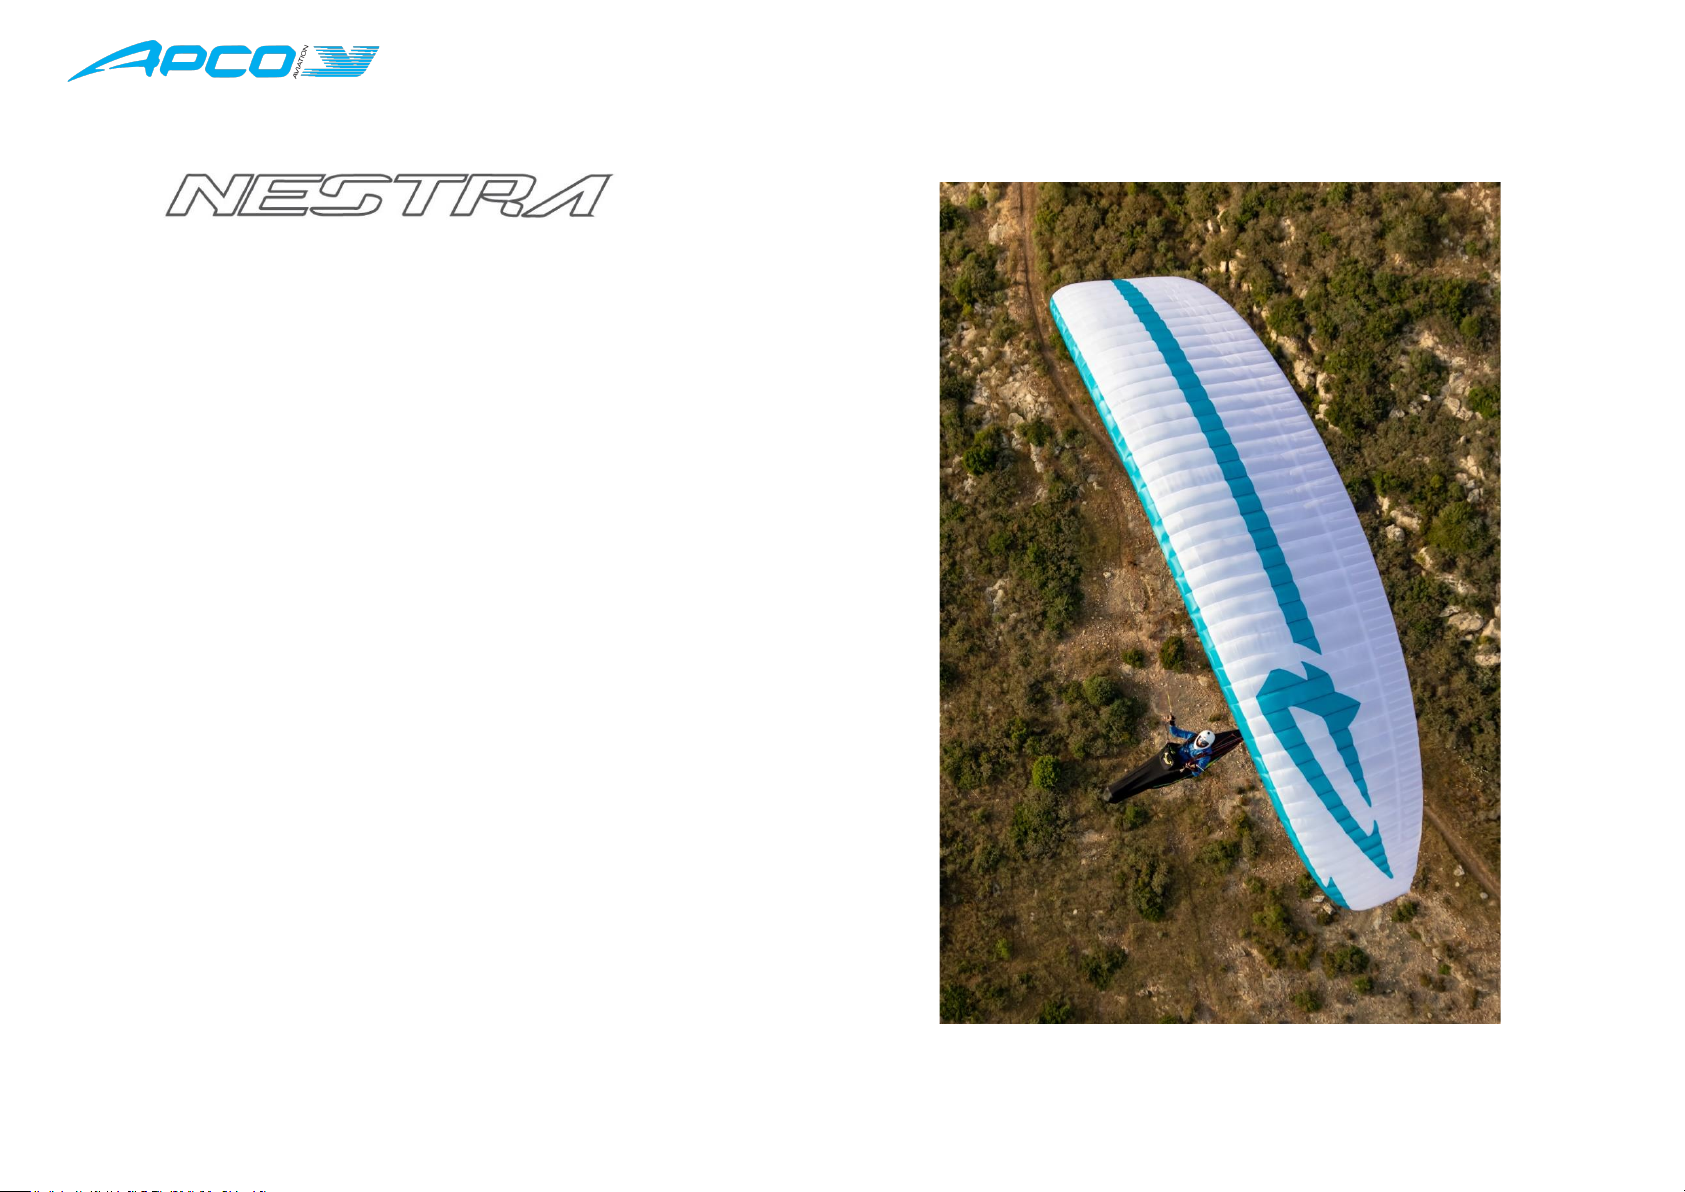
The NESTRA is APCO's all new high end EN-B.
A true cross country machine offering C level performance in
the EN-B category with real life B level safety for pilots looking for the
best that man can get!
No effort was spared to make it the best possible product,
which can be summed up with the following:
•True 2.5 liner - the only wing in the B category to date!
•Light weight –starting from 4.35 kg including standard risers.
•6.0 aspect ratio with impressive passive safety.
•Only 215m of lines - less than new generation EN-C 2-liners!
•APCO's embedded hook up points (link) for the cleanest, most
aerodynamic connection between line and canopy
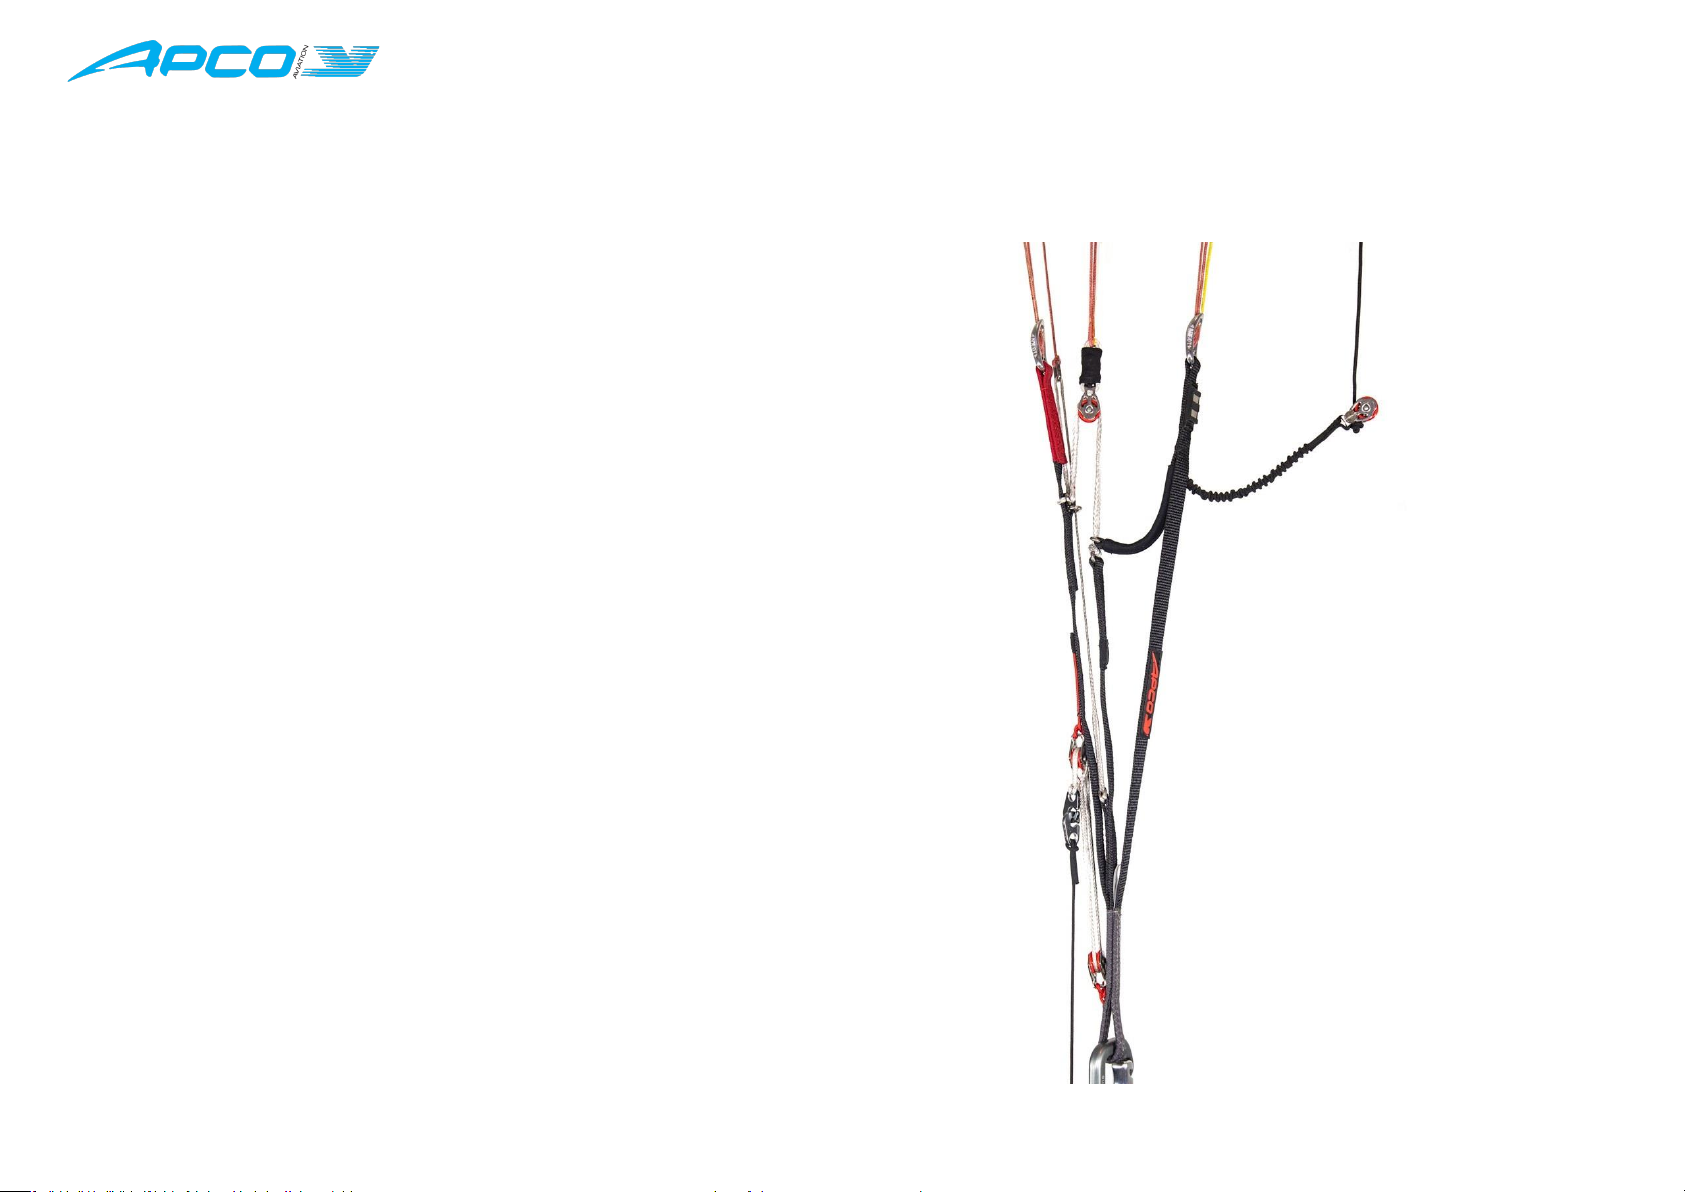
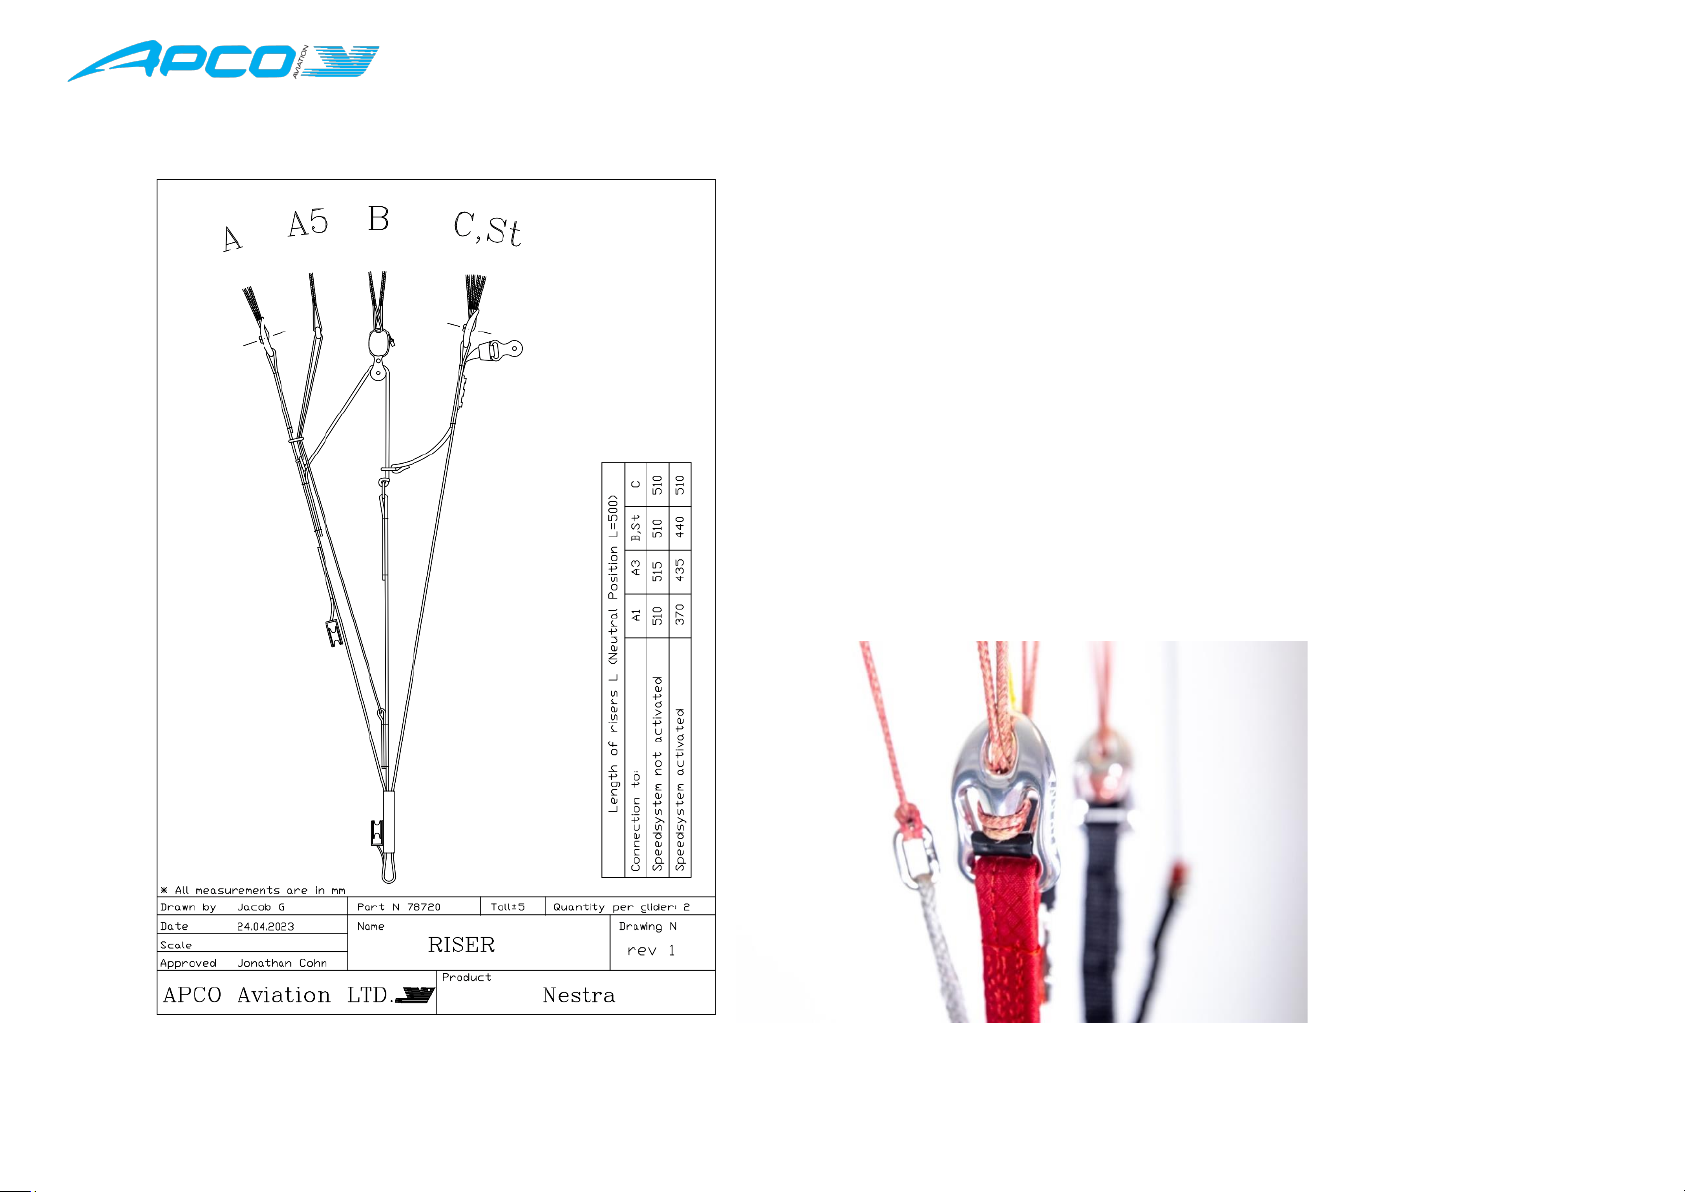
•Risers, including C steering, supported only by ball bearing pulleys
for amazing smoothness
•Flow aligned ribs (link to features page)
•Double diagonal ribs
•APCO's Flexon battens - memory free, do not require any special
care or folding technique
•3D shaping, butt holes, competition lines, shark nose, APCO V-
links, brake tensioners and more.
The Nestra is intended to pilots who has experience with EN-B
paragliders and flying at least 50h per year, and also recommended
for pilots that are already flying EN C wings but wants to move for a
lower class without sacrificing performance.

P a g e | 5
Cutting Edge Handling
Enjoy direct precision steering and World Class APCO’S
refinement in a beautifully balanced wing.
With the aid of the dyneema brake shrinkers, the handling
is direct and precise with light linear brake pressure up to the
90% mark where it becomes stone hard indicating the stall
point.
The Risers are a true masterpiece, equipped with C
steering handles that are operated solely on Ball Bearing
Pulleys, giving you the feeling of a two liner paraglider, it
is effortless to use and will become second nature quickly to
those coming up from lower category.
The Line to riser interface is with APCO unique V-Links,
light and strong they are like pieces of jewelry at the end of
your lines.
NESTRA –“You’ll be on your way up! You’ll be seeing great
sights! You’ll join the high fliers who soar to high heights.” Dr.
Seuss

P a g e | 6
CONSTRUCTION
This paraglider is built with top and bottom surface connected by ribs, these three parts connected together is called by cell, each cell has an
opening on the front lower part, they are filled by air, forcing the panels to take the shape dictated by the air-foil (rib) section.
Both sides of the wing end in a stabilizer or wing tip, which provides straight-line (yaw) stability and produces outward lift to keep the span-wise
tension.
The front part of the ribs uses APCO's FLEXON batten system to keep the shape of the leading edge at high speeds and in turbulent air, they also
improve the performance and launching characteristics of the paraglider.
The hook-up point lines are made of dyneema and embedded on the bottom surface of the wing for minimal drag and maximum performance.

P a g e | 7
1MATERIALS
The paraglider is made from tear resistant ripstop nylon cloth, which is P.U. coated to zero porosity and then siliconized to give the fabric high
resistance to the elements, different cloths are used for top, bottom and ribs due their different functions, the lines are made of unsheathed Kevlar, for
best performance and dimensional stability length-wise, the bottom section of the brake lines is made of sheathed dyneema because of its better
mechanical properties, quick links that attach the lines to the risers are made of stainless steel are unique APCO’s V-Links.
2FLEXON® Batten system:
New generation FLEXON ® Batten system incorporated to the leading edge of the
ribs, insuring perfect profile shape. FLEXON ® battens reduce the weight of the glider by
500g.
Additional advantage of FLEXON batten is that it is practically indestructible,
making packing easier, safeguarding the performance and launch easiness over the
lifespan of the glider.

P a g e | 8
3DOUBLE DIAGONAL RIBS (DDR)
Diagonal ribs are the internal structure of the canopy which supports all the ribs that are not supported by lines, it is a unique
structure in which the diagonal rib is doubled in the same location twice - once to partial height of the rib and another time to the top of the
rib, to create the most stable and supported structure possible.
With the DDR system, we were able to reach a distance of up to 4 unsupported panels, reducing lines, drag and improving
performance.
4TRIMMING
All APCO paragliders are trimmed for optimum performance combined with unsurpassed safety. It’s very important to not re-trim or
tamper with any of the lines or risers, as this may change performance and safety.
5HARNESS
All the APCO’s paragliders are developed with the use of ABS (Automatic Bracing System) type harnesses without cross bracing. We
recommend the use of an ABS harness with all our paragliders. All certified harnesses can be used with our gliders. For best safety and
performance, we recommend an APCO harness equipped with a Mayday emergency parachute.
6EMERGENCY PARACHUTE
It’s highly recommended to use a certified rescue parachute when flying, no matter your intended altitude or flying style.
Attaching the rescue parachute should be done in accordance with the recommendations of the harness and reserve parachute
manufacturer.
Always check the reserve handle and locking pins during every pre-flight check.

P a g e | 9
7SPEED SYSTEM
ASSEMBLY & ADJUSTMENT
APCO’s paragliders can be ordered with the Wonder-Bar, which makes reaching the speed
bar a breeze.
•First attach the harness to the glider.
•Remove the Chain Link from the end of the accelerator line attached to the speed bar,
then thread it through the elasticized ring on the harness, then through harness pulley and
then re-attach it to the Chain link with a larks-head knot.
•Hook the Chain link onto the Chain Link on the riser of the corresponding side.
•Sit in the harness and have someone hold the riser up in a flying position for you.
•Adjust the speed bar line by pulling the end through the speed bar tube and moving the
knot.
•The Bar should be about 10 cm (or closer if you have a second step) away from the front of
the harness seat, this allows you to easily reach the bar with your foot, and will allow you to
use the full range of the speed bar if you extend your legs fully.
•Do not adjust the speed system too short, as this will cause it to be activated permanently
while flying, and could be dangerous.
•It is possible to fit a second step to the system, if one has trouble using the full range of the system (supplied separately).
WARNING:
The use of the speed system in turbulent conditions or close to the ground is dangerous. While flying with the accelerator, the
paraglider has a reduced angle of attack and is therefore more susceptible to turbulence and may collapse or partially deflate.
Paragliders react faster when accelerated and may turn more. The accelerator should immediately be released in this case.

P a g e | 10
8RISERS
The NESTRA is supplied with risers featuring a split A riser. The 1st A-
riser attaches to the central two A lines (A1 & A3). The second A-riser is attached
to the outermost A line (A5). At no time should the pilot change the risers or use
risers not intended for this specific glider as this will affect the performance and
safety of the glider.
*This paraglider has no trimmers.
V-Links
On NESTRA, you will find APCO’s V-Links connecting lines to the risers.
In case you need to replace a line, you will have to open the plastic locks using a
small and flat screwdriver, placing it between both plastics and gently inserting
the screwdriver between the two pieces of plastic in order to open them. After
you replace the line,
don’t re-use the
same plastic pieces,
you can replace
them by new ones as
you will get 8 extra V-
Links locks with your
wing.
*Difference not more than 5mm from the lengths laid down in this user’s manual

P a g e | 11
V-LINK SNAP-ON PLASTIC INSERT INSTALLATION MANUAL
1. Inspect male and female parts for any defects before installation. Discard any defective
part and do not attempt to install it.
2. Attach the lines to the v-links prior to installing snap-on locking inserts. Place the male
part under the v-link correctly oriented and with teeth facing upwards. Make sure it is
installed on the front side of the v-link.
3. Place the female part on top of the male part teeth in the following orientation (a). Make
sure it is installed on the back side of the v-link. Press both parts together until they snap
lock (b).
4. Inspect for correct installation. Pins must be clamped inside holes and both parts
attached without any space in between. When installed correctly, pins are tightly clamped
in a symmetrical manner with even grooves on the edges of the female part (c).
secure the lock of both parts with a tiny amount of superglue (or similar) inside the grooves
(d).
Take extra care to avoid gluing lines together or to the v-link assembly. Ensure free
movement of v-link on the riser webbing after installation process!
4. Inspect for correct installation. Pins must be clamped inside holes and both parts
attached without any space in between. When installed correctly, pins are tightly clamped
in a symmetrical manner with even grooves on the edges of the female part (c). Secure the
lock of both parts with a tiny amount of superglue (or similar) inside the grooves (d). Take
extra care to avoid gluing lines together or to the v-link assembly. Ensure free movement
of v-link on the riser webbing after installation process!
5. The process is now complete. Pay attention to the following incorrect installation photos.
Please remove and discard the snap-on insert if one of the following faults is present.
I. Grooves around pins on female part are enlarged indicating the pin is incorrectly
clamped. Not symmetrical round grooves.
II. White area indicates internal damage due to over bending/stretching of plastic.
III. Uneven and non-symmetrical grooves on edges indicating female part incorrectly
clamping male part
Snap-on plastic inserts model supersede previous bolt on plastic inserts model.
Contact your APCO AVIATION dealer to place an order for a kit of new Snap-On inserts.
PLASTIC SNAP-ON INSERTS MUST BE INSTALLED BY HAND PREFERABLY WITHOUT USING TOOLS
INSTALL ONLY NEW PARTS EACH SERVICE DONE ON LINES
DO NOT ATTEMPT TO REUSE DEFECTIVE OR DAMAGED PARTS
DO NOT REUSE DISASSEMBLED PARTS

P a g e | 12
9GENERAL INSPECTION
Pilots, please ensure that your paraglider has been test flown and fully checked by your dealer before taking it into your possession.
Verify that the dealer checked and confirms that the glider is airworthy.
10 ANNUAL / PERIODICAL AIRWORTHINESS INSPECTION
It is highly recommended that your glider (and other equipment), undergo a periodical airworthiness inspection which is to be done
by APCO, or an APCO approved/appointed service centre.
This is recommended to be done every 24 months or 100 hours, whichever comes first.
This recommendation is in line with Israeli regulations, binding in Israel. As an alternative, we suggest you to follow the regulations set by
your national authorities.
POROSITY:
Porosity is measured with a calibrated Porosimeter. It should be measured in at least 5 different places on the upper surface. Below is an
example of the sections we test at APCO. The upper surface, at 20-35% chord (from L/E) is most prone to become porous, and is thus the
most important section to test. It’s also important to test the different cloth types, and different colours used.

P a g e | 13
LINE MAINTENANCE
•Unsheathed Kevlar lines are known by their resistance to stretching, warm temperatures and durability, even being durable and
resistant, they must be carefully inspected periodically.
•In his/her own interest, the pilot must observe the following points to ensure maximum performance and safety from the glider.
Avoid sharp bending and squeezing of lines.
•Take care that people do not step on the lines.
•Do not pull on the lines if they are caught on rocks or vegetation.
•Avoid getting the lines wet. If they do get wet, dry them as soon as possible at room temperature, and never store them wet.
•One line of each line group (A, B, C, upper and lower) must be tested for minimum 50% of the rated strength, if the line fails under
the load test or does not return to its specified length all the corresponding lines must be replaced.
Never replace lines with different diameter or type of lines as all gliders were flight and load tested for safety in their original
configuration. Changing line diameter/strengths can have dangerous/fatal consequences.
Professional use of paragliders: towing, tandem, schooling and competition flying requires more frequent line inspection and replacement
of A, B, C and brake lines. For replacement lines please refer to our online direct line services.

P a g e | 14
11 BEFORE THE FIRST FLIGHT
FIRST CHECK AND PREFLIGHT INSPECTION
With every new paraglider, the following points should be checked:
• Connection points between paraglider and harness.
• Check that there are no lines twisted, tangled or knotted.
• Check that the risers and speed-system are hooked up to the harness correctly, without any interference.
•Check that V-Links are snapped and closed.
*On the Nestra we have no adjustable or removable devices.
REGULAR INSPECTION CHECKS
• Damage to lines, webbing and thread on the stitching of the harness and risers.
• The V-Links connections on the risers are not damaged and the plastic locks are fully closed and tight.
• The pulleys of the speed system and c-steering system are free to move and the lines are not twisted.
• The condition of the brake lines, stainless steel rings and the security of the knot attaching the brake handle to the brake line.
• The sewing and connection of the lines.
• No damage to hook up points on the glider.
• No damage to the ribs and diagonal ribs.
• No damage to the top and bottom panels and seams between panels.

P a g e | 15
12 PARAGLIDING
TAKE OFF
As this is not a training manual, we will not teach you launching techniques. We will briefly go through the different launch
techniques to help you get the most out of your glider.
LAYOUT
•Pre-flight check should be done before every flight.
•Spread the glider on the ground. Spread the lines, dividing them into groups A, B, C and brake lines, left and right sides. Make sure
the lines are free and not twisted or knotted.
•Make sure all the lines are on top of the glider and none are caught on vegetation or rocks under the glider. Lay out the glider in a
horseshoe shape. This method ensures that all the lines are equally tensioned on launch, and results in an even inflation.
•The FLEXON rib reinforcements will keep the shape, and the leading edge open for easy inflation.
ALPINE LAUNCH OR FORWARD LAUNCH
•The NESTRA has very good launch behaviour in no wind conditions.
•For the best results we recommend the use of the following technique:
•Lay out the glider and position yourself in the centre of the wing with the lines almost tight.
•With a positive and constant force, inflate the wing holding only the A-risers, and smoothly increase your running speed, the wing
will quickly inflate and settle above your head without the tendency to stick behind.
•After you leave the A-risers, if it’s needed, you just need to control the paraglider in order to keep it over your head and then take-
off.

P a g e | 16
STRONG WIND AND REVERSE LAUNCH
The NESTRA is easy to inflate and control, but like any other wing, it’s important to be careful in strong wind conditions to not be
over pulled.
Due our improved new risers design, we recommend you to pull the A risers in your direction, instead of pulling up, this movement will
lead into an easier inflation. In strong wind conditions, it also helps if you walk towards the canopy while the glider rises, and leave the A-
riser just before the glider gets above your head, then, if necessary, pull the brake to stop the wing from overshooting, (be careful to not
apply too much of brake as the glider might pull you off your feet too early) turn and launch.
TOW OR WINCH LAUNCHING
All APCO gliders are well suited for winching and have no bad tendencies on the winch. With towing it is important to have the wing
above your head on launch and not to try and force a stalled wing into the air, this is especially important if the winch operator is using high
tension on the winch.
Very little brake if any need be applied on launch and during the tow.
Directional changes can be made with weight shift rather than brakes. While on tow, the brake pressure will be higher and more
force will be required to make corrections.

P a g e | 17
FLIGHT TECHNIQUES
THERMAL FLYING
In light lift it is advised to make flat turns to keep the glider from banking too much and avoid increasing the sink rate.
In strong lift conditions it is most effective to make small turns in the core with relatively high bank.
The NESTRA has excellent thermalling capacity and will be a pleasure even when you are in a big gaggle or just having fun on
a long XC flight.
The glider behaves really well even in strong thermal conditions, with no strong pitch tendency, it is normal to sometimes have
some small and smooth tips collapses, we have designed the NESTRA on purpose to be more communicative, so you will be aware when
you are flying through unstable air and will be ready to act accordingly.
WARNING:
The use of the speed system in turbulent conditions or close to the ground is dangerous. While flying with the accelerator, the glider
has a reduced angle of attack and is therefore more susceptible to turbulence and may collapse or partially deflate. Gliders react
faster when accelerated and may turn more. The accelerator should immediately be released in this case.

P a g e | 18
C-STEERING SYSTEM (CSTR)
The CSTR is essentially a system that cancels the effect of the speed system. It rotates the canopy to a higher angle of attack in
a clean rotation exactly as the speed system rotates the wing to a lower angle of attack, with this technology you will have a similar feeling
of flying a two liner paraglider.
The working principle is that while accelerated the pilot can control the wing by pulling the C steering thereby cancelling the effect
of the speed system on that side, leading to turning or slowing down the wing without releasing the speed system, this allows instant
changes of angle of attack without distorting the shape of the profile.
The CSTR system adds another level of safety as will pilot the wing without using the brakes greatly improves the safety of the wing
during accelerated flight.
It is important to use CSTR in the correct way - which means pulling the handles down towards the carabiners and not back towards
the shoulders of the pilot.
Before using the CSTR, is important to remove any wraps on the brakes.
If you have any failure on your main brakes, you can always use the CSTR to handle and control your paraglider, in this case we
recommend you to go landing as soon as possible, once flying without having the main brakes control is not advised and will compromise
your handling possibilities.
*Always use the CSTR system during accelerated flight.

P a g e | 19
ASYMMETRIC COLLAPSE
If one side of the glider partially folds or collapses it is important to keep your flying direction by applying weight shift and some
brake on the opposite side.
The wing should re-inflate on its own without any input from the pilot.
To help re-inflation it is possible to pull some brake on the collapsed side and release immediately.
In the event of a big deflation, i.e. 70%, it is important to apply brake on the inflated side of the wing, but care must be taken not to pull too
much as you could stall the flying side.
B-STALL
B-stall is not suitable for the NESTRA.
CRAVAT
In case a cravat occurs after a collapse, it is important to keep your flying direction by applying some brake on the opposite side and
then it can usually be opened by pulling down on the stabilo line, or an effective brake input on the affected side while countering the turn
with the opposite brake and weight shift.
FRONT STALL OR SYMMETRIC COLLAPSE
In the event of a front stall the glider will normally re-inflate on its own immediately without any change of direction. To speed up re-
inflation briefly apply 30%-40% brake (to pump open the leading edge). Do not hold the brakes down permanently to avoid an unwanted
stall.
SIGNS OF PARACHUTAL STALL
• The pilot has very little or no forward airspeed and no wind in his face.
• The glider will be fully open but the cells will be bulging in and not out on the bottom surface.
• The glider might have a very slow turning sensation.
• You will have an increased vertical descent.

P a g e | 20
RECOVERY FROM PARACHUTAL STALL
It is important to recognize this situation, most accidents involving parachutal stall happens because the pilot did not realize that he
was in this configuration.
•The best way to exit a parachutal stall is fully raise both hands, if the glider continues in stall configuration you have to pull both A
risers down to get the wing flying again. The pilot can pull the riser down until the wing starts to fly again. The moment the wing
starts to fly the pilot should release the A risers, or the wing might suffer a frontal collapse.
•Alternatively, the pilot can push the speed bar to lower the angle of attack and get the wing flying again.
•By pulling one or both brakes while in deep stall the pilot can accidentally enter a full stall or spin. (Not recommended)
BIG EARS
Altitude can be lost in a controlled way by collapsing both tips. To do this, take the outer-most A-line (split A-Riser) on both sides
and pull them down until the tips collapse. Pulling one side at a time may be more comfortable and easier, especially for smaller pilots. This
should close about 30% of the wing in total. It is possible to steer with weight shift.
To increase the sink rate the pilot can push the speed system after he/she has collapsed the tips. This can give up to about 7 m/s sink-rate
with about 50km/h forward speed, if you want to combine big ears with speed system, always pull the big ears first then push the speed
system (pulling big ears with accelerator applied can lead to big deflation). To exit, release the speed system and then release the tip A-
lines, it might be necessary to apply brake to open the tips, we recommend you to open one side at a time to avoid reducing your speed
and accidentally inducing stall.
SPIRAL DIVES
The NESTRA has very good behaviour in spiral and has no tendency to stick in the spiral. By progressively applying brake on one
side the glider can be put into a spiral dive. Safe high sink rates can be achieved like this. The spiral has to be exited slowly by releasing the
brake over one complete turn or the glider may pitch forward and possibly suffer a collapse.
Care must be taken that the pilot has enough height to exit the spiral safely.
Table of contents
Other Apco Aircraft manuals
Popular Aircraft manuals by other brands

Ozone
Ozone M6 Mantra Pilot's manual

AEROPRAKT
AEROPRAKT AEROPRAKT-32L Pilot operating handbook

BOMBARDIER
BOMBARDIER SD3-60 Maintenance manual

Advance acoustic
Advance acoustic OMEGA ULS 21 product manual

Dancing Wings Hobby
Dancing Wings Hobby 1.8M Bleriot XI instruction manual

Aeros
Aeros Discus 12 owner's manual