Apogee ClipMic digital 2 - User’s Guide
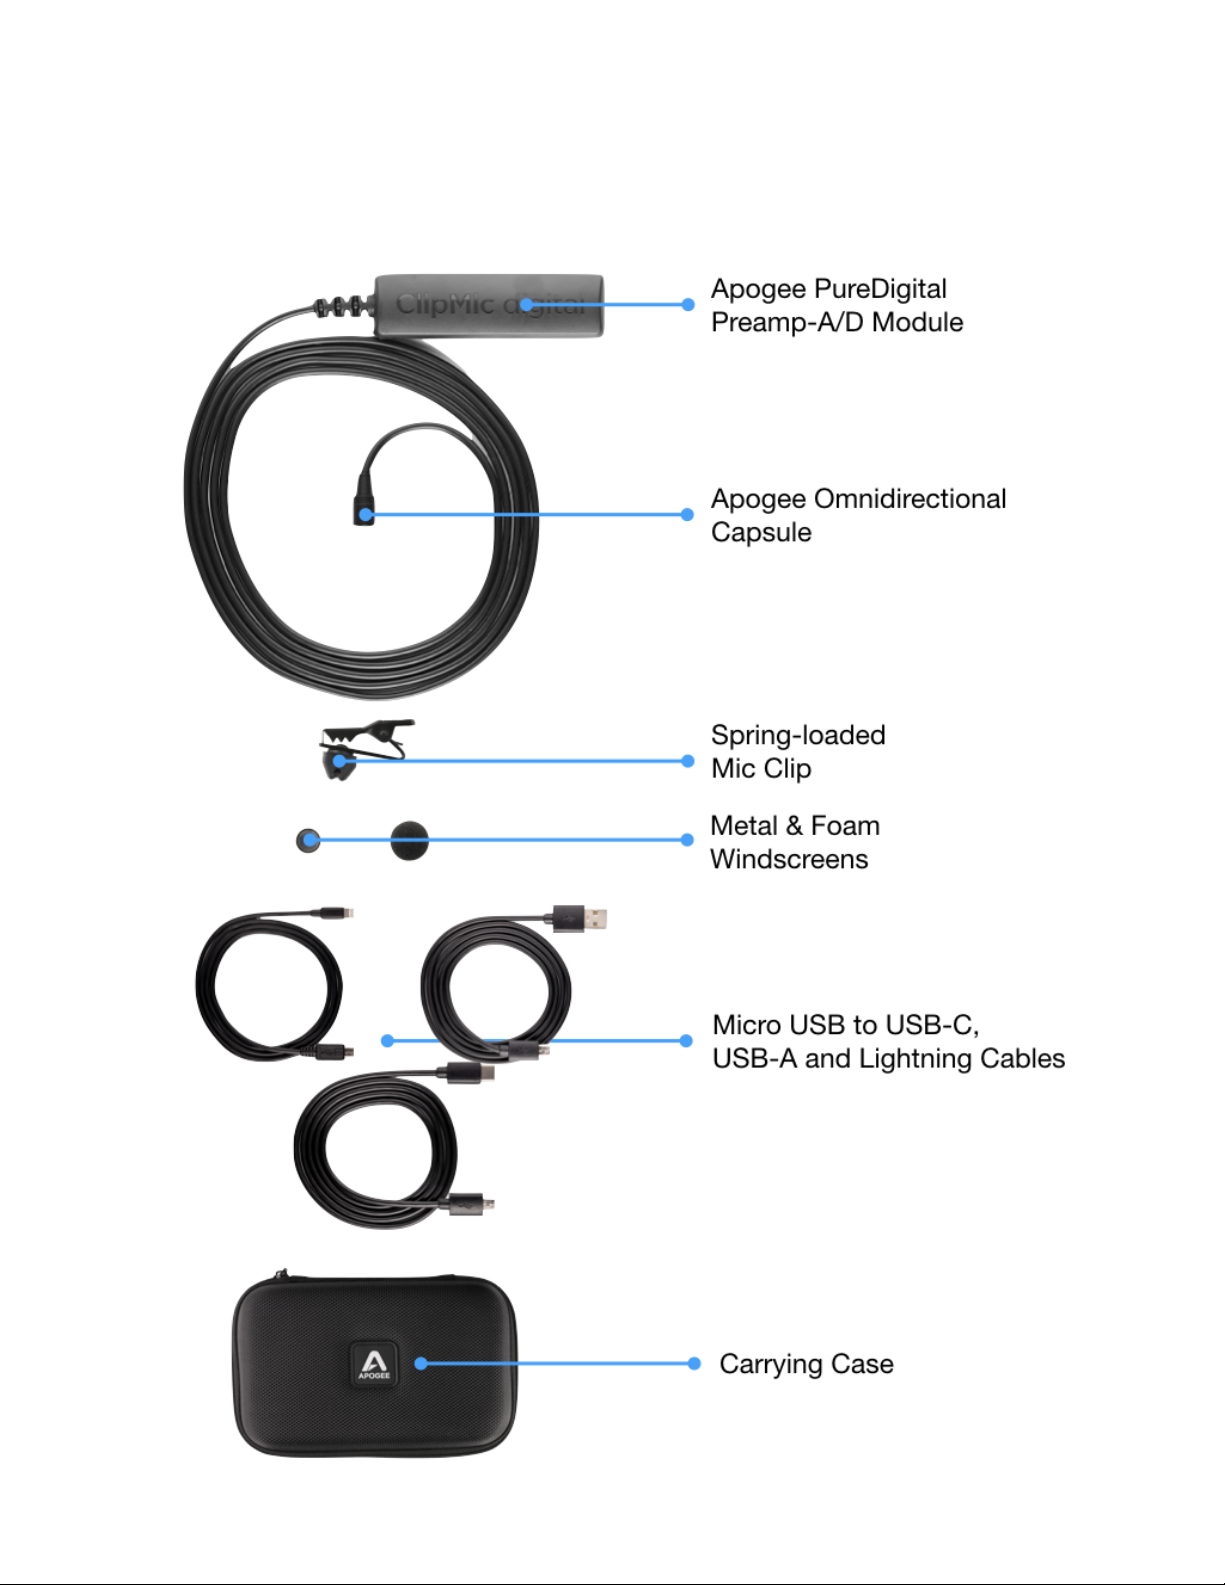
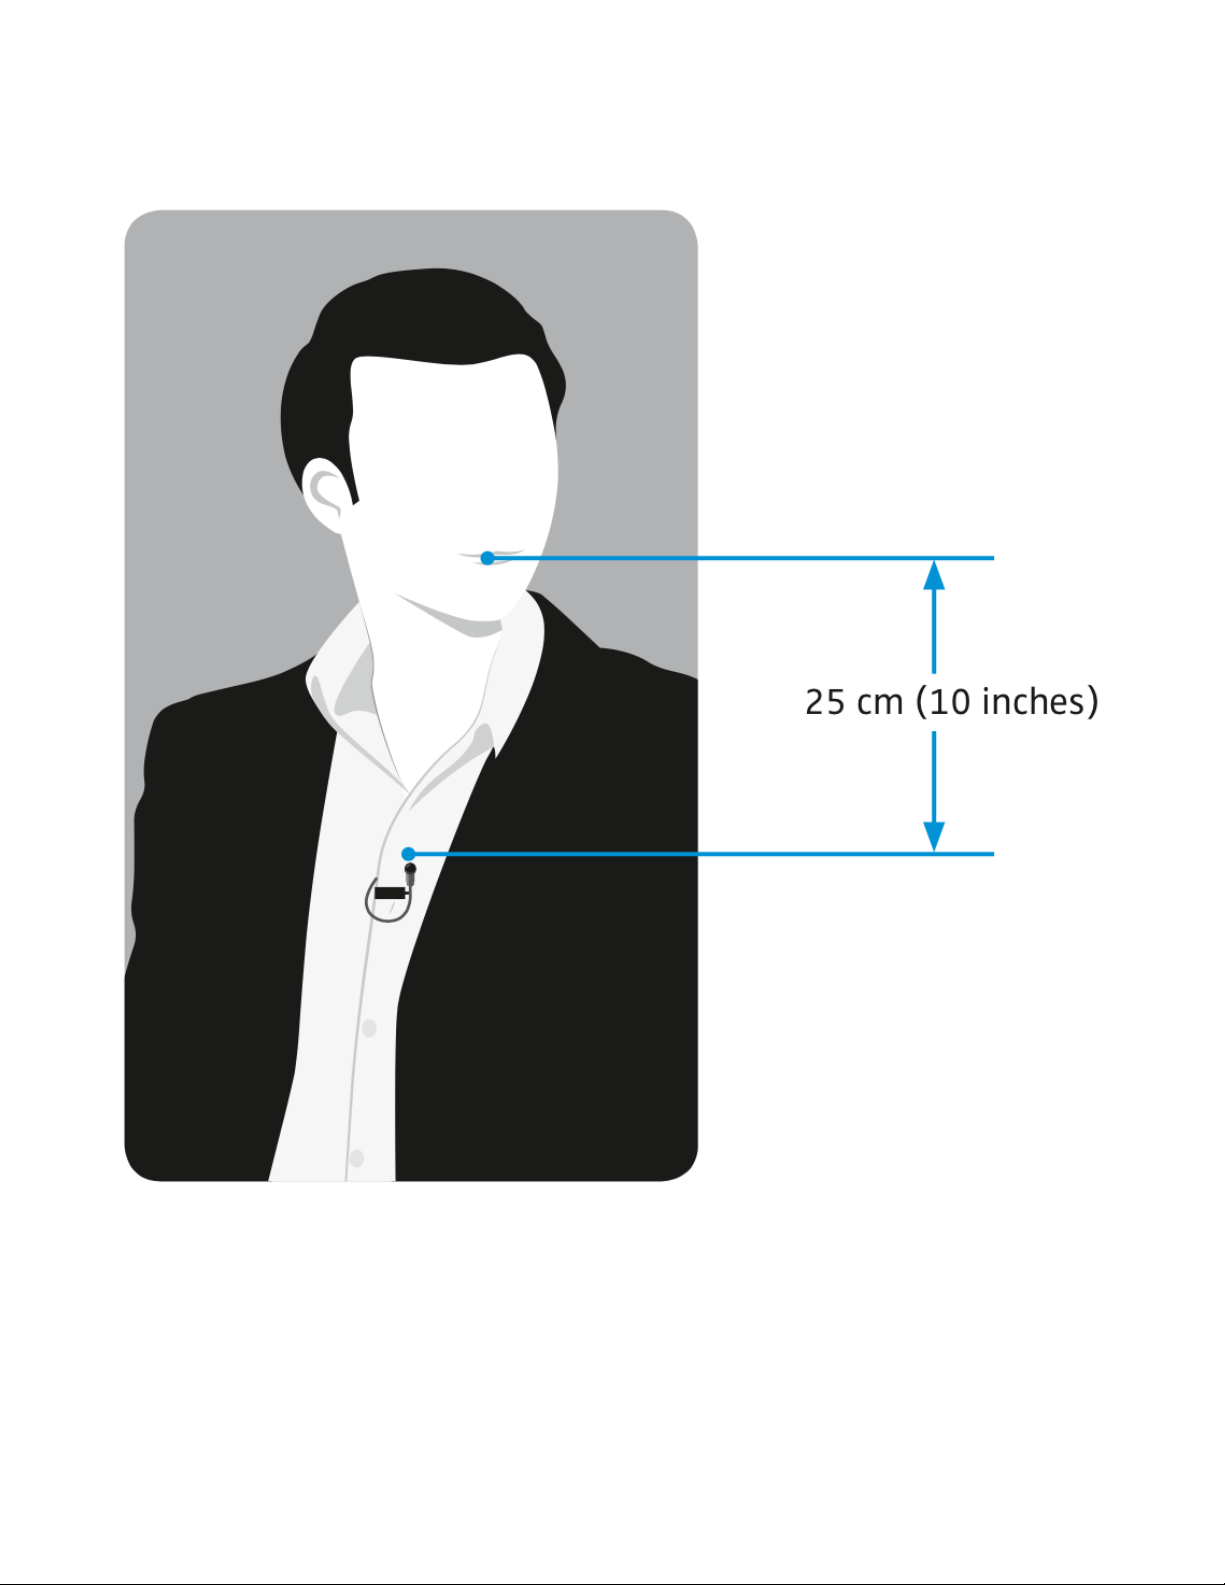
Recording with ClipMic digital
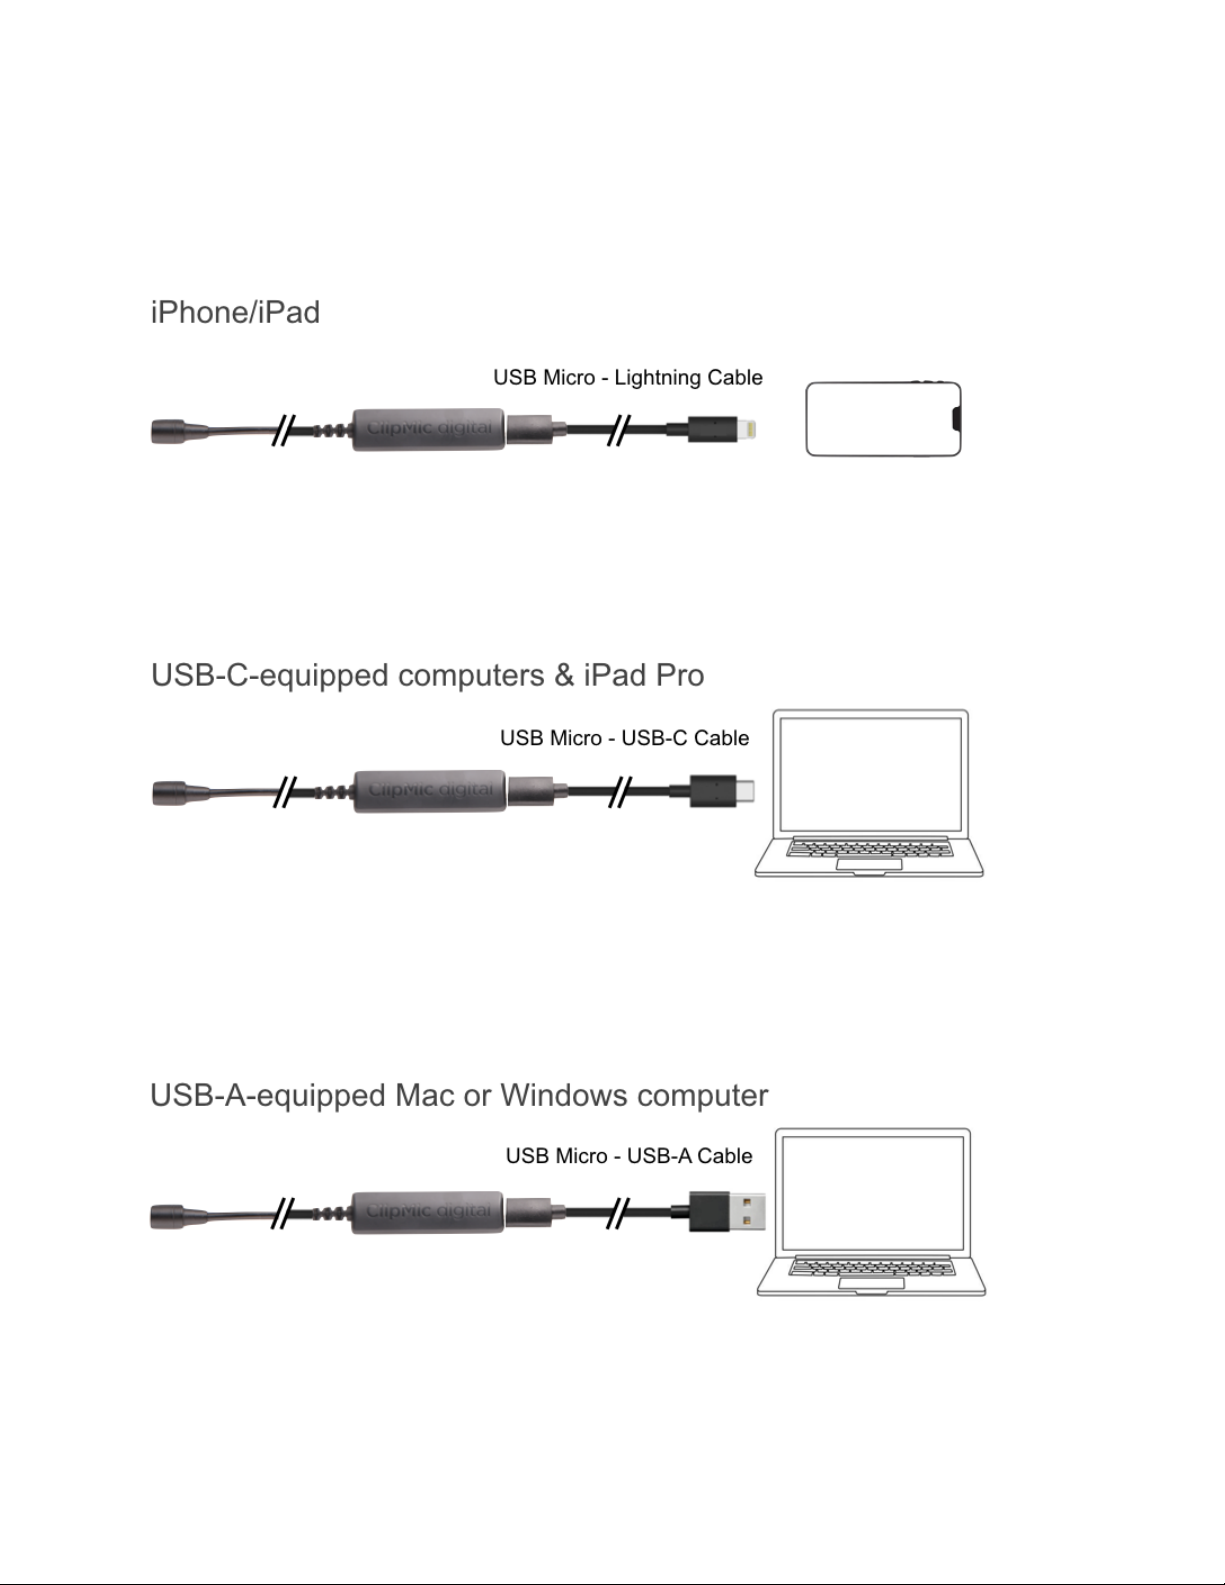
Working with iPhone/iPad
Audio hardware device selection is done automatically in iOS, so that when a device is connected it’s
ready to use with all audio and video apps.
Note: ClipMic digital, like all USB mics, is not compatible with iOS “telephony” apps like Phone,
Facetime and Skype. ClipMic is compatible with the macOS and Windows 10 versions of Facetime and
Skype.
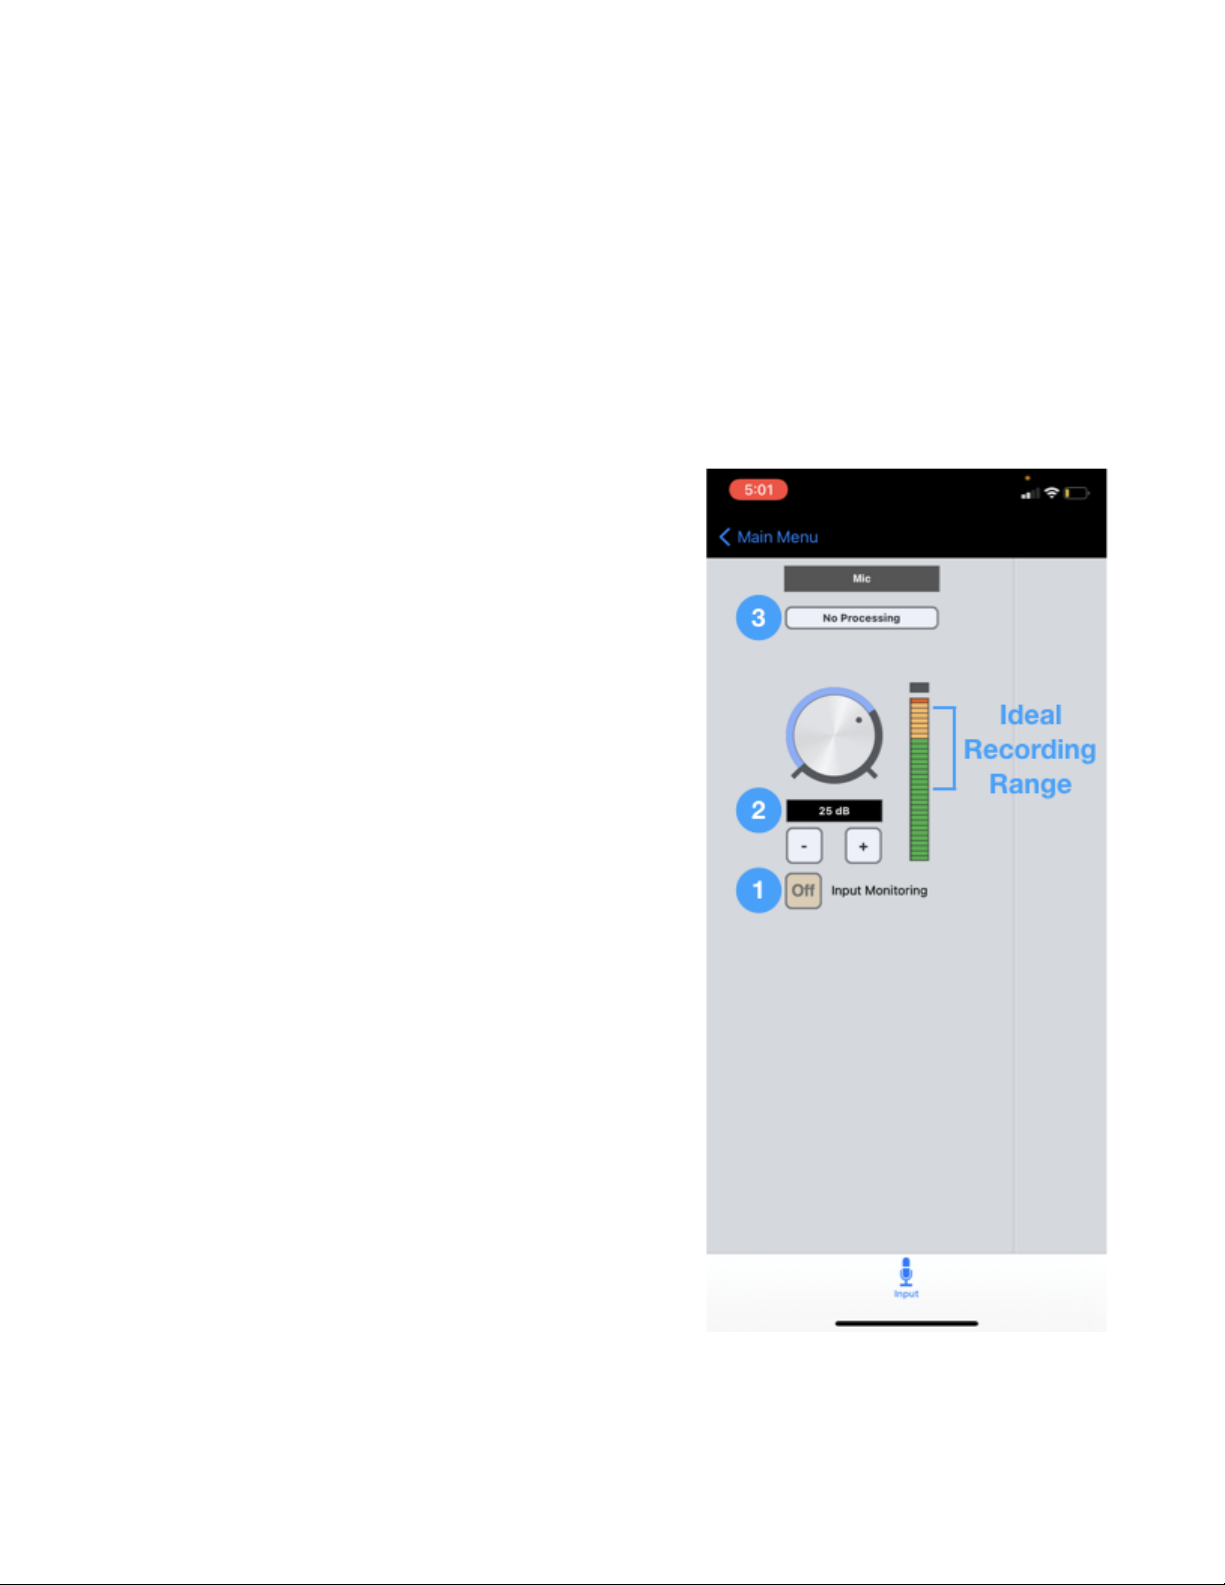
Apogee Maestro
1. To hear input, tap the Input Monitoring button to
ON.
2. To set Input Gain, speak into the mic at the volume
you plan to record at, then adjust the Input Gain so
the audio level falls within the ideal recording range
on the level meter as shown at right.
3. To apply corrective DSP, tap the Processing button:
a. Engage Rumble Reducer if you hear
undesirable low frequency sound from air
conditioners and other mechanical
equipment.
b. Engage Hiss Reducer to attenuate
undesirable high frequency sounds.
c. Engage Overload Eliminator if the audio
input is loud or inconsistent with large
peaks.
4. Once Input Gain and DSP are set, open your
preferred audio/video application - iOS
automatically assigns ClipMic digital as the audio
input for the app.