Apogee MiC User manual
QuickStart Guide

Contents
1 Introduction
2 Package Contents
3 MiC Features
4 System Requirements
5 Using the Tripod
6 Using MiC with an iPad
7 Using MiC with an iPhone
8 Using MiC with a Mac
9-10 Recording techniques
11-14 Registration and Warranty Information

MiC QuickStart Guide
1
Introduction
Congratulations on your purchase of MiC by Apogee.
It’s an Apogee: legendary sound quality at an incredible price.
If you haven’t seen Apogee gear in a commercial recording studio,
you’ve heard it on countless hits. Apogee products are preferred by
recording pros around the world and have set the industry standard
in professional recording for over two decades.
MiC makes the legendary quality of Apogee available in a portable
form factor and at the lowest price ever for a premium computer
recording interface.
For more information on MiC, visit apogeedigital.com

MiC QuickStart Guide 2
Package Contents
USB Cable
Tripod
MiC
iOS Dock Connector Cable

MiC QuickStart Guide
3
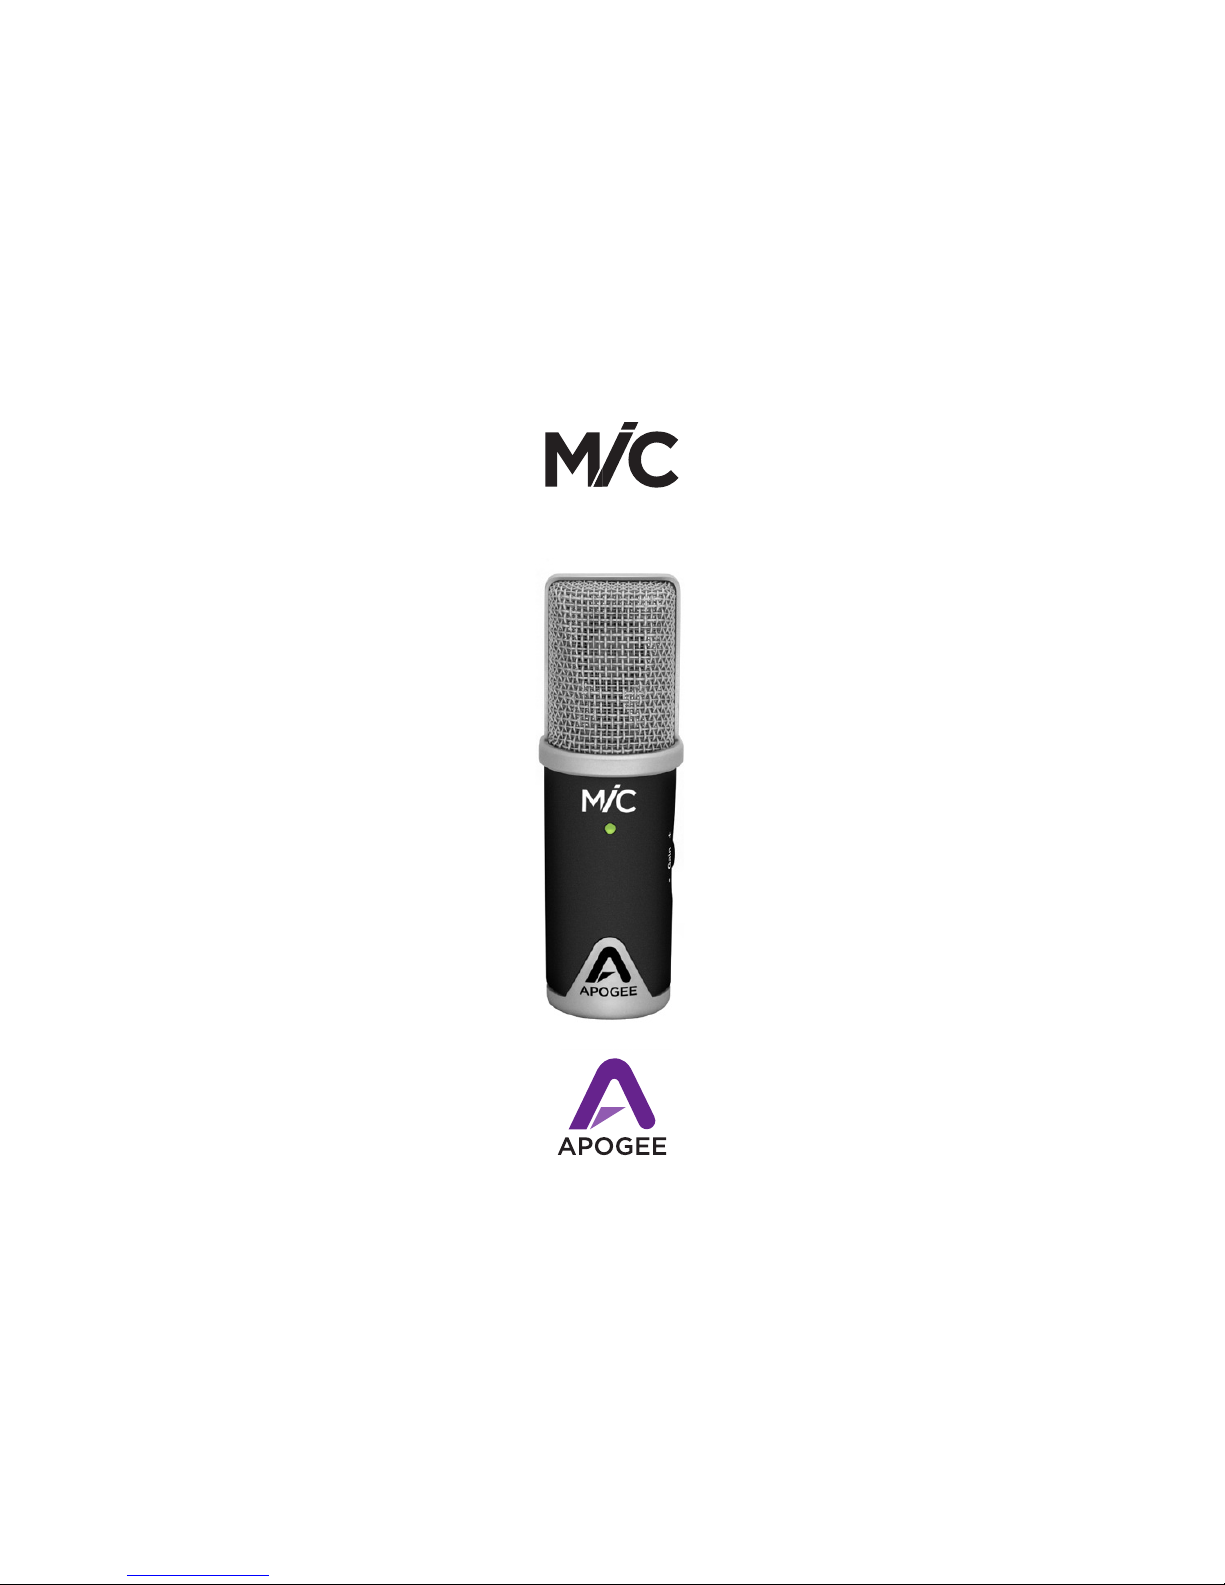
MiC Features
Blue - Connected to hardware device , but not working
with audio software
Dim Green - Working with audio software, no audio level
Bright Green - Audio level is present
Orange - Approaching maximum input level
Red - Input overload, adjust the gain using the Gain
Control Knob on the side of MiC
Status Indicator Light
Gain Control Knob
Tripod

MiC QuickStart Guide 4
Gain Control Knob
Tripod
System Requirements
iOS:
Devices: iPhone 4, iPhone 4S, iPad, iPad 2
iOS version: 4.3 and later
Connection: Dock connector port (no batteries required)
Software: Made for GarageBand
Mac OS:
Computer: Mac, with an Intel processor
Memory: 1 GB minimum of installed RAM, 2 GB recommended
OS version: 10.6.4 or later including 10.9 Lion
Connection: USB 2.0 Full Speed
Software: GarageBand, Logic Pro, MainStage
or any Core Audio compatible application

MiC QuickStart Guide
5
Using the Tripod
Screw the Tripod into the threaded hole on the back of MiC.
Tighten the locking nut on the Tripod to create a tight t.
Loosen the wing nut on the back of the Tripod and move MiC
into the desired position.
Tighten the wing nut to lock MiC in place.
locking nut
wing nut

Plug MiC into your iPad using the provided iOS Dock Connector Cable.
Start up GarageBand and choose New Song.
MiC’s status indicator light should now turn Green.
Choose Audio Recorder.
Check your input level on the Status Indicator Light and adjust accordingly.
You can listen to your recording through headphones, iPad’s internal
speakers or powered external speakers.
To hear what you are recording though your headphones,
Turn Monitor ON by clicking this icon and following instructions.
Check the status indicator light on MiC, it should be Blue.
MiC QuickStart Guide 6
Plug your headphones into iPad’s headphone output*
Click the Record button and you are recording with MiC!
Using MiC with an iPad
*Monitoring through headphones will eliminate the risk of feedback.

MiC QuickStart Guide
7
Using MiC with an iPhone
Plug MiC into your iPhone using the provided iOS Dock Cable.
Plug your headphones into iPhone’s headphone output*
Check the status indicator light on MiC, it should be Blue.
Start up GarageBand and choose New Song.
MiC’s status indicator light should now turn Green.
Check your input level on the Status Indicator Light and adjust accordingly.
Choose Audio Recorder.
To hear what you are recording though your headphones,
Turn Monitor ON by clicking this icon and following instructions.
You can listen to your recording through headphones, iPhone’s internal
speakers or powered external speakers.
Click the Record button and you are recording with MiC!
*Monitoring through headphones will eliminate the risk of feedback.

MiC QuickStart Guide 8
Using MiC with a Mac
Select the track you want to record on and click the Record button.
Plug your headphones into your Mac’s headphone output *
Plug MiC into your Mac using the provided USB cable.
Check the status indicator light on MiC, it should be Blue.
Open GarageBand and select New Project > Voice. Name and save your project.
Go to GarageBand > Preferences > Audio/MIDI and select MiC for Audio Input.
MiC’s status light should now turn Green.
Check your input level on the Status Indicator Light and adjust accordingly.
To hear what you are recording though your headphones, Turn Monitor ON.
You can listen to your recording through headphones, your Mac’s internal
speakers or powered external speakers.
*Monitoring through headphones will eliminate the risk of feedback.
Other manuals for MiC
1
Table of contents
Other Apogee Microphone manuals


