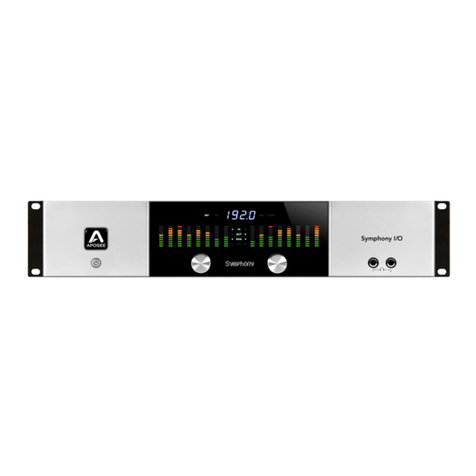
Apogee Symphony I/O User manual

Apogee Symphony I/O Users Guide - Print Version
December 2011
This version of the Symphony I/O Users Guide is for PRINT purposes only.
The latest and most up-to-date Users Guide is available at:
http://support.apogeedigital.com/help/symphony-io/
In this User’s Guide you’ll find complete information about the Symphony I/O hardware
interface and its companion software control application, Apogee Maestro.

Getting Started!7
Package Contents!7
An Introduction to the Symphony I/O System!8
Audio Interface Mode (AIM)!9
The following Audio Interface Modes are available:!9
Flexible Input/Output Architecture!10
The following I/O Modules are available:!10
8 Analog I/O + 8 AES I/O!10
16 Analog IN + 16 Optical OUT!10
16 Analog OUT + 16 Optical IN!10
8 Mic Preamp!10
Hardware and Software Control!10
Symphony I/O Front Panel!11
Apogee Maestro Software!11
Apple OS X Control Panels!12
Apple Mac Keyboard!12
Symphony I/O Release 4 Requirements!13
Symphony Audio Interface Mode!13
Requirements when connecting to Symphony 64 or Mobile PCI cards:!13
Pro Tools HD Audio Interface Mode!14
Requirements when connecting to Avid Pro Tools PCI Cards:!14
Requirements to run Maestro software, to control Symphony I/O via USB:!14
Symphony PCI Quick Start Guide!15
Step 1 - Install the Symphony 64 PCIe Card (sold separately)!15
Step 2 - Connect Symphony I/O to the Symphony 64 Card!16
Step 3 - Download and Install Symphony I/O Software!17
Step 4 - Connect Headphones, Speakers and Inputs!17
Step 5 - Playback from iTunes!18
Step 6 - Configure Apple Logic Pro!19

Step 7 - Open Apogee Maestro Software!20
Pro Tools PCI Quick Start Guide!22
Step 1 - Install Pro Tools HD cards!22
Step 2 - Connect Symphony I/O to the Pro Tools HD PCI Card!22
Step 3 - Connect Symphony I/O to the Software Remote Mac!23
Step 4 - Download and Install Symphony I/O Software!23
Step 5 - Connect Headphones, Speakers and Inputs!24
Step 6 - Configure Pro Tools Software!25
Step 7 - Playback from Pro Tools Software!25
Step 8 - Open Apogee Maestro Software!25
Symphony I/O Features!26
Symphony I/O Front Panel!26
Symphony I/O Rear Panel!27
8 Analog I/O + 8 Optical I/O Module!29
8 Analog I/O + 8 AES I/O Module!30
16 Analog IN + 16 Optical Out I/O Module!31
16 Analog Out + 16 Optical In I/O Module!32
Mic Pre I/O Module!33
Maestro Features!35
Devices Sidebar!35
Device Icon & ID Button!36
Input Tab Window!37
Output Tab Window!38
Input/Output Tab Windows - Parameter Order!39
Device Settings Tab Window!40
Routing Tab Windows!41
Output Routing - Symphony Audio Interface Mode!42
Standalone Routing - Standalone Audio Interface Mode!43
Routing - Pro Tools HD Audio Interface Mode!44
System Setup Tab Window!45

System Setup - Symphony Audio Interface Mode!45
System Setup - Standalone Audio Interface Mode!46
System Setup - Pro Tools HD Audio Interface Mode!47
Toolb a r!47
Menu Bar Menus!48
Connecting Your Symphony I/O System!50
Analog IN!50
Analog OUT!50
Optical IN!51
Optical Out!51
AES In/Out!52
S/PDIF In/Out!53
Mic Pre I/O Module!53
I/O Numbering with 2 IO Modules!54
I/O Module Connections - Standalone Audio Interface Mode!56
Connecting Headphones!56
Making Hardware Clock Connections!57
Locking External Devices to Symphony I/O!57
Locking Symphony I/O to External Devices!57
Locking multiple Symphony I/Os with Loop Clock!58
Locking multiple Symphony I/Os to External Devices!59
Connecting to a Symphony 64 PCIe Card!59
Connecting to a Symphony Mobile Card!60
Connecting to Pro Tools HD PCI Cards!62
Connecting to Pro Tools HD Native cards!63
Apogee Maestro Software Control via USB!63
Connecting to a Mac’s USB Port!63
Symphony Audio Interface Mode!64
Pro Tools HD Audio Interface Mode!64
Standalone Interface Mode!65

Configuring Your Symphony I/O System!66
Audio Interface Mode (AIM)!66
Setting the Audio Interface Mode!67
Symphony Audio Interface Mode!68
Pro Tools HD audio interface mode!69
Standalone Interface Mode!71
Navigating in Maestro!72
Setting the Clock Source!74
Standalone Audio Interface Mode!75
Pro Tools HD Audio Interface Mode!75
Pro Tools Clock Source!76
Setting the Sample Rate!77
Configuring Speaker and Headphone Outputs!78
Configuring Digital I/O Formats!79
Using the S/PDIF Coax I/O!79
Calibrating Symphony I/O!79
Configuring Audio Software!82
Configuration Settings on your Mac!82
Configuration Settings in OS X Audio MIDI Setup !83
Configuration Settings in OS X Sound Preferences!84
Configuration Settings in Apple Logic Pro!85
Configuration Settings in Apple GarageBand!87
Configuration Settings in Avid Pro Tools!88
I/O Setup!89
Audio Routing Between Symphony I/O and Pro Tools!91
Working with Your Symphony I/O System!92
Setting Speaker and Headphone Output Levels!92
Front Panel Encoders!92
Maestro Level Controls!92

Mac Keyboard!93
Using Soft Limit!94
Working with Front Panel and Maestro Level Meters!95
Working with VBus!96
Working in your Digital Audio Studio!97
Setting Levels!97
Understanding Latency!98
FAQs !101
Maestro FAQs!104
Troubleshooting!105
Symphony Audio Interface Mode!105
Symptoms and Solutions!106
Pro Tools HD Audio Interface Mode!108
General Troubleshooting - All Audio Interface Modes!109
Troubleshooting Signal Flow!109
Further Troubleshooting Resources!110
Symphony I/O Hardware!110
Installing I/O Modules!111
Symphony I/O Screws!112
Directions!113
Auto Power!119
Updating Symphony I/O!120
Specifications!121
Connector Pinouts!123
Symphony I/O Warranty Information and Legal Notices!127
Warnings!128

Getting Started
Package Contents
The following items are included in the Symphony I/O package.
Software and Firmware for this Apogee Product is available online only at
http://www.apogeedigital.com/downloads.php#SYMIO
• Symphony I/O
• USB Cable
• Power Cable
• Rack Ears and Screws
• QuickStart Guide

An Introduction to the Symphony I/O System
Thank you for your purchase of Symphony I/O, the latest flagship digital audio interface
from Apogee Electronics!
!
More than the latest High-end product from Apogee, Symphony I/O is the completion
of the Symphony System and the platform for Apogee development and technology for
years to come. Built to last and designed to meet the demands of the most discerning
musicians, producers and engineers, Symphony I/O sets a new standard in digital
audio interface quality, flexibility and ease of use.
•Next-generation A/D and D/A conversion quality
•Audio Interface Mode (AIM) technology for simple and direct connection to all
popular audio workstations and formats
•Flexible and scalable I/O architecture to fit the needs of any studio
•Total software control with the new Apogee Maestro control software
•Unprecedented value

Audio Interface Mode (AIM)
The Audio Interface Mode (AIM) setting transforms the most fundamental
characteristics of the Symphony I/O system to best match the host device to which
Symphony I/O is connected. Rather than create a single hardware and software user
interface that must adapt to all connection scenarios, the Audio Interface Mode
customizes the user interface to your specific scenario, thus simplifying operation. If
you change the way you connect your setup, select the appropriate Audio Interface
Mode from the front panel. When switching between Audio Interface Modes as your
workflow demands, the settings of each Mode are recalled automatically!
The following Audio Interface Modes are available:
Symphony - to connect to Symphony 64 PCI and Symphony Mobile Express/34 cards.
Pro Tools HD - to connect to Pro Tools HD PCI cards. Symphony I/O may be controlled
from a Mac via USB, though the Mac connection isn’t required for audio operation.
USB Audio - to use Symphony I/O as a USB audio interface with an Apple Mac
computer.
Standalone - to connect Symphony I/O to recording devices via ADAT, S/PDIF or AES
inputs and outputs. Symphony I/O may be controlled from a Mac via USB, though the
Mac connection isn’t required for audio operation.

Flexible Input/Output Architecture
Several I/O Modules are available, allowing the customization of Symphony I/O’s inputs
and outputs to your particular requirements.
!
The following I/O Modules are available:
!
8 Analog I/O + 8 AES I/O
8 channels of Analog and 8 channels of AES I/O simultaneously
•8 analog inputs and outputs
•8 AES inputs and outputs
•Stereo S/PDIF Coax input and output.
8 Analog I/O + 8 Optical I/O
8 channels of Analog I/O and up to 8 channels of Optical I/O simultaneously
•8 analog inputs and outputs
•8 channels of ADAT/SMUX inputs and outputs or a stereo S/PDIF optical input and
output
•Stereo S/PDIF coax input and output.
16 Analog IN + 16 Optical OUT
16 channels of Analog INPUT and up to 16 channels of Digital OUTPUT simultaneously
•16 analog inputs
•16 channels of ADAT/SMUX outputs or 2 stereo S/PDIF optical outputs
•Stereo S/PDIF coax input and output
16 Analog OUT + 16 Optical IN
16 channels of Analog OUTPUT and up to 16 channels of Digital INPUT simultaneously
•16 analog outputs
•16 channels of ADAT/SMUX inputs or a 2 stereo S/PDIF optical inputs
•Stereo S/PDIF coax input and output
8 Mic Preamp
8 Mic preamps with 4 instrument inputs and 8 insert points
•8 Mic Pre inputs, with 70 dB of gain, 48v phantom power
•4 Instrument inputs
•8 assignable analog insert sends and returns
Hardware and Software Control
Symphony I/O’s operating parameters may be set from a variety of hardware and
software controls, listed below. Though several options are offered, you may choose
the hardware and software controls that best suit your individual preferences.

Symphony I/O Front Panel
Basic parameters such as levels and clocking may be set using the two front panel
encoders.
Apogee Maestro Software
Apogee Maestro provides complete control of all Symphony I/O settings.

Apple OS X Control Panels
Levels and some clock parameters may be set from the OS X System Preferences >
Sound window and the Audio MIDI Setup utility.
Apple Mac Keyboard
Set output levels directly from your Mac keyboard’s volume control.

Symphony I/O Release 4 Requirements
!
Symphony Audio Interface Mode
!
Requirements when connecting to Symphony 64 or Mobile PCI cards:
•Apogee Symphony 64 or Apogee Symphony Mobile PCI card (sold separately)
•OS X Snow Leopard 10.6.4 or OS X Lion 10.7 or greater (64-bit and 32-bit kernel
modes)
•Symphony 64 - Apple Mac Pro - 2GB memory required, 4 GB recommended
Important - Use Symphony 64 Driver 1.1.4 or greater, included in the Symphony I/O
Release 4 Software Installer.
•Symphony Mobile - Apple MacBook Pro with an Express/34 card slot - 2GB
memory required, 4 GB recommended
•Important - Use Symphony Mobile Driver 1.0.53 or greater, included in the
Symphony I/O Release 4 Software Installer.
!
!

Pro Tools HD Audio Interface Mode
A Symphony I/O based Pro Tools system consists of two independent computer
connections: audio (to a Pro Tools HD PCI card) and software control (via USB to an
Intel Mac running Maestro 2). In the case where PCI cards are installed in a PowerPC
Mac or Windows computer, it’s possible to run Maestro from a separate Intel Mac, such
as Mac Mini or MacBook.
!
Requirements when connecting to Avid Pro Tools PCI Cards:
Avid Pro Tools HD Core, HD Process, HD Accel PCI, HD Accel Core, HD Accel or HD
Native PCIe card installed in a computer in accordance with the Pro Tools HD
Compatibility Grids, available at www.avid.com
Pro Tools 8.1, 9.0 or greater 10.0 or greater
Requirements to run Maestro software, to control Symphony I/O via USB:
OS X Snow Leopard 10.6.4 or OS X Lion 10.7 or greater (64-bit and 32-bit kernel
modes)
Apple Intel Mac

Symphony PCI Quick Start Guide
This Quick Start Guide describes how to configure one Symphony I/O with a Symphony
PCI card or other device to record and play back audio.
Step 1 - Install the Symphony 64 PCIe Card (sold separately)
a. Power down the Mac and wait for 5-10 minutes.
b. Disconnect all external cables to the Mac except the AC power cable.
c. Touch the Mac’s metal PCI access covers to discharge any static electricity in
your body.
d. Disconnect the AC Cable.
e. Remove the Mac’s side cover and carefully put it aside.
f. Remove the Mac’s PCI bracket by unscrewing the two thumb screws on the
bracket.
g. Holding the Symphony PCIe card by its corners, align the card's connector with
the desired PCI slot and press the card firmly into place.
If the card does not slide into place with minimal effort, remove the card, check
alignment, and check for foreign objects.
h. Once the card is installed, re-attach the PCI bracket to secure the Symphony 64
card.
i. Re-install the Mac’s side panel.

Step 2 - Connect Symphony I/O to the Symphony 64 Card
Using the 3 meter PC-32 cable included with the Symphony 64 card, connect the
Symphony I/O’s Main port to the Symphony 64 PCIe card’s Channels 1-32 port as
shown below.

Step 3 - Download and Install Symphony I/O Software
Download the most current Symphony I/O Release package from the Apogee website:
http://www.apogeedigital.com/downloads.php#SYMIO
!
Once downloaded, the package will open automatically to reveal the following
contents:
•Symphony I/O Software Installer
•Symphony I/O Uninstaller
•Symphony I/O User’s Guide
•Read-Me
Double-click on the Symphony I/O Software Installer icon and follow the onscreen
directions provided by the installer program.
Following installation, you will be required to restart your Mac.
Step 4 - Connect Headphones, Speakers and Inputs
Connect line inputs to rear panel analog inputs 1-2 using an Apogee AD8-IFC cable
or equivalent.

Connect speakers to the rear panel analog outputs 1-2 using an Apogee DA8-IFC
cable or equivalent.
Step 5 - Playback from iTunes
After restarting your Mac, a dialog box will prompt you to choose Symphony 64 for Mac
sound output. Click Yes.
Open Apple iTunes and play an audio selection.
Using the front panel left hand encoder, select the speaker or headphone icon; use
the right hand encoder to adjust the playback level of the selected output.
!

Step 6 - Configure Apple Logic Pro
Logic 9.1.1 or greater recommended
a. Launch Logic Pro
b. Open Preferences > Audio
c. Click the Devices Tab, then the Core Audio Tab
d. Set Input Device and Output Device to Symphony 64
e. Set the I/O Buffer Size to 64
f. Check the Enabled box
g. Click Apply Changes
!
By selecting Symphony I/O input and output labels in Logic, the labels you see in
Logic’s Channel Strip input and output slots correspond exactly to Symphony I/O’s
hardware inputs and outputs, making I/O assignment much easier.

a. In Logic, choose Options > Audio > I/O Labels
b. Select the labels in the Provided by Driver column
c. Close the I/O Labels window
Step 7 - Open Apogee Maestro Software
Apogee Maestro software provides complete control of all Symphony I/O settings, from
levels to formats to routing.
Other manuals for Symphony I/O
2
Table of contents
Other Apogee Recording Equipment manuals

Apogee
Apogee DA-16 User manual

Apogee
Apogee Duet 2 User manual

Apogee
Apogee Element 46 User manual

Apogee
Apogee Apogee Duet User manual

Apogee
Apogee Boom User manual

Apogee
Apogee AD-16X User manual

Apogee
Apogee PSX-100 Supplement

Apogee
Apogee Symphony I/O User manual

Apogee
Apogee GiO User manual

Apogee
Apogee GiO User manual
Popular Recording Equipment manuals by other brands

Advanced
Advanced Axis AV-V70-KIT installation instructions

Kenwood
Kenwood KOS-A300 - CarPortal Media Controller instruction manual

Sony
Sony PCMD1 - Professional XLR Microphone Preamp Service manual

Duncan
Duncan SILVER LAKE user guide

TC Electronic
TC Electronic D22 Addendum

Paia
Paia CS-87 Assembly and using manual