Apogee Boom User manual

Boom User’s Guide
Version 1.0
1

Apogee Boom User’s Guide
Contents
Contents 2
Overview 4
Introduction 4
Features 4
Navigating This User’s Guide 5
In the Box 6
Included Software 6
System Requirements 6
Register your Product 6
Boom Front Panel Tour 7
Boom Rear Panel Tour 7
Getting Started 8
Installing Apogee Control 2 Software 8
macOS Installer 8
Windows 10 Installer 9
Firmware Update 9
Setting Up Boom 10
Connecting to a Mac or Windows computer 10
Connecting to an iPad Pro (USB-C connector) 10
Connecting to an iOS Device (Lightning connector) 11
Configure OS to use BOOM for Audio I/O 12
macOS 12
Windows 10 13
Apple iOS 13
Connecting Your Studio 14
BOOM Front Panel Features 17
Control Knob & Focus LEDs 17
Front Panel Meters 18
Apogee Control 2 Software 19
Primary Window 19
Toolbar 20
System Settings Sidebar 20
Channel Section 21
General Settings 21
Analog IN Channels 1-2 21
Playback Channels 22
2

Apogee Boom User’s Guide
Mixer Section 25
Monitor/Output Section 26
Choose Your Boom Workflow 27
A Glossary of Importantds Workflow Concepts 27
Monitoring Workflows 29
Software Monitoring 29
Direct Monitoring 30
Working with Onboard Hardware DSP 31
Assign to SW (Software) Inputs 32
Configuring Your DAW 33
Apple Logic Pro 33
Avid Pro Tools 34
Ableton Live 35
Troubleshooting 37
Specifications 38
Warranty Information and Legal Notices 39
Declarations of Conformity 39
3

Apogee Boom User’s Guide
Overview
Introduction
Apogee BOOM is made for passionate creators that pursue their craft without compromise. Whether
you're a musician, podcaster, video producer or live streamer, take your project to the next level with
studio-quality sound by Apogee.
Capture your performance through class-leading mic preamps and high-end digital conversion, then
use on-board hardware DSP processing to enhance your source. Dive into the power and detail of all
your recordings through the audiophile-quality headphone output.
Create your complete podcast and streaming production environment with the on-board Mixer and
Loopback mode.
Connect BOOM directly to your Mac, iPad Pro, or Windows laptop - No external power required to get
your ideas flowing.
Features
● Built-in hardware DSP - Print through the Symphony ECS Channel Strip plugin
● Inputs
○ 1 balanced ¼” instrument/line input
○ 1 balanced combi mic/line/instrument input
● Outputs
○ 1 ¼” Zero ohm Headphone output
○ BalancedLeft/Right speaker outputs
● Totally portable and bus powered
● Apogee Loopback feature makes live streaming multiple audio sources easy
● Includes Apogee Control 2 software for macOS, iOS and Windows
● Includes Ableton Live Lite DAW (free license + download with registration)
4

Apogee Boom User’s Guide
Navigating This User’s Guide
A computer-based audio production system built around the Boom includes the following
components:
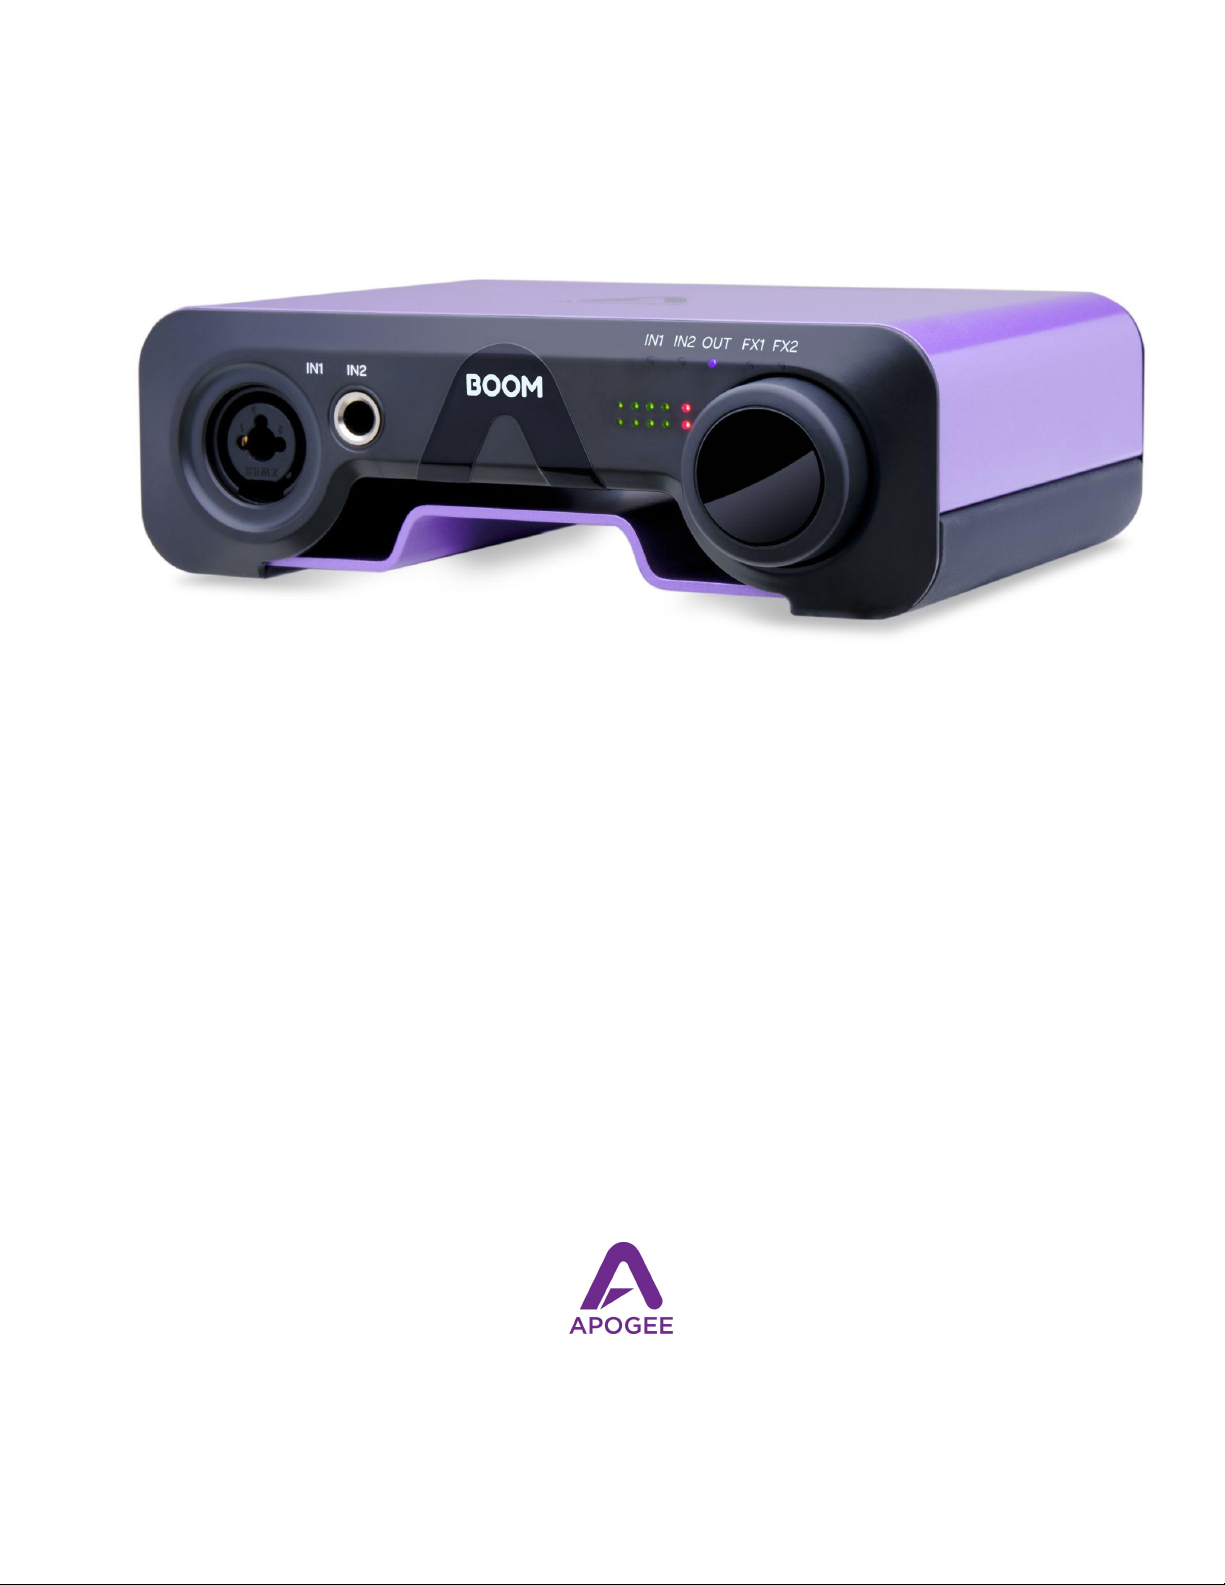
● Boom Hardware Interface
● Apogee Control 2 software application
● Integrated Symphony ECS Channel Strip plugin
● Mac, Windows or iOS device plus a Digital audio workstation (DAW) software application
● Microphones and instruments for recording plus speakers and headphones for listening
This User’s Guide will take you through the following steps to integrate the components of your
system into a powerful and efficient audio production environment. When text is highlighted in blue, it
may be clicked to link to further information in this Guide.
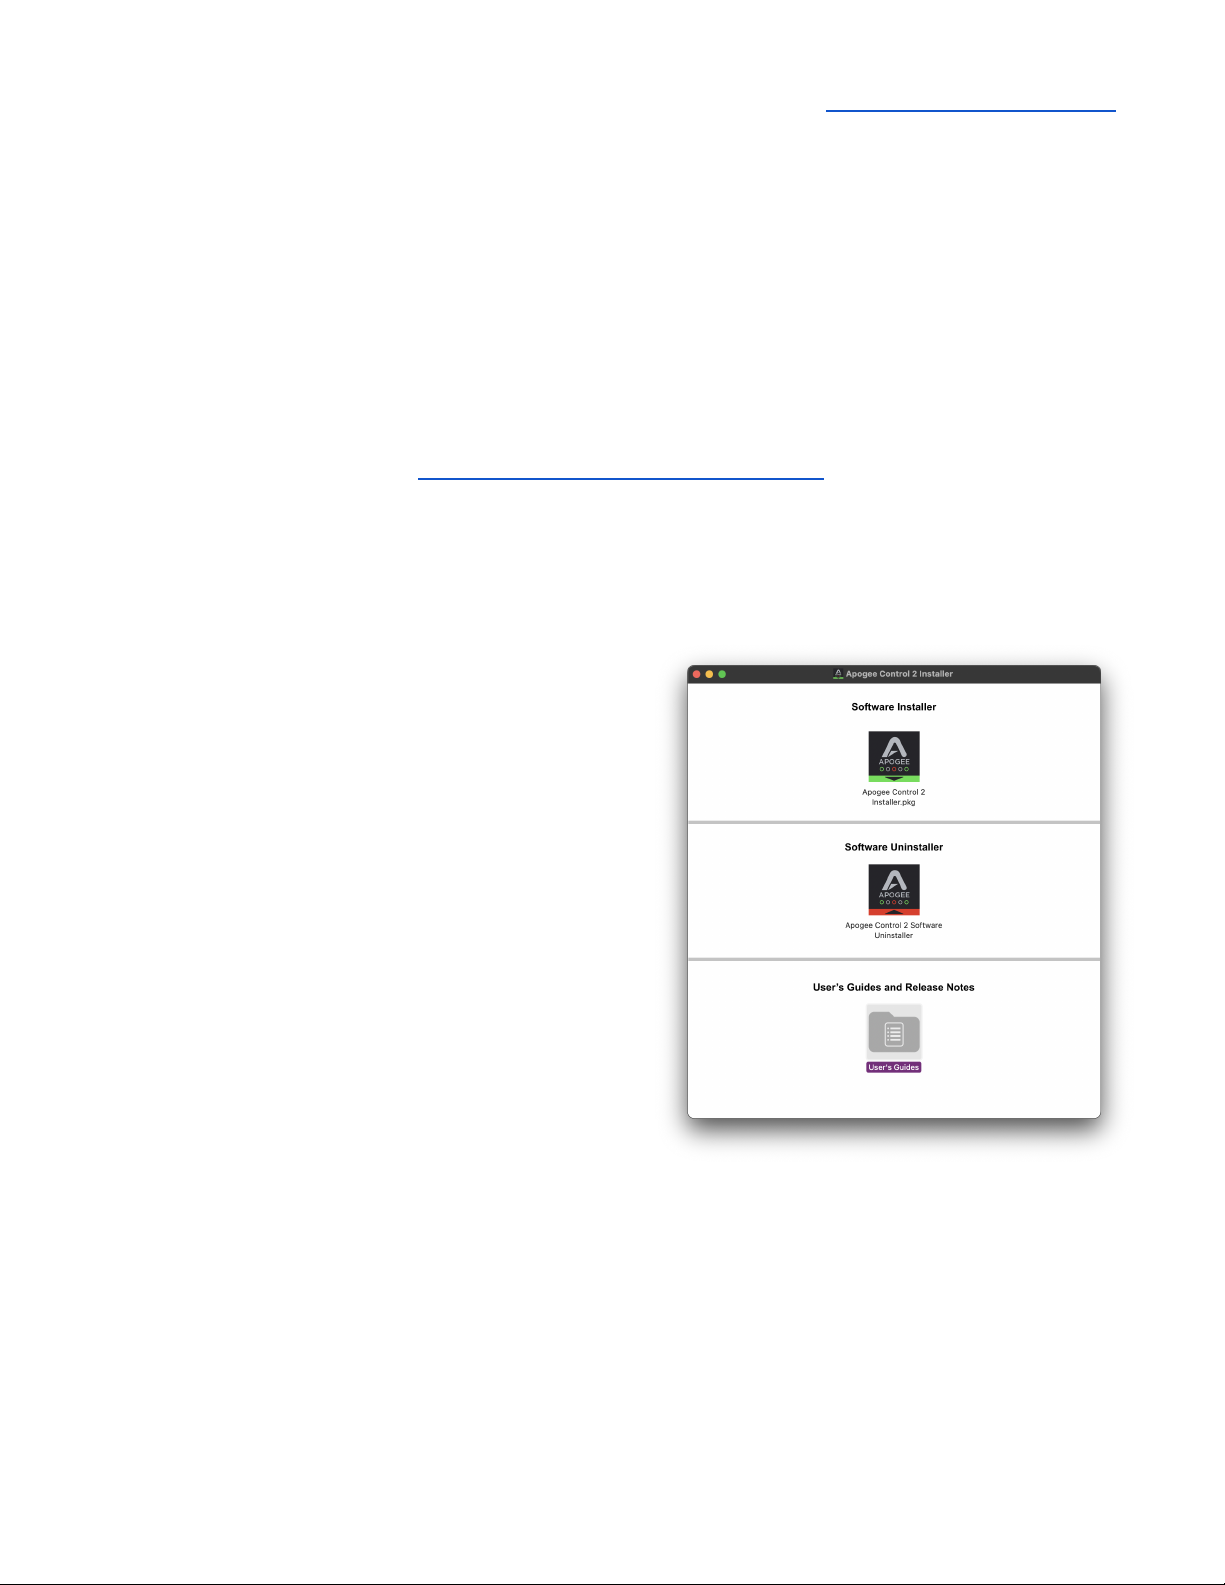
● Download and run the Boom Installer, which installs the Apogee Control 2 application (and
driver if required) on your computer (link).
● Configure your computer’s operating system (OS) to use Boom for audio input and output
(link).
● Configure your DAW to use Boom for audio input and output (link).
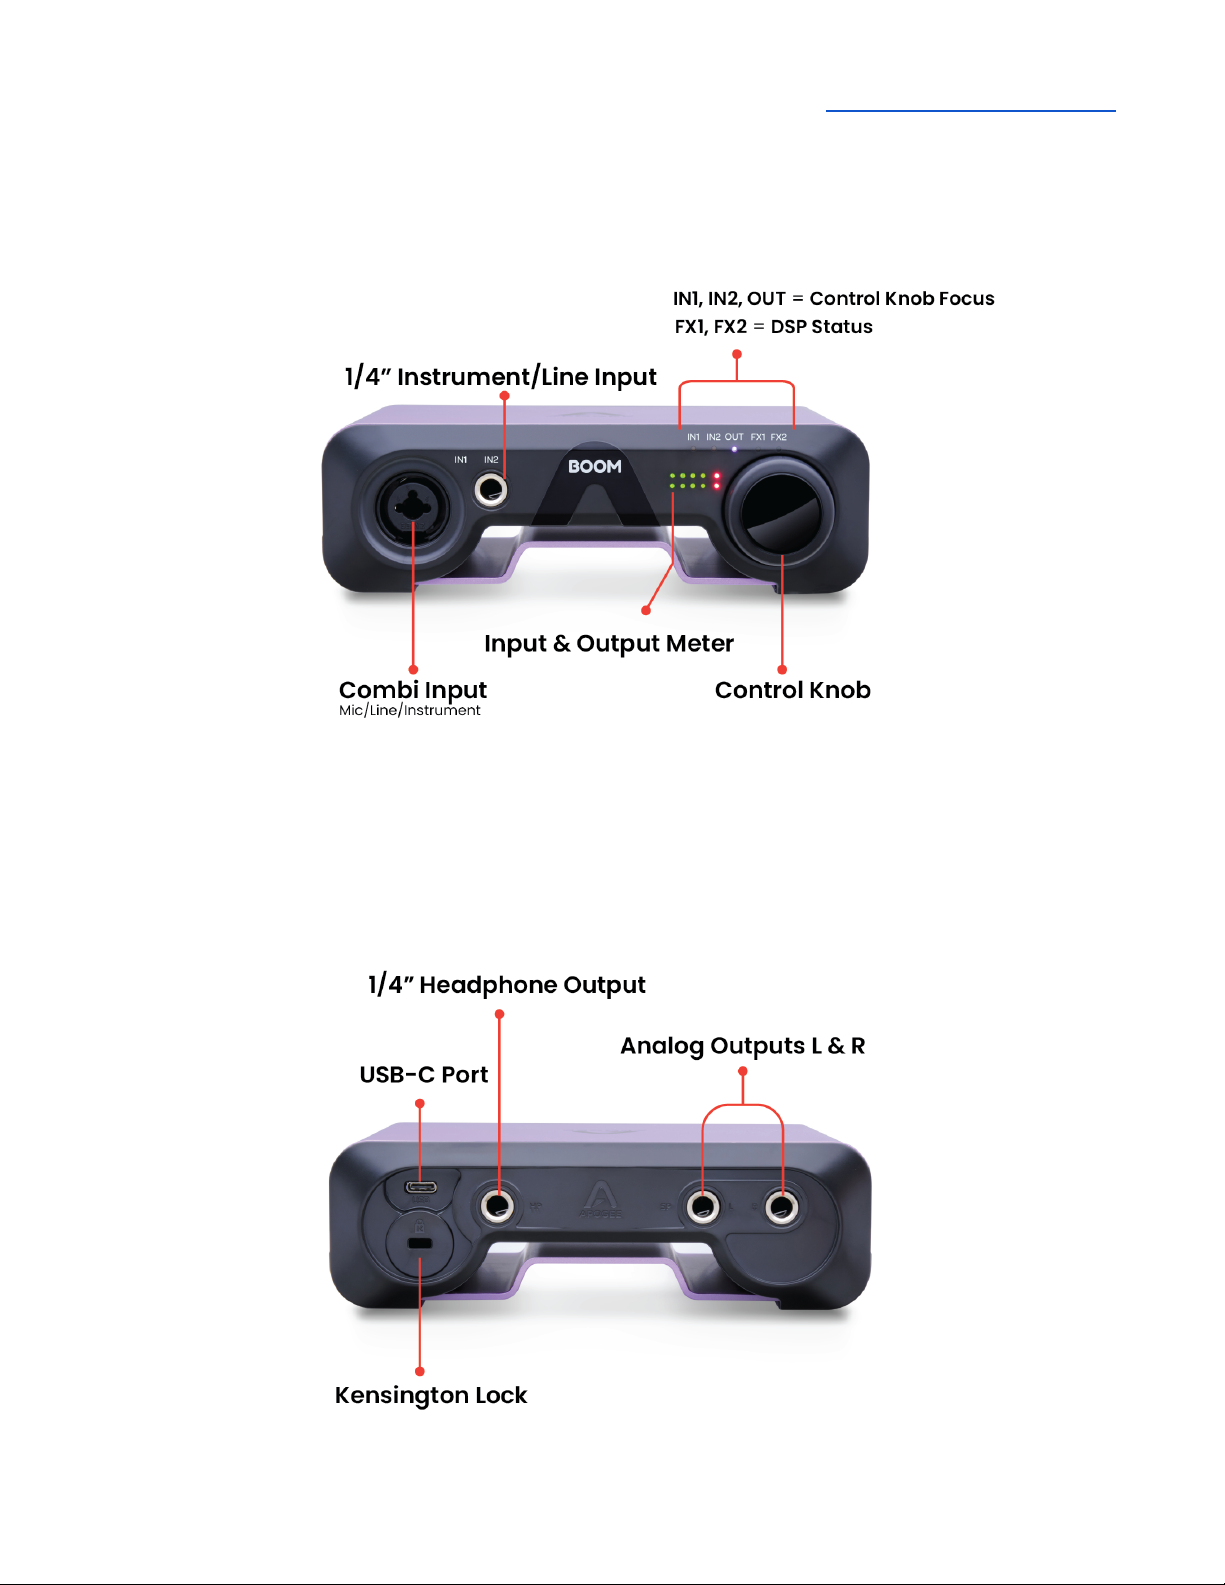
● Connect microphones, instruments, headphones, speakers and other audio hardware to
Boom (link).
● Use Boom front panel Control Knob to adjust gain on the Inputs and level for the headphones
and speaker outputs. The Control Knob can also be set to toggle between i/o and mute
outputs. (link).
● Use Apogee Control 2 software to navigate all settings, including direct monitor mixing and FX
(link).
● Choose a Monitoring workflow and configure your DAW and Boom (link).
● Set up FX Processing according to your preference (link).
5

Apogee Boom User’s Guide
In the Box
● Boom
● USB-C Cable with included USB-C to USB-A adapter
● Warranty Booklet
Included Software
● Ableton Live Lite - Requires registration
● Apogee Control 2 - macOS and Windows
● Apogee Control 2 - iOS
System Requirements
● macOS 10.14.6 or greater
● Windows 10 Anniversary update or later
● iOS 13 or greater
● Mac & Windows: 4GB minimum RAM, 8GB Recommended
Register your Product
● Access Apogee’s expert Technical Support for free
● Receive important product update information by email
● Take the Customer Satisfaction Survey for a chance to win Apogee gear!
Register Now: www.apogeedigital.com/support/register
6

Apogee Boom User’s Guide
Boom Front Panel Tour
Boom Rear Panel Tour
7

Apogee Boom User’s Guide
Getting Started
Installing Apogee Control 2 Software
To register your product and receive the Boom Installer, learn the most up-to-date information on new
releases, and view Interactive tutorials, click the link below.
www.apogeedigital.com/support/boom
Once you’ve registered your Boom, you’ll receive an email with links to Mac and Windows versions of
the Boom Installer download.
macOS Installer
Once downloaded, double-click the .dmg file to
display the contents:
● Apogee Control 2 Software Installer
● User’s Guides
● Apogee Control 2 Uninstaller
To install Apogee Control 2 Software:
1. Double-click the Apogee Control 2 Software
installer.
2. A dialog box will appear with a series of steps to
complete the installation.
3. You will be required to restart your computer.
8

Apogee Boom User’s Guide
Windows 10 Installer
1. In your Downloads folder, double-click the .zip
file to extract it, then double-click the .exe file
to start the installation process.
2. Click Next through all steps, then click Finish
at the final step.
3. You should restart your computer immediately.
Firmware Update
If Boom’s firmware requires a firmware update, the
notification at right is displayed after the installation.
1. Quit Apogee Control 2 and any audio apps.
2. Disconnect Boom’s USB cable from the computer.
3. Press and hold down Boom’s Control knob while
re-connecting its USB cable to the computer.
4. Once the “Found Boom in firmware update mode”
dialog appears, release the Control knob.
5. Click “Yes” in the “Found Boom…” dialog. Once the
“Firmware update complete!” dialog appears, click Ok.
Boom will re-initialize.
9

Apogee Boom User’s Guide
Setting Up Boom
Connecting to a Mac or Windows computer
Note: the supplied USB-C to USB-C/USB-A cable includes an integrated USB-C to USB-A adaptor`.
Remove the USB-A adaptor to connect to USB-C devices.
Using the supplied cable, connect Boom’s USB-C port to a USB port on your Mac or Windows
computer.
Connecting to an iPad Pro (USB-C connector)
Using the supplied USB-C to USB-C/USB-A cable, connect Boom’’s USB-C port to the iPad Pro’s
USB-C connector.
10

Apogee Boom User’s Guide
Connecting to an iOS Device (Lightning connector)
Using the supplied USB-C to USB-C/USB-A cable, connect Boom’s USB-C port to a powered USB
hub (sold separately). Connect the Apple Camera Connection Kit (sold separately) to the powered
USB hub and your Lightning iOS device. Connect the USB hub to a power source.
Connecting BOOM to an iPhone with Lightning connector via powered USB hub/Camera Connector Kit
Connecting BOOM to an iPad with Lightning connector via powered USB hub/Camera Connector Kit
11

Apogee Boom User’s Guide
Configure OS to use BOOM for Audio I/O
macOS
To choose Boom as the audio interface for Mac applications that don’t have specific audio hardware
preferences, such as Safari, Spotify, Voice Memos and others:
1. Open System Preferences by choosing Apple menu > System Preferences.
2. Click the Sound icon to open the Sound preferences panel.
3. Click the Output tab, then click BOOM in the devices list.
4. Click the Input tab, then click BOOM in the devices list.
12

Apogee Boom User’s Guide
Windows 10
To choose BOOM as the audio interface for Windows
applications that don’t have specific audio hardware
preferences, such as Google Chrome, Spotify, and others:
1. Type Control Panel in the Windows search bar to open
the Control Panel. Double-click the Sound icon.
2. Click the Playback tab and select Speakers-Boom.
3. Click Properties, then click the Advanced tab.
4. Uncheck Exclusive Mode checkboxes. When using a
DAW and apps like Spotify simultaneously, match the
Default Format sample rate with the rate of the DAW
session.
5. Click Apply.
6. Click the Recording tab and repeat steps 2-5
Apple iOS
Apple iOS automatically chooses the most recently connected audio interface as the audio I/O device
for all applications. Simply connect BOOM to your iOS device’s Lightning or USB-C port as described
above.
13

Apogee Boom User’s Guide
Connecting Your Studio
On the Boom back panel, connect your studio monitors to the left and right ¼” SP (Speaker) outputs.
Connect headphones to the ¼” HP (Headphone) output. If your speakers are equipped with XLR
inputs, use a ¼” TRS (tip-ring-sleeve) to XLR male adaptor cable. If using passive speakers, connect
the Speaker outputs to the speaker’s amplifier inputs.
Important - Only one output is active at a time.
● When headphones are connected, the headphone output is active.
● When headphones are not connected, the speaker output is active.
14

Apogee Boom User’s Guide
Connect microphones, guitars, keyboards, line-level audio devices and other sources to the front
panel connectors.
Connect your microphone to the front panel IN1 XLR Combi jack.
1. Open Apogee Control 2 software, then set Analog IN 1 Analog Level
to Mic.
2. When using condenser mics, be sure to click 48V to engage phantom
power.
3. If the input level is too high even when Gain is set to 0 dB (for example
when recording loud sources like drums or guitar amps), click the PAD
-10dB button.
15

Apogee Boom User’s Guide
Connect guitars, synthesizers and other instruments to the IN1 ¼”
Combi jack and the IN2 ¼” jack.
1. In Apogee Control, set Analog Level to Instrument.
2. If the input level is too high even when Gain is set to 0 dB (as
may be the case with modern synths), click the PAD button.
For the more technically minded - when the Pad is engaged, the
Instrument input impedance is 3.2kOhm, suitable for modern
keyboards and guitars and basses with active (low impedance)
pickups.
When the Pad is not engaged, the Instrument input impedance is
1MOhm, suitable for guitars and basses with passive pickups or
contact pickups.
Connect line-level sources such as audio interfaces, consumer
stereo units and mixing consoles to the IN1 ¼” Combi jack and the
IN2 ¼” jack.
1. In Apogee Control, set Analog Level to +4 dBu or -10 dBV,
based on the nominal output level of the source. As a
general rule, set to +4 dBu for pro devices like mixing
consoles; set to -10 dBV for consumer “hi-fi” sources.
16

Apogee Boom User’s Guide
BOOM Front Panel Features
Control Knob & Focus LEDs
With Boom’s front panel Control knob, you have the most important settings right at your fingertips.
Set Input gain, Speaker and headphone listening level.
Tap the front panel Control knob to toggle the Control Knob Focus LEDs through this sequence:
1. IN1 - set the Combi XLR/ ¼” (Analog IN 1) input gain
2. IN2 - set the ¼” (Analog IN 2) input gain
3. OUT - set the currently active Output (Speaker or Headphone). Only one output is active at a
time - when headphones are connected, the headphone output is active; when headphones
are not connected, the speaker outputs are active.
4. Press and hold the Control knob to mute/unmute the currently active output. When the output
is muted, the OUT LED blinks.
5. DSP Status - When the Symphony ECS Channel Strip DSP processing is enabled on Analog
IN 1 or Analog IN 2, the FX1 or FX2 LED lights.
17

Apogee Boom User’s Guide
Front Panel Meters
The signal level of the selected Control Knob Focus is displayed by the front panel meters:
●IN1 - recording level of the Combi XLR/ ¼” (Analog IN 1) input
●IN2 - recording level of the ¼” (Analog IN 2) input
●OUT - signal level of the currently active Output source (Speaker or Headphone). Route
different sources to the Speaker and Headphones outputs in Apogee Control 2.
When Control Knob Focus is set to OUT, the Control knob volume setting is displayed by the meters
as you rotate the knob. This allows you to visualize the current output level setting. The volume
setting is displayed as shown below.
18

Apogee Boom User’s Guide
Apogee Control 2 Software
The Apogee Control 2 application provides access to all settings, including System setup, direct
monitor mixing, hardware DSP and Monitor controller functionality.
Primary Window
The Apogee Control 2 software interface consists of the following sections:
19

Apogee Boom User’s Guide
Toolbar
1. Clear Meters
2. Mute All Outputs
3. Open the Hover Help window
System Settings Sidebar
Provides System-wide settings that apply to your recording system as a whole.
1. System Status Display - Displays the status of the connected hardware.
●Green - System is ready: Hardware is connected and recognized over
USB.
●Red - No compatible hardware is detected.
2. Device - When multiple Apogee devices are connected to the same host,
select the device in focus (i.e. under control of the software) in the Device
dropdown.
3. Sample Rate - Set Boom’s sample rate. In some cases this setting may be
overridden by software running on the computer (e.g. when a DAW session
is open).
4. Peak Hold - Set the time that peak indications are held on the level meters.
5. Over Hold - Set the time that over indicators are held on the level meters.
6. Mixer View - Show/hide the Direct mixer in the Primary window.
20
Table of contents
Other Apogee Recording Equipment manuals

Apogee
Apogee Symphony I/O Mk II SoundGrid User manual

Apogee
Apogee AD-16X User manual

Apogee
Apogee Symphony I/O User manual

Apogee
Apogee GiO User manual

Apogee
Apogee Quartet User manual

Apogee
Apogee PSX-100 Supplement

Apogee
Apogee Duet 2 User manual

Apogee
Apogee Apogee Duet User manual

Apogee
Apogee Symphony I/O User manual

Apogee
Apogee DLX24 Operator's manual
Popular Recording Equipment manuals by other brands

National Instruments
National Instruments UMI-7774 USER GUIDE AND SPECIFICATIONS

Audio Technology
Audio Technology NAGRA-SD user manual

Honeywell
Honeywell FUSION III DVR user guide

Simplex
Simplex 2100 installation instructions

Metronic
Metronic DTR-02 user manual

Miditech
Miditech MIDIPLUS Jr. owner's manual