5 GiO by APOGEE – User’s Guide
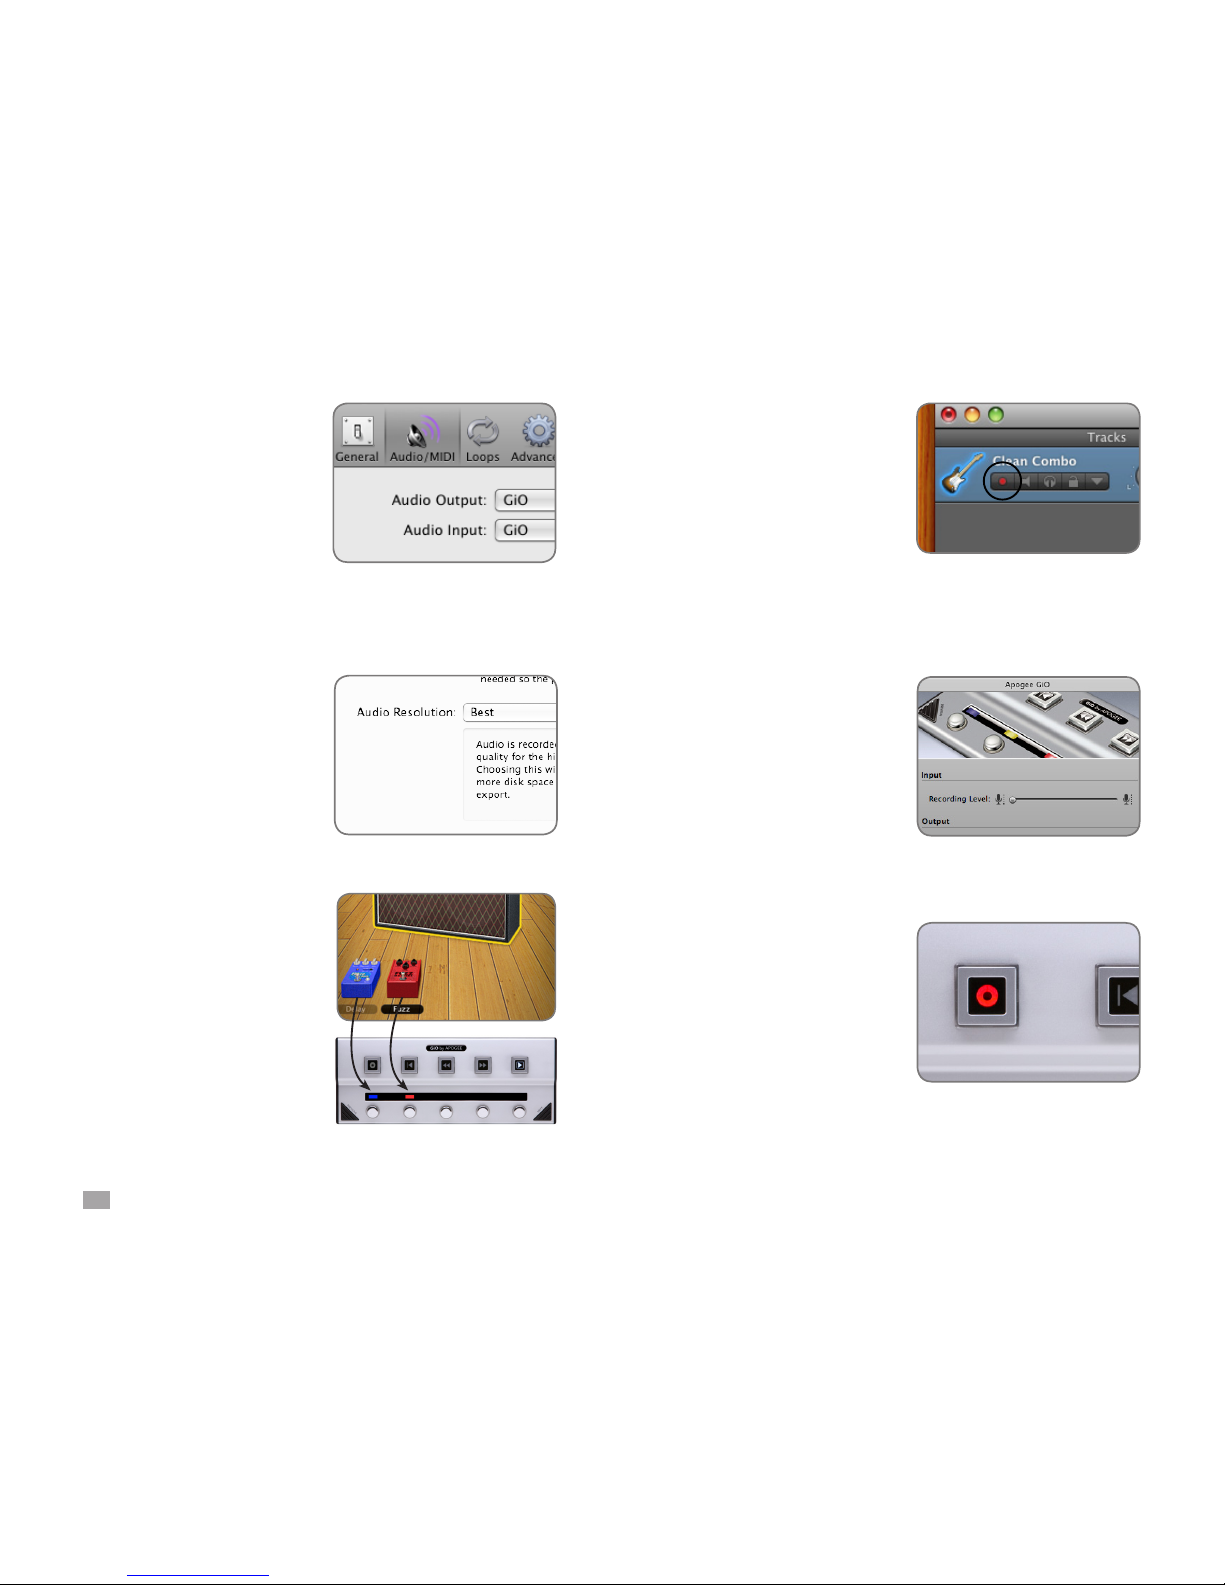
GarageBand Preferences
If GiO can’t be selected in
the Input Source menu, open
GarageBand Preferences
(GarageBand > Preferences),
click Audio/MIDI, and select GiO
in the Audio Output and Audio
Input menus.
Important!
To experience the full audio
resolution of GiO, open
GarageBand Preferences, click
Advanced, and select Best in the
Audio Resolution menu.
Using GiO’s Stompbox buttons
When you load a GarageBand
guitar preset that includes
stompboxes, each of GiO’s
Stompbox indicators light to a
color that corresponds to the
stompboxes selected in the
preset. Press GiO’s stompbox
switch to turn the effect on - the
indicator glows brightly.
Press again to turn the effect
off - the indicator glows dimly.
Set the Input Level
Click the GarageBand track’s
Record enable button to see
the input signal level on the
track meters and hear it in your
headphones.
In the Apogee GiO control panel,
adjust the Recording Level
slider until a good signal level
is displayed in the track meters.
See page 19 for a more detailed
description of setting recording
levels.
Record!
Once you’ve set a level, tap the
Record Transport button. The
newly created region appears
in GarageBand’s timeline. Once
you’ve completed recording, tap
the Play button to stop recording,
tap either the Go To Beginning or
Rewind button, and tap Play to
listen back to your recording.