APURO G784-A User manual

Vegetable Cutter
Instruction manual
Model
G784-A

1
Safety Tips
• Position on a flat, stable surface.
• A service agent/qualified technician should carry out installation and any repairs if required. Do not
remove any components on this product.
•ConsultLocalandNational Standards to comply with the following:
• Health and Safety at Work Legislation
• BS EN Codes of Practice
• Fire Precautions
• IEE Wiring Regulations
• Building Regulations
• DO NOT immerse the appliance in water.
• DO NOT place hands in either food chute.
• DO NOT attempt to cut frozen food with the appliance.
• Suitable for indoor use only.
• Always switch off and disconnect the power supply to the appliance when not in use.
• Regularly check the screws fixing the blades to the cutting discs and tighten as necessary
• This appliance must only be used in accordance with these instructions and by persons competent to
do so.
• This appliance is not suitable for use by children.
• Keep all packaging away from children. Dispose of the packaging in accordance to the regulations of
local authorities.
• If the power cord is damaged, it must be replaced by an Apuro agent or a recommended qualified
technician in order to avoid a hazard.
Introduction
Please take a few moments to carefully read through this manual. Correct maintenance and operation of
this machine will provide the best possible performance from your Apuro product.
Pack Contents
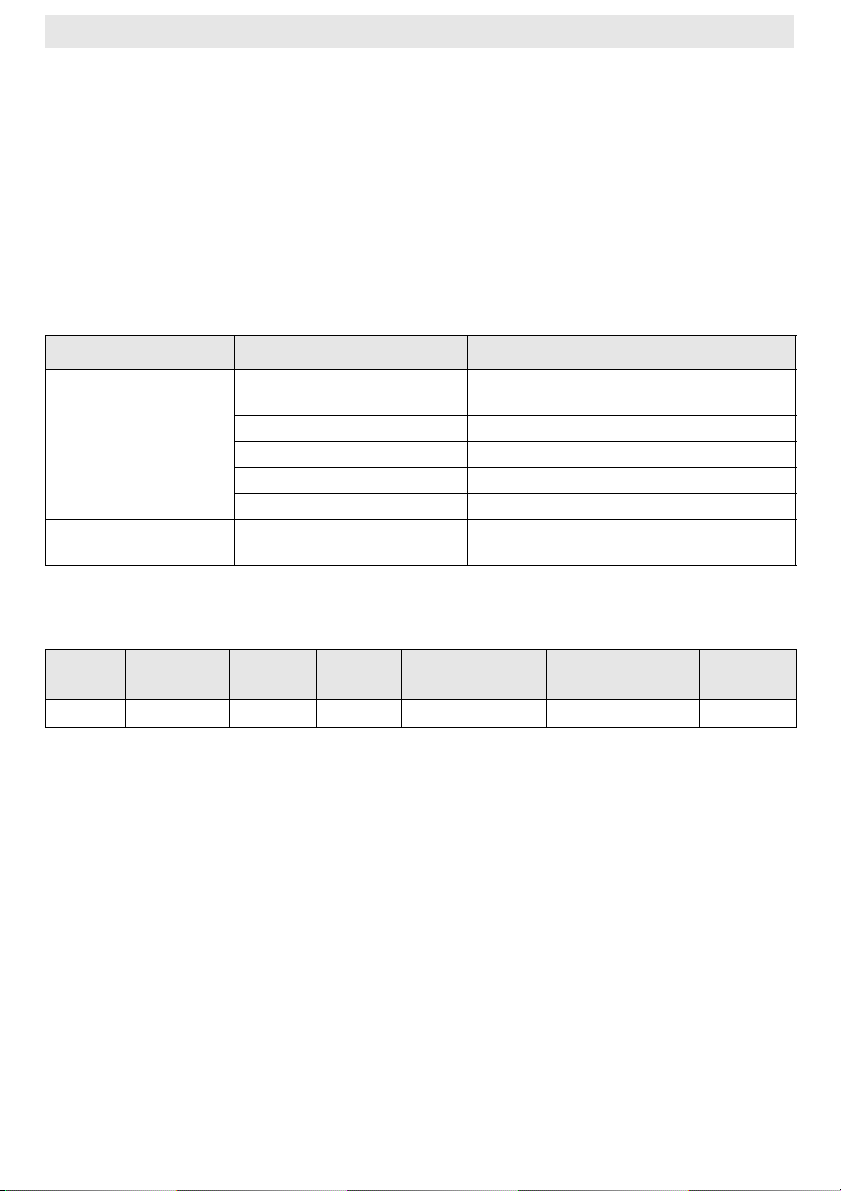
The following is included:
Apuro prides itself on quality and service, ensuring that at the time of packaging the contents are supplied
fully functional and free of damage.
Should you find any damage as a result of transit, please contact your Apuro dealer immediately.
THE VEGETABLE CUTTER IS AHAZARDOUS APPLIANCE AND MUST ONLY BE
USED BY TRAINED PERSONNEL IN ACCORDANCE WITH THESE INSTRUCTIONS
Note: Cutting discs are available separately. Contact your supplier for more details.
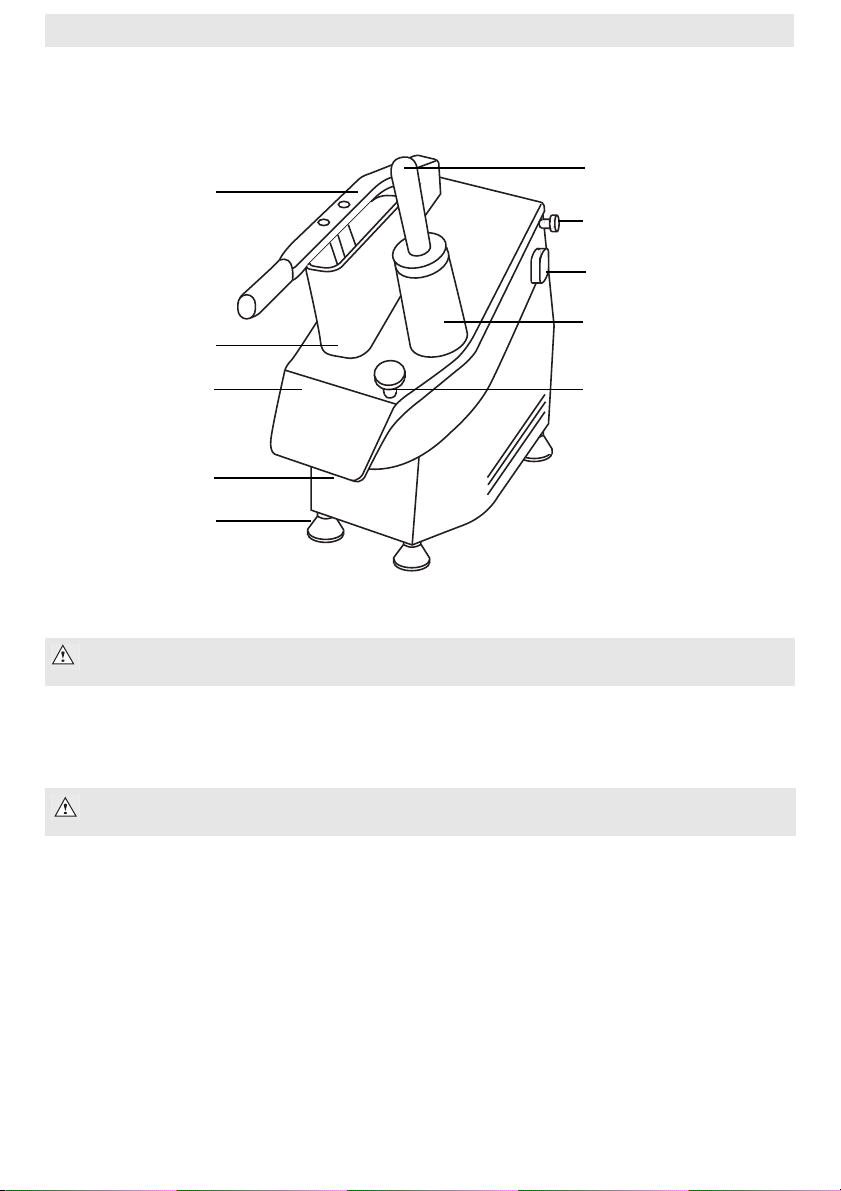
• Apuro Vegetable Cutter
• Food pusher
•Deflector
• Cleaning brush
• Instruction manual

2
Telephone Helpline: 1300 225 960 (Australia)
Operation
Location of Controls
Cutting Vegetables
1. Connect the appliance to the mains power supply.
2. Place the vegetables in the required food chute.
3. Lower the handle or place the food pusher in the chute.
4. Place a suitable container beneath the exit chute to collect the cut vegetables.
5. Turn the power On [I]. The discs begin to spin.
6. Press down on the handle or the food pusher. As the vegetables are cut they are ejected from the
cutter mouth.
7. Once all vegetables are cut turn Off the appliance and disconnect it from the power supply.
Note: Before using the first time clean all parts that come into contact with food with
warm soapy water.
WARNING: Do not use anything other than the food pusher supplied with the appliance
to press vegetables against the blades.
Pusher handle
Large chute
Lid
Cutter mouth
Feet
Pusher
Lid Release pin
On/Off button
Small chute
Lid Release knob

3
Selecting a Cutting Disc
The Apuro vegetable cutter utilises various discs for different tasks.
Disc Use Disc Use
4mm Grating Disc
Suitable for medium/coarse grating
Product Code: AA077
2.5mm Julienne Disc
Suitable for thin slicing
Product Code: AA084
7mm Grating Disc
Suitable for coarse grating
Product Code: AA078
4mm Julienne Disc
Suitable for medium slicing
Product Code: AA085
3mm Grating Disc
Suitable for medium grating
Product Code: AA081
8 x 8mm French Fries Disc
For French fries
Product Code: AA086
Use with 8mm Slicing Disc (AA079)
8mm Slicing Disc
Suitable for medium/thick slicing
Product Code: AA079
10 x 10mm French Fries Disc
For French fries
Product Code: AA087
Use with 10mm Slicing Disc (AA083)
2mm Slicing Disc
Suitable for thin slicing
Product Code: AA080
8 x 8mm Dicing Disc
For Diced vegetables
Product Code: AA088
Use with 8mm Slicing Disc (AA079)
4mm Slicing Disc
Suitable for medium slicing
Product Code: AA082
10 x 10mm Dicing Disc
For Diced vegetables
Product Code: AA089
Use with 10mm Slicing Disc (AA083)
10mm Slicing Disc
Suitable for thick slicing
Product Code: AA083
Note: Regularly check the screws fixing the blades to the cutting discs and tighten as
necessary.

4
Telephone Helpline: 1300 225 960 (Australia)
Changing the Cutting Disc
1. Disconnect the appliance from the mains power supply.
2. Turn the lid release knob anti-clockwise.
3. Remove the food pusher (if inserted) and carefully lift the lid.
4. Turn the disc anti-clockwise and lift it away from the appliance. This may require a sharp tap to free it
from the shaft.
5. Slot the new disc in place. Turn the disc if necessary to drop it in place over the lugs.
6. Turn the disc clockwise to secure it in position.
7. Lower the lid and turn the lid release knob clockwise to secure it in place.
Using the Base Discs
Some cutting processes require two discs to be inserted into the
appliance.
1. Open the lid and remove the cutting disc(s), as described above.
2. Slot the desired base disc onto the appliance.
3. Slot the 8 or 10mm slicing disc on top of the base disc, ensuring
it is securely connected to the centre pin and spins freely.
4. Lower the lid and turn the lid release knob clockwise to secure it
in place.
WARNING: The blades on the cutting disc are sharp. Take care to avoid the edges when
changing discs.
Note: Ensure the appliance is clean and free from food debris when changing discs to
ensure the disc can be securely fitted.
Note: The deflector can also be removed by following this procedure. Removing the
deflector is necessary to thoroughly clean the appliance.
Note: The base cutting disc is not perfectly circular
and has a lip that sits in the cutter mouth to keep it
securely in place.
WARNING: Only the thinner aluminium cutting
discs are suitable for use with the base discs. DO
NOT use the thicker plastic cutting discs.

5
Cleaning, Care & Maintenance
• Always turn off and disconnect the appliance from the power supply before cleaning.
• Use soapy water and a damp cloth to clean the appliance and cutting discs.
• DO NOT wash the cutting discs in the dishwasher.
• Dry thoroughly after cleaning.
• Ensure all foodstuffs are removed from the appliance after each use.
• If required, lift the cover and loosen the two Lid Release knobs to remove the lid and clean.
Troubleshooting
Technical Specifications
Electrical Wiring
The plug is to be connected to a suitable mains socket.
This appliance is wired as follows:
• Live wire (coloured brown) to terminal marked L
• Neutral wire (coloured blue) to terminal marked N
• Earth wire (coloured green/yellow) to terminal marked E
This appliance must be earthed, using a dedicated earthing circuit.
If in doubt consult a qualified electrician.
Electrical isolation points must be kept clear of any obstructions. In the event of any emergency
disconnection being required they must be readily accessible.
Fault Probable Cause Action
The unit is not working The unit is not switched on Check the unit is plugged in correctly and
switched on
Plug and lead are damaged Call Apuro agent or qualified technician
Fuse in the plug has blown Replace the plug fuse
Power supply Check power supply
Internal wiring fault Call Apuro agent or qualified technician
Vegetables are not being
ejected from chute
Internal blockage Disconnect from power supply and empty
chute/cutting area of vegetables
Model Voltage Power Current Cutting Disc RPM Dimensions
h x w x d mm Weight
G784-A 230V 50Hz 550W 2.4A 270 470 x 220 x 490 22.5kg

6
Telephone Helpline: 1300 225 960 (Australia)
Compliance
The WEEE logo on this product or its documentation indicates that the product must
not be disposed of as household waste. To help prevent possible harm to human
health and/or the environment, the product must be disposed of in an approved and
environmentally safe recycling process. For further information on how to dispose of
this product correctly, contact the product supplier, or the local authority responsible
for waste disposal in your area.
Apuro parts have undergone strict product testing in order to comply with regulatory
standards and specifications set by international, independent, and federal authorities.
Apuro products have been approved to carry the following symbol:
All rights reserved. No part of these instructions may be produced or transmitted in any form or by
any means, electronic, mechanical, photocopying, recording or otherwise, without the prior written permission of Apuro.
Every effort is made to ensure all details are correct at the time of going to press, however, Apuro reserve the right to change
specifications without notice.

DECLARATION OF CONFORMITY
I, the undersigned, hereby declare that the equipment specified above
conforms to the above Legislation and Standard(s).
Equipment Type Vegetable Preparation Machine
Model G784-A
Legislation C-Tick
AS/NZ 3820 Essential Safety Requirements for
Low Voltage Electrical Equipment
Standards AS/NZS 61000.6.3:2007
AS/NZS 60335.1:2002+A1+A2
IEC 60335-2-64:2002+A1
Producer Name Apuro
Producer Address 15 Badgally Road,
Campbelltown,
NSW 2560
Date 21/11/12
Signature
Full Name Richard Cromwell
Position Commercial Director

• Notes •

• Notes •

• Notes •

G784-A_A5_v3
Table of contents