Copyright © 2019 Aqua Creek Products All Rights Reserved Revised 6/17/19
Ranger 2 Assembly Instructions
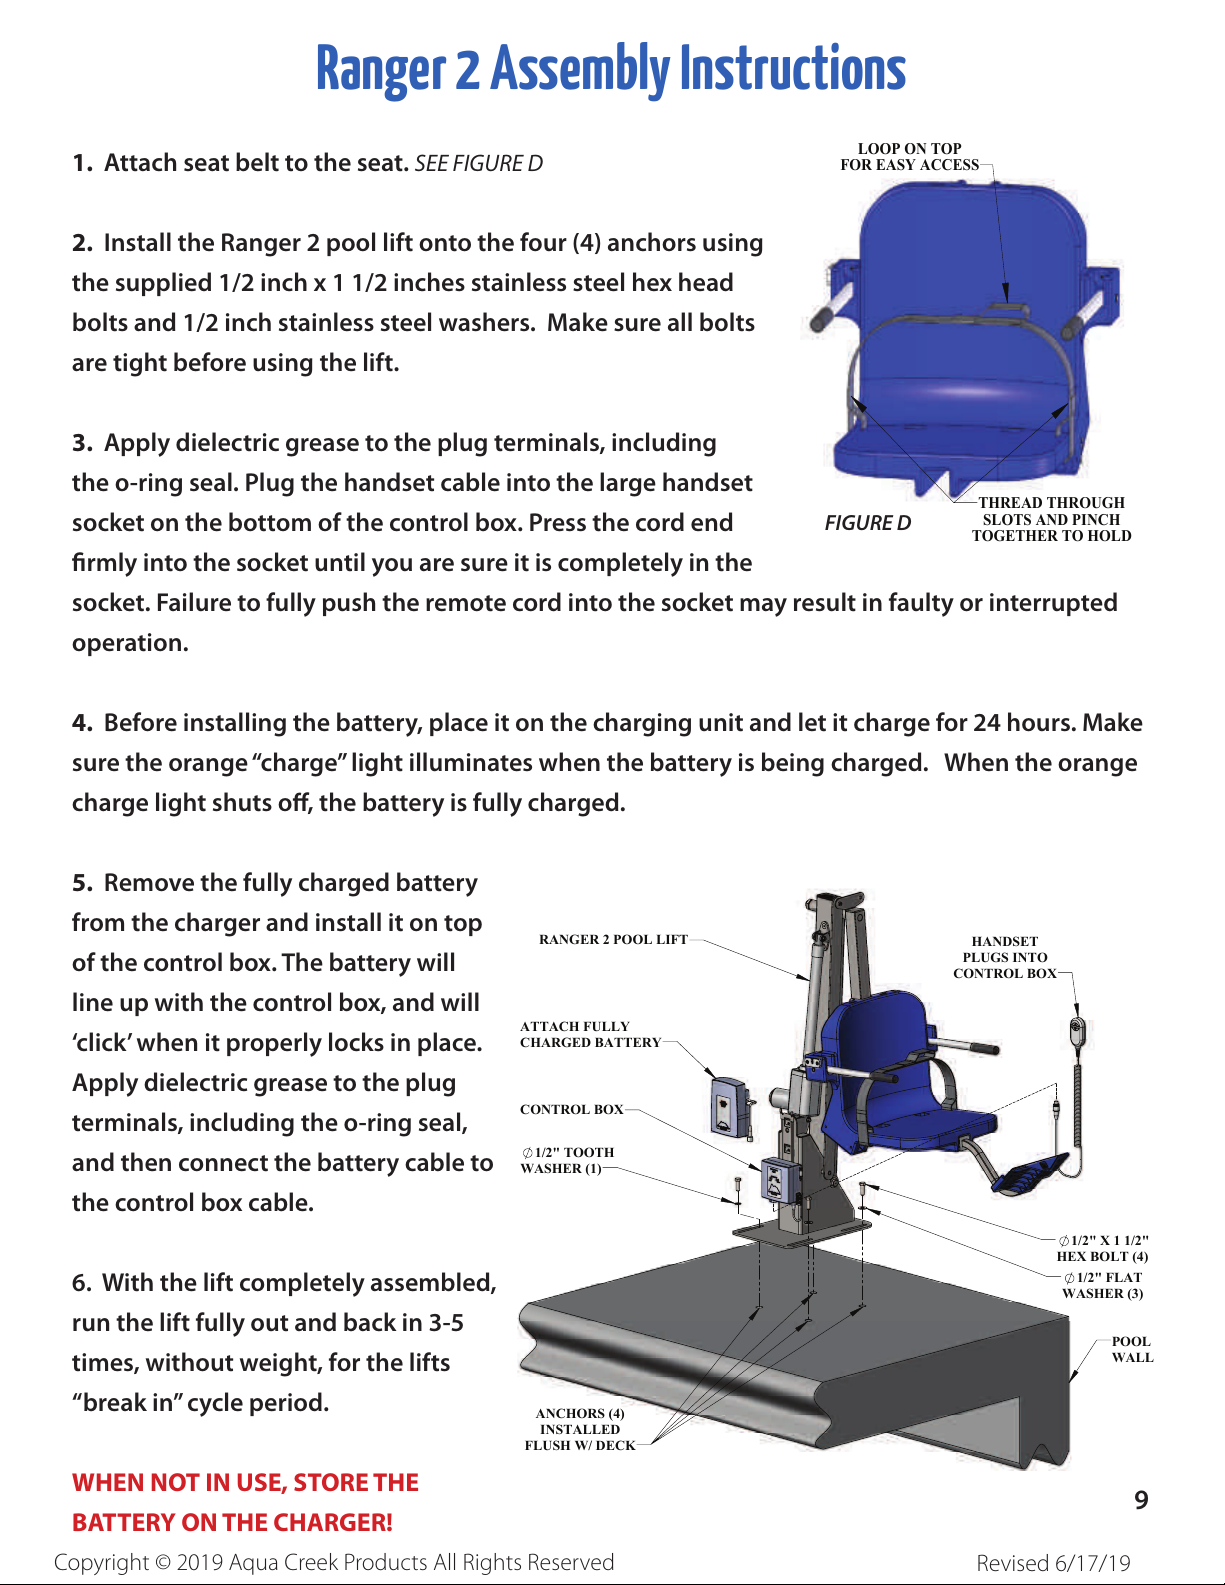
1. Attach seat belt to the seat. SEE FIGURE D
2. Install the Ranger 2 pool lift onto the four (4) anchors using
the supplied 1/2 inch x 1 1/2 inches stainless steel hex head
bolts and 1/2 inch stainless steel washers. Make sure all bolts
are tight before using the lift.
3. Apply dielectric grease to the plug terminals, including
the o-ring seal. Plug the handset cable into the large handset
socket on the bottom of the control box. Press the cord end
rmly into the socket until you are sure it is completely in the
socket. Failure to fully push the remote cord into the socket may result in faulty or interrupted
operation.
4. Before installing the battery, place it on the charging unit and let it charge for 24 hours. Make
sure the orange“charge” light illuminates when the battery is being charged. When the orange
charge light shuts off, the battery is fully charged.
5. Remove the fully charged battery
from the charger and install it on top
of the control box. The battery will
line up with the control box, and will
‘click’ when it properly locks in place.
Apply dielectric grease to the plug
terminals, including the o-ring seal,
and then connect the battery cable to
the control box cable.
6. With the lift completely assembled,
run the lift fully out and back in 3-5
times, without weight, for the lifts
“break in” cycle period.
WHEN NOT IN USE, STORE THE BATTERY ON THE CHARGER!
LOOP ON TOP
FOR EASY ACCESS
THREAD THROUGH
SLOTS AND PINCH
TOGETHER TO HOLD
FIGURE D
POOL
WALL
ANCHORS (4)
INSTALLED
FLUSH W/ DECK
1/2" X 1 1/2"
HEX BOLT (4)
1/2" FLAT
WASHER (3)
HANDSET
PLUGS INTO
CONTROL BOX
RANGER 2 POOL LIFT
ATTACH FULLY
CHARGED BATTERY
CONTROL BOX
1/2" TOOTH
WASHER (1)
9