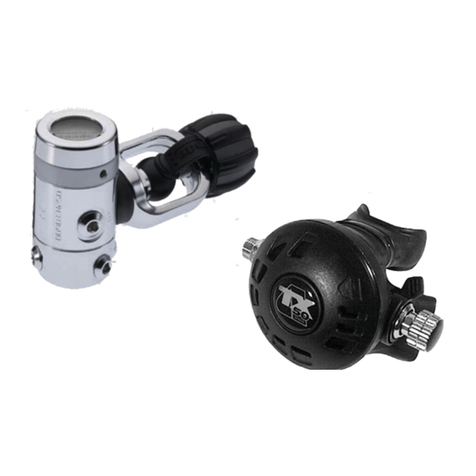
Aqua Lung mikron User manual

TECHNICAL MAINTENANCE MANUAL
FIRST STAGE

2
CHANGE LOG
PAGE # DATE TITLE AND/OR BRIEF DESCRIPTION CHANGE MADE BY
12 October 20,
2010 Out of order number sequence Aqua Lung America
5,11 May 20,
2013 Instructions for new body style Aqua Lung America

3
Mikron First Stage Technical Maintenance Manual
CONTENTS
COPYRIGHT NOTICE...................................................................................................4
GENERAL GUIDELINES..............................................................................................4
GENERAL CONVENTIONS .........................................................................................4
DISASSEMBLY PROCEDURE.....................................................................................5
REASSEMBLY PROCEDURE......................................................................................9
ADJUSTING THE FIRST STAGE ...............................................................................13
FINAL TESTING .........................................................................................................13
TABLE 1: TROUBLESHOOTING GUIDE...................................................................14
TABLE 2: TOOL LIST & SERVICE KITS....................................................................15
TABLE 3: TORQUE SPECIFICATIONS......................................................................16
TABLE 4: TEST BENCH SPECIFICATIONS ..............................................................16
TABLE 5: RECOMMENDED CLEANERS & LUBRICANTS ......................................17
PROCEDURE A: CLEANING & LUBRICATING ........................................................18
MAINTENANCE NOTES.............................................................................................19
MIKRON FIRST STAGE EXPLODED VIEW...............................................................20

4
COPYRIGHT NOTICE
This manual is copyrighted, all rights reserved. It may not, in whole or in
part, be copied, photocopied, reproduced, translated or reduced to any
electronic medium or machine-readable form without prior consent in
writing from Aqua Lung International. It may not be distributed through the
internet or computer bulletin board systems without prior consent in writing
from Aqua Lung International.
©2016 Aqua Lung America, Inc.
Mikron First Stage Technical Maintenance Manual
INTRODUCTION
This manual provides factory prescribed procedures for the correct service and
repair of theAqua Lung orApeks regulator products described in this manual. It
is not intended to be used as an instructional manual for untrained personnel.
The procedures outlined within this manual are to be performed only by
personnel who have received Factory Authorized training through an Aqua
Lung Service & Repair Seminar. If you do not completely understand all of
theproceduresoutlinedin this manual, contactAqua Lung® to speak directly
with a Technical Advisor before proceeding any further.
WARNINGS, CAUTIONS, & NOTES
Payspecialattentionto information provided in warnings, cautions and notes
that are accompanied by one of these symbols:
SCHEDULED SERVICE
If the regulator is in good working order, it is permissible to overhaul it every
other year with an inspection procedure being performed on the “off” years.
For example:
Year #1 : Inspection
Year #2 : Overhaul
Year #3 : Inspection
Year #4 : Overhaul, and so on.
BothInspectionsandOverhaulsneed to bedocumentedintheAnnual Service
& Inspection Record (this can be printed from the Owner’s Manual CD) to
keep the Limited Lifetime Warranty in effect.
Ifaregulatorfailsitem#1,2,3or4,theentireregulatorshouldbeoverhauled.
If a regulator fails #5, 6, 7 or 8, it will be up to the technician’s discretion
whether or not a full overhaul is required.
WARNINGS indicate a procedure or situation that may result in
serious injury or death if instructions are not followed correctly.
CAUTIONS indicateanysituationortechniquethatwillresult
in potential damage to the product, or render the product
unsafe if instructions are not followed correctly.
NOTES are used to emphasize important points, tips and reminders.
NOTE: A unit that receives heavy or frequent use, such as rental, in-
struction, or commercial applications, should be serviced at least twice
a year - or more often - depending on the conditions of use and the
manner in which it is maintained. (Refer to the care and maintenance
procedures outlined in the Regulator Owner’s Manual.)
4. The followingacronyms are used throughout the manual: MP is Medium
Pressure; HP is High Pressure; LP is Low Pressure.
5. Numbers in parentheses reference the key numbers on the
exploded parts schematics. For example, in the statement,
“...remove the o-ring (7) from the crown (8)...”, the number 7 is
the key number to the crown o-ring.
GENERAL GUIDELINES
1. In order to correctly perform the procedures outlined in this manual, it
is important to follow each step exactly in the order given. Read over the
entire manual to become familiar with all procedures before attempting to
disassemble the product in this manual, and to learn which specialty tools
and replacement parts will be required. Keep the manual open beside you
for reference while performing each procedure. Do not rely on memory.
2. All service and repair should be carried out in a work area
specically set up and equipped for the task. Adequate lighting, cleanliness,
and easy access to all required tools are essential for an efcient repair
facility.
3. As the regulator is disassembled, reusable components should be
segregated and not allowed to intermix with nonreusable parts or parts
from other units. Delicate parts, including inlet ttings and crowns which
contain critical sealing surfaces,mustbe protected and isolated from other
parts to prevent damage during the cleaning procedure.
4. Use only genuine Aqua Lung parts provided in the overhaul parts kit for
this product. DO NOT attempt to substitute an Aqua Lung part with another
manufacturer’s, regardless of any similarity in shape or size.
5. Donotattemptto reusemandatoryreplacementparts under anycircum-
stances, regardless of the amount of use the product has received since it
was manufactured or last serviced.
6. When reassembling, it is important to follow every torque
specication prescribed in this manual, using a calibrated torque wrench.
Most parts are made of either marine brass or plastic, and can be perma-
nently damaged by undue stress.
7. In order to make the regulator compatible with nitrox up to
40% O2 (EAN40), the regulator must be properly cleaned, lubri-
cated and assembled using genuine Aqua Lung® or Apeks replace-
ment parts. In addition, assembly must be carried out in a clean
environment usingpowderless, latexglovesor equivalent.Formore detailed
information, be sure to read Procedure A: Cleaning and Lubrication at
the back of this manual.
GENERAL CONVENTIONS
Unless otherwise instructed, the following terminology and techniques
are assumed:
1. When instructed to remove, unscrew, or loosen a threaded part, turn
the part counterclockwise.
2. When instructed to install, screw in, or tighten a threaded part, turn
the part clockwise.
3. When instructed to remove an o-ring, use the pinch method
(see illustration below) if possible, or use a brass or plastic o-ring removal
tool. Avoid using hardened steel picks, as they may damage the o-ring
sealing surface. All o-rings that are removed are discarded and replaced
with brand new o-rings.
Pinch Method
Press upwards on sides of o-ring to
create a protrusion. Grab o-ring or
insert o-ring tool at protrusion.
An Ofcial Inspection consists of:
1. A pressurized immersion test of the entire unit to check for air leakage.
2. Checking for stable medium pressure that is within the acceptable range.
3. Checking for opening effort that is within the acceptable range.
4. Checking for smooth operation of the control knob and venturi switch.
5. A visual inspection of the lter for debris or discoloration.
6. A visual inspection of the exhaust valve to see that it is in good shape
and that it’s resting against a clean surface.
7. A visual inspection of the mouthpiece looking for tears or holes.
8. Follow Hose Inspection document for guidelines.
5
Mikron First Stage Technical Maintenance Manual
DISASSEMBLY PROCEDURE
2
Use a 4mm hex key to remove the HP (22) and MP (24) port
plugs. Use an o-ring tool to remove all port plug o-rings (13,21)
from the port plugs.
3Thread the vise mount tool
(p/n 100395) into the HP port.
DISASSEMBLY (Yoke)
4
Remove the yoke screw
(16) and dust cap (17) from
the yoke (18).
NOTE: Before performing any disassembly, refer to the exploded
parts drawing, which references all mandatory replacement parts.
These parts should be replaced with new, and must not be reused
under any circumstances - regardless of the age of the regulator or
how much use it has received since it was last serviced.
CAUTION: Use only a plastic or brass o-ring removal tool when
removing o-rings to prevent damage to the sealing surface.
Even a small scratch across an o-ring sealing surface could
result in leakage. Once an o-ring sealing surface has been dam-
aged, the part must be replaced with new. DO NOT use a dental
pick or any other steel instrument.
6Remove the lter (14) and o-ring (13) from inside the inlet area
of the body (20).
7Use the pointed end of
the seat extraction tool
(p/n 109437) to push the filter
(14) and o-ring (13) out of the
inlet fitting (19).
2013>BODY MOUNTED FILTER
<2012 INLET FITTING MOUNTED FILTER
5Secure the vise mount tool and rst stage into a bench vise with
the yoke (18) facing up. Using an 8mm hex key, turn the inlet t-
ting (19) counter-clockwise to loosen. Lift off the yoke assembly and
remove the inlet tting from the yoke.
NOTE: In 2013, there was a change to the Mikron body and in-
let tting. This change moved the lter and o-ring placement to
the body instead of the inlet tting. For more information on this
change, see Technical Bulletin #38, Feb 1, 2013.
NOTE: If the lter and o-ring are mounted in the inlet tting, pro-
ceed directly to step #7.
NOTE: After completing step #6, proceed directly to step #13.
NOTE: After completing step #7, proceed directly to step #13.
1Using an 9/16” open end
wrench, removetheMPreg-
ulator hose from the rst stage.
Follow all the guidelines from
the Hose Inspection & Cleaning
Technical Maintenance Manual.
TECHNICAL MAINTENANCE MANUAL
HOSE INSPECTION
& CLEANING

6
11Use the pointed end of
the seat extraction tool
(p/n 109437) to tcarefully push
the lter (14) and o-ring (13) out
of the DIN tting (12).
13Reposition the body in vise so that the MP side is facing
up. Carefully lift and remove the spacer (1) from the spring
retainer (6) using the at brass o-ring tool.
10Remove the lter (14) and o-ring (13) from inside the inlet
area of the body (20).
2013>BODY MOUNTED FILTER
<2012 DIN FITTING MOUNTED FILTER
NOTE: In 2013, there was a change to the Mikron body and
DIN tting. This change moved the lter and o-ring placement to
the body instead of the DIN tting For more information on this
change, see Technical Bulletin #38, Feb 1, 2013.
9Secure the vise mount tool and rst stage into a bench vise with
the DIN assembly facing up. Using an 6mm hex key, turn the
DIN tting (12) counter-clockwise to loosen. Lift off the DIN assem-
bly and seperate the DIN tting from the handwheel (15). 12Use an o-ring tool to
remove the face o-ring
(11) from the DIN tting (12).
NOTE: If the lter and o-ring are mounted in the DIN tting, pro-
ceed directly to step #11.
NOTE: After completing step #10, proceed directly to step #12.
8Remove the protective cap
(10) from the DIN tting.
DISASSEMBLY (DIN)
14Using an 8mm hex key, turn the adjustment screw (2) coun-
ter-clockwise and remove it from the spring retainer (6).

7
Mikron First Stage Technical Maintenance Manual
15Using your ngers, remove the washer (3) and spring (4).
NOTE: If the washer is not on top of the spring, it can be found
stuck on the inside of the adjustment screw.
16Using a large, adjustable wrench turn the spring retainer (6)
counter-clockwise and remove it from the body (20).
17Lift the spring pad (5) out of the spring retainer (6). Using
your nger, push the diaphragm (7) out from the top side of
the spring retainer.
NOTE: Diaphragm and spring pad will come away with the spring
retainer.
18Rotate the body (20) in the vise so that the HP side is facing
up. This will allow the pin support (8) and the pin (9) to fall
out into your hand. Separate the pin and the pin support.
19Using an 8mm hex key, turn the HP plug (30) counter-clock-
wise to loosen and remove it from the body (20).
20Use an o-ring tool to
remove the outer o-ring
(31) from the HP plug (30).
21Using extreme care, remove the o-ring (28) from the balanc-
ing chamber inside the HP plug (30) followed by the back-up
ring (29).
CAUTION: Care must be taken when removing the o-ring and
back-up ring from the HP balancing plug. If the inside wall of
the plug is scratched, it can cause a high pressure leak in the
rst stage and will have to be replaced.
NOTE: It is highly recommended to use the o-ring tool (pnAT79K) to
remove the o-ring and back-up ring from the HP balance plug. Push
the hooked end of the tool straight down into the plug and then pull
it straight up and out.
22Remove the rst stage
from the vise. Turn the
body (20) over and allow the
spring (27) and HP seat (26)
to fall out. Remove vise mount
tool from the HP port.

8
O-ring groove
Sealing area
25Use a small dowel to carefully push the crown (25) out of
the body (20).
26Carefully remove the o-ring (23) from the crown (25). In-
spect the crown sealing surfaces for any signs of damage.
Replace the crown if any damage is found).
THIS CONCLUDES DISASSEMBLY
CAUTION: Perform this step over a padded surface. Any
damage to the crown orice can cause a HP leak to result.
CAUTION: Care must be taken not to scratch the sealing sur-
faces of the crown orice or a HP leak could result. Use brass
or plastic o-ring tools only.
NOTE: Before beginning reassembly, perform
parts cleaning and lubrication in accordance with
Procedure A: Cleaning and Lubricating.
24Use the at brass o-ring tool to lift the securing tabs in the in-
let area on the sheath (32), slide the sheath off the body (20).
REMOVING THE SHEATH
SINGLE HP PORT VERSION
NOTE: In 2012, a second HP-port was added to the Mikron body.
This also included a slight change to the spring retainer and the
protective sheath.
REMOVING THE SHEATH
TWO HP PORT VERSION
23Thread the vise mount tool into a MP port closest to the inlet
area. Push down on the two corners of the sheath (32) oppo-
site the vise tool. Push the sheath edge out of the groove on the body
(20). Continue to hold that part of the sheath out of the groove, then
push down on the sheath next to the inlet area. Continue to push the
sheath downward and slide it from the body.
NOTE: If the body only has one HP-port, proceed directly to step #24.
NOTE: After completing step #23, proceed directly to step #25.

9
Mikron First Stage Technical Maintenance Manual
REASSEMBLY PROCEDURE
WARNING: Use only genuine Aqua Lung®parts, subas-
semblies, and components whenever assembling any Aqua
Lung®product. DO NOT attempt to substitute an Aqua Lung®
part with another manufacturer’s, regardless of any similar-
ity in shape, size or appearance. Doing so may render the
product unsafe, and could result in serious injury or death.
1Install a well lubricated o-ring
(23) onto the crown (25).
2Using the seat installation
tool (p/n 109437), place
the raised area of the crown
(25) against the plastic handle.
Push the crown into the HP side
of the body (20). Make sure the
crown is seated evenly inside
the body.
3Install the HP seat (26) so that the blue side rests against the
sealing edge of the crown (25). Place the spring (27) over the
HP seat.
NOTE: Before continuing, closely examine the back-up ring (29).
You will note that it has a at side and a concave side. For correct
assembly, the concave side should be against the o-ring (28), as
shown in the picture below.
O-ring
Back-up ring
4Install back up ring (29) into HP plug (30) with concave side
facing out. Place a well lubricated o-ring (28) into the HP plug
so that it sits evenly on top of the back up ring.
5Install the HP plug o-ring
(31) on the HP plug (30).
6Place HP plug (30) into the body (20). Using an 8mm hex key,
compress and turn the HP plug clockwise until snug.
7Install vise mount tool (p/n
100395) into HP port of the
body (20). Position the body in
a vise so that the HP side is fac-
ing up. Using a torque wrench
and an 8mm hex key adapter,
torque the HP plug (30) clock-
wise to 45 in-lbs (4.9 Nm).
8Rotate the body (20) so that the MP side is facing up. Insert pin
(9) into the center hole. Place the pin support (8) onto the pin.
Push down on pin support and you should feel spring tension.
NOTE: Before performing any reassembly, it is important to inspect
all parts, both new and those that are being reused, to ensure that
every part and component is perfectly clean and free of any dust,
corrosion, or blemishes. Before dressing each o-ring with Christo-
Lube®, check to ensure it is clean, supple, and free of any blemish.

10
Not Fitted
Fitted
9Press a new diaphragm (7) into the spring retainer (6). Make
sure the diaphragm is seated evenly in the spring retainer.
10Install the spring retainer (6) onto the body (20). Turn the
spring retainer clockwise by hand until snug.
11Using a torque wrench with
the spring retainer socket
(p/n 122152), torque the spring
retainer (6) clockwise to 18 ft-lbs
(25.4 Nm)
12Place the spring pad (5)
with the raised edge fac-
ing up, into the spring retainer
(6). Place the spring (4) over the
raised edge of the spring pad.
Place the washer (3) directly on
the top of the spring (4).
13Put the adjustment screw (2) over top of the washer and
spring. Using an 8mm hex key, turn the adjustment screw
clockwise until it is ush with the spring retainer (6).
14Align the at edge of the spacer (1) with the at edge on the
spring retainer (6). Slide the spacer onto the spring retainer
in that position.
CAUTION: If the tabs on the sheath are not tted correctly, it
will cause the yoke or DIN assembly to leak air when installed.
15Remove the body (20) and vise mount tool from the vise.
Line up the sheath (32) in the proper orientation. Place the
vise mounting tool through the side of the sheath and then slide the
sheath onto the body.
INSTALLING THE SHEATH
TWO HP PORT VERSION
INSTALLING THE SHEATH
SINGLE HP PORT VERSION
16Rotate the body (20) in the vise so that the HP side is fac-
ing up. Line up the sheath (32) in the proper orientation and
slide it onto the body. Conrm that the securing tabs on the sheath
t into the inlet area correctly.
NOTE: After completing step #15, proceed directly to step #17.

11
Mikron First Stage Technical Maintenance Manual
19Place the lter (14) into the back side of the inlet tting (19).
Install an “UNLUBRICATED” o-ring (13) into the groove
around the lter.
2013>BODY MOUNTED FILTER
<2012 INLET FITTING MOUNTED FILTER
REASSEMBLY (Yoke)
18Put the inlet tting (19) through the yoke (18). Holding the
yoke, carefully lower the inlet tting down onto the lter us-
ing caution not to dislodge the lter (14) & o-ring (13). Turn the inlet
tting clockwise by hand until snug.
17Using the vise mount tool, place the body (20) in the vise with
the inlet opening facing upward. Using your nger, press the
“UNLUBRICATED” o-ring (13) into the o-ring groove in the inlet area
on the body. Carefully push the large end of the lter (14) into the o-
ring so that the lter is lightly supported upright by the o-ring.
NOTE: After completing step #18, proceed directly to step #21.
NOTE: If the lter and o-ring are mounted in the inlet tting, pro-
ceed directly to step #19.
CAUTION: Make sure when lowering the inlet tting onto the
lter that the tting remains perfectly vertical. Damage can oc-
cur to the lter/o-ring if care is not taken resulting in a HP leak.
20Insert the inlet tting (19) through the yoke (18) being care-
ful not to dislodge the o-ring (13) and lter (14). With the
inlet area of the body (20) facing down, thread the inlet tting clock-
wise up into the body by hand until snug.
CAUTION: Preliminary installation of the inlet tting requires
the lter/o-ring to be facing up and the body inlet area fac-
ing down. This will keep the lter/o-ring from dislodging and
becoming damaged. Damage to the lter or o-ring can result
in a HP leak.
21If needed, rotate the rst
stage in the vise so that
the yoke is facing up. Using a
torque wrench with a long 8mm
hex key adapter, torque the in-
let tting (19) clockwise to 18
ft-lbs (24.5 Nm).
22Remove the rst stage from the vise. Unthread the vise
mount tool. Install the yoke screw (16) and dust cap (17).
REASSEMBLY (DIN)
23Place an “UNLUBRICATED” o-ring (11) into face of the
DIN tting (12).
NOTE: After completing step #22, proceed directly to step #30.

12
NOTE: If the lter and o-ring are mounted in the DIN tting, pro-
ceed directly to step #26.
2013>BODY MOUNTED FILTER
24Using the vise mount tool, place the body (20) in the vise with
the inlet opening facing upward. Using your nger, press the
“UNLUBRICATED” o-ring (13) into the o-ring groove in the inlet area
on the body. Carefully push the large end of the lter (14) into the o-
ring so that the lter is lightly supported upright by the o-ring.
25Put the DIN tting (12)
through the DIN hand-
wheel (15). Holding the hand-
wheel, carefully lower the DIN
assembly down onto the lter
(14) using caution not to dis-
lodge the lter & o-ring (13).
Turn the DIN tting clockwise
by hand until snug.
NOTE: After completing step #25, proceed directly to step #28.
CAUTION: Make sure when lowering the DIN tting onto the
lter that the tting remains perfectly vertical. Damage can oc-
cur to the lter/o-ring if care is not taken resulting in a HP leak.
26Place lter (14) into the back-side of the DIN tting (12).
Install an “UNLUBRICATED” o-ring (13) into the groove
around the lter (14).
<2012 DIN FITTING MOUNTED FILTER
THIS ENDS REASSEMBLY
CAUTION: Preliminary installation of the DIN tting requires
that the lter side to be facing up; keeping the o-ring and lter
from dislodging and becoming damaged. Damage to the lter
or o-ring can result in a HP leak.
28If needed, rotate the
body so that the DIN
assembly is now facing up. Us-
ing a ft-lb torque wrench and a
6mm hex key adapter, torque
the DIN tting clockwise to 18
ft-lbs (24.5 Nm).
30Install o-rings (13 & 21)
onto port plugs (22 &
24). Using a 4mm hex key, turn
the port plugs clockwise until
snug. Leave one MP port open
for testing.
29Remove the rst stage
from vise. Unthread the
vise mounting tool and replace
protective DIN cap (10).
27Place the DIN tting (12) through the DIN handwheel (15)
being careful not to dislodge the o-ring (13) and lter (14).
With the inlet area of the body (20) facing down, thread the DIN
tting clockwise up into the body by hand until snug.

13
Mikron First Stage Technical Maintenance Manual
BLEED VALVE
ADJUSTING
ADJUSTING MEDIUM PRESSURE (MP)
2Attach the rst stage to a
fully charged 3000 psi (206
bar) cylinder. While closely
monitoring the MP test gauge,
slowly open the cylinder valve
to pressurize the regulator.
Then slowly turn the knob of the
bleed valve clockwise until it is
completely shut.
CAUTION: Before pressurizing the rst stage, it is important
to have a properly adjusted second stage attached to the rst
stage. This will provide a safety relief valve if the MP exceeds
145 psi (10 bar). Failure to relieve increasing MP may result in
damage to the test gauge or the MP hose.
WARNING: If the pressure gauge rapidly exceeds 145 psi (10
bar), there is a HP leak. Quickly close the cylinder valve and
purge the second stage, or reopen the bleed valve of the test
gauge and close the cylinder. Failure to do so may cause a
rupture to the MP hose and/or MP gauge, which in turn can
lead to personal injury. Refer to Table 1: Troubleshooting
Guide for corrective guidelines and specic procedures.
WARNING: Be certain not to install a MP hose into the HP port
via an adapter. Doing so may cause the hose to rupture when
pressurized, and could result in serious personal injury.
1
Thread the male end of the MP regulator hose clockwise into
the open MP port. Use a 9/16” open end wrench to tighten until
snug. Next, Install the MP gauge
(p/n 111610) onto the hose swiv-
el. Open the bleed valve on the
gauge. If your test gauge does
not have an bleed valve, then it
is vital that a properly adjusted
second stage is attached to the
rst stage to act as an overpres-
sure relief valve in the event of a
HP leak.
3If no leaks are detected, use a 8mm hex key to adjust the
MP by turning the adjustment screw: Turning the adjustment
screw clockwise increases the MP; turning the adjustment screw
counter-clockwise decreases the MP. Turn the adjustment screw
in 1/8th turn increments and cycle the bleed valve or second stage
purge button several times after each adjustment. Set the MP to
130-145 psi (9-10 bar). After cycling, watch the gauge needle.
The rst stage MP should “lock-up” and be stable at the desired
setting. Make any further adjustments as necessary. Leave the
regulator under pressure for several minutes and check that the
MP remains stable. If the MP rises more than 5 psi (0.3 bar), this
indicates a leak. Refer to Table 1: Troubleshooting Guide for
corrective guidelines and specic procedures.
FINAL TESTING
EXTERNAL LEAK TEST
1With the Mikron still pres-
surized, submerge unit in a
tub of water. Observe for leaks;
troubleshoot accordingly.
NOTE: Do not confuse bubbles from trapped air with a true leak. If
there is an air leak, bubbles will come out in a constant stream.
THIS CONCLUDES SERVICING OF THE
MIKRON FIRST STAGE

14
TABLE 1: TROUBLESHOOTING GUIDE
NOTE: This is a partial list of possible problems and recommended treatments. For more infor-
mation, refer to the second-stage troubleshooting guide, or contactAqua Lung Technical Service
Department for assistance with problems not described here.
CAUTION: Recommended treatments which require disassembly of the regulator must
be performed during a complete overhaul, according to the prescribed procedures for
scheduled, annual service. Do not attempt to perform partial service.
SYMPTOM POSSIBLE CAUSE TREATMENT
High or
Unstable MP
1. The HP seat (26) is worn or damaged 1. Replace the HP seat
2. The crown (25) is damaged 2. Replace the crown
3. The crown o-ring (23) is worn or
damaged. 3. Replace the o-ring
4. The body to crown sealing surface
is damaged 4. Replace the body
5. The HP plug o-ring (31) is damaged 5. Replace the o-ring
6. The HP plug (30) internal wall is
weakened or damaged 6. Replace the HP plug
7. The HP o-ring (28) is worn or damaged 7. Replace the o-ring
8. The HP back-up ring (29) is in-
stalled upside down 8. Replace the back-up ring
9. The HP spring (27) is weakened
or damaged 9. Replace the spring
10. The rst stage is improperly adjusted 10. Readjust the adjustment screw (2)
External Air
Leak
1. The port plug o-rings (13 and 21)
are worn or damaged 1. Replace the o-rings
2. The diaphragm (7) is worn or damaged 2. Replace the diaphragm
3. The diaphragm seating surface is
damaged 3. Replace the body
4. Spring Retainer (6) is loose 4. Re-torque the Spring Retainer
5. Inlet/DIN tting o-ring (13) is worn
or damaged 5. Replace the o-ring
Restricted air
ow or high
inhalation resis-
tance through
entire system
1. The cylinder valve is not com-
pletely open 1. Open valve and check cylinder
pressure
2. The cylinder valve needs service 2. Try another cylinder
3. The lter (14) is clogged 3. Replace the lter

15
Mikron First Stage Technical Maintenance Manual
PART # DESCRIPTION APPLICATION
111610 MP Gauge
0-400 psi MP testing
944022
103102
Brass O-ring
Tool Set
O-ring Tool
(Plastic)
Removal and installation of o-rings
AT79K O-ring Tool Removal of HP o-ring (28) & back-up ring (29)
N/A Small Dowel Crown (25) removal
109437 Seat Extraction
Tool Crown (25) installation
100395 Vise Mounting
Tool Holding rst stage body (20) in vise.
N/A Large
Adjustable
Wrench Loosen/Tighten/Adjust parts
N/A Torque Wrench Apply torque to parts listed in Table 3: Torque Specications
122152 Spring Retainer
Socket Apply torque to parts listed in Table 3: Torque Specications
N/A Hex Key Adapter
(6mm & 8mm long) Apply torque to parts listed in Table 3: Torque Specications
N/A 9/16” Open
End Wrench Loosen/Tighten/Adjust parts
N/A Hex Key
(4mm,6mm,8mm) Loosen/Tighten/Adjust parts
N/A Magnier w/ Light Inspection of small parts
N/A Bench Vise Disassembly/Reassembly
N/A Ultrasonic Cleaner Brass and stainless steel parts cleaning
N/A Powderless Latex Gloves or Finger Cots Keep nger oils off of parts
N/A Test Bench
900014 Mikron First Stage Service Kit
TABLE 2: TOOL LIST & SERVICE KITS

16
TABLE 3: TORQUE SPECIFICATIONS
TABLE 4: TEST BENCH SPECIFICATIONS
PART # DESCRIPTION/KEY ITEM # TORQUE
127874/127583 Spring Retainer (6) 18 ft-lbs (24.5 Nm)
129251/127801 DIN Fitting (12) 18 ft-lbs (24.5 Nm)
129253/127808 Inlet Fitting (19) 18 ft-lbs (24.5 Nm)
129120 HP Plug (30) 45 in-lbs (4.9 Nm)
PART # DESCRIPTION/KEY ITEM # TORQUE
Leak Test Inlet 3,000 psi (206 bar) No leaks allowed
MP Inlet 3,000 psi (206 bar) 130-145 psi (9-10 bar)
MP Creep Inlet 3,000 psi (206 bar) 5 psi (0.3 bar) max between
5 to 15 seconds after cycling
regulator (purge)

17
Mikron First Stage Technical Maintenance Manual
TABLE 5: RECOMMENDED CLEANERS & LUBRICANTS
LUBRICANT/CLEANER APPLICATION SOURCE
Christo-Lube®MCG 111
PerouroLube 20/1
Lubricant for all o-rings
Aqua Lung, PN 820466,
or
Lubrication Technologies
310 Morton Street
Jackson, OH 45640
(800) 477-8704
Performance Fluids
Ste 101 Lomeshaye Business Park
Turner Road
Nelson Lancashire BBP 7DR
White distilled vinegar
(diluted with water) Bath for reusable stainless
steel and brass parts. “Household” grade
Oxygen Compatible Solution
Promoclean TP108
Janitol Plus
Nitrox/O2 Cleaning
As Per Training
INVENTEC PERFORMANCE
CHEMICALS SA.
20, Rue de bourgogne
BP 211
69802 SAINT-PRIEST cedex
JOHN LAWSON DIST.
SCOTSHAW BROOK HOUSE
BRANCH ROAD
LOWER DARWEN
LANCASHIRE BB3 0PR
Liquid Dishwashing Detergent
(diluted with warm water)
Degreaser for brass and stain-
less steel parts; general clean-
ing solution for plastic and
rubber “Household” grade
CAUTION: Silicone rubber requires no lubrication or preservative treatment. DO NOT apply grease or spray to silicone
rubber parts. Doing so may cause a chemical breakdown and premature deterioration of the material.
CAUTION: Do not use muriatic acid for the cleaning of any parts. Even if strongly diluted, muriatic acid can harm
chrome plating and may leave a residue that is harmful to o-ring seals and other parts.

18
PROCEDURE A: CLEANING & LUBRICATING
Cleaning Brass and Stainless Steel Parts
1. Preclean in warm, soapy water* using a soft nylon bristle brush.
2. Thoroughly clean parts in an ultrasonic cleaner lled with soapy water. If there are stubborn deposits, household white distilled
vinegar (acetic acid) in an ultrasonic cleaner will work well. DO NOT place plastic, rubber, silicone or anodized aluminum
parts in vinegar.
3. Remove parts from the ultrasonic cleaner and rinse with fresh water. If tap water is extremely “hard,” place the parts in a bath
of distilled water to prevent any mineral residue. Agitate lightly, and allow to soak for 5-10 minutes. Remove and blow dry with
low pressure (25 psi) ltered air, and inspect closely to ensure proper cleaning and like-new condition.
Cleaning Anodized Aluminum, Plastic & Rubber Parts
Anodized aluminum parts and parts made of plastic or rubber, such as box bottoms, box tops, dust caps, etc., may be soaked and
cleaned in a solution of warm water mixed with mild dish soap. Use only a soft nylon toothbrush to scrub away any deposits. Rinse in
fresh water and thoroughly blow dry, using low pressure ltered air.
Cleaning MP Hoses (Air use Only)
Follow Hose Inspection & Cleaning Guidelines for more detailed information
1. Hose ttings: Ultrasonically clean with soapy water; Use soft nylon bristle brush. If corrosion is evident, use a brass bristle brush.
2. Run water through hose if needed
3. Thoroughly rinse with fresh water
4. Blow out hose before installing
Lubrication and Dressing
Wear powderless, latex gloves when handling and lubricating o-rings. Keeping internal parts free from skin oils and other contaminates is
important when running enriched air nitrox through a rst stage. All o-rings should be lubricated with Christo-Lube®MCG-111. Dress the
o-rings with a very light lm of grease, and remove any visible excess by running the o-ring between thumb and forenger. Avoid applying
excessive amounts of Christo-Lube grease, as this will attract particulate matter that may cause damage to the o-ring.
*Soapy water is dened as “household” grade liquid dishwashing detergent diluted in warm water.
When it comes to issues of nitrox safety and compatibility, the concerns lie primarily with the regulator’s rst stage as it is subjected to
high inlet pressures. High inlet pressures lead to adiabatic compression or heating of the gas. TheAqua Lung or Apeks regulator product
described in this manual, when properly cleaned and assembled, is authorized for use with enriched air nitrox (EAN) that does not ex-
ceed 40% (EAN 40). It is authorized because it has undergone adiabatic compression testing and the authorized service kit components
and lubricants are compatible in elevated oxygen environments. During cleaning, a mild detergent must be used to remove condensed
hydrocarbons (compressor oils) from the inside passageways of the rst stage. For the rst stage to remain EAN40 compatible, only use
hyperltered compressed gas (hydrocarbons < 0.1 mg/m3). Ordinary compressed breathing air (Grade E) usually does not meet this
criterion. Once ordinary breathing air is used, the rst stage is no longer EAN40 compatible until it is cleaned and serviced again.
Although regulator second stage components are not exposed to high pressure EAN, Aqua Lung and Apeks recommend that the same
cleaning procedures be followed for the complete regulator. This prevents the possibility of cross contamination and guarantees the
cleanliness of the entire regulator.
AQUA LUNG AND APEKS REGULATORS AND NITROX
CAUTION: Do not place complete hose length in contact with acid solu-
tions. This could alter their physical properties and cause degradation
and premature breakdown.
CAUTION: Do not place plastic and rubber parts in contact with acid solu-
tions. This could alter their physical properties and cause degradation and
premature breakdown.

19
Mikron First Stage Technical Maintenance Manual
MAINTENANCE NOTES

20
2013 Filter Placement
MIKRON
Key # .Part # Description Key # .Part # Description
.......129022 DIN Adapter Kit, (2013>)
.......127865 DIN Adapter Kit, (<2012)
.......900014 Overhaul Parts Kit, (Yoke and DIN)
1.......127888 Spacer, Black/Blue
......127878 Spacer, Black/Pink
.....127872 Spacer, Black/Green
.....127837 Spacer, Black/Red
.......127839 Spacer, Vanilla
2 .......127566 Adjustment Screw
3.......127568 Washer
4 .......127567 Spring
5 .......127565 Spring Pad
6 .......127874 Spring Retainer (2-HP Ports)
.......127583 Spring Retainer
7 .......119159 Diaphragm
8 .......127563 Pin Support
9 .......127564 Pin
10 .......124665 Din ACD Cap
11 .......820094P O-ring (20 pk)
12 .......129251 DIN Fitting, 2013
.......127801 DIN Fitting
13 .......820011P O-ring (25 pk)
14 .......129151 Filter
15 .......127803 DIN Handwheel
16 .......127805 Yoke Screw
17 .......124555 Dust Cap
18 .......127807 Yoke
19 .......129253 Inlet Fitting, 2013
.......127808 Inlet Fitting
20 .......129244 Body, 2013
.......127873 Body (2-HP Ports), <2012
.......127844 Body (1-HP Port)
21 .......820072P O-ring (20 pk)
22 .......103137 Plug, HP Port, 7/16”
23 .......820038P O-ring (20 pk)
24 .......122233 Plug, MP Port, 3/8”
25 .......127585 Crown
26 .......105940 HP Seat
27 .......122244 Spring
28 .......820080P O-ring (25 pk)
29 .......119129 Back-up Ring
30 .......129120 Plug
31 .......824407P O-ring (20 pk)
32 .......127876 Sheath, Black (2-HP Ports)
.....127804 Sheath, Black (1-HP Port)
.....127831 Sheath, Vanilla (1-HP Port)
Part numbers in BOLD ITALICS indicate standard overhaul replacement part.
123
4
5
7
8
9
23
14
16
17
18
21
10
19
18 ft-lbs
24.5 Nm
18 ft-lbs
24.5 Nm 45 in-lbs
4.9 Nm
6
18 ft-lbs
24.5 Nm
40 in-lbs
4.5 Nm
22
24
11
12
15
13
20
13
25
26 27 28 29 30
31 32
Table of contents
Other Aqua Lung Controllers manuals

Aqua Lung
Aqua Lung CORE User manual

Aqua Lung
Aqua Lung APEKS TX 50 User manual

Aqua Lung
Aqua Lung Conshelf XIV User manual

Aqua Lung
Aqua Lung Titan Service manual

Aqua Lung
Aqua Lung MISTRAL SECOND STAGE User manual

Aqua Lung
Aqua Lung GLACIA Operating instructions

Aqua Lung
Aqua Lung Legend LX Second Stage User manual

Aqua Lung
Aqua Lung apeks XTX 200(FSR) User manual

Aqua Lung
Aqua Lung Cousteau/ SEA Operating instructions