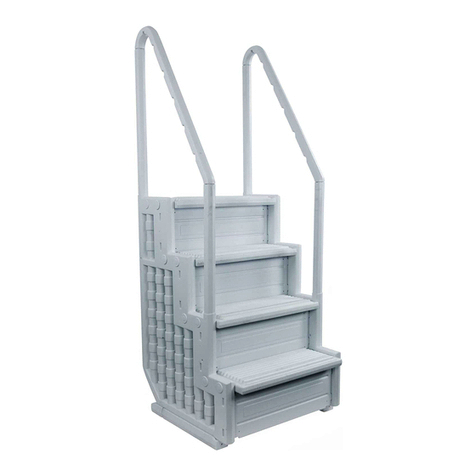
Aqua Select 832406SC User manual

7961
The enclosed ladder will attach to the Aqua Select® Everest step (832402B). Please open the
step carton and assemble the step per the instructions. Refer to this book for instructions on
the assembly and attachment of the ladder when instructed in step manual.
TOOLS REQUIRED
•Drill with 1/8” drill bit
•Small rubber mallet or hammer w/piece of wood
•Phillips head screwdriver
•Pliers
•Spray lubricant or liquid soap
•40 Lbs. of Sand
•Funnel
•Hacksaw
FOR USE WITH:
AQUA SELECT®
EVEREST
32” GATED
ENTRY STEP WITH
IN POOL LADDER
(832406EV)
Aqua Select® Heavy Duty Resin In-Pool Ladders with Entrapment Barrier
(1) 832402B — Aqua Select® Everest Steps
(1) 832405P — Aqua Select® Pickets
(1) 832406 — Aqua Select® Gate
(1) 832406SC — Aqua Select® Heavy Duty
Resin In-Pool Ladder
CARTONS REQUIRED
MODEL 832406SC

2
3
1
2
7
910
11
12
13
45
6
8
Aqua Select® Heavy Duty Resin In-Pool Ladder Parts
PART # MODEL # DESCRIPTION QTY
1 AC HANDRAIL
Handrail
2
2 AC PLATFORM Platform 1
3 832402LC Lock Cap 4
4 AC ADJTUBE Adjustable Tube 2
5 AC MTBLOCK Mounting Blocks 2
6 AC MDSTEP Upper Step 4
7 AC 01129 Capri Leg 2
8 AC SHIELD Shield 2
9 AC BTSTEP Bottom Step 1
10 AC 01124 Small Barrier 1
11 AC 01126 Lower Base 1
12 AC 01123 Lsrge Barrier 1
13 AC 01125 Upper Brace 1
14 AC 01130 Hardware Bag 1

STEP 1
•
Place the bottom step (AC BTSTEP) on a level surface with
indentations facing up.
•
Take leg (AC 01129) and stand upright (pointed side down).
When installed on bottom step, the leg will need to have the
raised areas facing inward. The raised area with the
pre-drilled screw hole should be at the front of the ladder
toward the top of the leg.
•
Place the left leg into the indentation on the left side of the
step and push straight down until it clicks into place.
•Repeat above for right leg on right side of step.
STEP 2
•There are two sets of lug locations on the stringers in the
areas where each step will be installed. Each step should
be installed into the UPPER set of lugs only.
•Locate one of the four groups of lugs and slide step
(AC MKSTEP) into the upper set of lugs on the legs so
it clicks into place.
•Repeat for each of the remaining (3) steps.
•Secure all by drilling (1) #10 x 1-1/4” screw into each side
of the step through the pre-marked leg openings.
3
The Ladder must be installed based on Manufacturer’s Instructions
•One person on the Ladder/Stair at a time
•This Ladder is designed and manufactured for a specific Pool Wall Height
and/or Deck of the Pool
•For Entry/Exit of pool, face the ladder at all times
•Remove and secure Ladder when pool is not occupied
•The Ladder will be suitable up to 54” Maximum Pool Height
•There shall be clearance of Min. 3” and Max. 6” between the Pool Wall and
the Ladder
IMPORTANT SAFETY INSTRUCTIONS
PLEASE READ PRIOR TO ASSEMBLY/USE

4
•Screw Upper Brace of Entrapment Barrier into the
third step of the Inside Portion of the Ladder with
(2) #10 x 1-1/4” screws
•Slide Upper Brace (AC 01125)
through the groove in the Large
Barrier and push down lightly to
secure.
•Screw Lower Base of Entrapment Barrier into bottom
step of the Inside Portion of the Ladder with
(2) #10 x 1-1/4” screws.
STEP 3
•Slide Upper Brace
(AC 01125) over Small
Barrier as shown.
•Place the Lower Base (AC 01126) on a level surface.
•Snap Large Barrier (AC 01123) into the groove on the lower
base facing round edge.
•Snap Small Barrier (AC 01124) into the groove on the lower
base facing the straight side.
•
This Ladder is designed to fit multiple pool heights. ONLY
FOLLOW THIS STEP IF YOUR POOL HEIGHT IS 48”.
•Locate the leg (AC 01129) on both sides
of the ladder.
•Find the lines located at the top of the legs.
•Using a hacksaw cut both legs evenly along the line.
FOR 48” POOLS, CUT ALL FOUR
LEGS AT THIS LINE
STEP 4
NOTE
Follow this step if using as an In Pool Ladder

5
•Using a funnel fill both legs with sand.
Use approximately 20 Lbs. of sand in each leg.
FILL LEGS WITH SAND
USING A FUNNEL
STEP 5
STEP 6
•Put ladder aside for now and install handrails
(AC HANDRAIL) onto platform (AC PLATFORM).
•Lay one handrail on flat surface and push the
connected dowels of the platform into the openings
on the handrail until fully seated. Make sure treads
of platform are facing upward.
•Before attaching second handrail, make sure that
the longer part of the handrail is facing in the same
direction on both handrails. Repeat above for
installation of second handrail.
•Center locking cap (832402LC)over opening on
side of handrail where platform was just attached.
Using a rubber mallet or a hammer and a small
piece of wood, tap on cap until the cap is flush
with the handrail
•Repeat for each of the remaining (3) locking caps.
•Coat the tops of the legs with lubricant and attach
handrails by pushing them down over the legs.
Secure with (4) #10 1-1/4” screws through each of
the pre-marked openings.

6
STEP 8 —
AQUA SELECT® EVEREST ENTRY SYSTEM
•To attach the ladder to the step assembly,
you will need to attach the shield (AC SHIELD).
•Line the shield up above the handrail and push
it down so it slides onto the handrail.
Repeat for opposite side.
•Rotate shield 90 degrees, so that the open
sleeve of each shield is on the outside
(see photo).
STEP 9
•Once shields are situated properly, lift ladder
up and line up the openings of shield with long
handrail posts of the step.
•Slide the ladder down until it rests on ground
outside.
•
Coat adjustable tube (AC ADJTUBE) with lubricant and slip
(1) mounting block (AC MTBLOCK) all the way down over the nubs on the tube.
The open side should be exposed.
•
Repeat for second adjustable tube and mounting block.
•Push one adjustable tube into the longer part of each handrail. The mounting block
should sit on the top step to hold the ladder in place. Secure into handrail using
(4) #10 1-1/4” screws in pre-marked openings.
•Move tube down to deck until it rests on the deck. Using the proper hardware
(not included) screw mounting blocks into decking through the pre-drilled holes.
STEP 7—DECK MOUNT
NOTE
• If attaching to a Deck proceed to STEP 7
• If attaching to a Step to create the Aqua Select® Everest Entry
System proceed to STEP 8

7
NOTE
•Coat adjustable tube (AC ADJTUBE) with lubricant and slip
(1) mounting block (AC MTBLOCK) all the way down over the
nubs on the tube. The open side should be exposed.
•Repeat for second adjustable tube and mounting block.
•Push one adjustable tube into the longer part of each handrail.
The mounting block should sit on the top step to hold the ladder
in place. Secure into handrail using (4) #10 1-1/4” screws in pre-
marked openings.
•Secure each mounting block to the top step of the staircase using
(4) #10 1-1/4” screws per mounting block.
•Fasten the shields to the handrails using
(8) #10 1-1/4” screws (4 per side).
OPEN
END
•Lubricate inside of long and short handrail posts
on step with liquid soap or lubricant.
•Attach handrails from step box (832402B)to
handrail posts by pushing into posts. The more
curved part of the handrail is meant to be installed
in the long handrail post.
•Using (4) screws from step box (832402B)
hardware bag, secure handrails in place.
STEP 10
STEP 9 CONT.
If attaching Aqua Select® Gate System. Please refer to instructions
packed in carton marked 832406

8
LADDER MATS
1. Remove ladder mat from packaging
2. Place ladder mat onto the bottom of
the pool with the smooth side facing
down towards the liner
3. Place fully assembled ladder on top of
the ladder mat. Make sure the ladder
is centered on the ladder mat
4. Properly secure ladder to your pool
HOW TO INSTALL YOUR LADDER MAT
•
The use of a ladder mat is STRONGLY RECOMMENDED with any
pool ladder. Ladder mats prevent your pool liner from being damaged
by slight movements of your pool ladder.
USE MODEL 832116
Aqua Select® 9” x 24” MAT
SAFETY INFORMATION
MAINTENANCE
•Step/ladder/bridges must be removed for winter, failure to do so can cause the step to
crack.
•When removing step/ladder/bridges for winter, it is recommended that you spray down
step with hose water to rinse off any chemical residual prior to storing.
•When storing step/ladder/bridges for winter, they should be protected from the elements
and stored either in a shed or garage, or covered with a tarp.
WARNING
Exceeding the recommended weight limit may cause the
step to fail and may result in injury.
•When lifting heavy or awkward loads, it is suggested that two people lift to avoid injury.
•DO NOT use the pool entry system for any purpose other than that for which it is intended.
•Maximum weight on steps should NOT exceed 350 lbs.
LADDER MATS ARE SOLD SEPARATELY
FROM YOUR POOL LADDER
Table of contents
Other Aqua Select Ladder manuals
Popular Ladder manuals by other brands

USTEPS
USTEPS Prime Line instruction manual

Little Giant Ladder
Little Giant Ladder WingSpan Wall Stand Off instructions

Stromberg Carlson Products
Stromberg Carlson Products LA-401 quick start guide

Costway
Costway TS10097 manual

Vestil
Vestil LAD-EZ Series instruction manual

FACAL
FACAL SUPER COMBINATION LADDER PRIMA Use and maintenance handbook