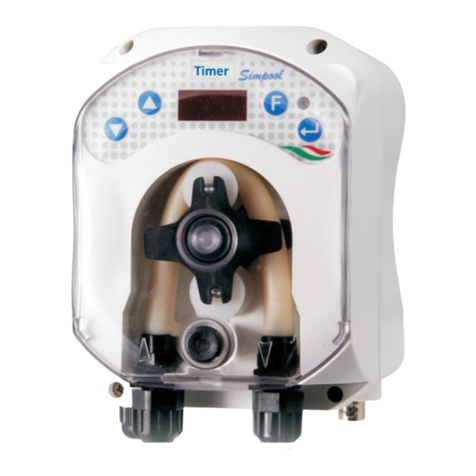
Aqua Simpool pH User manual

Simpool Modello pH MANUALE ISTRUZIONE e MANUTENZIONE
Pompa peristaltica digitale programmabile ITALIANO
ADSP7000407 rev. 1.2 27/03/2015 1/313
Simpool
Modello pH
For other languages please visit
http://aqua.quickris.com/simpool-ph/
ITALIANO
Manuale istruzioni
pagina 2
ENGLISH
Instruction manual
page 41
FRANÇAIS
Mode d’emploi
page 80
ESPAÑOL
Manual de instrucciones
página 119
DEUTSCH
Bedienungsanleitung
Seite 158
TÜRKÇE
Kullanım kılavuzu
sayfa 197
PORTUGUÊS
Manual de instruções
página 236
РУССКИЙ
Руководство с инструкциями
Страница 275

Simpool pH model INSTRUCTION AND MAINTENANCE MANUAL
Programmable digital peristaltic pump ENGLISH
ADSP7000407 rev. 1.2 27/03/2015 41/313
CONTENTS
1.0 INTRODUCTION ……………………………………….…………………………………………………………………………..……………… 42
1.1 Warnings …..…………………………………………………………………...………………………………...............………………….. 42
1.2 Normative references……… .…………………………………………………………………………..…………………………….…… 42
1.3 Technical features ………….……………………………………………………………………………………….….......……………… 43
1.3.1 Electrical features ……………………………….……………………………………………….……………..…………………… 43
1.3.2 Performance …………….……………………….……………………………………………….…………………………………. 43
2.0 INSTALLATION ………………………………………………………………………………………………….………………………………… 43
2.1 General rules ….………. …………………………………….………………………….…………………………………..….……………. 43
2.2 Installation kit…...…..……………………………………………………….……………………..………………………………………… 43
2.3 Assembly..…………….………………………………………………………………………….…………………………………………… 44
2.3.1 Assembly of the accessories …………………………………………………………………………………….……………….. 45
2.4 Electrical connections….………………….………..………………………………………………………..………………………..…….. 46
2.4.1 PT100 Temperature Reading Probe …………….…………………………………………………………….…………………. 47
2.5 Hydraulic connections………...…………………………………………………………………………………………………….…… … 48
3.0 PROGRAMMING …...………..………..……..……………………….……………….………………………………………........................... 49
3.1 Main Features ……………….………..….…………………………………………..…………………………………………………….. 49
3.2 Quick Start-Up …….…….………………………………………………….……………………………………..………………………….. 52
3.3 Advanced Programming ………………………………..………………………………………………………………………….……… 53
3.3.1 Setting the Language …………………………………..…………………………………………………………………………… 53
3.3.2 Setting the Setpoint and the Operating Mode ………………………..…………………………………………….…………… 53
3.3.3 Calibrating the pH Probe ..……………………………….………………………………………………………………….……... 54
3.3.4 Setting the Temperature …………..………………………………….……………………………………………………………… 55
3.3.5 Displaying and Resetting Statistics ………………………………………………………………………………...…………….. 57
3.3.6 Pump Calibration ………………… ………………………………………………………………………………………………… 57
3.3.7 Resetting Default Parameters …………..………………………………………………………………………………………… 58
3.3.8 Settings Menu …………..….………………………………………………………………………………………..…. …………. 58
4.0 ALARMS ………………………..……………………….…………………………………………………………………………..………..…………59
4.1 Maintenance Alarm …………………………………..………………………………………………………………….……………………. 59
4.2 Level Alarm …….……………………………..……………………………………………………………….…………………… …….. 59
4.3 OFF Status Alarm ……………………………..…………………………………………………………………..…………………. …… 60
4.4 OFA Alarm ….……………………………..…………………………………………………………………..…………… ………….......... 60
4.5 Pool Alarm…. ……………………………..…………………………………………………………………..……………………............ 60
4 6 Range Alarm ……………………………..…………………………………………………………………..……………………………. 60
4.7 Temperature Alarm …..…………………………………………………………………………………………………………………. …… 61
5.0 MAINTENANCE ……..……..………………………..…………………….………..…………………………………………..………………….. 61
5.1 General Rules ……….…………………………………………………………………………………………………………….………… 61
5.2 Periodic Maintenance …..………….…………….………………………………………………………….………………………………. 61
5.3 Troubleshooting …………………………….….……………………………………….…..………………………………………………. 63
6.0 RETURNING MATERIAL TO THE AFTER-SALES SERVICE ..…………………….……………..………………………………………… 64
7.0 WARRANTY CERTIFICATE..………..………..………………………………………….……………….……………………………..………. 64
8.0 ANNEXES …………………………..………………………………………………………………………………………………………………. 65
ANNEX A –OVERALL DIMENSIONS …………………..……………………………………………………………………………………….. 65
ANNEX B –REFERENCE FIGURES …….……………………………………………………………………………………………………… 66
ANNEX C –EXPLODED VIEWS …………………………..…………………………………………………………………….………………… 68
ANNEX D –CHEMICAL COMPATIBILITY TABLE ……….……..…………………… ……………………………………….……………… 69
ANNEX E –DEFAULT PARAMETERS …….…..…..…………………………………………………………………………………………… 71
ANNEX F –ACRONYMS TABLE……………..………..…..……………………………………………………………………………………… 72
ANNEX G –MENU LAYOUTS …………. …….………..…..…………………………………………………………………………………….. 74
ANNEX H –POOL PARAMETERS BALANCE …………………….…………………………………………………………………………….. 77

Simpool pH model INSTRUCTION AND MAINTENANCE MANUAL
Programmable digital peristaltic pump ENGLISH
ADSP7000407 rev. 1.2 27/03/2015 42/313
1.0 INTRODUCTION
The range of “Simpool” programmable digital peristaltic pumps is designed to manage swimming pools and
consists of the following models:
pH model: for dosage proportional to the pH value
Rx model: for dosage proportional to the Redox value
The pH model allows to adjust the either acid or alkaline ph of a swimming pool in an easy, flexible and accurate
manner.
1.1 WARNINGS
Before starting assembly, carefully read these instructions and follow them during installation.
If the instructions reported in this manual are not followed or carried out correctly, this may result in
personal injury or damage the device and/or systems.
We recommend reading the label reported on the pump and following the directions below:
The pressure of the injection point must be lower or equal to the pump's rated value!
When you receive the product, check the integrity of the pump and all of its parts. Should there be
any anomalies, promptly notify qualified personnel before performing any operations.
Keep this manual carefully for future reference.
Before installing the pump make sure that the details provided on the adhesive plate attached to
the pump correspond to those of the electrical system.
Do not handle the equipment with wet hands or feet!
Do not leave the equipment exposed to the elements!
Make sure the peristaltic tube is compatible with the liquid to be dosed!
The equipment must be handled by qualified personnel!
If any irregularities are experienced during pump operation, cut off the power supply and contact
one of our customer care centres for any repairs!
In order for the pump to operate correctly it is necessary to use original spare parts or accessories.
The manufacturer is relieved of any responsibility in the case of any breakdowns due to tampering
or use of non-conforming parts and accessories
The electrical system must comply with regulations in force in the country where the system is
installed.
The operating ambient temperature must not exceed 40°C with a relative humidity of 90% at 90°C.
1.2 NORMATIVE REFERENCES
Our pumps are manufactured according to General Standards in force and in compliance with the following
European Directives:
n° 2004/108/CE “ e s.m.i.
n° 2006/95/CE “DBT Low Voltage Directive” e s.m.i.
n° 2011/65/UE , 2012/19/UE “directive RoHs e WEEE” e s.m.i.

Simpool pH model INSTRUCTION AND MAINTENANCE MANUAL
Programmable digital peristaltic pump ENGLISH
ADSP7000407 rev. 1.2 27/03/2015 43/313
1.3 TECHNICAL FEATURES
1.3.1 ELECTRICAL FEATURES
For the power supply value we recommend reading the label on the pump!
1.3.2 PERFORMANCE
Maximum height of the suction tube: 1.5 m
Flow rate and backpressure: refer to the table below and read the label in the pump to identify the
corresponding model.
Codes
Power supply
Motor
Type
Flow
rate (l/h)
Backpressure
(bar)
Peristaltic
Tube
PT100
ADD100G00201003A000
230 VAC
230
VAC
1.4
1
Santoprene
X
ADD100D00101003A000
230 VAC
230
VAC
3
1
Santoprene
X
ADD300G00201003A000
230 VAC
230
VAC
1.4
1
Santoprene
ADD300D00101003A000
230 VAC
230
VAC
3
1
Santoprene
Operating ambient temperature: 0 ÷ 45°C
Transport and Packaging Temperature: -10 ÷ 50°C
Protection rating: IP65
2.0 INSTALLATION
2.1 GENERAL RULES
Pump installation must be carried out as follows:
In vertical position with an uncertainty not greater than +/-15°.
Away from sources of heat in dry locations, at a maximum temperature of 40°C and a minimum of 0°C.
In a ventilated environment and easily accessible to an operator for periodic maintenance.
Above the level of the liquid that needs to be dosed, at a height of 1.5 metres maximum.
Do not install the pump above the tank when using liquids that emit fumes, unless it is sealed shut.
2.2 INSTALLATION KIT
When you purchase the pump, it includes everything required for correct installation, specifically:
Bracket (code ADSP8000025);
Plugs and screws (cod. ADSP6000041);
pH 4.01 buffer solution (cod. ADSPH4);
pH 7.00 buffer solution (code ADSPH7);
Empty bottle to wash the pH probe (code ADSP4000020);
PT100 temperature probe with 3 wires (optional, code ADSTS100N);
Level Probe (optional, code ADSLG4);
Foot strainer (*);
2-in-1 injection probe-holder (code ADSP6000880);
PVC suction and delivery tubes (*);
pH electrode with 5 m cable (code ADELTPH055);
O-rings and spacers, ring nut for the pH electrode (*);
Drill bit Ø 24 (*);
(*) Kit components included in the ADSP6000631 code

Simpool pH model INSTRUCTION AND MAINTENANCE MANUAL
Programmable digital peristaltic pump ENGLISH
ADSP7000407 rev. 1.2 27/03/2015 44/313
The full kit supplied is reported in Figure 1
Fig. 1- Installation kit
2.3 ASSEMBLY
We always recommend wearing protective masks, gloves, goggles and any other PPE during all
installation steps and when handling chemical products.
WALL MOUNTING
Proceed as follows to secure the pump to the wall:
Fix the bracket to the wall using the plugs and screws supplied.
Place the pump on the bracket.
Ensure the fixing is stable.
It is also recommended to install the pump in a dry environment, away from heat sources and
exhaust vapour.

Simpool pH model INSTRUCTION AND MAINTENANCE MANUAL
Programmable digital peristaltic pump ENGLISH
ADSP7000407 rev. 1.2 27/03/2015 45/313
2.3.1 ASSEMBLY OF THE ACCESSORIES
The probe-holder is installed on a D50 or D63 diameter tube on which a 24 mm diameter hole has been
carried out;
Check the direction of the flow in the tube to insert the injection tube correctly;
The probe-holder must be positioned vertically +- 45°
Performing a D24 mm hole
Conduct a 5 mm pre-hole at the centre of the upper part of the tube;
Expand the hole with the 24mm drill bit supplied in the installation kit, until you introduce the whole
drill bit in the tube;
Deburr the hole by removing the PVC residues;
Installing the probe-holder:
Insert the O-ring on the small injection tube;
Insert the small injection tube on the tube by following the direction of the flow, as indicated by the arrow on
the label;
Position the O-ring in place and hold it there. Apply the upper part of the probe-holder on the pool tube;
Insert the two screws (if it is a DN63 tube use the two spacers between the upper probe-holder and the
lower collar). Apply the lower part of the probe-holder on the tube and tighten the nuts on the screws;
Screw the clamping screws evenly to achieve proper fastening. Do not tighten a screw fully home
when the other one is still unscrewed.
Fig. 2- Probe-holder Assembly
Installing the short electrode
6. Remove the cap from the electrode. (Carefully store away the cap, you will need it during maintenance or
when the equipment is not used during winter. In this case, it must placed back on the electrode after filling
it up to ¾ with water);
7. Insert the two O-rings and slide them until they reach the lower part of the electrode's head;
8. Pass the electrode's cable on the slot located on the ring nut;
9. Now go ahead with the calibration of the probe described in chapter 3.3.3 and then proceed with section 5;
10. Insert the electrode in the probe-holder without forcing it in until the O-ring positions itself between the
lower part of the electrode head and the seat on the probe-holder. Then tighten the ring nut manually;
Refer to Fig. 3

Simpool pH model INSTRUCTION AND MAINTENANCE MANUAL
Programmable digital peristaltic pump ENGLISH
ADSP7000407 rev. 1.2 27/03/2015 46/313
Fig. 3- Mounting the probe in the probe-holder
Installing a long electrode (120 mm)
It is possible to use a standard electrode (12x120 mm). In this case it is necessary to use all the parts supplied;
Insert the following in sequence on the body of the probe: the ring nut and then alternate a
spacer and an O-ring as shown in Fig. 4
Gently insert the electrode on the probe-holder by carrying out small clockwise and
anticlockwise rotations to make the O-rings move down. When all the components are in
place, tighten the ring nut manually.
Never bend the electrode, which would otherwise be irreparably damaged. The
internal part of the electrode is very fragile!
Fig. 4- Long pH Electrode
2.4 ELECTRICAL CONNECTIONS
Before performing any intervention on the pump, disconnect the power supply voltage of the
machine!
Fig. 5- View from below

Simpool pH model INSTRUCTION AND MAINTENANCE MANUAL
Programmable digital peristaltic pump ENGLISH
ADSP7000407 rev. 1.2 27/03/2015 47/313
Connect the pump cable to a voltage that is compatible with the one on the label.
For the connections refer to Fig. 5.
CAUTION !!!!!
Verify that the earth system is perfectly functional and complies with the applicable regulations.
Ensure the unit is connected to a circuit protected by a highly sensitive (0.03A) RCCB circuit
breaker. If unsure please consult a competent electrician. Verify that the rated values of the pump
are compatible with those of the mains. Never install the pump directly in parallel with inductive
loads (e.g. motors/solenoid valves) if necessary, use an isolating relay.
There are 2 protection devices inside the pump: a varistor and a fuse.
2.4.1 PT100 TEMPERATURE READING PROBE
The PT100 temperature reading probe is an optional item when the product is purchased.
If you want to connect the temperature probe after you bought the pump –provided the pump model you
purchased is designed to be fitted with one (pH model with PT100) –you will need to open the box and proceed
with the connection on the pH card mounted on the main electronic board (see Fig. 6).
Fig.7 shows the connection of the PT100 temperature probe on the corresponding terminal on the card. Depending
on the available probe model, perform one of the connections reported in Fig.7- b
Fig. 6- Pump disassembly
(a) (b)
Fig.7- pH card and temperature probe connection

Simpool pH model INSTRUCTION AND MAINTENANCE MANUAL
Programmable digital peristaltic pump ENGLISH
ADSP7000407 rev. 1.2 27/03/2015 48/313
2.5 HYDRAULIC CONNECTIONS
Make sure the suction tube is placed in the product's container and then connected to the pump's intake
fitting (marked with the ▲ symbol on the cover) and tightened with the correct ring nut.
Make sure the delivery tube is inserted in the pump's delivery fitting (marked with the ▼ symbol on the
cover) and tightened with the correct ring nut. It must then be connected to the infeed fitting of the
injection probe-holder.
Fig. 8 Installation

Simpool pH model INSTRUCTION AND MAINTENANCE MANUAL
Programmable digital peristaltic pump ENGLISH
ADSP7000407 rev. 1.2 27/03/2015 49/313
3.0 PROGRAMMING
3.1 MAIN FEATURES
FIG.9-USER INTERFACE
The Increase/Decrease keys allow to change the numerical values and scroll through the lists of options for
all the available menu entries.
The Enter key allows to access and exit from the various entries of the submenus. Pressing the key for 3
seconds allows, from the Initial Menu, to access the Programming Menu and to go back to the Menu one
level up from the main entries on a Menu;
The Function key allows to browse through the Menu's entries.
By pressing the key for 3 seconds from the initial page, you can access the User Menu;
TWO-COLOURED LED
The two-coloured LED displays the following conditions:
Steady green: the pump is active;
Flashing green: the pump is dosing;
Steady red: the pump is off;
Flashing red: there is an alarm;
Steady orange: if you are browsing the Programming Menu;
Flashing orange: Pump priming in progress;
The switch has three positions:
: the pump is active (ON)
O: the pump is off (OFF)
: the pump is priming (MOM)
The MOM position is monostable, therefore after setting the switch to MOM, when it is released the
switch automatically goes back to OFF.
The pump doses for 60 seconds at the maximum speed; if the MOM key is pressed again before the
60 seconds elapse, the priming is interrupted.
OPERATION
The pump allows to dose a chemical product in a proportional manner to increase (Alkaline operation) or reduce
(Acid operation) the pool's pH value. Dosage may be subject to the status of the recirculation pump (Inhibiting
Signal).
The pH value is acquired by an electronic pH probe that needs to be calibrated and requires periodic maintenance.
Dosage is based on a cyclical pattern: at each cycle the pump is activated for a set time in relation to the difference
between the pH value acquired and the set pH Setpoint (from 5.00 to 9.00 pH). The pump's dosing time (Ton) is
calculated proportionally (see [3.1]) within the range of values indicated as “Proportional Band”.
The following figure (Fig. 10) reports the operating diagrams for the acid and alkaline modes.

Simpool pH model INSTRUCTION AND MAINTENANCE MANUAL
Programmable digital peristaltic pump ENGLISH
ADSP7000407 rev. 1.2 27/03/2015 50/313
Fig. 10 - Acid and alkaline operating diagrams
The pH cycle period features a Ton time during which the pump is active and a Toff time during which the pump is
stationary.
The Ton and Toff times are calculated at the beginning of a pH cycle based on the following formulas:
[3-1]
[3-2]
The pH Proportional Band can be programmed with the following values: 0.5/ 1/ 1.5/ 3 pH.
Example:
pH Setpoint = 7 pH
pH Cycle Period = 500 sec
Operating Mode = Acid
pH proportional band = 1 pH
Read value = 7.5 pH
The calibration of the pH probe is conducted for the 7.00 and 4.01 pH sections, which correspond to the pH values
of the buffer solutions provided in the installation kit. These values can be changed to adapt them to the available
buffer solutions.
If the application allows to work around a 7.00 pH value, you will be able to calibrate the probe for a single point. In
this case, the probe gain taken into account matches the theoretical one.
At the end of the calibration, the quality of the probe is displayed as a percentage. If the value is less than or equal
to 25%, the probe must be replaced.
The pH of a solution is influenced by the temperature as well and to compensate for this influence you need to
know its value. You can choose to offset the pH value automatically and with the temperature acquired by the
PT100 probe or to set the value manually.

Simpool pH model INSTRUCTION AND MAINTENANCE MANUAL
Programmable digital peristaltic pump ENGLISH
ADSP7000407 rev. 1.2 27/03/2015 51/313
MENU
When the pump is turned on, regardless of the status of the switch, for a second the display shows the firmware
version with the following format “rx.y”. It then displays the first entry of the Initial Menu.
You can browse the whole Menu both when the switch is ON and when it is OFF.
The Menu consists of the following submenus:
Initial Menu, which allows to display the status of the pump;
User Menu, which allows to change the main operating parameters;
Programming Menu,which allows to set all the operating parameters and to display statistics: this menu
can only be accessed by entering a password;
To browse through the Menus refer to Annex G - Menu Layouts.
Initial Menu
The first entry of the Initial menu displays one of the following pages, depending on the status of the switch and the
pump:
(*) example of a pH value read;
noS (Signal not active): displayed if the inhibiting signal, which is linked to the pool's water recirculation pump, is
not active;
Stb (Signal in Stabilization): displayed if the inhibiting signal, which is linked to the pool's water circulation pump,
is active but waiting to be stabilized;
Read pH value: the reported value is the pH value read by the probe displayed with centesimal precision from 0.00
to 9.99 pH and with decimal precision from 10.0 to 14.0 pH. The value flashes, alternated with noS or Stb, if the
signal is not active or active but not stabilized. The value is instead steady if the inhibiting value of the water
recirculation pump is active and stabilized;
Alr (Alarm entry): if there is one or several active alarms, with the switch set to ON, every page of the Initial Menu
will be alternated to the entry that reports the signal with the top priority. (see Alarms section).
If the inhibiting signal is disabled from the Settings Menu (see relative section), only the Redox potential
value read will be displayed.
From the home page, with the Fkey it is possible to scroll through the other entries of the Menu and display:
the SEt setpoint value selected for the pH;
the temperature value (°C) set manually or read by the PT100 temperature probe from 0.0 to 99.9°C: if the
automatic temperature has been set and the temperature probe is not connected, the display will show “t -
- “.
If the temperature compensation option is disabled (OFF), this entry will not be displayed.
From the temperature value, again with the Fkey, you can go back to the first entry: if the pH value is shown on the
display (enabling value stabilized or disabled from the Settings Menu), the reading of the pH value will come after
the “pH” label.
From any entry of the Initial Menu you can go to the:
Programming Menu by pressing Enter for 3 seconds;
User Menu by pressing the Fkey for 3 seconds;

Simpool pH model INSTRUCTION AND MAINTENANCE MANUAL
Programmable digital peristaltic pump ENGLISH
ADSP7000407 rev. 1.2 27/03/2015 52/313
User Menu
The User Menu allows to set the main pump dosing parameters.
You can browse through the User Menu with the Fkey and display:
PrI: allows to prime the pump without using the switch. You can start or stop the priming with the Enter
key. The display shows a flashing “PrI” and the pump starts running run at top speed.
SEt: allows to set the setpoint value from 5.00 to 9.00;
doS: allows to select the pump's operating mode, Alkaline AL.d or Acid ACI;
CAL: allows to access the Calibration Menu of the pH probe;
°C: allows to set the temperature value, from 0.0°C to 99.9°C;
OFA: allows to select the OFA alarms' control time frame within a range of 300 to 999 seconds or disable it
(OFF);
The parameters can be changed and the pH probe can be calibrated only if they have been enabled from the
Settings Menu, that is if:
OnS (on-line Setpoint change) enabled
Ond (on-line operating mode) enabled
OnC(on-line probe calibration execution) enabled
Ont (on-line manual temperature change) enabled
OnA (on-line OFA alarm change) enabled
From the User Menu you can go back to the Initial Menu by pressing the Fkey for 3 seconds.
Programming Menu
The Programming Menu allows to set all of the pump's operating parameters and can be accessed only by entering
the password.
You can enter the Programming Menu only from the Initial Menu: after pressing Enter for 3 seconds, the display
shows “PAS”, the LED turns orange and is steady. Then press Enter again and on the password selection menu
the first digit of “000” starts flashing. With the ▲ and ▼ keys you can increase/decrease the value displayed, with
Enter you can scroll and select the desired digit. After setting the correct password, press Enter again for 3
seconds.
From every menu you will go back to the first entry of the Initial Menu if no operation is carried out for more than 2
minutes.
3.2 QUICK START-UP
This section features the steps to carry out to use the pump straight away. For further details on operation, refer to
section 3.3 “Advanced Programming”.
Here below are the main parameters to set in order to operate the pump:
pH setpoint –pH Operating Mode –pH Proportional Band
From the User Menu you can proceed quickly with the steps below:
Prime the pump;
Select the Setpoint;
Set the pH Operating Mode;
Calibrate the pH measuring probe; (see pH Probe Calibration Menu)
Set the temperature (if in manual mode);
Select the time in seconds to control the PFA alarm;
Here below are the pump's default parameters:
pH Proportional Band equal to 1.5;
pH Cycle Period equal to 300 sec;
On-line modification of the User Menu values and On-line execution of the probe calibration enabled;
Stabilization Time: 10 sec;
OFA alarm disabled (OFF);

Simpool pH model INSTRUCTION AND MAINTENANCE MANUAL
Programmable digital peristaltic pump ENGLISH
ADSP7000407 rev. 1.2 27/03/2015 53/313
A.PH activation value and r.PH deactivation value of the OFA alarm, respectively equal to 0.05 pH and 0.2
pH (see OFA alarm);
USER MENU
Fig. 11 - Standard programming from User Menu
The temperature value can be changed only if the Manual mode is set and the corresponding On-line
change is enabled.
3.3 ADVANCED PROGRAMMING
Here below are the various features of the Programming Menu in greater detail.
Every parameter that is changed in the pump's programming is saved when you go back to the initial
display. If the pump's power supply is disconnected before going to the stand-by display, programmed
data is lost.
3.3.1 SETTING THE LANGUAGE
From the LAn entry you can choose between Italian It and English En via the ▲ ▼ keys. Use Enter to enter and
exit. (Fig. 12)
Fig. 12 - Programming the Language
3.3.2 SETTING THE SETPOINT AND THE OPERATING MODE
From the PH entry it is possible to access the following submenu: (Fig. 13)
SEt: allows to display and if necessary change, via the ▲ and ▼ keys, the Setpoint value from 5.00 to 9.00
pH;
LEt: allows to display the pH value read by the probe;
doS: entry to select the pump's operating mode; via the ▲ and ▼ keys you can scroll through the AL.d
(Alkaline) and ACI (Acid) entries;
To go back to the main PH entry of the Programming Menu, press Enter for 3 seconds.

Simpool pH model INSTRUCTION AND MAINTENANCE MANUAL
Programmable digital peristaltic pump ENGLISH
ADSP7000407 rev. 1.2 27/03/2015 54/313
Fig. 13- Setting the dosage parameters from the Programming Menu
3.3.3 CALIBRATING THE PHPROBE
From the CAL entry you can calibrate the pH's electrode.
Before you start, first of all you must get the accessories required to calibrate the probe (Installation kit):
Empty container that needs to be filled up with drinkable water;
pH 7.00 buffer solution (or with another value);
pH 4.01 buffer solution (or with another value);
The calibration can also be carried out with a pH 7.00 buffer solution (or with a solution with a valid pH value for the
1st calibration point), as the menu allows to calibrate the probe also for just a single point, considering the 2nd
calibration point equal to the theoretical value of 4.01 pH.
After washing the probe in drinking water, immerse it in the first solution and select the correct pH value of the
buffer solution used for the calibration (typically 7.00 pH). Then press Enter: the display will show a flashing 60-
second countdown. When this ends, the display shows the value measured in mV and the count can be interrupted
by pressing Enter.
Then, after about 10 seconds, the display shows the value of the 4.01 pH buffer solution to be used for the 2nd
calibration point: if you intend to calibrate only one point of the probe, just go to the “PEr” page (Probe Quality
Percentage) via the Fkey. Otherwise you need to rinse the probe in the drinking water again and immerse it in the
second buffer solution by selecting the correct pH value used for the calibration on the display.
Press Enter to carry out the second acquisition: the display will show a flashing 60-second countdown again (this
can be stopped by pressing Enter). When it ends, the display shows the measured value mV. After about 10
seconds, it displays the PEr page and with Enter, you can display the Quality of the probe expressed as a
percentage.
A Quality percentage value of the probe less than or equal to 25% means the pH probe must be replaced.

Simpool pH model INSTRUCTION AND MAINTENANCE MANUAL
Programmable digital peristaltic pump ENGLISH
ADSP7000407 rev. 1.2 27/03/2015 55/313
Fig. 14- pH Probe Calibration Menu
3.3.4 SETTING THE TEMPERATURE
The temperature setting allows to correct the pH value read.
From the Programming Menu, by accessing it from the °C entry you can choose between the “noA” manual setting
and the ”Aut” automatic temperature reading from the PT100 probe or OFF.
If you want to correct the pH value in relation to the thermal variation, in manual mode just set a temperature equal
to 25°C or select OFF.
The default setting is the manual mode, with a temperature of
25°C (pH correction not enabled).
If you have not selected OFF among the options, the
following will be displayed by pressing Enter:
Temperature value measured from 0.0 to 99.9°C if
the mode is Aut: if the probe is not connected, the
display will show “t - -“;
Set temperature value, from 0 to 99.9 °C if the mode
is noA;
To go back to the Programming Menu, press Enter again.
FIG.15-TEMPERATURE

Simpool pH model INSTRUCTION AND MAINTENANCE MANUAL
Programmable digital peristaltic pump ENGLISH
ADSP7000407 rev. 1.2 27/03/2015 56/313
3.3.5 DISPLAYING AND RESETTING STATISTICS
From the StA entry on the Programming Menu you can access the Pump statistics submenu.
Here below are the parameters saved during the pump's operation:
How many times the OFA overdosage alarm has been activated (from 0 to 999);
The maximum pH value H.PH measured from 0.00 to 14.0 pH;
The average pH value A.PH measured from 0.00 to 14.0 pH;
The maximum pH value L.PH measured from 0.00 to 14.0 pH;
The maximum H.°C temperature value detected from 0.0 to 99.9°C or t --(*);
The average A.°C temperature value detected from 0.0 to 99.9°C or t - -;
The minimum L.°C temperature value detected from 0.0 to 99.9°C or t - -;
The pump's overall operating time P.d.t, from 0 to 999 hours, with the following format:
- h.mm up to 9 h and 59 m
- hh.m up to 99 h and 59 m (minutes expressed in tens)
- hhh up to 999 h
To reset each of the above-mentioned fields, just access from the numerical value to the rSt reset entry with the F
key and from there select YES, confirming with Enter: the corresponding reset value is displayed.
The entries related to the temperature values are not displayed if the °C temperature is set to OFF.
Fig. 16- Statistics Menu
To go back to the Programming Menu press Enter for 3 seconds.
3.3.6 CALIBRATING THE PUMP
The calibration of the pump allows to achieve more accurate dosing, as it allows to correct the dosing time Ton in
relation to the actual flow rate of the pump. If the calibration is not carried out, dosing times are calculated based on
the pump's rated flow rate value (read the value on the label).
The rated flow rate and the actual flow rate could differ for a number of reasons related to the use of the device
(wear of the peristaltic tube, etc.).
From the P.CA entry, you will be able to calibrate the pump for a fixed time of 60 seconds, thereby measuring the
amount of liquid dosed via a graduated container used as a reference: from the start label “StA”, launch the count
by pressing Enter and the pump will start dosing at top speed. Finally, just set the amount in ml (from 0 to 300).
(*) displayed if the temperature is in automatic mode and the PT100 probe is not connected;

Simpool pH model INSTRUCTION AND MAINTENANCE MANUAL
Programmable digital peristaltic pump ENGLISH
ADSP7000407 rev. 1.2 27/03/2015 57/313
Fig. 17- pH Pump Calibration Menu
3.3.7 RESETTING DEFAULT PARAMETERS
From the r.d.P entry you will be able to reset the equipment's default parameters (refer to the Default Parameters
Table in Annex E). If you chose to reset the initial values, you will go back to the initial display. See Fig. 18
Once you confirm with YES, you cannot go back.
Fig. 18- Default parameters reset
3.3.8 SETTINGS MENU
From the OPt entry of the Programming Menu, via the Enter key, you can access the Settings Menu
From the Settings Menu you can carry out the following operations (refer to Figure 19):
Set the password to access the Programming section, PAS: with Enter you can go to the “000” selection
page, with the ▲ and ▼ keys you can increase/decrease the value displayed and with Enter you can scroll
through the figure you intend to set. After choosing the new password, press Enter for 3 seconds to go back
to the PAS entry;
Enable the pump stop in the case of a P.St level alarm: to access and exit the submenu, use Enter, to
scroll through “YES/no” use the ▲ and ▼ keys;

Simpool pH model INSTRUCTION AND MAINTENANCE MANUAL
Programmable digital peristaltic pump ENGLISH
ADSP7000407 rev. 1.2 27/03/2015 58/313
Select the P.P.b value of the pH Proportional Band: to enter and exit the submenu use Enter, to scroll
through the 0.5/ 1/ 1.5/ 3 values use the ▲ and ▼ keys;
Set the PHP value in seconds of the duration of the pH Cycle Period: to enter and exit the submenu, use
Enter, to scroll through the values from 300 to 999 seconds use the ▲ and ▼ keys;
Set the minimum A.PH variation of the pH to activate the OFA alarm within a range of 0.05- 0.99 pH: to
enter and edit the submenu use Enter, to scroll through the values use the ▲ and ▼ keys;
Set the minimum variation of the pH to reset the OFA alarm, r.PH within a range of 0.99-90 mV: to enter and
exit the submenu use Enter, to scroll through the values use the ▲ and ▼ keys;
Select the time frame to control the OFA alarm, OFA, within a range of 300-999 seconds or disable it (OFF):
to enter and exit the submenu use Enter, to scroll through the values use the ▲ and ▼ keys;
Set the stabilization time of the inhibiting signal, Stb, coming from the pool's circulation pump in a range of
0- 999 seconds: to enter and exit the submenu use Enter, to scroll through the values use the ▲ and ▼
keys;
Set the time of the pump's maintenance alarm, O.F.d, from 0 (disabled) to 999 hours, based on the following
format:
- h.mm up to 9 h and 59 m
- hh.m up to 99 h and 59 m (minutes expressed in tens)
- hhh up to 999 h
To enter and exit the submenu use Enter and increase/decrease the value with the ▲ and ▼ keys;
Access the window to identify the inhibiting signal, S.In: to enter and exit the submenu use Enter. The
display will show the status identified by the pump for the input signal:
steady “HI”: enabling signal identified as active;
steady “Lo”: enabling signal identified as not active;
flashing “HI”: enabling signal identified as active, but just above the identification voltage threshold;
flashing “Lo” : enabling signal identified as not active, but just below the identification voltage threshold;
If the status displayed does not correspond to the actual status of the signal or if the status displayed is
flashing, just scroll with the ▲ and ▼ keys to change the threshold, namely:
Status of the non-active signal (recirculation pump OFF)
if the signal is identified as active (HI steady or flashing) or not active but near the threshold (flashing Lo),
press ▼ to reduce the threshold voltage until a steady “Lo” is displayed;
if the signal is permanently identified as not active (steady Lo), conduct a check when the signal is
activated;
Status of the non-active signal (recirculation pump ON)
if the signal is identified as not active (Lo steady or flashing), or active but near the threshold(HI flashing),
press ▲to increase the threshold voltage until a steady “HI” is displayed;
if the signal is permanently identified as not active (steady HI), conduct a check when the signal is
disabled;
Enable or do not enable the acquisition of the inhibiting signal to read and adjust the pH, A.In: to enter and
exit the submenu use Enter, to scroll through “YES/no” use the ▲ and ▼ keys;
Choose if you want to make the Setpoint, OnS, a value that can be changed from the User Menu: to enter
and exit the submenu use Enter, to scroll through “YES/no” use the ▲ and ▼ keys;
Choose if you want to make the pH operating mode, Ond, a value that can be changed from the User Menu:
to enter and exit the submenu use Enter, to scroll through “YES/no” use the ▲ and ▼ keys;
Choose if you want to calibrate the pH probe from the User Menu, OnC: to enter and exit the submenu use
Enter, to scroll through “YES/no” use the ▲ and ▼ keys;
Choose if you want to modify the temperature value from the User Menu, Ont: to enter and exit from the
submenu use Enter, to scroll through “YES/no” use the ▲ and ▼ keys. This entry is displayed only if the
temperature is set in manual mode from the Programming Menu;

Simpool pH model INSTRUCTION AND MAINTENANCE MANUAL
Programmable digital peristaltic pump ENGLISH
ADSP7000407 rev. 1.2 27/03/2015 59/313
Choose if you want to modify the OFA alarm's time frame from the User Menu, OnA: to enter and exit the
submenu use Enter, to scroll through “YES/no” use the ▲ and ▼ keys;
Enable the b.En buzzer when an alarm is activated: to enter and exit the submenu use Enter, to scroll
through “YES/no” use the ▲ and ▼ keys;
To go back to the Programming Menu, to the Opt entry, just press Enter for 3 seconds from any entry of the Menu.
Fig. 19 - Settings Menu
4.0 ALARMS
The entry that reports the active alarm with the top priority is only displayed alternated with the entries of the Initial
Menu, while there will be an audio signal (if the buzzer is enabled) and a flashing red LED associated with the
status of the Alarm both on the Initial Menu and the User Menu.
4.1 MAINTENANCE ALARM
The maintenance alarm is activated when the pump has been running for longer than the time set in the relative
O.F.d submenu (see Settings Menu).
If you set 0.00 (h.mm) as a time value for the maintenance alarm, it will be disabled.
This is reported by the pump as follows:
Audio signal via the buzzer (if there is one on the pump) if enabled (see b.En on the “Settings Menu”) with a
frequency of 1 second on and 1 second off;
flashing red LED;
“OFd” flashing on the display;
In this alarm status the motor is stationary. To disable the alarm, you need to go to the P.d.t entry (pump operating
time) in the Statistics Menu and reset the value.
4.2 LEVEL ALARM (only for the model with the level probe)
A level probe can be connected to the pump to report the end of the product, which is indicated by the pump in the
following way:
Audio signal via the buzzer (if there is one on the pump) and if enabled (see b.En on the “Settings Menu”)
with a frequency of 1 second on and 1 second off;
flashing red LED;
“uLo” flashing on the display;
The inlet has a 3-second recognition filter to identify false contacts and unwanted level alarm signals.
This alarm may or may not imply the pump will stop, depending on the option chosen in the “P.St” submenu
(Settings Menu: P.St=YESthe pump is stopped; P.St =nothe pump keeps on dosing).
The alarm is automatically reset when the level of the chemical product to be dosed is restored.
In priming mode, the level alarm is not indicated.
Table of contents
Other Aqua Swimming Pool Pump manuals
Popular Swimming Pool Pump manuals by other brands

Kripsol
Kripsol KS EVO BLACK EDITION user guide

Speck pumps
Speck pumps S90-II E+ owner's manual

Swim & Fun
Swim & Fun SPS 50-1T user manual

Theralux
Theralux Theraflo S Series Installation and operating instruction manual

OEG
OEG 650 001 082 Installation and operating instructions

Harmopool
Harmopool Harmo Kubi ZVWX4015 instruction manual

AQUALUX
AQUALUX VESUVIO VES06R Installation and user manual

Madimack
Madimack invermac inverFLOW Series installation manual

Oase
Oase Varionaut 270 DMX/02 operating instructions

Perle
Perle MP2-POOL-T Programming instructions

Pentair
Pentair ONGA Eco Select PANTERA evolution owner's manual

STA-RITE
STA-RITE MAX-E-PRO brochure