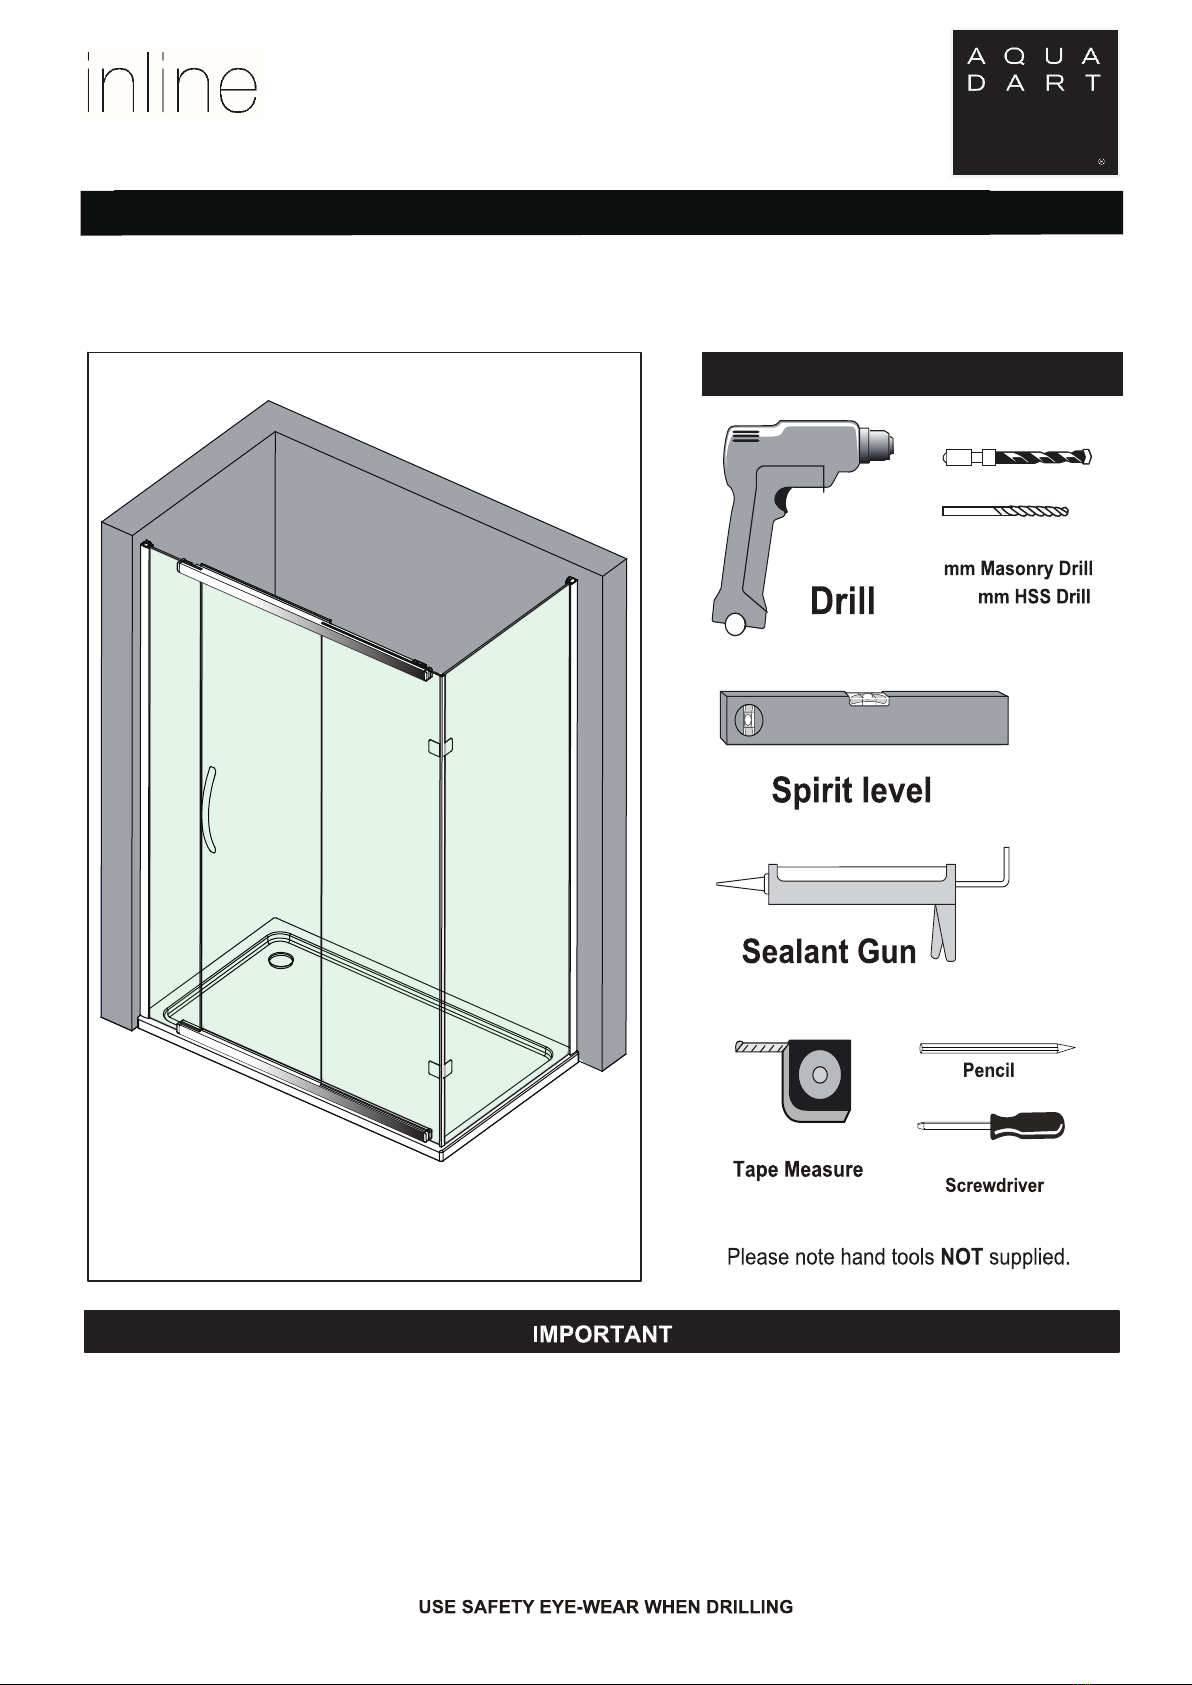
INSTALLATION INSTRUCTIONS
Aquadart Inline Slider
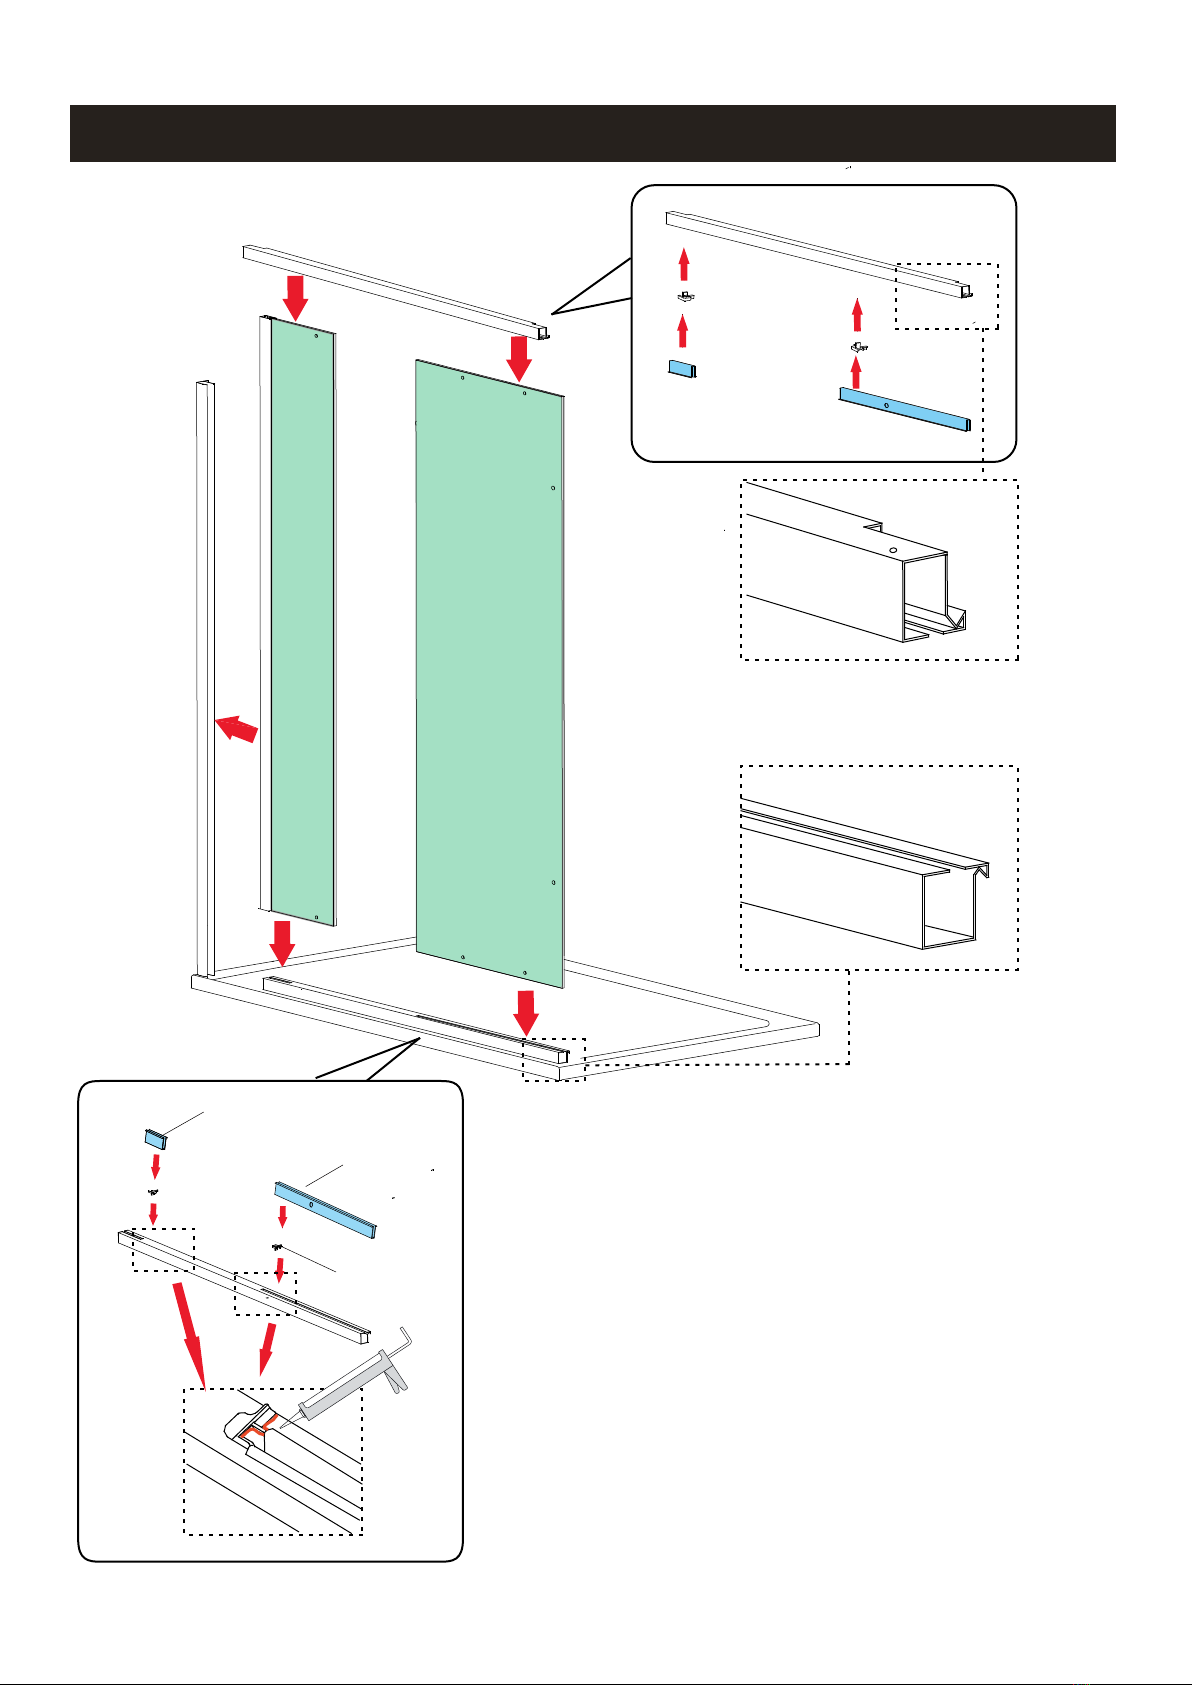
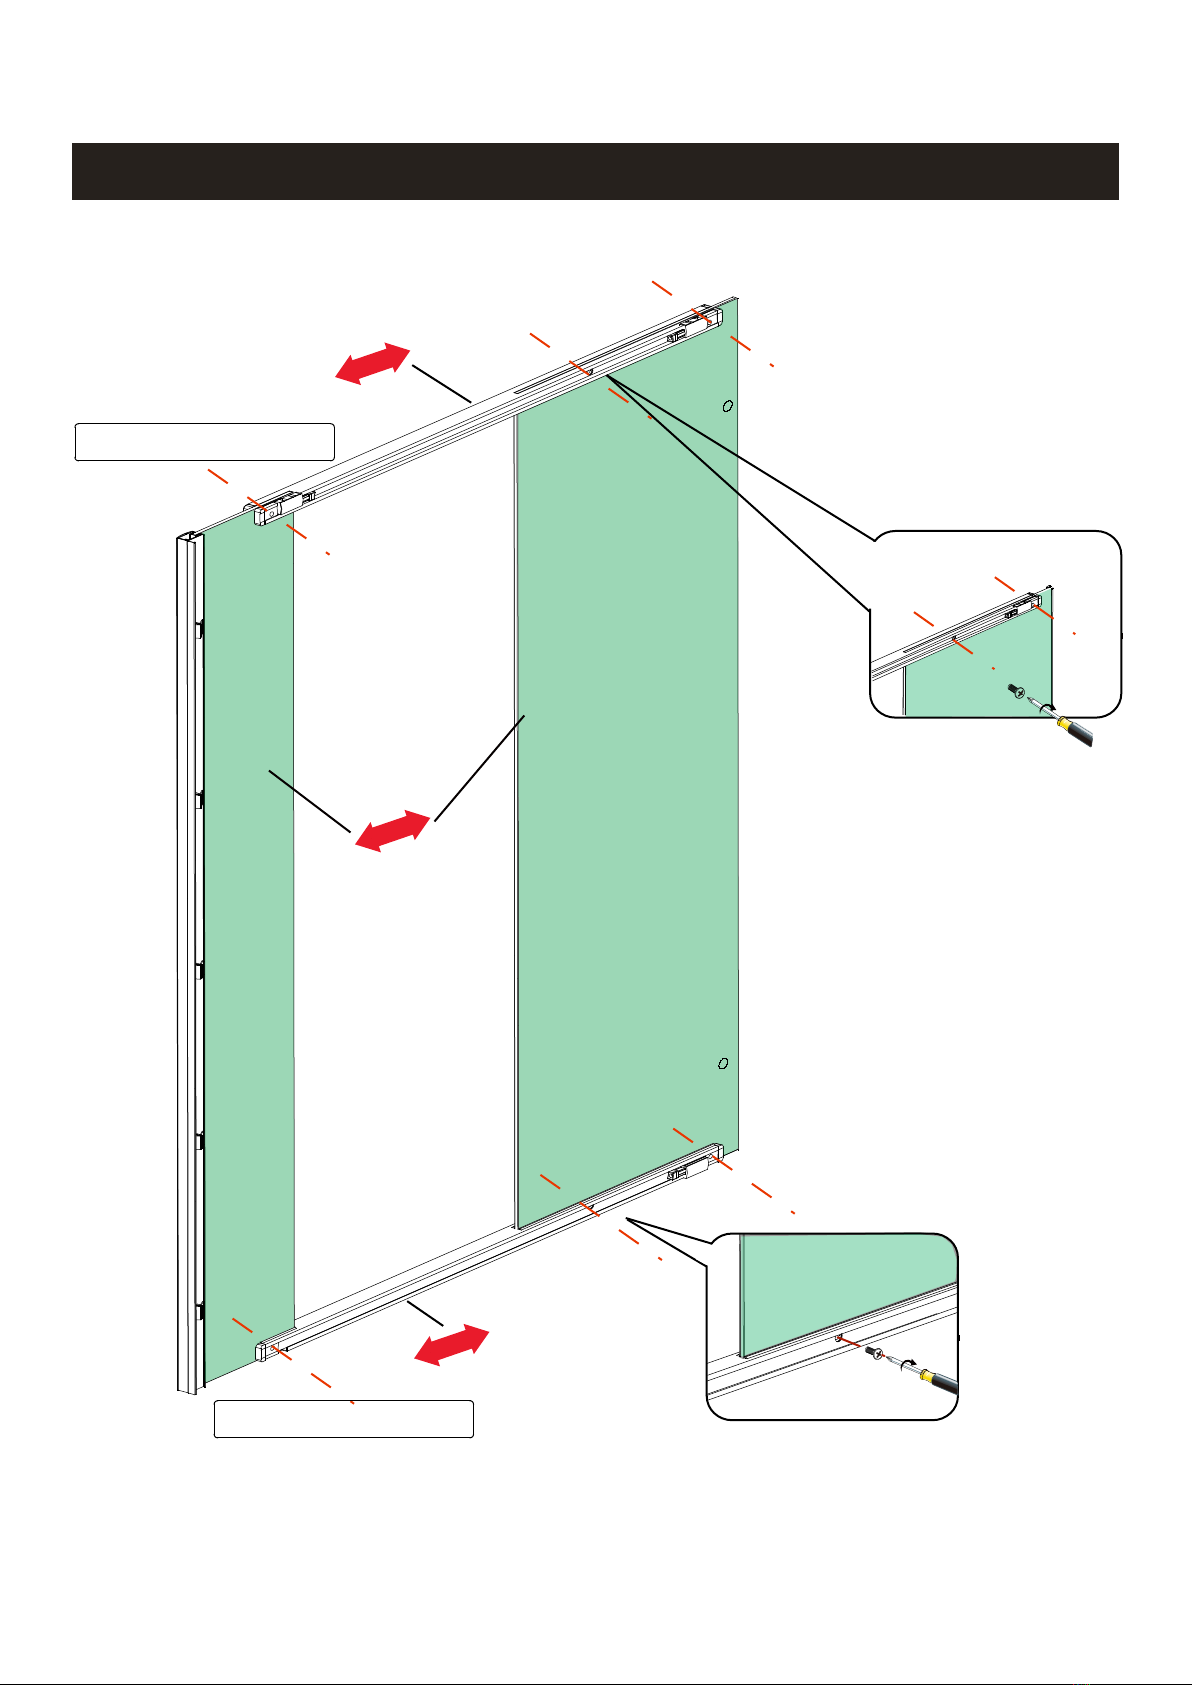
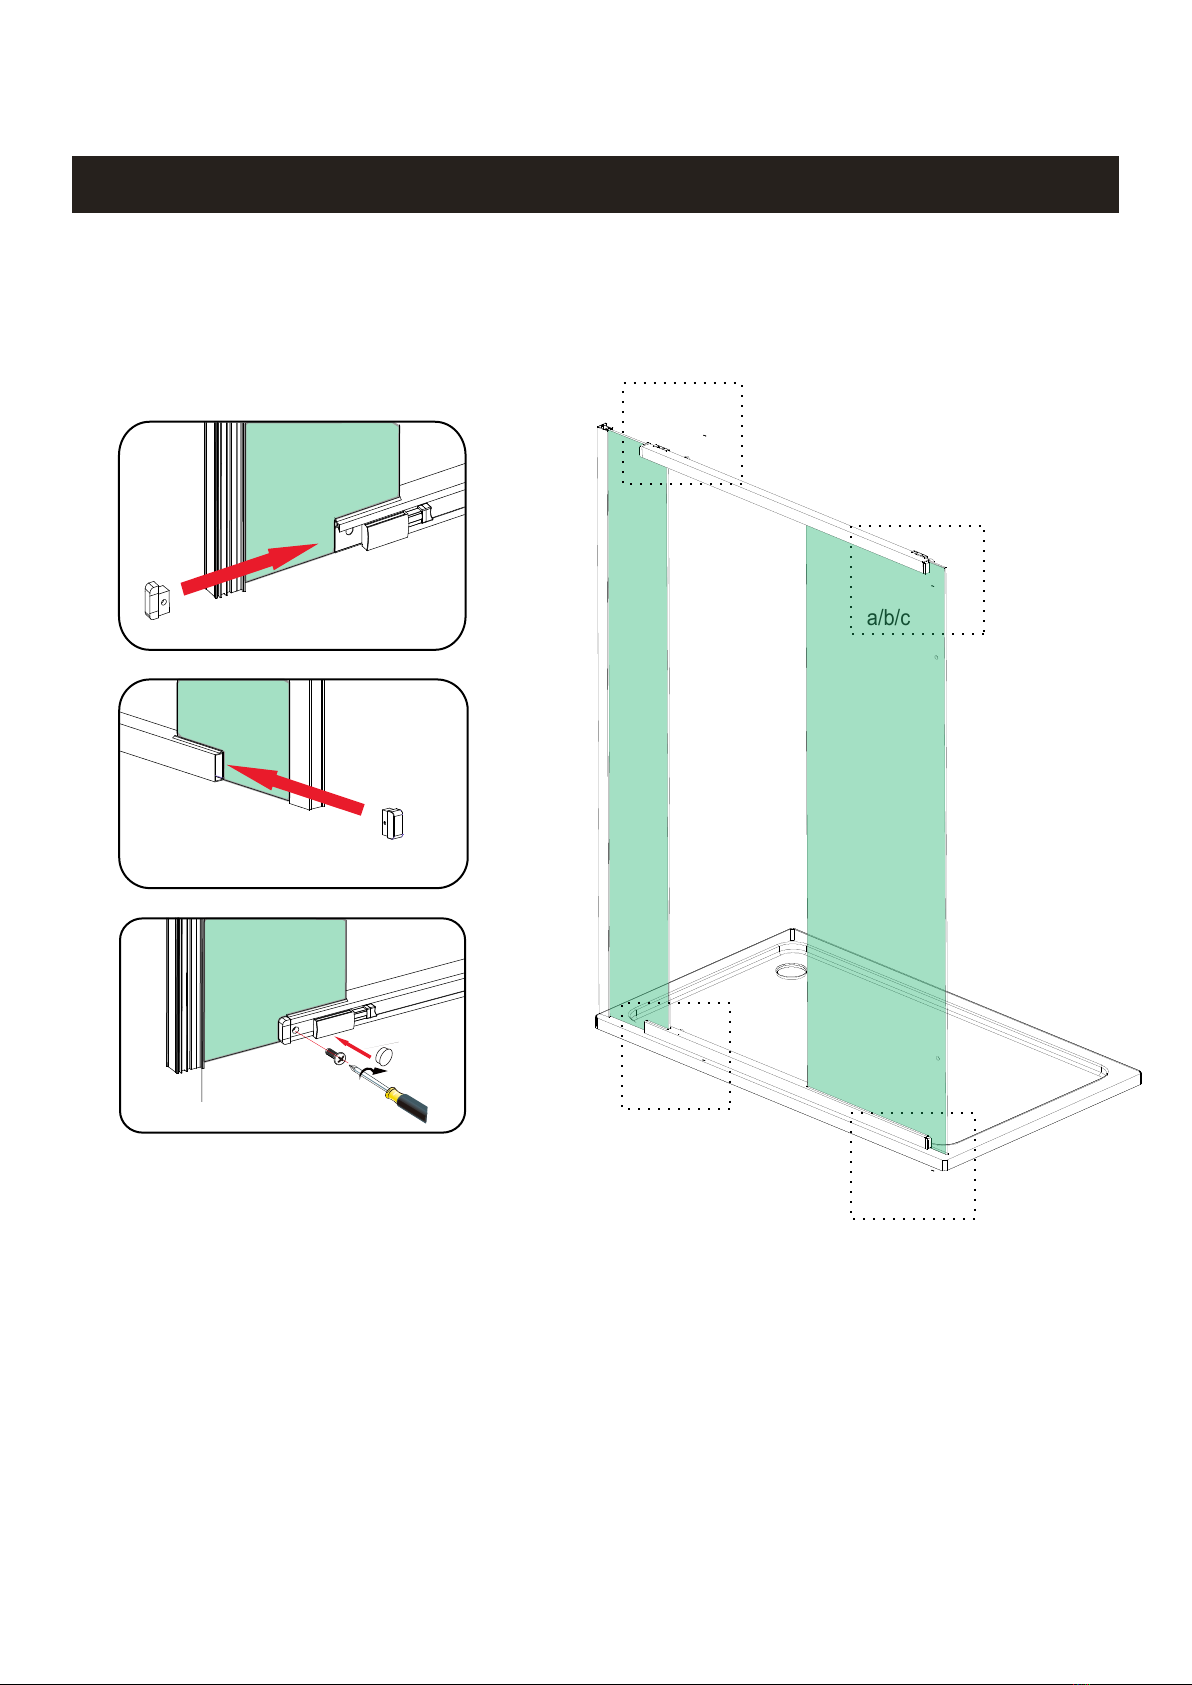
Step.2 Fit the fixed panel and rail profile.
Step.2 .1
2.1 Fit the glass clips(no.32) onto the rail profile then
insert the the seals(No.10/11),drop a little silicone
sealant to seal the glass clip then place the rail profile
onto the tray.
.
2.2 Push the small fixed panel into the bottom rail notch,
ensure the Clean & Clear sticker on the glass is on the
inside of the enclosure
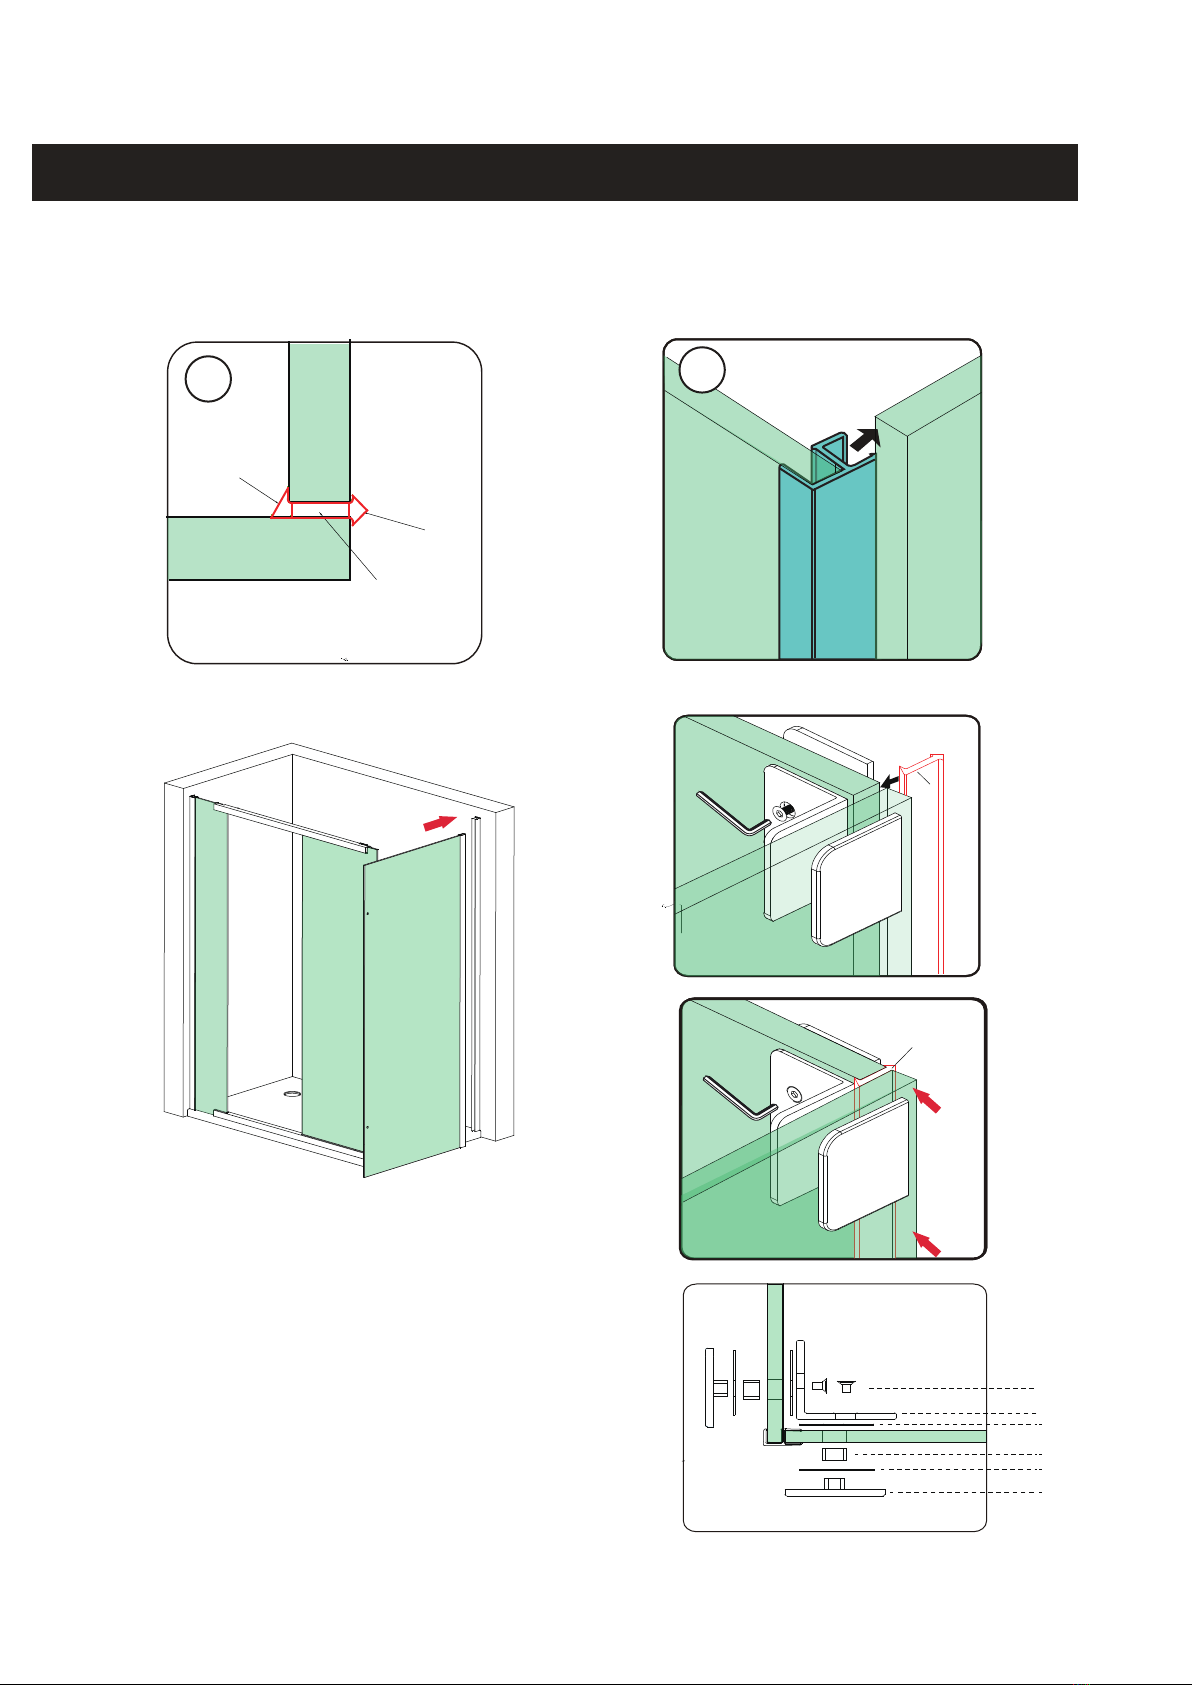
2.3 Press the small fixed panel into the wall channel
2.4 Push the large fixed panel into the bottom rail notch,
ensure the Clean & Clear sticker on the glass is on the
inside of the enclosure
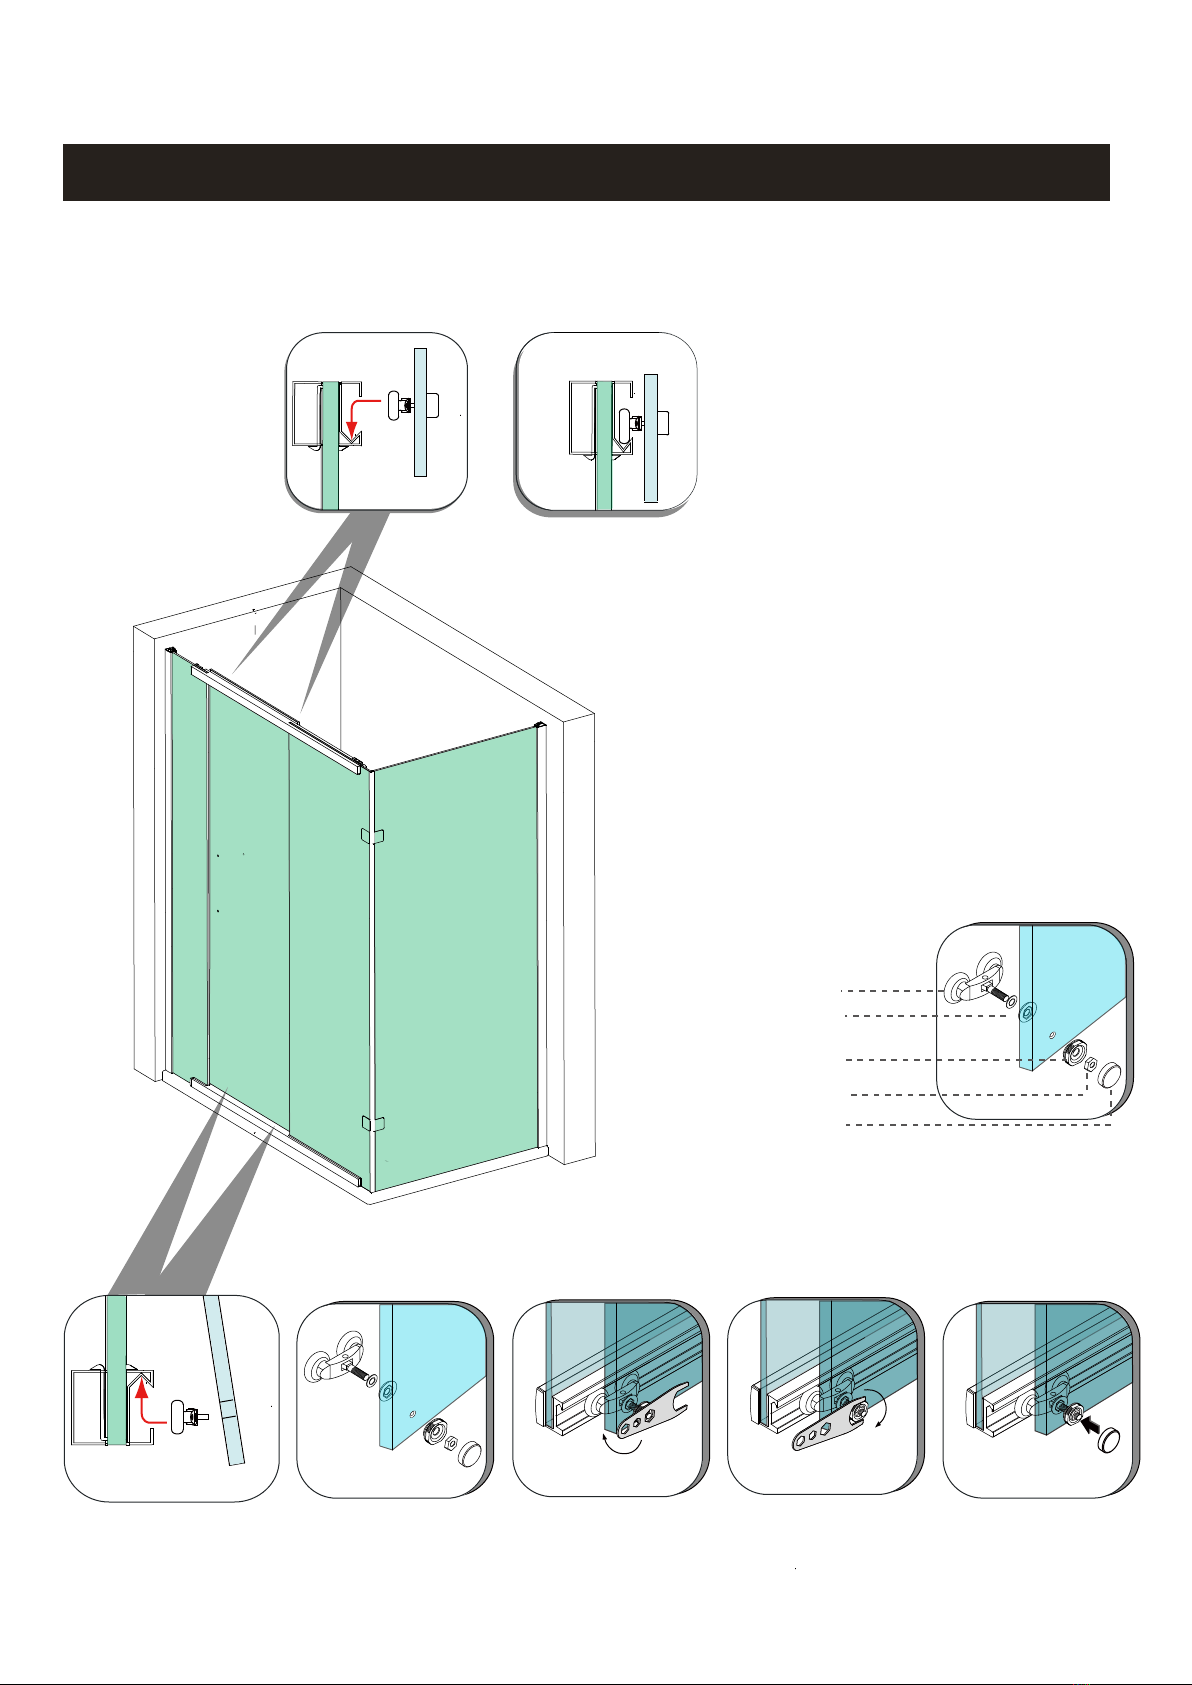
2.5 Fit glass clips onto the top rail then insert the seals(no.10/11)
into the rail notch,then fit the top rail onto the fixed glass panels.
Note:The door can be built in left and right handed positions,
the diagram above is for right handed.
2.5
2.2
2.3
2.4
2.5
Top Rail Direction
Bottom Rail Direction