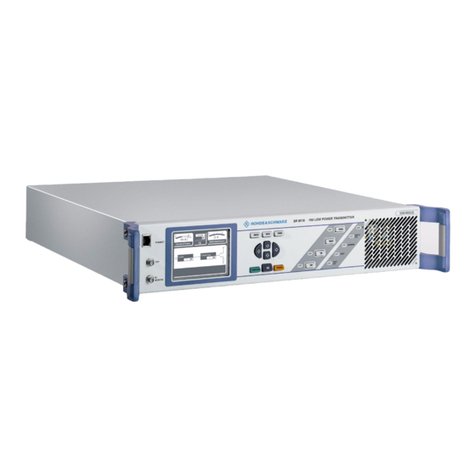
aquasant MLT 6130 User manual

OPERATING MANUAL
Continuous level measuring
with auto-100% adjustment on
* keystroke
* internal limit value 2nd measuring
circuit
* external limit value digital input
* with level-difference measuring
* via filling curve
Auto-100% adjustment with product-
compensation, 2end measuring circuit
Display unit %/mA/Impuls/free choice
1 or 2 analog outputs 4–20 mA
Limit value with relay
MLT version V1.2x
Technical specifications
Operating
Commissioning
Installation
Aquasant Messtechnik AG | Postfach 107 | Hauptstrasse 22 | 4416 Bubendorf | Switzerland
T: +41 61 935 50 00 | info@aquasant-mt.com | www.aquasant.com
Level transmitter - measuring device
MLT 6130/6230/6260
mipromex®
for continuous level measurement
in production plants

mipromex® type: MLT
Seite ii
Sales:Aquasant Messtechnik AG
Hauptstrasse 22
CH - 4416 Bubendorf
T. +41 (0)61 935 5000
F. +41 (0)61 931 2777
info@aquasant-mt.com
www.aquasant.com
Manufacturer: Aquasant Messtechnik AG
Manual No.: VEB-Mipromex-MLT-V1.2x_ATEX09.docx
Version: V17828/7
Pages: 63
Author: R. Inauen
Modifications: Subject to modifications
Dear Customer
Congratulations! With this system you have chosen a high performance unit of
the famous mipromex® line from Aquasant-mt Switzerland.
The filling level device MLT 6130 is furnished with volume linearization and
residual volume display. Diverse calibration algorithms are at your sidposal. The
MLT 6230 offers a product-compensated level measuring. It is made for use
without calibration or parameterization. The 2nd measuring circuit measures the
quality of the product, which can be indicated – with the MLT6260 – as analog
output 4-20 mA as well.
Reading and carefully following the operating instructions, assures a perfect
functioning of your MLT system.
There’s something else which is important for you to know:
If any troubles should appear (opposite all our expectations), then our
Aquasant-mt Switzerland service department will assist you even long time
after you purchased your MLT level measuring device.

OPERATING MANUAL
V17828/7
Page 3
Using this manual
Symbols and conventions
In this document the following conventions are used at formatting to differentiate text elements.
The names of equipment pieces are written in BOLD.
Example: mipromex®
In this document the following terms and symbols are used for special program messages:
Emphasized symbols and notices and their meaning:
Mortal Danger:
The non-observance can lead to injuries or
death.
Step by step:
Text enhanced/marked this way, contains
detailed instructions and comments
Caution:
the non-observance can lead to equipment
damages or loss of information.
Actions to be carried out by user.
Information / Notice:
describes equipment characteristic features.
Read and follow instruction steps.
A waiting time is required during which the
equipment does recalibrate itself.
mipromex
®
display
Compare with the mipromex® display.
Adjustment of the measuring electronic MTI
(visualized by red and green LED’s).
Plug in mains 230/115 V (24 V AC/DC).
Observe and control equipment display.
Send equipment back to manufacturer.
Button on mipromex® front panel mipromex® error message on display
with Time/Date
Function: change value according to
displayed character set
Button on mipromex® front panel
Change line without store
Function: select number or character
Button on mipromex® front panel,
Function: back
Button on mipromex® front panel,
Functions: menu, select, next,
store (press more than 2s)
"next step" in
navigation
bar
Press ok button on mipromex®.
Press less than 2 seconds to advance to the
next parameter
"store" in
navigation
bar Press ok button on mipromex®. Press
more than 2 seconds to store
Chart.1 Symbol description

mipromex® type: MLT
Page 4
Index
1. Security and precautions --------------------------------------------------------------------------- 6
1.1.
Installation -------------------------------------------------------------------------------------- 6
1.2.
Setup --------------------------------------------------------------------------------------------- 6
1.3.
Hazardous Area protection--------------------------------------------------------------------- 6
1.3.1. Following notices must be observed: ----------------------------------------------------------------------7
1.4.
SIL Safety Integrity Level---------------------------------------------------------------------- 7
1.5.
Cleaning of units -------------------------------------------------------------------------------- 7
1.6.
Maintenance------------------------------------------------------------------------------------- 7
1.7.
Warranty claims--------------------------------------------------------------------------------- 7
1.8.
Waste disposal of electrical and mechanical components ---------------------------------- 7
2. mipromex® type description ----------------------------------------------------------------------- 8
2.1.
MLT hardware types ---------------------------------------------------------------------------- 8
2.1.1. mipromex®-type code: --------------------------------------------------------------------------------------9
2.2.
Software Versions------------------------------------------------------------------------------10
2.2.1. Basics --------------------------------------------------------------------------------------------------------- 10
2.3.
Basic function ----------------------------------------------------------------------------------10
2.4.
Measuring circuit-------------------------------------------------------------------------------10
2.5.
Function-----------------------------------------------------------------------------------------10
2.5.1. Table of digital inputs external functions---------------------------------------------------------------- 11
2.6.
Operation: Menu [4.2.] ------------------------------------------------------------------------12
3. Structure of data input (parameterization)------------------------------------------------------15
3.1.
General------------------------------------------------------------------------------------------15
3.2.
Key functions-----------------------------------------------------------------------------------15
3.2.1. Input / changing of characters---------------------------------------------------------------------------- 15
3.2.2. Select language---------------------------------------------------------------------------------------------- 15
3.3.
Graphic display---------------------------------------------------------------------------------16
3.3.1. Display at switch-on of mipromex® --------------------------------------------------------------------- 16
3.3.2. Measured value display ------------------------------------------------------------------------------------ 16
3.3.3. Menu parameter settings ---------------------------------------------------------------------------------- 17
4. Program structure with parameters of the analog transmitter --------------------------------18
4.1.
Description of the menu, program structure General, for all mipromex® units ---------24
4.1.1. [1.] Basic settings------------------------------------------------------------------------------------------- 24
4.1.2. [2.] Device specs-------------------------------------------------------------------------------------------- 26
4.1.3. [3.] Signal settings------------------------------------------------------------------------------------------ 28
4.1.4. [4.] Commissioning ----------------------------------------------------------------------------------------- 32
4.1.5. [5.] Measuring range --------------------------------------------------------------------------------------- 32
4.1.6. [6.] Limit values --------------------------------------------------------------------------------------------- 34
4.1.7. [7.] Test functions ------------------------------------------------------------------------------------------ 35
4.1.8. [8.] Programmable mA output --------------------------------------------------------------------------- 36
4.1.9. [9.] Controller settings ------------------------------------------------------------------------------------- 37
4.1.10. [10.] Production log (not in use!) ------------------------------------------------------------------------ 37
4.1.11. [11.] Basic settings of service parameters -------------------------------------------------------------- 38
4.1.12. [12.] Calculation parameter ------------------------------------------------------------------------------- 40
4.1.13. [13.] Archive ------------------------------------------------------------------------------------------------- 41
5. Commissioning example ---------------------------------------------------------------------------42

OPERATING MANUAL
V17828/7
Page 5
5.1.
Level bar probe --------------------------------------------------------------------------------42
5.1.1. Level measurement with a measuring circuit MLT 6130---------------------------------------------- 42
5.1.2. Level measurement via filling curve---------------------------------------------------------------------- 42
5.2.
Bar probe with serial referenc bar probe (one-bar measuring probe) or parallel two probes
MLT 6230/6260---------------------------------------------------------------------------------------42
5.2.1. Product compensated level measuring ------------------------------------------------------------------ 42
5.2.2. Level measuring with internal limit switch for 100% compensation -------------------------------- 42
5.3.
Electronic calibration MTI, basic equalization ----------------------------------------------43
5.4.
Final inspection and commissioning certificate MLT 6130--------------------------------44
5.5.
Final inspection and commissioning certificate MLT 6230/6260 -------------------------46
6. Fault finding ----------------------------------------------------------------------------------------49
6.1.
After power on ---------------------------------------------------------------------------------49
6.2.
During operation-------------------------------------------------------------------------------49
6.2.1. Data error ---------------------------------------------------------------------------------------------------- 49
6.2.2. Display error ------------------------------------------------------------------------------------------------- 51
6.2.3. Radio equipment -------------------------------------------------------------------------------------------- 51
7. Wiring diagram -------------------------------------------------------------------------------------52
7.1.
Measuring electronic/probe with fix connection -------------------------------------------52
7.2.
Connections to female multipoint connector with 32 poles, type: MLT 6130------------ 53
7.3.
Connections to female multipoint connector with 32 poles, type: MLT 6230/6260 ---- 54
7.4.
Printed circuit board for 19"-Rack, Monorack, Wall- and Table Top housing------------55
7.5.
Earthing of microprocessor units and probes-----------------------------------------------56
8. Technical Data--------------------------------------------------------------------------------------57
8.1.
mipromex® level measuring unit type: MLT 6130 -----------------------------------------57
8.2.
mipromex®- level measuring unit type: MLT 6230/60 ------------------------------------ 58
8.3.
Measuring electronic MTI for measuring probes -------------------------------------------59
Probes with separate or integrated measuring electronic MTI
-------------------------------------------------59
8.3.1. Technical Data MTI . . . / .--------------------------------------------------------------------------------- 60

mipromex® type: MLT
Page 6
1.
Security and precautions
The following points must be considered at installation and setting up of microprocessor units 24 V AC/DC:
1.1.
Installation
∫The units are IP20 according to EN 60529 and must be protected against e.g. splash water or pollution
exceeding the degree of pollution 2.
∫The units must be installed outside the hazardous area.
Maximum 7 units can be installed into a 19“-Rack. Multipoint connector type: FI32 must only be equipped with
d- and z – contacts. Solder connections are to be isolated with heat shrinkable sleeves (see chapter 7.)
∫Single units installed with Monorack Type MRM 2 (see chapter 7.6)
∫Hazardous area blue line to lead separately (cable channel or joined to loom of cables)
equipotential bond must be installed; Hazardous area protection
outside installations: a corresponding lighILing protection of the probe supply cables is recommended.
∫Installation instructions for impedance probes l must be observed
1.2.
Setup
∫Verify wiring and power supply tension (chapter 7.)
∫Perform probe and system specific parameterization in the menu (chapter 5.)
∫Check max. load of the opto-electronic coupling transistor outputs (NPN) according to datasheet (chapter 7.8.)
∫Adjustments under tension are only allowed to be carried out by manufacturer
Handling by user is performed only via protected film keypad
Repair of unit only by trained personnel with manufacturer certificate
1.3.
Hazardous Area protection
The EC-type examination certificate has to be respected. It is specially important to respect the contained "special
conditions". Ex certification according to Directive 94/9/CE (ATEX 100 A).
Confidential test certificate no. 08-IK-0396.01 1254
EC-type examination certificate SEV09 ATEX 0132
Notification no.: QS 11 ATEX 2081
Ex classification: II (2)G [Ex ia] IIC
II (2)D [Ex iaD]
II (2)GD
Please pay attention to the following documents:
-
VEZ-SEV-ATEX-09-ISO_Certifcat-Doc.pdf
(actually valid certificats)
-VED-TSS**….probe data sheet with specific (X) Ex-relevant coat thicknesses and information regarding the
application in which zone
-08-IK-0396.01 the test certificate with the characteristics is submitted in strict confidence.

OPERATING MANUAL
V17828/7
Page 7
1.3.1. Following notices must be observed:
1. The microprocessor control unit mipromex® as per EN
60079-0:2006
can only be used outside of the
hazardous area.
2. The highest allowed ambient temperature is 60°C (also inside a protective housing)
3. The microprocessor unit mipromex® is to install in a manner that at least the protection standard IP 20 as
per Standard IEC 529 resp. EN 60529 is fulfilled. By corresponding mount into rack unit this condition is
fulfilled.
4. At installation of the microprocessor control unit mipromex® a minimum distance of 50mm must be created
by insertion of a separation wall between the intrinsic safe and non intrinsic safe wiring circuit or the
connecting parts must be insulated (i.e. with a heat-shrinkable sleeve). The input lines are secured to the rack
or the monorack with a strain relief.
5. The intrinsic safe signal wiring circuits are safe galvanic separated from the remaining wiring circuits
up to a peak value of 375 V of the nominal voltage.
1.4.
SIL Safety Integrity Level
The microprocessor unit mipromex® is produced as per the SIL standards Norm IEC 61508/61511.
1.5.
Cleaning of units
The microprocessor unit mipromex® and the measuring electronic MTI built-in on the probe head are not allowed
to be cleaned with water.
The cleaning of the front panel is to be done with a slightly damped, clean cloth. The printed circuit boards, to remove
the dust, shall only be slightly blown-out with compressed air (low pressure 4 bar).
The bar probes must be cleaned with alcohol or a corresponding solvent.
Probes with stainless steel electrodes (SRK or SRM or probes made to measure powders/solids) are not allowed to be
cleaned with water or liquids.
1.6.
Maintenance
The data transmission of the microprocessor units remains stable, even over a long period of time. Therefore, a
periodic adjustment or similar, is not necessary.
1.7.
Warranty claims
Your measuring system had to undergo a precise final inspection at the factory. Interventions are only allowed to be
carried out by a competent person. Guarantee according to Aquasant Messtechnik AG warranty.
1.8.
Waste disposal of electrical and mechanical
components
The disposal of the components must be carried out in compliance with the country valid regulations.

mipromex® type: MLT
Page 8
2.
mipromex® type description
Pic. 1 mipromex®
2.1.
MLT hardware types
MLT 6130 1 measuring circuit with 1 analog output and 2 limit-value outputs with relay
MLT 6230 2 measuring circuits with 1 analog output and 2 limit-value outputs with relay on measuring circuit 1
MLT 6130/260 1 measuring circuit with 1 analog output and 2 limit-value outputs with relay
2nd measuring circuit and 2nd analog output can be activated with the activation code
MLT 6260 2 measuring circuits with 1 analog output each; measuring circuit 1 with to limit-value outputs with
relay on measuring circuit 1

OPERATING MANUAL
V17828/7
Page 9
2.1.1. mipromex®-type code:
X1
X2
X3
X4
X5
X6
X7
X8
-Ex
hazardous area protection
special functions
additional software code
analog and relay outputs
measuring prints, analog input,
digital inputs
higher ranking function
basic function
device function
mipromex® device generation
X1M = mipromex®
X2A = Analog I = Interface
L = Level P = Product
X3C = Limit/Level M = Monitoring T = Transmitter
R = Recognition Q = Quality S = Switch
L = Level U = Universal
X41 = Limit switch 4 = Analog output 7 =
2 = Level switch empty 5 = Universal new 8 = Interfacial layer
3 = Level switch full 6 = Filling level 9 = Product (quality, type,
concentration)
X
5
Meas.
print
MeV of 2nd unit
analog input
digital input
1
1
3
2
2
3
3
2
1 MeV ex Rackbus
3
4
2
2 MeV ex Rackbus
3
5
1
1
3
6
2
1
3
X6
Relay
OC
analog output
DC-converter
One DC-converter, with potential
separation, analog output toward
power supply
Two DC-converter, additional
potential separation, analog
outputs toward each other
0
2
1
1/2
1
1
2
2
2
1
3
2
1
1
4
2
2
2
5
2
2
2
6
2
2
1
7
2
8
2 internal
1
1
9
1
1
1
X70 = standard - software
1 = first expansion of a standard - software
X8- = without
C = controller (device with control function) e.g. MIL 8110 C interfacial layer level controller
P = product compensation
S = Segment
Ex Ex = with hazardous area protection according to ATEX II(2)G [Ex ia] IIC // II(2)D [Ex iaD]
Exd = with hazardous area protection according to ATEX II(2)GD [Ex d ia] IIC
NEx = without hazardous area protection on measuring print

mipromex® type: MLT
Page 10
2.2.
Software Versions
2.2.1. Basics
The standard operating software is used for all basic hardware units. The basic functions are identical for all software
versions; you can use them on all the units. Software versions are marked according to NAMUR EN53.
Examples:
MLT 6130 V1.2x 1 measuring circuit with 1 analog output and 2 limit-value outputs with relay
MLT 6230 V1.2x 2 measuring circuits with 1 analog output and 2 limit-value outputs with relay on measuring
circuit 1
MLT 6130/260 V1.2x 1 measuring circuit with 1 analog output and 2 limit-value outputs with relay
2nd measuring circuit and 2nd analog output can be activated with the activation code
MLT 6260 V1.2x 2 measuring circuits with 1 analog output each; measuring circuit 1 with to limit-value outputs
with relay on measuring circuit 1
Within each software type additional functions can be activated liable to costs.
For each additional function a separate activation code is generated for each measuring circuit. The activation code is
serial number depending.
The simple menu navigation (language selectable) assures a fast and accurate operation.
Input can be made via buttons and display of the device or via connection to a laptop or the process control system.
2.3.
Basic function
The mipromex®MLT has one or two separated and independent measuring circuits. Depending on the device type,
one or two measured signal processing can be activated.
The impulse signal transmitted by the measuring electronics MTI becomes in an offset compensated, filtered impulse
value changed and into function of the entered measuring range for the batch separation with dynamic interfacial
layer detection or a parameter substitute for the interfacial layer level converted into 4-20 mA signals.
The output signal is displayed as pulses value, % value semantics on:
mm/cm/m/ml/l/hl/cm3/dm3/m3/g/kg/t/in/feet/ga/lb/oz/gt or as mA value.
The offset range can be set between 10 and 1000 pulses.
The measuring signal offset (zero point) can be picked up automatically and/or the stored value can be modified via
the keypad buttons. The measuring span is product dependent determined and automatically stored and/or the
stored value can also be modified manually via the keypad buttons. The impulses signal is converted into a 0–100%
value.
The 4-20 mA analog output from the interfacial layer measuring can spread via programmable % start value and %
final value.
Parameter input is menu-driven and device-type based. Inactive positions are hidden.
The parameters can be stored and reloaded. The device is equipped with three digital inputs which the dynamic
interfacial layer monitoring is started alternatively at batch separations or being able to dial interfacial layer level in 7
product-related parameters. If all 3 inputs are on 0, the interfacial layer monitoring can also start ID via keypad
buttons. At the interfacial level measuring the parameters are loaded from the archives.
For interfacial layer monitoring or level measuring being available 2 open collectors (OC) or relay with change-over
contact low and high function as well as adjustable at on-delay, drop-out delay and fail-save position. Error messages
are visualized with time and date of the error. Press OK button more than 2 seconds, the error is confirmed and the
display changes back to lastactive menue point.
2.4.
Measuring circuit
One or two probes with the measuring electronic MTI in the connecting head are connected to the mipromex®MLt
using a shielded two core cable. Between field and control room an equipotential bond must be installed.
2.5.
Function
The product-surrounded electrode system of an aquasant-mt impedance bar probe varies the impedance in function
of the dielectric and electrically conductive qualities of organic products or aqueous solutions as well as in function of
the immersion depth of the active part of the bar probe .
The measured impedance sum signal is converted directly by the measuring electronic MTI into a normed signal and
is transmitted as pulse packages to the mipromex®MLT.
OPERATING MANUAL
V17828/7
Page 11
There are diverse calibration alternatives for the level measuring with the MLT 6130 (no product variations during
measuring):
1. Importing of the measured value at known filling level and measuring-span calculation on
keystroke
.
That
demands the entry of the current filling level in mm and of the 100 % filling level in mm or in the
instantaneous active unit.
2.
External limit value
via digital input D1 (see chapter 7.4.) with entry of the filling level at the limit-value
probe and conversion to 100 % according to the unit mm, m, ml, l, m3, kg, t at overstepping or undercutting
of the limit value but not at supply on.
3. Automatic importing of the 100 % measured value; adjustment
via filling curve
adjusting on gradient only
(no adjustment at filling level stop).
4. Calculation of the measuring span in function of a
filling level difference.
Measured value storage at filling
level 1 and filling level 2 and entry of the filling level difference.
5. Provides 1 analog output 4-20 mA and 2 filling level limit value relay outputs.
The level measuring MLT 6130/6260 is conform to the MLT 6130 software, but furnished for a 2nd measuring
circuit. The 2nd measuring circuit can be activated with the activation code, position 1.7.
Product-compensated measurement with MLT 6230:
1. Factory parameterization for a level probe.
2. Connect the level probe and measure. Entry of limit values and linearization curves for volume indication
according to installation specification.
3. Internal limit value with internal limit value 3 of measuring circuit 2, entry of the filling level at the limit-value
probe and conversion to 100 % according tot he unit mm, m, ml, l, m3, kg, t… at overstepping or undercutting
of the limit value but not at supply on.
4. Provides 1 analog output 4-20 mA and 2 filling level limit value relay outputs on measuring circuit 1.
Product-compensated measurement with MLT 6260: (Software according to MLT 6230, item 3 disabled)
1. Factory parameterization for a level probe. Same software as 6230.
2. Connect the level probe and measure. Entry of limit values and linearization curves for volume indication
according to installation specification.
3. Provides 1 analog output 4-20 mA each for filling level and product measuring value as well as 2, in
measuring circuit 1, filling level limit value relay outputs.
2.5.1. Table of digital inputs external functions
Digital inputs
Importing
of meas.
Value
D1 D2 D3
Digital input D1 importing of measured value at MLT 6130. Change to positive
shoulder on the digital input D1.
0
0
0
1
1
0
0
2
0
1
0
3
1
1
0
4
0
0
1
5
1
0
1
6
0
1
1
7
1
1
1
Chart.2 Digital inputs
A modern menu-guided operating and calibration concept allows a very time-saving commissiong oft he level
measuring device. The film keypad with functional buttons and fully graphical display makes the operating easy and
save. Wiring scheme see chapter 7.4.

mipromex® type: MLT
Page 12
2.6.
Operation: Menu [4.2.]
MLT 6130
Calibration on keypress
The calibration is made on keypress at
known filing level / volume / weight.
With analog output and two relay
outputs for full/empty alarm.
Pic. 2 Vertical roundtank, calibration on
keypress
Filling level 100%
= 340 l =1800 mm = 20 mA
(mm / m / l / m³ / kg / t
Residual volume (RV)
150 l
Importing on
KEYPRESS!
0 mm = RV 40 l
Calibration by external limit value
A re-calculation of the 100% measuring
span follows from each ascending limit
value oversteppig!
Activation at the digital input D1 of the
mipromex® MLT 6130
Linearization of vertical linear
roundtank menu item: [2.6.] selection: no
Pic. 3 Vertical roundtank, calibration by
external
limit value
20% = 360 mm = 100 l
Filling level 100%
= 340 l = 1800 mm = 20 mA
(mm / m / l / m³ / t)
Residual volume (RV)
External
limit value D1
0 mm = RV 40 l
External
limit value D1 Feeding
Calibration by filling curve
A re-calculation of the measuring span
through filling curve follows from mains
supply ON
Automatic calculation of the 100%
filling level! (Relays stay energized
while filling)
Pic. 4 Vertical roundtank, calibration by filling
curve
Residual volume (RV)
Feeding
Meas. range end point 1800 mm
Filling level 100%
= 340 l / 1800 mm / 20 mA
(mm / m / l / m³ / kg / t
Time
Filling level
Filling curve

OPERATING MANUAL
V17828/7
Page 13
MLT 6130
Calibration by level variation
1) Level variation by product addition
(e.g. 50 l)
2) Level variation by product taking
(e.g. 50 l)
3) At partly filled tank:
Calibration by changing the level
by
defined removal of the bar probe
(e.g. remove about 100 mm)
To change measuring range: mm l
limit values will be checked!
Linearization of vertical linear
roundtank menu item: [2.6.] selection:
no
With analog output and two relay
outputs for full/empty alarm.
Pic. 5 Vertical roundtank, calibration by level
variation
1) + 50 l
2) - 50 l
Filling level 100%
= 340 l = 1800 mm = 20 mA
(mm / m / l / m³ / kg / t
Residual volume (RV)
MV 1
MV 2
0 mm =
RV 40 l
3) Determination
MS in mm
Feeding
MV 2
Horizontal roundtank
Calibration by
Linearization vertical
roundtank menu item: [2.6.]
selection: yes
Enter: internal diameter and
residual height in mm
Residual volume will be calculated!
Example:
Ø = 600 mm
Residual height = 100 mm
Pic. 6 Horizontal roundtank, calibration by
linearization
300 l = 20 mA
100% = 340 l
Residual volume (RV) = 44.4 l
MLT 6260
Calibration by auto-product
compensation
Continuous calculation of the 100%
measuring span
Product and temperature variations
will be compensated automatically
mipromex® MLT 6230/6260
Linearization horizontal roundtank
menu item: [2.6.] selection: yes
Pic. 7 Horizontal roundtank, calibration by
product compensation
300 l = 20 mA
100% = 340 l
Inner-Ø in mm
Residual heigth in mm
Referance electrode /
Compensation
Meas. electrode

mipromex® type: MLT
Page 14
MLT 6260
Calibration by internal limit value
A re-calculation of the 100%
measuring span follows from each
ascending limit value oversteppig!
Activation at LV3 of the
mipromex® MLT 6230/6260
Pic. 8 Vertical roundtank with internal limit
value
Füllstand 100% = 340 l
= 1800 mm = 20 mA
(mm / m / l / m³ / t)
Restvolumen (RV)
Grenzwert
Intern GW3
Zulauf
Calibration by auto-product
compensation
Continuous calculation of the 100%
measuring span
Product and temperature variations
will be compensated automatically
mipromex® MLT 6230/6260
Serial reference electrode
Probe length at measuring range
endpoint =
Length of ref. meas. probe + space of
electrodes a + length of measuring
probe up to 100%
Length of measuring range = length of
measuring probe up to 100% +
residual height
Pic. 9 Vertical roundtank with auto-product
compensation
300 l
a
Filling level 100% = 340 l
1800 mm = 20 mA
(mm / m / l / m³ / kg / t)
Residual volume (RV) 40 l
Referance electrode
(Compensation serial)
Meas. electrode
Probe gauge lengh L = 1700mm
Measuring range end point 1800mm
Residual
heigh
100 mm
SERIAL
PARALLEL
Feeding
Parallel
Mounting 1:
Enter length of ref. probe: x
mm
Mounting 2:
Set length of ref. probe on 0
mm
Switch-on point of measuring span
calculation
Length of ref. probe + Hyst 1 (30 mm)
Pic. 10 Probe with parallel measurement
PARALLEL
Mounting 1 Mounting 2

OPERATING MANUAL
V17828/7
Page 15
3.
Structure of data input (parameterization)
3.1.
General
To select a menu point or to go forward/ "next" step in the menu, use the OK button.
The function of the OK button is shown in the inversed bar at the bottom of the display.
The position number of the actual menu item is displayed at bottom left.
To select the desired menu item use the ▲▼ buttons. The selected menu item is shown inversed. To execute the
shown function use the ok button, to delete a value or go back to the previous menu, use the C button.
3.2.
Key functions
key
description
display
main menu
menu line
data input
▲
up
Proceeding
Display
"next" menu item
1 step up
., /, 0-9, :, A-Z, -
▼
down
Next
Display
"next" menu item
1 step down
., /, 9-0, :, Z-A, -
►
right
-
-
Choose right
input right
◄
left
-
-
Choose left
input left
OK "next" / menu /
select / store
(>2 s)
Persistency check
select confirm
continue or
(>2 s) store
continue
C
back
back
back
back
back
Chart.3 Key functions
3.2.1. Input / changing of characters
Every parameter has its own input field.
The input and change of parameter values can be done using the mipromex® menu or via PC-Software.
For several menu configuration text input is required. Text input is done the same way in all functions.
Input via buttons on the mipromex® key pad is done as follows:
The first position, beginning on the left, is inverted. To change the character use the ▲▼buttons.
To select the next position use the ◄►buttons.
With the ok button (press >2 sec) the new value is stored and the display changes to the next parameter.
You can reactivate the old value using the C button. If no input is made during an adjustable amount of time, the
display changes back to measured value.
Define your position, instrument
Input Pos. No.
Change and input
1. position character input using -buttons
alpha-numerical
or tag-number, 11 characters max.
1 Pos. SR10P_ _ _ _ _ _ _
active key-navigation ▲▼◄► Adjust
Menu-Pos.-Nr.-Code /
ok
button function
3.1.1. Store
press
ok
key more than 2s; store and
advance to the next Menu item
Chart. 4 Display
3.2.2. Select language
The languages Deutsch/English/Français are available and selectable in the mipromex® menu. A fourth language
can be programmed. The parameter text field is loaded according to language code via PC-Software. Changes of the
text can not be done using only the microprocessor unit mipromex®!

mipromex® type: MLT
Page 16
3.3.
Graphic display
The format of the display is as follows:
Every menu position, parameter and device unit can be set active or inactive (not visible) according to the function of
the device. The display is also adjusted to the function of the device.
3.3.1. Display at switch-on of mipromex®
Vendor
Start information mask. The mask switches to measurement
indication after 10 seconds automatically
Name of device generation
mipromex ®
ok
button function Next
ok: forward to device type
Unit description
Level
Start information mask.
Device type and hardware model
Meas. Device type
MLT 6130/6230/6260
MLT 6130
ok button function
Next
ok
: forward to Funktionsinfo
Unit description
Measuring spane
Information mask in accordance with program choice
Parameter sets 1-7 from archive
Continuous Interfacial level in the
reactor, dacanter
calculate
by GW extern
ok button function
Next
ok
: forward to meas.value display
Unit description
Level
Start information mask.
Device type and hardware model
Meas. Device type
MLT 6260
ok
button function
Next
ok
: forward to Funktionsinfo
3.3.2. Measured value display
3.3.2.1. Unit types MLT 6130/6160 (1 Meas. circuit)
Description of the 1st measuring position
1 Tag QLA12345678
Change and input in measuring circuit 1, Menu 3.1.1.
Description of the measured value
Level
ID = Interfacial layer detection ON dyn (stat L or H)
↑ or ↓ flasching = interfacial layer detect OC/Relay 2
Actual calibrated meas.value display in %
Change and input in Menu 3.1.5. / 5.1.1.
3.20
m
Hi
-
Limit value Full/empty sensor are reaches OC/relay 1
modification and petition under measuring circuit 1 menu 6.1.2
ok
button function / active keys
Menu ▲▼
ok: change back to menu
: circulate (loop) in display mode
Description of the 1st measuring position
1 Tag QLA12345678
Change and input in measuring circuit 1, Menu 3.1.1.
Analog output
Level
Display in function of the measuring range 0-100% = 4-20 mA
Full/Empty sensor static (not adjustable)
Show L or H
20.00
mA
ID = Interfacial layer detection ON
ID
↑ or ID↓
flasching = Interfacial layer detect OC/Relay 2
ok
button function / active keys
Menu ▲▼
ok: change back to menu
▲▼
: circulate (loop) in display mode

OPERATING MANUAL
V17828/7
Page 17
3.3.2.2. Unit type MLT 6260 (2 Measuring circuits)
Description of the 1st measuring position
1 Tag QLA12345678
Change and input in Menu 3.1.1.
Description of the measured value Level
Actual calibrated meas. value display in
%/Imp. Change and input in menu 3.1.5.
92.6
mm
-
L
Limit value full/empty sensor are reaches OC/relay 1 modi-
fication and petition under measuring circuit 1 menu 6.1.2
and 5.1.1.
Menu ▲▼
Description of the 2nd measuring position
2 Tag QLA12345679
Change and input in measuring circuit 1, Menu 3.1.1.
Description of the 2nd measured value Reference value
Modification and petition under Measuring circuit 2 menu
2.5. level of the top phase with level probe
Meas. Value level upper phrase
0914
Imp
Display in function of the measuring range
Menu ▲▼
Description of the outputs
of the 1
st
and 2
nd
measured value
1 level 2 ref.MeV
(or display 2: upper layer level)
During alarm ∆, Low (Lo) or High (Hi): no display and arrow
Product meas. value calibrated %
1
2350
Imp
Level measuring upper phase
Seperation reaction 2
656
Imp
Menu ▲▼
Description of the outputs
of the 1
st
and 2
nd
measured value
1 level 2 MeS
(or display 2: upper layer level)
During alarm ∆, Low (Lo) or High (Hi): no display and arrow
Product meas. value calibrated %
1
2350
mm
Level measuring upper phase
Seperation reaction
2 ON
656
Imp
Menu ▲▼
At ∆, arrows ↑↓: no measured value display / set fault message current e.g. 3.6 mA
Description of the outputs
and of the 1
st
and 2
nd
measured value
1 level 2 ref.MeV
(or display 2: upper layer level)
Actual display of current output
product data
1
20.00
mA
Measurement organic phase separation or
level in the upper phase
2
14.05
mA
Menu ▲▼
3.3.3. Menu parameter settings
After pressing the OK button the display changes to the info menu.
Menu-Information
=> Menu-Info <=
Store = Press Longer than 2 sec. on the OK-button
Next = shortly on the OK-button
Both functions of the ok button
Press OK key
store or
> 2s store !
next
< 2s next !
Menu Pos. No. /
ok
button function
Info 01 Next
ok: change to password input
After pressing the OK button the display changes to the password input.
Enter Password !
1. key-in the numerical password using the
-buttons
2. press ok button more than 2 seconds
Standard factory password 0000
Display changes to the menu
Parameters can be changed
selected character is inverted
0000
Menu Pos. No
1. Store
ok
: change to the menu
After pressing the OK button the display changes to the menu.
selected menu item is inverted
Basic settings
Device specs
Signal settings
Commissioning
Menu Pos. No./
ok
function/active keys
1. Select ▲▼
ok: change to the selected menu
item
: circulate (loop) menu items

miprom ex ® type: MLT
Page 18
4.
Program structure with parameters of the analog
transmitter
Legend:
= Select / = Input / = Display /
= only available with activation code
Menu-Code Parameter
Types:
MLT 6130 ID
MLT
6130/6260
MLT 6230
MLT 6260
Change
1. Basic settings
1.1. Language
1.1.1. Deutsch
1.1.2. English
1.1.3. Français
1.1.4. Free language / text
-
-
-
-
1.2. Time/Date
1.2.1. Time, input/correction
1.2.2. Date, input/correction
1.3. Modify Password
1.3.1. Password input
1.3.2. Modify password
1.4. Lighting
1.4.1. Lighting on/off
1.4.2. Duration of lighting in min. / 0 = continuous ON
1.5. Contact information
1.5.1. Contact address
1.5.2. Contact Tel./E-Mail
1.5.3. Contact Web
1.6. Factory settings
1.6.1. Store parameter set
1.6.2. Load parameter set
1.6.3. Initialize device no/yes
1.7. Activation code
1.7.1. Activation of 2nd measuring circuit, Code: ****************
-
-
-
2. Device specs
2.1. Device type: MIQ 8110 / 8130 oder MIQ 8260; Software: Version V….
2.2. Serial Number and system Verification date
2.3. Quantity of measuring circuits (1. Measuring circuit 2.5.-2.7. skip)
Battery type: CR2032
- -
2.4. Select MS calculation:
Keypress /
External limit value /
Filling curve
/
MV difference in function of the level variation
--
2.5. Select
Internal limit value 3 measuring circuit 2 /
Product compensation (MLT 6230: 2
nd
analog output not activ)
--
2.6. Select calibration curve for volume display: no/yes
(horizontal roundtank standard or curve from archives)
2.7. Select measuring circuit 1 / 2
-
-
2.7.1. Probe; Type code 1 / 2
2.7.2. Probe S/N 1 / 2

OPERATING MANUAL
V17828/7
Page 19
Legend:
= Select / = Input / = Display /
= only available with activation code
Menu-Code Parameter
Types:
MLT 6130 ID
MLT
6130/6260
MLT 6230
MLT 6260
Change
3. Signal settings
3.1 Select measuring circuit 1 / 2
-
-
3.1.1. Input (position number)/ TAG - No
3.1.2. Probe factor
Info 06: Zero adjustment for; Bar probe; empty/clean; ex-works prog ~ 60
3.1.3. Zero point MeV input (Offset), accept at press of OK button, store
3.1.4. Manual input of the zero point =MeV (Offset)
Info 14 MS calculation on keypress at known filling level (MLT 6130/)
-
-
Info 15: Determine/measure out filling level
[%, mm, cm, m, ml, l, hl, cm3, dm3, m3, g, kg, t, in, feet, ga, lb, gz, qt Imp]
- -
3.1.5. level input and Meas. span = MeS, accept at press button, store [%, mm,
cm, m, ml, l, hl, cm3, dm3, m3, g, kg, t, in, feet, ga, lb, gz, qt/ %]
- -
3.1.6. level input/volume/actual weight XL/XV/XG
(%, mm, m, ml, l, m3, kg, t) accept at press button
- -
Info 16: MS calculation with external limit value input D1(MLT 6130/)
-
-
3.1.7. Level input/volume/weight XL/XV/XG position of limit value probe
(%, mm, m, ml, l, m3, kg, t); external LV exceeded re-calculation on
measuring range unit 5.1.3. (2.6. no)
3.1.8. Level input position of limit value probe in mm (linearization with calibration
curve 2.6. yes)
- -
Info 17: MS calculation with filling curve (MLT 6130/)
-
-
Info 18: MS calculation with level variation (MLT 6130/)
-
-
3.1.9. Importing of measured value MV1 on keypress
-
-
3.1.10. Enter level variation DL in units (2.6. no)
-
-
3.1.11. Enter level variation DL in mm (Linearization with calibration curve 2.6. yes)
-
-
3.1.12. Importing of measured value MV2 on keypress, Store: measuring span
calculation
- -
Info19: Internal limit value LV3 for measuring span calculation
-
-
3.1.13. Set internal limit value LV3 measuring circuit 2
(according to position of the limit value probe)
- -
3.1.14. Mounting height of the limit value probe
-
-
3.1.15. Measuring span MS manual entry/correction/initial measuring span
3.1.16. Signal filter
4. Commissioning according to device type
4.1. [2.1.] Selection of device type MLT 6130 or MLT 6230/6260 (if 1.7.1 activated)
4.2. [2.4.] Selection: MS caculation:
Keypress /
External limit value /
Filling curve / MV difference in function of the level variation
--
4.3. [2.5.] Select
Internal limit value 3 measuring circuit 2 /
Product compensation (MLT 6230: 2
nd
analog output not activ)
- -
4.4. [2.6.] Selection calibration curve for volume indication: no/yes
(horizontal roundtank standard or curve from archives) (Calibr. curve yes)
4.5. [2.7.1.] Probe type
4.6. [2.7.2.] Serial no.
4.7. [5.1.1.] Measuring unit
[%, mm, cm, m, ml, l, hl, cm3, dm3, m3, g, kg, t, in, feet, ga, lb, gz, qt]
4.8. [5.1.2.] Enter number of decimal places
4.9. [5.1.3.] Measuring range 100% point
4.10. [5.1.4.] Residual volume/%/volume/weight (RV)
[%, mm, cm, m, ml, l, hl, cm3, dm3, m3, g, kg, t, in, feet, ga, lb, gz, qt]

mipromex® type: MLT
Page 20
Legend:
= Select / = Input / = Display /
= only available with activation code
Menu-Code Parameter
Types:
MLT 6130 ID
MLT
6130/6260
MLT 6230
MLT 6260
Change
4.11. [5.1.5.] Measuring range starting point 4 mA (setting measured value in units)
4.12. [5.1.6.] Measuring range end point 20 mA (setting measured value in units)
4.13. [5.1.7.] Residual height filling level of horizontal roundtank (initial value 00000 mm)
[Calib. curve yes]
4.14. [5.1.8.] Probe measuring length (mm) according to 100%; xxx
[%, mm, cm, m, ml, l, hl, cm3, dm3, m3, g, kg, t, in, feet, ga, lb, gz, qt]
- -
4.15. [5.1.9.] Diameter of horizontal roundtank (initial value 02000 mm) Calib. curve yes]
4.16. [3.1.1.] Entry position no. ; Tag No.
4.17. [3.1.2.] Probe factor
Info 06: Zero point for bar probe, receptacle empty, clean factory calibration ~ 60
4.18. [3.1.3.] Zero point MV importing on keypress (offset) OK store
4.19. [3.1.4.] Zero point MV manual entry (offset)
Info 14: MS calculation on keypress at known filling level ()
-
-
Info 15: Determine/measure out filling level (% , mm, m, ml, l, m3, kg, t)
-
-
4.20. [3.1.5.] Filling level input and measuring span calculation MS on keystroke
[%, mm, cm, m, ml, l, hl, cm3, dm3, m3, g, kg, t, in, feet, ga, lb, gz, qt/ %]
[Calib. curve.: No]
- -
4.21. [3.1.6.] Filling level input and measuring span calculation MS on keystroke [ mm]
[Calib. curve.: Yes]
- -
Info 16: MS calculation with external limit value input D1 ()
-
-
4.22. [3.1.7.] Level input/volume/weight XL/XV/XG
(%, mm, m, ml, l, m3, kg, t)
- -
4.23. [3.1.8.] Level input/volume/weight XL/XV/XG [mm] [Calib. curve: yes]
Position of the limit value probe
- -
Info 17: MS calculation with filling curve ()
-
-
Info 18: MS calculation with level variation ()
-
-
4.24. [3.1.9.] Importing of the measured value MV1 on keystroke
-
-
4.25. [3.1.10.]Enter level variation DL [Calib. curve: no]
[%, mm, cm, m, ml, l, hl, cm3, dm3, m3, g, kg, t, in, feet, ga, lb, gz, qt/ %]
- -
4.26. [3.1.11.]Enter level variation DL [mm] [Calib. curve: yes]
-
-
4.27. [3.1.12.]Measuring span = MS, accept at keystroke, store
-
-
4.28. [3.1.15.]Measuring span = MS input / manual correction
4.29. [3.1.16.] Signal filter
4.30. [11.12.] Limitation of current output on RV
Info21: Filling level measuring product compensated 11. Take note of the service
parameters
- -
Info 20 Measuring circuit 1 limit value 1 and 2; Measuring circuit 2 internal limit
value 3
Info 22 Limit value 1
4.31. [6.1.2.] Limit value
4.32. [6.1.4.] Time delay, off
4.33. [6.1.5.] Time delay, on
4.34. [6.1.6.] FSL / FSH position
Info 23 Limit value 2
4.35. [6.1.1.] Function relay 2 (limit value 2) Limit value/Fault message/Controller
4.36. [6.1.2.] Limit value
4.37. [6.1.4.] Time delay, off
4.38. [6.1.5.] Time delay, on
4.39. [6.1.6.] FSL / FSH Position
This manual suits for next models
2
Table of contents