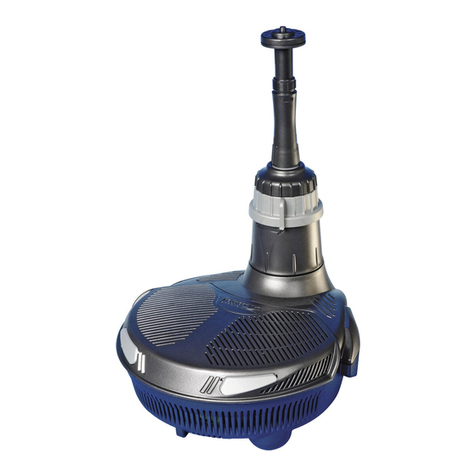
Aqueon 100542354 User manual

90 Day Limited Warranty
WHAT THE WARRANTY COVERS:
Central Aquatics (Company) warrants this Aqueon®product (see Exclusions below) to the
original purchaser against defective material and workmanship that occurs during normal
in-home use for 90 days. Company will, at Company’s option, either repair or replace same
without charge (but no cash refunds will be made). This warranty is limited to replacement
or repair of product only and does not cover loss of aquarium life, personal injury, property
loss, or damage arising from the use of the product.
EXCLUSIONS:
1. Damage resulting from accident, misuse, abuse, lack of reasonable care, subjecting the
product to any but the specified electrical service, other than normal and ordinary use of
the product, subjecting the product to abnormal working conditions or any other failure
not resulting from defects in materials or workmanship.
2. Damage resulting from modification, tampering with or attempted repair by anyone
other than the Company.
3. Transfer of product to someone other than the original consumer purchaser.
FOR WARRANTY OR TECHNICAL SERVICE:
1. Contact the Company by mail or telephone: Central Aquatics, 5401 West Oakwood Park
Drive, Franklin, WI 53132, Telephone: (888) 255-4527 to obtain a return authorization
number.
NOTE: Be sure to provide contact information when requesting return authorization
number.
2. Deliver, mail or ship the product, together with a copy of the original bill of sale, to:
Central Aquatics, 5401 West Oakwood Park Drive, Franklin, WI 53132
You must pay any postage, shipping charges, insurance costs and other expenses to return
the product along with the original cash register receipt to Central Aquatics. However, if the
necessary repairs are covered by the warranty, Company will pay the return shipping
charges to any destination within the United States or Canada.
LIMITATION OF IMPLIED WARRANTIES AND EXCLUSION OF CERTAIN DAMAGES:
THE COMPANY DISCLAIMS LIABILITY FOR INCIDENTAL AND CONSEQUENTIAL DAMAGES FOR
BREACH OF ANY EXPRESS OR IMPLIED WARRANTY, INCLUDING ANY IMPLIED WARRANTY OF
MERCHANTABILITY, WITH RESPECT TO THIS PRODUCT. THIS WRITING CONSTITUTES THE
ENTIRE AGREEMENT OF THE PARTIES WITH RESPECT TO THE SUBJECT MATTER HEREOF; NO
WAIVER OR AMENDMENT SHALL BE VALID UNLESS IN WRITING SIGNED BY THE COMPANY.
Some states do not allow the exclusion or limitation of consequential damages, so the
above limitation or exclusion may not apply to you.
Please read these instructions in their entirety
before attempting to use this product.
Betta Filter
Instruction Manual
(Item 100542354, 100542356)
A product of Central Aquatics
(Division of Central Garden & Pet Company)
Franklin, WI 53132 888.255.4527
Aqueon and It’s all about the fish are registered
trademarks of Central Garden & Pet Company
© 2019 Central Garden & Pet Company
U.S. Patent # 9,839,205
Made in China
Maintenance
WEEKLY
Remove debris that may have covered the Betta Filter to ensure ideal performance.
If algae has built up on the plastic plant or resin décor piece use a soft, non-abrasive
cloth to carefully remove it.
MONTHLY
Replace the Betta Filter cartridge to maintain optimal performance. Over time the Betta
Filter sponge will become plugged, reducing the amount of water that can pass through
it and the activated carbon will become saturated. Ask your retailer for the Betta Filter
Cartridge 2 Pack for Aqueon®Betta Filter.
AS NEEDED
Follow the manufacturer’s instructions to periodically clean and maintain the air pump.
To Replace Betta Filter Cartridge
Rotate the used Betta Filter cartridge to separate
it from the base piece with the suction cup.
Rinse the replacement cartridge under cold water
to remove any carbon dust and install it onto
the filter base, turning it to lock it in place.

AQUARIUM
APPLIANCE
POWER
SUPPLY
CORD
DRIP LOOP
4. Plug in the air pump power cord into an
appropriate grounded GFCI outlet utilizing
a drip loop (Figure 3).
5. Adjust air flow using the air adjustment valve
until a gentle steady stream of air bubbles are
flowing from the Betta Filter. Depending on the
size of the fish bowl or aquarium, adjust the air
flow so the bubbles are generating adequate
water movement through the filter.
Installation and Operation
Consult your retailer to determine the proper size air pump (not included) required
to power the Aqueon®Betta Filter for your fish bowl or aquarium.
Follow all installation instructions and warnings included with the air pump.
1. Select a location in your aquarium for the Betta Filter. The base of the Betta Filter
may be buried underneath the aquarium gravel and/or attached directly to the bottom
of the aquarium with the supplied suction cup to hold it in place. Connect the air tubing
to the airline inlet on the Betta Filter (Figure 1). The 2 included air tubing suction cups may
be used to help hold the air tubing securely in place in the fish bowl or aquarium and
route it out of the aquarium.
Note: For item 100542356 Betta Filter with Volcano, slide the décor piece over the
Betta Filter to hide it once it has been installed in the aquarium.
2. Install the air control valve in-line. Next, install the included air adjustment valve in-line
with the air tubing (Figure 2). The best position is a few inches outside the aquarium where
it will be accessible for adjusting the strength of the air flow going to the Betta Filter.
Cut the air tubing and install the air adjustment valve by pushing the air tubing onto
each end of the air adjustment valve.
3. A check valve should be utilized when installing the air tubing for added safety.
The check valve should be installed between the air adjustment valve and the air pump
(sold separately) by cutting the air tubing again. Connect the end of the air tubing, leading
from the air adjustment valve, to the “out” side of the check valve. Attach the other
segment of air tubing to the check valve side labeled “in” and the air pump (sold separately)
Once complete, the assembled components should be arranged as shown in Figure 2.
HINT: If assembled as pictured in Figure 2 and still no air is flowing, verify the check valve
is oriented properly and the air adjustment valve is open. If check valve is reversed and/or
the air control valve is closed, air will not flow from the air pump to the filter.
Parts
IMPORTANT SAFETY INSTRUCTIONS
WARNING – To guard against injury, basic safety precautions should be observed
including the following:
1.
READ AND FOLLOW ALL SAFETY
INSTRUCTIONS
2. DANGER – To avoid possible electric shock, special care should be taken since water is
employed in the use of aquarium equipment. For each of the following situations, do not
attempt to repair yourself; return the appliance to an authorized service facility for service
or discard the appliance:
A. If the appliance shows any sign of abnormal water leakage, immediately unplug
it from power.
B. Carefully examine the appliance after installation. It should not be plugged in if there
is water on the parts not intended to be wet.
C. Do not operate any appliance if it has a damaged cord or plug, or if it is malfunctioning
or if it is dropped or damaged in any manner.
D. To avoid the possibility of the appliance
plug or receptacle getting wet, position
aquarium stand and tank to one side of
the wall-mounted receptacle to prevent
water from dripping onto the receptacle
or plug. As shown in the figure, a “drip
loop” should be arranged by the user
for each cord connecting an aquarium
appliance to the receptacle. The “drip
loop” is the part of the cord below the
level of the receptacle, or the connector
if an extension cord is used, to prevent
water travel along the cord and coming
in contact with the receptacle. If the
plug or the receptacle does get wet,
DON’T unplug the cord. Disconnect the fuse to the circuit breaker that supplies power to the
appliance. Then unplug and examine for the presence of water in the receptacle.
3. Close supervision is necessary when any appliance is used by or near children.
4. To avoid injury, do not contact moving parts or hot parts such as heaters, reflectors, lamp
bulbs, etc.
5. Always unplug an appliance from the outlet when not in use, before putting on or taking off
parts, and before cleaning. Never yank the cord to pull plug from the outlet. Grasp the plug
and pull to disconnect.
6. Do not use an appliance for other than intended use. The use of attachments not
recommended or sold by the appliance manufacturer may cause an unsafe condition.
7. Do not install or store the appliance where it will be exposed to the weather or to temperatures
below freezing (32°F/0°C).
8. Make sure an appliance mounted on a tank is securely installed before operating it.
9. Read and observe all the important notices on the appliance.
10. If an extension cord is necessary, a cord with a proper rating should be used. A cord rated for
less amperes or watts than the appliance rating may overheat. Care should be taken to arrange
the cord so that it will not be tripped over or pulled.
ONLY FOR POLARIZED ATTACHMENT PLUG APPLIANCES
11. This appliance has a polarized plug (one blade is wider than the other) as a safety feature, this
plug will fit in a polarized outlet only one way. If the plug does not fit fully in the outlet, reverse
the plug. If it still does not fit, contact a qualified electrician. Never use with an extension cord
unless plug can be fully inserted. Do not attempt to defeat this safety feature.
12.
SAVE THESE INSTRUCTIONS
Figure 1
Betta Filter
Betta Filter
Betta Filter
Betta Filter
Suction Cup Base
Suction Cup Base
Airline Inlet
Natural Plant
(Item 100542354)
Volcano
(Item 100542356)
A– Betta Filter
B– Betta Filter Suction Cup Base
C– Air Tubing
D– Air Adjustment Valve
E– Air Tubing Suction Cups (qty 2)
F– Check Valve
A
B
C
D
E
F
Figure 3
Drip Loop
Power
supply cord
Figure 2
Air
Tubing
(C)
Air
Tubing
(C)
Air
Tubing
(C)
Betta Filter
(A, B)
Air
Adjustment
Valve
(D)
Check Valve
(F)
Air Pump
(sold separately)
OUT IN
This manual suits for next models
1
Other Aqueon Water Filtration System manuals
