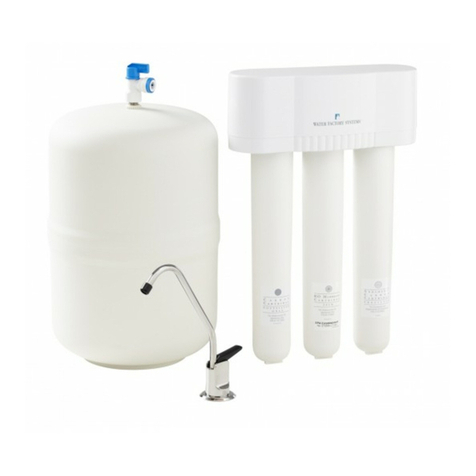
Water Factory Systems 40T User manual

Model 40T
Owner's Manual
This Manual is for the Installation, Operation,
and Maintenance of the
WATER FACTORY SYSTEMS®
Countertop Reverse Osmosis System
Activated Carbon Drinking Water Appliance
© 2002 CUNO Incorporated
98-880012 0602
®

Table of Contents
Getting to Know Your Countertop RO Appliance ...................................................................................... 2-3
Set Up ...................................................................................................................................................... 4-5
Installation .................................................................................................................................................. 6
Start Up........................................................................................................................................................ 7
Regular Use ................................................................................................................................................ 8
Routine Maintenance .................................................................................................................................. 9
Helpful Hints ................................................................................................................................................ 9
Cartridge Replacement.......................................................................................................................... 10-11
Troubleshooting ........................................................................................................................................ 12
Specifications and Operating Guidelines.................................................................................................... 13
Replacement Parts .................................................................................................................................... 13
‘Push-In’ Tubing Connector Instructions.................................................................................................... 14

Getting to Know Your Countertop RO Appliance
Take a minute to become familiar with the important parts of your new Countertop RO Appliance.
Description
1) Reservoir Lid 9) Spigot
2) View Window 10) Connecting Hose
3) Air Filter 11) Quick Connect
4) Reservoir 11a) Plastic Locking Collar
5) Shroud 11b) Flow Control Valve
6) Base 11c) Overflow Outlet (Underneath)
7) Fill Tube (Inside) 12) Aerator
8) Overflow Tube (Inside)
2
3
1
7
4
9
5
6
8
11
12
11a
11b
11c
10
2

Getting to Know Your Countertop RO Appliance
Description
13) Base Screw Knobs 19) RO Membrane Cartridge
14) Head Bracket 20) Carbon Cartridge (Postfilter)
15) Plastic Bolts 21) Cartridge Head
16) Retaining Clips 22) Cartridge Ears
17) Sediment Cartridge (Prefilter) 23) O-ring Seals
18) Carbon Cartridge (Prefilter)
13
15
16
19
20
18
17
14
21
23
22
3

Set Up
Preparation
1) Remove all of the parts from the carton and set them in front of you on a table. Compare your parts
with the drawing to make sure you have everything you need to set up your countertop RO appliance.
Note: Thoroughly wash your hands before proceeding with the minor assembly which follows.
2) Holding shroud firmly, press plastic hose clip into hole on back of the unit.
3) Install the spigot:
a) Slip the white o-ring over the threaded shaft of the spigot.
b) Insert the spigot shaft through the hole in the front of the reservoir.
c) Slip the flat white washer over the threaded shaft of the spigot.
d) Thread the plastic nut onto the end.
e) Rotate the spigot until the assembly is snug and the spigot is in a vertical position. Do not
overtighten.
4
Plastic Nut White O-Ring
Flat White Washer Spigot

Set Up (Continued)
4) Install the Reverse Osmosis Cartridge:
a) Remove reservoir lid and set aside.
b) Holding the unit with both hands by the shroud, turn it upside down with the two base screw
knobs facing up.
c) Using both hands, loosen the two base screws completely by turning to the left at the same time
(see drawing below). This releases the base from the shroud.
d) Holding both the base and the shroud together, turn the appliance right side up.
e) To expose cartridge compartment, carefully lift shroud just above base and tilt away from you
onto the counter. Be careful not to pull tubing loose.
f) Remove new RO cartridge from it’s sanitary sealed wrapper.
g) Remove the plug from drain connection on the RO cartridge.
h) Using tap water, wet the o-ring seals to make insertion easier. Slide the filter cartridge into the
retaining clip.
i) Line up the ears, insert cartridge, and push into cartridge head until fully seated. Twist the
cartridge 1/4 turn to the right to lock into place.
j) Insert black tube into drain connection on new RO cartridge.
k) Carefully lift shroud and fit over base, making sure not to kink or twist tubing.
l) Holding both the base and the shroud together, turn the appliance upside down.
m) Using both hands, tighten the two base screw knobs by turning to the right at the same time.
n) Turn the appliance right side up.
5

Installation
Placement of Your RO Appliance
1) Place your RO appliance on the kitchen counter within two feet (61 cm) of the sink (or on any solid,
flat surface within the length of the connecting hose).
Important: The top of the RO appliance must be at least 5” (13 cm) higher than the sink faucet outlet.
This will assure proper operation of the automatic overflow device.
Replace Existing Aerator
2) Your faucet should already have an aerator at the outlet. To attach the RO appliance, you’ll have to
remove the existing aerator and replace it with the special aerator supplied.
a) Remove old aerator. Use a pair of pliers (slip joint pliers are best) with tape wrapped around the
jaws to prevent marring.
b) Determine whether your faucet has male or female threads. Use correct washers for your faucet
as shown below and install new aerator.
c) Turn cold water on full force and check for leaks between faucet and aerator.
d) If a leak occurs, remove aerator and confirm that the washer is centered and flat against aerator.
Then reinstall aerator. Be sure to tighten sufficiently.
Note: If you do not have a faucet that will use the aerator supplied, please contact your supplier.
ABC
ABC
Male Threads
Female Threads
6

Start Up
1) Attach the quick connect to the faucet (see diagram below):
a) Remove and discard plastic packing plug from inside the collar of quick connect attachment.
b) Push down and hold plastic locking collar of quick connect attachment and push assembly over
faucet aerator.
c) Release collar, making sure it snaps up into place. Pull down on quick connect to make sure that
it is firmly attached.
2) Filling of reservoir:
a) Open flow control valve on quick connect two turns from fully closed position. Be careful not to
turn it too far or it will fall out. A spare flow control valve has been provided for your convenience.
b) Now turn COLD water on full force and let RO appliance flush for about five minutes. It is perfectly
normal for the initial few flushes to have a brief dark discoloration in the water due to carbon dust
from the new Carbon Cartridge (Prefilter).
Important: Never allow hot water to enter the RO unit or damage may occur.
c) Close down flow control valve until water flow is reduced to a slow trickle (approximately 1/2 cup
or 130 ml in 30 seconds). This rate of flow should always be maintained when RO appliance is
in operation.
Important: Never try to stop the flow completely or RO unit could be damaged in a short time.
d) Allow reservoir to fill high enough to check operation of the overflow system. If reservoir fills up
beyond the level of the overflow tube, check for kinks and loops in the connecting tube. Also,
make sure the hose lays flat and the top of the RO appliance is at least 5” (13 cm) higher than the
sink faucet outlet.
Note: The overflow protection system is designed so you don’t have to watch the RO appliance while it is
filling. Excess water will automatically be directed into the sink.
e) Let the RO appliance operate for 24 hours. It is this slow process that assures you of such high
quality water. Excess water will simply divert to drain through the overflow system.
Note: The rate of water production varies with water pressure and water temperature. Higher pressure
and temperature result in faster reservoir filling and vice versa. Never operate the RO appliance at
pressures above 85 psi (586 kPa) or water temperature above 85°F (29°C).
3) Detach RO appliance from faucet as follows:
a) Open flow control valve two full turns from closed position and flush for 1-2 minutes.
b) Turn cold water off and wait at least 10 seconds. Then remove the quick connect from aerator by
pushing down on plastic locking collar.
Important: Never try to remove quick connect while cold water is still on. Always relieve pressure
by opening flow control valve and turning off the faucet first.
7

4) Discard water in reservoir:
a) Open spigot and discard all water in reservoir into sink.
Note: It is normal for small black carbon particles from the carbon filter to appear in the first few reservoirs
of water. This is completely harmless.
b) Wipe inside of the reservoir with a clean paper towel or soft cloth.
Your RO appliance is now ready for regular use.
Regular Use
For regular use of your RO appliance follow these simple steps:
1) Attach quick connect to faucet and open flow control valve two full turns from closed position.
2) Turn COLD water on full force and allow RO appliance to flush for 1-2 minutes.
3) Turn down flow control valve until flow rate is a steady trickle (about 1/2 cup or 130 ml in 30
seconds). Your RO appliance is now producing clean, refreshing, great tasting water. It will fill the 2
gallon (7.6 liter) reservoir in approximately 2-4 hours. This is normally enough water for the daily
cooking and drinking needs of your family.
Important: Remember, never stop the flow completely by overtightening the flow control valve. This
could damage the membrane in a short time.
Note: You can monitor the level of water in the reservoir by looking through the window on the top.
4) When you’re ready to disconnect the RO unit, open flow control valve two full turns and flush for 1-2
minutes. Turn off cold water and wait at least 10 seconds. Then remove quick connect by pushing down
on plastic locking collar. Remember, never try to remove quick connect while cold water is still on.
Note: Between uses, connecting tube can be coiled onto the convenient clip located on the back of the unit.
8

Routine Maintenance
These simple steps will help assure that your RO appliance operates at maximum efficiency and provides
years of trouble-free performance.
Periodic Flushing
Make sure you flush the system before and after every use. Periodic flushing helps to keep the system
clean and fresh by rinsing away impurities.
If the RO appliance hasn’t been used for several days, it is recommended that you simply connect to the faucet,
open the flow control valve two full turns from the closed position, and turn on the cold water full force for two
minutes. Failure to flush the system periodically may result in more frequent cartridge replacements.
Cleaning and Sanitizing
Exterior (as needed):
The exterior of the appliance can be easily cleaned using a clean, soft cloth or
paper towel and mild liquid household cleaner. DO NOT USE A SPONGE, SCOURING POWDER OR OTHER
ABRASIVE CLEANSERS.
Reservoir (recommended every 3-6 months):
Empty contents of reservoir. Remove lid and clean inside
of the reservoir with a clean, damp, soft cloth. DO NOT USE A SPONGE, SCOURING POWDER OR OTHER
ABRASIVE CLEANSERS. Add about 1/8 tsp. (0.6 ml) of household bleach to reservoir. This will sanitize
the reservoir. Discard all of the water in the reservoir. It may be necessary to discard a second reservoir
full of water to eliminate the chlorine taste from sanitizing.
Helpful Hints
Using Tap Water While RO Appliance is Filling
You do not have to remove the quick connect for simple needs like rinsing dishware or washing hands.
Just open the flow control valve and use the water as usual. Remember to turn flow control valve down to
a trickle so you can continue making high quality water.
When to Make Water
Under normal conditions the RO appliance needs about 2-4 hours to fill the reservoir. If operated continuously
for 24 hours, it can produce 22-33 gallons (83-125 liters) depending on water pressure, temperature and
Total Dissolved Solids (TDS). An average family of four uses about 2 gallons (7.6 liters) of water per day
for drinking and cooking. Plan your water needs ahead of time, using your RO appliance as long and as
often as necessary.
How to Store Water
If water in the reservoir is not used frequently, always store it in sanitary, covered containers in the refrigerator
to keep it fresh.
Minimize Airborne Contaminants
Always keep the reservoir lid on securely to minimize the exposure of water to airborne dirt and dust. The
air filter removes particles and odors that can affect water quality and taste.
Long Periods of Non-Use
If you plan to be away for periods of three weeks or more, we recommend the filter and RO cartridges be
removed from the appliance and stored in a sealed plastic bag in the refrigerator. Place them in a location
so they cannot freeze, or permanent damage may occur.
Sanitizing and Rinsing Reservoir
To save time after sanitizing reservoir, you can use previously stored water to rinse out chlorine taste.
Never Allow RO Appliance to Freeze
The cartridges in the RO appliance can be permanently damaged in a short time if exposed to freezing
temperatures.
9

Cartridge Replacement
Cartridge Replacement Schedule
The RO membrane and filters are the heart of your countertop RO appliance. The life of these cartridges
depends on your local water conditions and amount of water used. To assure the best performance from
your RO unit, we recommend you follow the cartridge replacement schedule below:
Filter Cartridge Replacement Procedure
1) Remove reservoir lid and set aside. Fully empty contents of reservoir into sink.
2) Holding the unit with both hands by the shroud, turn it upside down with the two base screws facing up.
3) Using both hands, loosen the two base screw knobs completely by turning to the left at the same
time (see drawing below). This releases the base from the shroud.
4) Holding both the base and the shroud together, turn the appliance right side up.
5) To expose cartridges, carefully lift shroud just above base and tilt away from you onto the counter. Be
careful not to pull tubing loose.
Replacement Cartridge Change Frequency Part Number
Sediment Cartridge (Prefilter) Every 6-12 months 47-55702G2
Carbon Cartridge (Prefilter) Every 6-12 months 47-55704G2
Carbon Cartridge (Postfilter) Every 12 months 47-55704G2
Air Filter Every 6-12 months 50-1051
RO Membrane Cartridge(TFCM)
Every 3-5 years, or as determined by a TDS test
(available from your supplier)
66-4506G2
10

6) Twist the filter cartridge 1/4 turn to the left so that the ears on the cartridge are able to disengage from
the head. Then, hold the head bracket with one hand while gently pulling the cartridge away from the
head. (It may be necessary to move the cartridge slightly from side to side to help free it.)
7) Remove new cartridge from its sanitary sealed wrapper.
8) Using tap water, wet the o-ring seals to make insertion easier. Slide the filter cartridge under the
retaining clip as shown in the drawing.
9) Line up the ears, insert the cartridge, and push into head until fully seated. Twist the cartridge 1/4
turn to the right to lock into place.
10) Follow the same procedure as above for all filter cartridges.
11) Wipe any excess water from inside the base.
12) Carefully lift shroud and fit over base, making sure not to kink or twist tubing.
13) Holding both the base and the shroud together, turn the appliance upside down.
14) Using both hands, tighten the two base screw knobs by turning to the right at the same time.
15) Turn the appliance right side up.
16) Discard the first reservoir of water.
RO Membrane Cartridge Replacement
1) Remove tubing from the “Push-In” fitting at the bottom of the RO membrane cartridge. Note: It may
be helpful to remove the adjacent filter cartridge to make access easier.
2) Follow steps 6-9 from the section “Filter Cartridge Replacement Procedure” to replace cartridge.
3) Reconnect black tubing by inserting into the “Push-In” fitting at the bottom of the new RO membrane
cartridge as far as it will go.
4) Wipe up any excess water from inside the base.
5) Follow steps 11-15 from the section “Filter Cartridge Replacement Procedure” for reassembling unit.
6) Allow the new membrane to flush for 24 hours prior to use.
Air Filter Replacement
1) Remove reservoir lid.
2) With clean hands, push out white disc and two black discs from bottom. Do not lose the plastic air
filter cap on the opposite side.
3) Remove replacement discs from bag. FROM THE TOP, press white then black discs into receptacle.
4) Firmly press air filter cap into place.
11

Troubleshooting
Problem Possible Cause(s) Solution
Carbon postfilter
exhausted.
Replace Carbon Cartridge Postfilter* and flush
appliance for 5 minutes. Discard first reservoir.
Reservoir requires
sanitizing.
Sanitize reservoir.**
Air filter is exhausted. Replace air filter.*
Hydrogen sulfide gas in
household water supply.
Hydrogen sulfide must be removed from household
water supply before RO appliance is installed. Contact
a local water treatment specialist.
Appliance misused or
stored for extended periods
of time under unfavorable
conditions.
Replace all cartridges* and sanitize reservoir**.
Salty taste or "whitish" ice
cubes. TDS test indicates
less than 75% rejection.
RO membrane fouled.
Flush appliance for 5-10 minutes by opening flow
control valve 2 full turns from closed position. Allow
reservoir to fill and discard. If problem persists,
replace RO membrane cartridge.**
Reservoir fills much faster
than usual (less than 1 hr).
RO membrane deteriorated. Replace all cartridges* and sanitize reservoir**.
Appliance won't flush at
full force
Clogged prefilter cartridges
Replace Sediment Cartridge (Prefilter) and Carbon
Cartridge (Prefilter).*
Household water pressure
too low.
Pressure should be 30 psi (207 kPa) minimum.
Clogged prefilter. Replace Sediment Cartridge (Prefilter).*
Extremely low water
temperature.
Water production decreases with colder water
temperatures. Extra time will be required.
Fouled RO membrane.
Flush appliance for at least 5-10 minutes. If problem
persists, replace RO membrane cartridge.*
Top of appliance not 5" (13
cm) higher than the end of
kitchen faucet outlet or
connecting hose has sharp
bend or loop.
Raise appliance so that the top is at least 5" (13 cm)
higher than the end of the kitchen faucet outlet.
Kink or twist in tubing
inside shroud.
Remove shroud from base, inspect for kinks or twists
and straighten tubing.
Leak at fitting.
Incomplete tubing
connection.
Access inside of appliance. Remove tubing by
depressing the small collect and pulling tubing out.
Using a utility razor knife, squarely cut 1/4" (0.6 cm) of
tubing from the end. Re-insert tubing into fitting as far
as it will go. Check for leaks before reassembling.
Leak at cartridge.
Misaligned or damaged o-
ring seal(s).
Access bottom of appliance. Remove leaking cartridge
and inspect both o-rings for twisting, "nick" or other
deformity. Re-lubricate with water. If necessary,
replace o-rings.*
Reservoir overflow.
Note: If problem persists replace all filters and membrane. Sanitize reservoir.
Unpleasant taste and/or
odor.
Rotten egg smell from
water.
Excessive reservoir fill time
(over 12 hrs).
* See page 2 & 3 for position or location of parts.
** See page 8 for reservoir sanitizing
12

Part Description Part Number
Sediment Cartridge (Prefilter) 47-55702G2
Carbon Cartridge (Prefilter) 47-55704G2
RO Membrane Cartridge (TFCM) 66-4506G2
Carbon Cartridge (Postfilter) 47-55704G2
Air Filter Replacement 50-1051
O-ring Seal Kit 51-6359663
Aerator 61-9112
Spigot 69-2330
Flow Control Valve 85-1300601
Replacement Parts
Specifications and Operating Guidelines
Filter Assembly Components
Sediment Prefilter: 5 Micron Depth Cartridge
Carbon Prefilter: 10” Granular Activated Carbon
Membrane Type: Advanced Thin Film Composite (TFCM)
Carbon Post Filter: 10” Granular Activated Carbon
Daily Production: 22-33 gallons per day (83-125 liters per day)*
TDS Rejection: 96% nominal (to atmosphere)*
*Rated at 77°F (25°C), 60 psi (414 kPa), 500 ppm TDS. Actual production rate will depend on
local temperature, pressure, TDS level, and membrane variation. Each membrane is factory
tested and sanitized before shipping.
Reservoir Capacity: 2 gallons (7.6 liters)
Dimensions: 14” H x 8” W x 16”L (35.6 cm H x 20.3 cm W x 40.6 cm L)
Shipping Weight: 13 lbs. (5.9 kg)
Water Supply Parameters
Total Dissolved Solids: < 2000 ppm Hardness: < 350 mg/l Iron: < 0.1 mg/l
Manganese: < 0.05 mg/l Hydrogen Sulfide: None Allowable Free Chlorine: < 1.5 mg/l
Water Temperature: 40-85°F (4.4-29°C) Water Pressure: 30-85 psi (207-586 kPa) pH: 4-11
< = Less Than
Caution: Do not use with water that is microbiologically unsafe or of unknown quality without adequate
disinfection before or after the system.
13

1
Push in grey collet to release tubing.
2
Tubing is secured in.
Grey Collet
Tube
Push tubing straight in as far as it will go.
1
Pull tubing straight out.
2
To Attach Tubing To Release Tubing
This product is outfitted with user friendly ‘Push In’ connectors. Proper
use of the connectors is shown in the diagrams. It is most important
that the tubing selected for use with these connectors be of high
quality, exact size and roundness, and with no surface nicks or
scratches. If it is necessary to cut the tubing, use a plastic tubing cutter
or sharp razor knife. Make a clean square cut. Should a leak occur at a
‘Push-In’ connector, the cause is usually defective tubing.
To Fix: • Relieve pressure
• Release tubing
• Cut off at least 1/4” from end
• Reattach tubing
• Confirm connection is leak free
‘Push-In’ Tubing Connector
(Quick Connect Fittings)
14

CUNO Incorporated
400 Research Parkway
Meriden, CT 06450, U.S.A.
Toll Free: 1-800-733-1199
Worldwide: 203-237-5541
Fax: 203-238-8701
www.waterfactorysystems.com • www.cuno.com
Table of contents
Other Water Factory Systems Water Filtration System manuals
Popular Water Filtration System manuals by other brands

Pentair
Pentair ONGA FREEFLO FFCL-15-RPQ owner's manual

BERG
BERG PUREBERG FWW Installation and operating manual
Adey
Adey MagnaClean Professional2 Installation and servicing
BRUEL & KJAER
BRUEL & KJAER 1612 Instructions and applications

Pure-Pro
Pure-Pro ERO-S7 PERFECT WATER SERIES user manual
Hitech
Hitech Cloud user manual
