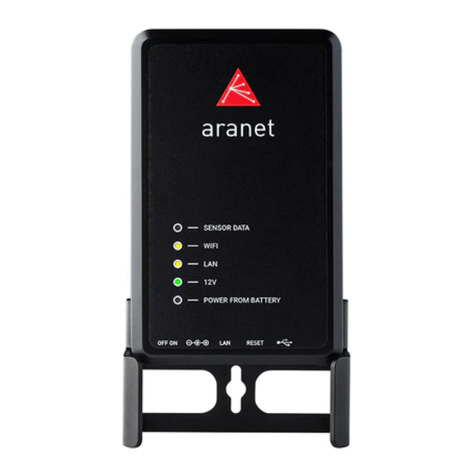
Aranet PRO 12 User manual

USERS GUIDE
Aranet PRO User’s Guide
Applicable for Aranet PRO 12, Aranet PRO 50, Aranet PRO 100

FCC Compliance statement
This equipment has been tested and found to comply with the limits for a Class B digital device, pursuant
to part 15 of the FCC Rules. These limits are designed to provide reasonable protection against harmful
interference in a residential installation. This equipment generates, uses and can radiate radio frequency
energy and, if not installed and used in accordance with the instructions, may cause harmful interference
to radio communications. However, there is no guarantee that interference will not occur in a particular
installation. If this equipment does cause harmful interference to radio or television reception, which
can be determined by turning the equipment o and on, the user is encouraged to try to correct the
interference by one or more of the following measures:
• Reorient or relocate the device.
• Increase the separation between the equipment and receiver.
• Connect the equipment into an outlet on a circuit dierent from the one the receiver is connected to.
• Consult the dealer or an experienced radio/TV technician for help.
Changes or modications not expressly approved by the party responsible for compliance
could void the user’s authority to operate the equipment.
Aranet PRO does not contain serviceable parts. Warranty will not be applicable in the
event Aranet PRO has been opened.
The information presented in this guide is the property of SAF Tehnika, JSC. No part of this document may
be reproduced or transmitted without proper permission from SAF Tehnika, JSC.
The specications or information contained in this document are subject to change without notice due
to continuing introduction of design improvements. If there is any conict between this document and
compliance statements, the latter will supersede this document.
SAF Tehnika, JSC has no liability for typing errors in this document or damages of any kind that result
from the use of this document.
To get up to date information about accessories and their availability, please contact sales representative.
Copyright Notice
Copyright © 2017 SAF Tehnika, JSC. All rights reserved.

Industry Canada Regulatory Statement
This device complies with Industry Canada’s licence-exempt RSSs. Operation is subject to the following
two conditions:
(1) This device may not cause interference; and
(2) This device must accept any interference, including interference that may cause undesired
operation of the device.
Le présent appareil est conforme aux CNR d’Industrie Canada applicables aux appareils radio exempts
de licence. L’exploitation est autorisée aux deux conditions suivantes : (1) l’appareil ne doit pas produire
de brouillage, et (2) l’utilisateur de l’appareil doit accepter tout brouillage radioélectrique subi, même si
le brouillage est susceptible d’en compromettre le fonctionnement.

TABLE OF CONTENTS
Introduction 1
Aranet PRO base station overview 2
What’s in the box 2
Aranet PRO 3
Aranet PRO ports 4
Aranet PRO Datasheet 4
Conguration 6
Router conguration WiFi 6
How to: Initial setup of Aranet PRO via WiFi 6
How to: Initial setup of Aranet PRO via router 6
How to: Initial setup of Aranet PRO connected to a Windows PC via Ethernet cable 6
How to: Initial Login 7
Recommended network conguration 7
Sensor pairing in Aranet SensorHUB 8
How to: Pair sensors to Aranet PRO 8
Sensor grouping in Aranet SensorHUB 10
How to: Using groups 10
Aranet SensorHUB overview 12
Main navigation bar 12
Main menu 12
Graphs 14
Notications 15
SMS screen 17
E-mail screen 17
Region 18
Sensor 18
Radio menu 18

System 19
Time menu 20
Backup menu 21
Firmware menu 21
Network 22
WiFi menu 22
Ethernet menu 23
Users 24
Terms of use 25
Warranty 25
RMA (Return Merchandise Authorization) form 29
Intellectual Property Rights 29
Cleaning And Maintenence 29
Accessories 30
Disclaimer 30
Additional information 30

1
INTRODUCTION
Aranet oers environmental monitoring solutions for a variety of businesses. Aranet PRO is an industrial
grade environment monitoring solution.
Aranet PRO comes in three variations - Aranet PRO 12, Aranet PRO 50 and Aranet PRO 100.
• Aranet PRO 100 permits connecting up to 100 sensors,
• Aranet PRO 50 allows 50 sensors, and
• Aranet PRO 12 grants 12 sensor connectivity per base station.
The base station has exceptional sensitivity of -130dBm and allows placing the sensors within line - of -
sight range of at least 3km/1.9mi.
All Aranet PRO base stations include embedded local web-server Aranet SensorHUB. Easy to use
interface allows viewing, analysing and comparing data in real time, setting thresholds for alarms as well
as exporting reports. Responsive design of the software adapts to smartphone, tablet or laptop.
Visit www.aranet.com for more information.

2
ARANET PRO BASE STATION OVERVIEW
What’s in the box
(1) Aranet PRO base station + Aranet SensorHUB software
(2) Aranet PRO base station mount with 2 W1412 screws
(3) AC power adapter
1
2
3

3
Aranet PRO
(1) Sensor data indicator LED – ashes amber every time a
data packet is received from a sensor.
(2) WiFi connection indicator LED – amber light when Aranet
PRO is connected to WiFi or works in Access Point mode
(3) LAN conncetion indicator LED – amber light when Aranet
PRO is connected to LAN connection through an Ethernet
cable
(4) 12V power indicator LED – green light when Aranet
PRO is connected to 12V power either through a PoE
connection or with the included AC power adapter
(5) Battery power indicator LED – red light when Aranet PRO
is using built in back up battery power
(1) Base station mount conguration for positioning on vertical surface (e.g. wall).
(2) Base station mount conguration for positioning on vertical surface (e.g. wall).
(3) Base station mount conguration for placement on horizontal surface (e.g. table).
SENSOR DATA
WIFI
LAN
12V
POWER FROM BATTERY
OFF ON LAN RESET
1
2
3
4
5
2 31

4
Aranet PRO ports
(1) On-O switch – switch in the left position means Aranet PRO is turned o, switch in the right
position means Aranet PRO is turned on
(2) DC Power port - for using the included AC power adapter to power Aranet PRO
(3) Ethernet port – for LAN connectivity as well as PoE connectivity
(4) Network reset button, press and hold for 5 seconds or more to reset network settings and
password of “root” user account
(5) USB port – for connecting USB GSM modem to enable SMS notication functionality
Aranet PRO Datasheet
Aranet PRO
Maximum sensors amount 100 / 50 / 12
Alarm type E-mail
Optional alarm SMS notication through USB modem
Data storage 10+ years with 100 sensors
Receiver sensitivity -130 dBm
Channels Channel 1: 917.3 / 922.9
Channel 2: 917.5 / 923.1
Channel 3: 917.7 / 923.3
Channel 4: 917.9 / 923.5
User interface Aranet SensorHUB
Interface accessibility PC, tablet or smart phone connected via Ethernet cable or local WiFi
connection
Temperature scale Celsius, Fahrenheit, Kelvin
Data resolution Temperature: 0.1°
Humidity: 1%
Data protection Password protected user accounts, encryption for data
Communication Ethernet cable, local WiFi
Power options AC Power adapter (12V, 0.5A)
Optional power supply with PoE adapter
Built in battery (backup power up to 30min)
Operating temperature 0°C to 40°C / 32°F to 104°F
1
2
3
4
5

5
Aranet PRO
Operating humidity 0% to 95% non-condensing
Dimensions 107x170x26 mm/ 4.2x6.7x1.02 in w/o mounting bracket
Ports 1 DC power, 1 Ethernet, 1 USB A
Weight 190g / 6.7oz w/o mounting bracket
Construction ABS Plastic, steel mounting bracket
Protection class IP40
FCC marking Yes
Included AC power adapter (12V, 0.5A), mounting bracket,
Aranet SensorHUB software
Terms of use The Customer is obliged to guarantee the usage, maintenance and preservation of the
Equipment at their own expense in a way that excludes the Equipment’s theft, loss, destruction, harming
and/or damaging (including as a result of mechanical damages, moisture, liquid related damages, lightning
and/or other similar events). The base station may only be used indoors, it needs to be protected from
environmental impact (snow, rain, direct sunlight).
!NOTE! Aranet PRO is supplied with built in UPS providing up to 30 minutes of power supply in case of
power shortage. It is meant only as a back up and should be used only during an emergency. If the device
discharges the UPS on Power ON position it may suer permanent damage.
!WARNING! ARANET PRO BASE STATIONS CONTAIN AN LI-ION 14500 PROTECTED TYPE
RECHARGEABLE BATTERY AND A CR2032 TYPE BATTERY. RISK OF DAMAGE IF BATTERY
IS REPLACED BY AN INCORRECT TYPE. THE USER IS RESPONSIBLE FOR DISPOSAL OF
BATTERIES ACCORDING TO THE STATE LEGISLATION.

6
CONFIGURATION
Router conguration WiFi
There are three options for initial set-up of Aranet PRO. It can be performed by connecting to Aranet PRO
WiFi, by connecting Aranet PRO to an internet router via Ethernet cable or directly to a laptop/PC.
!NOTE! Our recommendation is to use the router option, as once Aranet PRO is connected to the local
network it will be accessible on any device that is connected to it, as opposed to only being available for
devices that are connected to Aranet PRO. It is also a more reliable and robust method of connecting.
How to: Initial setup of Aranet PRO via WiFi
(1) Plug in Aranet PRO into power source using the included AC power adapter and switch it on.
(2) Wait until LED indicators next to “12V” and “WiFi” turn on and wait for another 30 seconds.
(3) Using a smartphone or a PC open the WiFi menu, you should see a new wireless network access
point called “Aranet”. Connect to it.
(4) Open internet browser and type in the URL bar IP address: 192.168.206.100
(5) You should now see the Aranet PRO login screen.
How to: Initial setup of Aranet PRO via router
(1) Plug in Aranet PRO into power source. It is optional to use a PoE injector or the included AC
power adapter. If the power supply is used, plug in an Ethernet cable that connects router to the
Aranet PRO. Switch Aranet PRO on.
!NOTE! If PoE injector is used follow the instructions on how to use a PoE injector.
(2) Wait until LED indicators next to “12V” and “LAN” turn on. Wait for another 30 seconds.
(3) There are two ways of conguring a router to work with the Aranet PRO base station – static IP
and DHCP.
(4) For satic IP set your router IP address to 192.168.205.1 and netmask to 255.255.255.0. Ensure
that the DHCP address pool will not collide with Aranet’s static IP of 192.168.205.100.
Refer to your router’s manual, for how to congure these parameters. After performing these
changes, Aranet Pro device should be accessible at its default ethernet IP: 192.168.205.100.
(5) Alternatively you can use the much more widespread DHCP conguration, which entails rst
connecting to the Aranet Pro base as a WiFi access point and setting the Ethernet interface to
DHCP mode. After this is set, you can connect the device to a router which has it’s DHCP enabled
and nd the Aranet Pro’s IP address in its DHCP Client list.
Refer to your router’s manual, for how to congure these parameters.
How to: Initial setup of Aranet PRO connected to a Windows PC via
Ethernet cable
(1) Plug in Aranet PRO into power source using the AC power adapter and plug in the Ethernet cable
that connects Aranet PRO and PC. Switch Aranet PRO on.
(2) Wait until LED indicators next to “12V” and “WiFi” turn on and wait for another 30 seconds.
(3) Make sure the PC is not connected to any WiFi Internet connections.

7
(4) In the Control Panel menu choose “Network and Sharing Center” (or “Network and Internet” for
Windows 8 and up).
(5) Click “Change adapter settings”.
(6) Right-click on “Local Area Connection” and click on “Properties”.
(7) Select “Internet Protocol Version 4 (TCP/IPv4)” and click on “Properties”.
(8) Select “Use the following IP Address”, set IP address to 192.168.205.101 and subnet mask to
255.255.255.0, leave rest of the elds blank and press “Save”.
(9) Open the Internet browser and in URL bar type the IP address of Aranet PRO: 192.168.205.100
(10) You should now see the Aranet PRO login screen.
How to: Initial Login
The default user login is:
Username: root
Password: changeme
!NOTE! It is an administrator account. We recommend changing the password as soon
as possible
We also recommend creating accounts for frequent users as needed.
!NOTE! There are two levels of access - user and administrator. The total account limit is 20.
Recommended network conguration
Once access is gained it is recommended to change the Aranet PRO Network settings under Ethernet from
static to DHCP client. This way if the Aranet PRO is connected to a dierent router it will automatically be
given an IP address. To nd the device once it is changed follow these steps. Same steps apply when it is
connected to a dierent network.
(1) Find the IP address of the router (you can usually nd this on the router or ask your system
administrator/IT support).
(2) Using a smartphone or a PC that is connected to the router via an Ethernet cable or WiFi open
the Internet browser and in URL bar type the IP address of the router.
(3) Log in the router.
(4) Once in router menu nd DHCP client list.
(5) By client name nd “Aranet”, copy the respective IP address.
(6) Paste the IP address in the URL bar.
(7) You should now see the Aranet PRO login screen.

8
SENSOR PAIRING IN ARANET SENSORHUB
How to: Pair sensors to Aranet PRO
Aranet PRO supports several types of sensors. In order to connect them to the system the same steps
apply for all types of sensors.
(1) You should physically be located within around 20 meters of Aranet PRO.
(2) In order to open the sensor follow the individual sensor’s instructions (see image above). Once it
is opened the battery compartment will be exposed.
(3) Go to Aranet PRO Settings screen.
(4) Choose “Sensors” menu.

9
(5) Click “Add sensor” button.
(6) Insert sensor’s battery/-ies.
(7) Red LED light will ash on the sensor. Three short ashes followed by a long ash will signal
a connection failure, the pause between ashes will be the same. In a successful pairing the
long ash will follow immeadiately after a short ash. Looking at the LED light can save time
while pairing sensors, however, Aranet PRO will also display a notication about a successful or
unsuccessful pairing.
(8) Close the sensor following respective sensor instructions.
(9) Now you can rename the sensor, set thresholds for alarms, add it to favorites. After completing
your tasks click save button.
(10) You have now paired a sensor to Aranet PRO and can place it in the desired location.

10
SENSOR GROUPING IN ARANET
SENSORHUB
Aranet SensorHUB allows users to create sensor groups, which can be helpful when managing large
number of sensors. Groups can have names, set alert thresholds and choose dierent alarm types.
How to: Using groups
(1) To create a group go to Aranet PRO Settings screen.
(2) Open “Sensor settings” and choose the “Groups” menu.
(3) Click “Add group”.

11
(4) Now the group can be renamed and thresholds for alarms can be set. These thresholds work for
all sensors in the group, unless a sensor is specied to use its own threshold in sensor menu.
After editing click the save icon.
(5) To add sensors to a group choose the “Sensors” menu and click on the item you would like to
add.
(6) In sensor options click on the group drop down menu. Choose the group you would like to add
this sensor to.
(7) In sensor options it is also possible to toggle between sensor thresholds and group thresholds as
preferred, so even grouped sensors can have individual thresholds.
(8) Click the save icon to save changes.

12
ARANET SENSORHUB OVERVIEW
Main navigation bar
The main navigation bar contains the icon for main menu, indication on which page you are viewing, a
search box, favorite and alarm lter icons.
(1) The search box allows you to quickly view a sensor or sensor group from any menu page.
Search function also allows ltering by device type. RH/T Sensor is Type 1, T-Probe sensor is Type
2, CO2 sensor is Type 3. By writing :t<sensor type number> you will lter only sensors of that
type to be displayed. Optionally adding a letter or word before will also lter sensors with that
letter or name in their name or hex ID. For example command “a:t1” will nd all RH/T sensors
with letter “a” in their sensor name or hex ID.
(2) The favorite icon allows you to quickly access all the sensors you have added to your favorite
lists.
(3) The alarm icon allows you to quickly see a list of all sensors that have current alarms and may
need attention.
Main menu

13
Main menu contains following sections - Home, Graph, Notications, Region, Sensors, System, Network,
Users. From these sections you can navigate to all options of the Aranet PRO software.
General information about the user login, current device time and date as well as log o option are
displayed here.
(1) The “Home” menu is the main monitoring page that lists all of the connected sensors. Sensor
information is updated with real time data. It is possible to arrange the sensors by highest or
lowest measurement values, by name or by group.
(2) By pressing on a sensor a submenu opens with sensor information (sensor serial number, name,
group, thresholds, last time data was received, battery level, signal strength). All changes for
sensor settings can be adjusted here. Graph icon will guide user to the open Graph screen and
the favorite icon enables user to add the sensor to favorites.

14
Graphs
Graph screen enables user to view, compare and analyse the data from the
sensors. The “Graph” page enables user to look at historical data, patterns
and changes, as well as compare multiple sensor readings over time to see
potential correlations.
(1) Choose which values to graph depending on the attached sensor,
and receive as much information as needed.
(2) Add up to 20 sensors at once for analysis.
(3) Set custom time period to look for historic data analysis.
(4) Export data to .csv or .xlsx les by using download button provided.
(5) A timeline on the top enables zooming in on specic parts of the
time period as needed.

15
On a desktop PC the timeline zooming into a specic time period can be done with the mouse wheel as
well as clicking on the borders of the displayed time period and dragging them. On a mobile device it is
possible to use multi touch and panning function with two ngers for navigation.
Notications
“Notications” menu oers management of alarms and summaries. Aranet PRO oers receiving alarms
and summaries via e-mail notications or text messages.
(1) The rst Sensor screen shows you groups of sensors and allows you to choose individual settings
for each group.
(2) Click icons to receive alarms for thresholds crossed, summaries or both. The icon with
exclamation mark represents alarm messages, while the table icon represents summaries.
(3) If sensors are not added to any group they will be automatically grouped together under
“Ungrouped”.
This manual suits for next models
2
Table of contents
Other Aranet Measuring Instrument manuals