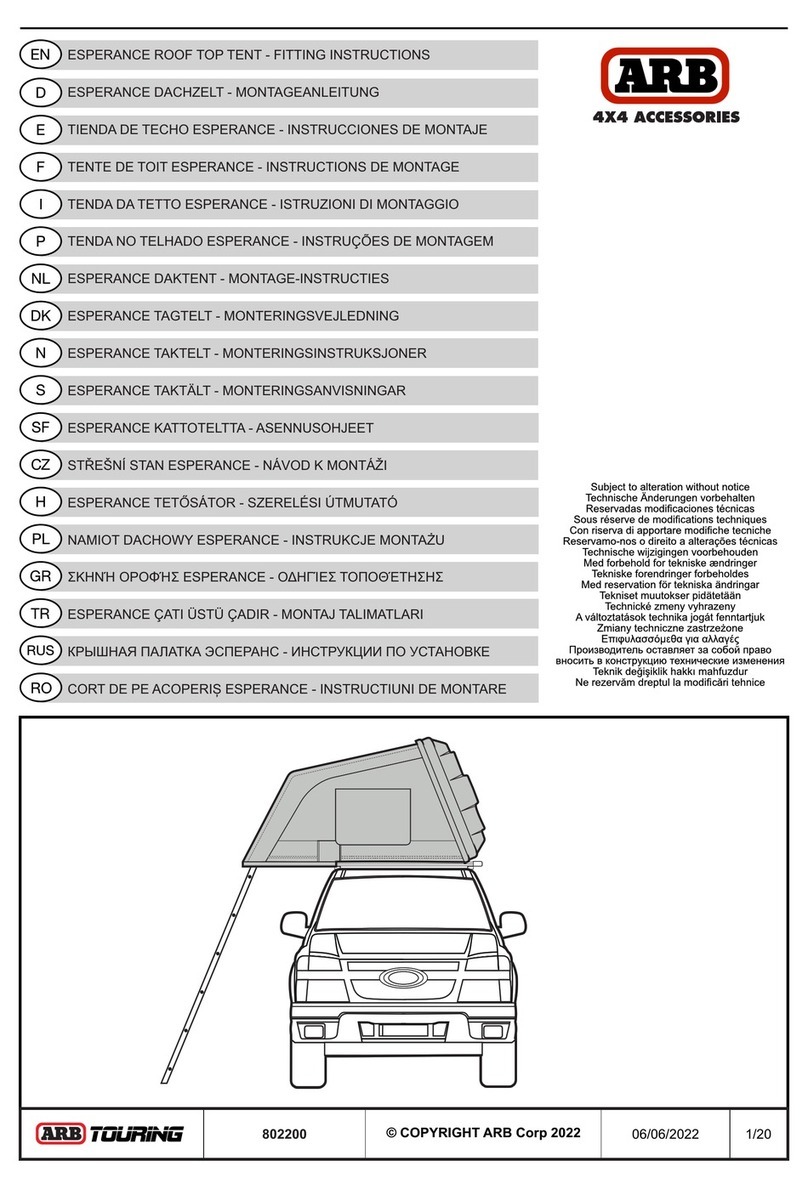
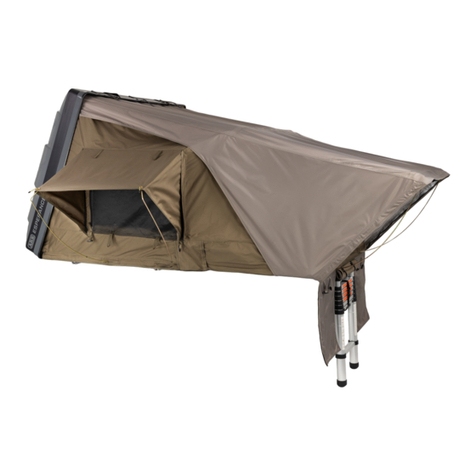
ARB Touring FLINDERS User manual

BR 2020 –Rev 1
Congratulations on purchasingyour
ARB TOURING ROOFTOP TENT - the quick and easy way to enjoy camping.
Included in this leaflet is all the information that you require to obtain the maximum enjoyment and benefit from
your rooftop tent. Given proper care your rooftop tent will give you many years of trouble-free camping.

1
Contents
1.
Attaching the mounting rails to the base of the ARB Rooftop Tent
1.1.
Rooftop Tent direction of opening - Back (Rear)or to the side of the vehicle?
1.2.
Attaching the mounting rails and Ladder
2.
Fitting the ARB Rooftop Tent to your Roof Rack or Roof Bars.
3.
Rooftop TentSetup Instructions.
4.
Ladder Extension Accessory
5.
Tent Light &Powerports
6.
Cautions, Storage and Care guide lines
7.
Warranty Instructions

2
1.Attaching the Mounting Rails to the ARB Rooftop Tent
1.1.
Direction of Opening
Before you fit your new rooftop tent to your vehicle, you will need to decide whether you wish to have
the rooftop tent open “off the back’” or “off the side” of your vehicle.
“Off the Back”
For most larger size vehicles opening “off the back” is preferable. The advantages of this
orientation are:
-
leaves extra roof space for additionalstorage.
-
with the tent open you will gain weather protection from the tent above your head
when accessing the back of your vehicle.
Caution: Some vehicles have tailgates which lift well above their roofline. Opening “off the back” is not
suitable for these vehicles as the tent base may restrict the full range of movement of the tailgate.
To mount the rooftop tent to open off the back, the mounting extrusions need to be cut off at both ends
up to the second pre-drilled hole, prior to being fitted to the base of the rooftop tent. See Diagram 1.
Diagram 1
The mounting extrusions are then bolted to the base of the tent at right angles to the roof rack or roof
bars, in the direction of opening (along the length of the tent base).
1.4m
Mounting Extrusion
Roof Bars
Direction of
Travel
1.2m

3
1.
Attaching the Mounting Rails to the ARB Rooftop Tent
1.1. Direction of Opening (continued)
“Off the Side”
For most medium or small vehicles opening “off the side” is preferable. The advantages of this
orientation are:
-
allows for lift up tailgates to operatenormally.
-
means the closed tent pack is better balanced on the roof and creates less wind drag
as the narrow face of the tent pack is travelling forward.
The mounting extrusions bolt to the base of the tent at right angles to the roof rack or roof bars (across
the width of the tent base)
1.2m
Mounting Extrusion
Roof Bars
Direction of
Travel
Once you have decided which is best suited to your application, follow the mounting instructions. If
you are uncertain of the most appropriate method of mounting your rooftop tent, please contact
ARB Corporation Limited or your distributor who will be happy to provide advice particular to your
circumstances.
1.4m

4
1.2.
Attaching the mounting rails and Ladder
1.
Remove mounting extrusion from the carton (cut as per Diagram 1 if you intend opening the
rooftop tent off the rear of yourvehicle.)
2.
Place the tent on its side on the ground onto a clean surface.
3.
Using the supplied 8mm x 40mm bolts and large washers, slide your hand in between the insideof
the base and the mattress and insert the bolts into the pre-drilled holes. See Diagram 2.
4.
Place the mounting extrusion into position over thebolts.
5.
Slide the 8mm nuts into the mounting extrusions and tighten the bolts from inside the tent. See
Diagram 2.
6.
Near the outside edges of the mounting extrusion you will find holes for the self drilling screws
supplied. Use the self drilling screws to attach the outside edge of the mounting extrusion to the
base of the tent through the pre-drilled holes. on the outer most edge of the extrusion.
Diagram 2
1.
Fold open the Ladder Mounting brackets attached to your Rooftop Tent. Mount the Ladder to the
folding brackets on the top of the Rooftop tent, the spring-loaded pins on the ladder will align with the
holes on the folding brackets. Once installed, the ladder should appear the same as the image below.
2.
The ladder, when not in use, will sit flat in its non-operational position on top of the Rooftop Tent.
See image below. The strap holding the foot end of the ladder when it is stowed on top of the
Rooftop Tent must be securely tightened. This strap will hold the ladder in place when the vehicle is
in motion. Failure to secure the ladder can cause injury or damage to the roof top tent. – Note the
ladder can be mounted to the Tent after you have finished mounting the tent to the roof of the
vehicle.
3.
Note: Removing the ladder from the Rooftop Tent when the tent is not being used, will reduce the overall
height of the vehicle and may make access to height restricted carparks easier. Figure 1
Ladder
assembly
The mounting extrusion fitted to the base of the tent with the
slide plate and bolt fitted.

5
2. Fitting the Rooftop Tent to your Roof Rack or Roof Bars
1.
Lift the tent onto the vehicle’s roof rack or roof bars.
2.
Place 8mm x 55mm bolt into the slide plate. Slide the plate and bolt into the mounting
extrusion. See Figure3.
3.
Attach the rooftop tent to your roof rack or roof bars in four places as per Figure 4. Use 2
bolts and 2 slide plates with the base plate to hug the bar. 1 set per corner.
Figure 4
4.
Prior to tightening all the nuts, ensure that your rooftop tent is centered (side to side) on
the roof of your vehicle and that the mounting points (as far as possible) are symmetrically
positioned near each corner of the tent.

6
1.
Undo Ladder travel strap, by unclipping the buckle, Slide out the ladder
until the locking pins engage. See Image 1A
2.
Unzip the travel cover from the tent by unzipping around the 3 edges
and unclip the remaining edge. See Image 2A & 3A
3.
Release the hold down Velcro straps on each side of the tent. See image 4A
NB - When closing the tent, do not use excessive force
on the side retaining Velcro straps. See caution on page
8.
4.
The ladder can now be used as a lever to open the tent. Pull the ladder
down and out so the tent unfolds like a book. See image 3A. The two bases
of the Rooftop Tent lock together with a Tongue and Groove locking
extrusion.
NB – While opening the Rooftop Tent, hold the transit cover
well away from the tongue and groove locking extrusion to
prevent damage to the cover. See image 3A. Following this
caution will prevent pinching of the cover and potential
damage to the locking extrusions.
NB – To avoid serious injury, ensure that your hands, fingers
and any other bits are well away from the locking extrusions
pinching points when the Rooftop Tent is being opened.
5.
Rest the ladder on the ground, to create a flat sleeping surface inside the
tent. See image 5A
Note: if the angle of the ladder is too upright or does not
reach the ground you will require a ladder extension. See
page 9.
Make sure the ladder is safe and will not move and climb into the Rooftop
Tent. Use the two black straps inside the tent to assist in getting in and out of
the tent. The Rooftop Tent has 3 bows which tension the canvas above the
floor of the Rooftop Tent. The Entry bow and the Head bow are both
extendable. Slide and extend out the Entry and the Head aluminum bows. To
tighten the bows, rotate the tube clockwise on both sides of the bow to lock
it in position. See image 6A. To Undo the bows twist anti clockwise.
Note: Do not overtighten bows, they only need to be firmly
tightened
6, Unclip the bungee straps inside the tent which are there to assist in folding
the tent neatly when packing the Rooftop Tent away. See Image 6A.
7. Retrieve the spring steel rods (SSR), these are used to tension the outside
window awnings and flysheet. Hook the shaped end of the SSR into the
eyelet of the front window awning. Insert the other end of the SSR into the
hole in the base of the rooftop tent, passing through the slit in the rooftop
tent skirt. This will require you to bend the SSR so that the angle of the SSR is
equal to the angle of the hole into which it should be inserted. NB reverse
this procedure to remove the SSR from the hole in the base of the rooftop
tent. See image 7A
Your Rooftop tent is now setup.
See image 7A
8. Repeat all the above steps in the reverse order to pack away your rooftop
tent. When packing away your tent, depending on your bedding volume it
may be necessary to take your pillows out of the tent.
1
2
4
5
6
7A
1A.
3. Rooftop Tent setup
2A.
3A
4A
5A
6A
**Please make sure the tent
Make sure tent is dried
before packing away, if the
tent needs to be packed
away wet, please make sure
itissetup as soon as possible
todryout**

7
4.
Ladder Extension Accessory
A Ladder Extension may be required depending on the height of your vehicle (in most cases
where the base of your rooftop tent is more than 2m off the ground).
If required slide ladder extension into the base of the main ladder. Position ladder and
extension to an appropriate climbing angle. Drill two 8mm holes into the main ladder to
accept the two locking pins from the ladder extension.
The overlap of the ladder extension to the main ladder must not be less than 240mm
The Ladder extension is stored separately in its own bag.
Sunroof & Windows
The sunroof and windows
operate as per a normal
tent would, these are all
zippered with anexternal
weather resistant canvas
and mesh inner. In foul
weather it is always
recommended to have all
the windows done up
and awnings down in
strong winds. In wet
weather leaving thetop
of your windows open
slightly toallow air flow.
this can assist in reducing
condensation inside the
tent. The front window
vent above the front door
is there toreduce the
condensation build up
when the tent is
occupied.
5. Tent Light & Power ports
The Power pole included contains a light, a 12V charging port and two USB charging ports. The Power Pole is also supplied with a
5m extension cord for connecting to a cigarette lighter port inyour vehicle. Please see below for operation and setup.
1. Attach thePower Pole to thetopofthecenter bow oftheRooftop Tent.
2. Connect the Power Pole to the connecter protruding from theapex ofthecenter bow.
3. Connect the 5m extension cord to the connecter protruding from the bottom right-hand side of the center bowand through the
small zip aperture in the side of the Rooftop Tent.
4. Plug the cigarette lighter end of the 5mextension cord into the cigarette lighter socket ofyour vehicle toprovide a 12V DCpower
supply tothe Power Pole the power pole now has power - To turn on light, touch the on off marking on the front of the light, keep
pressing to change the brightness levels and too power off.
NB. To protect the electrical cables from being damaged by the tongue and groove locking extrusions of the two bases,
ensure the wire protruding from the bottom right-hand side of the center bow is also protruding outside the Rooftop
Tent through the small zipped aperture in the canvas.
5. The Power Pole should be removed prior to packing away your Rooftop Tent. This will prevent damage to the Power Pole due to
pressure exerted on the Power Pole by other items left inside the Rooftop Tent at pack up. Additionally, this will allow for the
Power Pole to be used in general use. The Power Pole will also attach to the rafter arm or leg of an ARB Awning.
6. Be careful where the 5m extension cord is packed away to ensure that the cords are not damaged by the tongue and groove
extrusions locking the bases together, the next time your rooftop tent is opened.
7

8
6.
Cautions, Storage and Care guide lines
Cautions
-Do not use excessive force on side retaining Velcro straps when closing the tent. These straps
are designed only to hold the tent base together, and are not designed to be used to pull the bases
together. When you are closing the tent, hold down the top folded base to compact the tent, then use the
Velcro straps to secure the bases in this position. These straps will tear out of the tent if excessive force is
applied to the strap.
-
Do not store the tent wet.
If you do have to pack away when the tent when wet, zip closed all canvas
doors and windows to protect the inside of the tent, and pack away till weather has improved. As soon as you
can,open the tent and let it dry out thoroughly to prevent mould, mildew and rot.
If the tent is to be closed
up for extended periods of time it is very important that the tent is completely dry. Mould is not warranty
if found to be from the tent being stored or packed up wet or damp. Dry your tent completely.
-
Do not drill locking holes below the existing locking pin holes in the ladder. This will weaken the
structure of the ladder and can cause injury. If you need to extend the length of your ladder, please purchase a
ladder extension. If you need to shorten the ladder you can drill holes above the existing ladder locking pin
holes.
-
Be aware that with a rooftop tent fitted to your vehicle the overall height is increased.
You
should measure the overall height of your vehicle with the rooftop tent fitted as you will need this information
to decide if the vehicle can enter carparks etc. This is not covered by warranty, know your height before
moving your vehicle.
-
Centre of gravity. The attachment of a rooftop tent to your vehicle (similar to any other load on your roof
rack) will alter its center of gravity. Adjust your driving accordingly.
-
In trip inspections. Regularly check that all nuts and bolts attaching your rooftop tent to the roof of your
vehicle are tight and in good repair. Check the ladder is securely fastened and locking strap is applied and in good
working order. The ladder can be removed for storage or driving when not required, this will help lower your
height of the tent and help keep the ladder in good working order.
-
Do not force the Zipper. The zipper is not designed to be forced closed or to have load applied to it.
Always bring the two unzipped sections of zip together and ONLY pull the slider in the direction of travel of
the zipper, NOT at an angle adjacent to as this will damage the zipper and cause it to fail. If the zipper is stiff to
operate, clean dust and debris from the zipper with a soft brush before opening it further. The zipper can be
lubricated with commercially available zipper lubricant or paraffinwax.

9
Storage oftheTent
1.
If the tent is stored on the vehicle for extended periods and is exposed to the elements, it is possible for the
tent to absorb moisture from the air into the canvas fabric. For this reason, the tent should be opened
periodically and allowed to air or dry. It is not recommended to store the tent on the vehicle during winter
months or periods of extended rain. The ladder can remove separately to lower the overall height of your
vehicle.
2.
When storing the tent off the vehicle, ensure the tent is packed away completely dry and kept out of direct
sunlight. If the tent is stored in humid conditions, unzip or remove the travel cover to allow the canvas to
breath and dry. It is recommended to store the tent indoors in a warm, dry environment.
3.
Be careful not to drag the tent on the ground. This will damage the cover and allow potential water ingress
the next time you use your rooftoptent.
4.
Do not store directly on a concretefloor.
5.
The Ladder can be removed from the Tent when you are not camping and the tent is on in just general vehicle
use, this will help keep the ladder in good condition and also help reduce your height and improve aerodynamics.
This is a feature of the tent that the ladder does not need to be kept on while the tent is in transit.
6.
Mold and Mildew is not a defect or manufacturing fault, if the tent was found to be stored or packed up wet
and not dried correctly then a full review of the warranty will be required.
Care Instructions
1.
Clean all parts ofthe tent with cold water and a soft brush only - do not use soap ordetergent asthese may
damage the coating on the fabric, or cause corrosion to metal andalloy parts. Pay particular attention to remove
dirt, bird droppings and vegetation such as leaves as these can cause the tent torot when packed away.
2.
Clean the travel cover regularly to reduce the effects ofacid rain and other air born contaminants. To extend the
life of the PVC cover, regularly treat with a UV protectant such as ‘303 Aerospace Protectant’ or ‘Armor All
Protectant’. Keep harsh chemicals away from the Tent cover,Example Truck Wash.
3.
Do not expose any part of the tent to petrol, oil, solvents,harsh cleaning products or similar.
4.
Zippers should be cleaned regularly by brushing with a soft brush and wiping with a damp cloth. Zippers that
become stiff tooperate may belubricated periodically with commercially available zipper lubricant or
paraffin wax. Note: Do not over lubricate as this may attract dust anddebris.
5.
New poly/cotton canvas may initially experience some weeping through the seams.This will reduce
over time as the fabric cures. In a weep occurs its best to treat the weep with a seam sealer, these
can be purchase from good camping supply stores.
6.
Well-worn fabrics maybe re-proofed using a good quality waterproofingsolution.
7.
Always airyour tent before andafter use to allow anymoisture or condensation to dissipate. The travel cover
has welded seams and isnear water tight tokeep the elements out. Assoon asthe travel cover isfitted and
warms up in sunlight itcan heat any trapped moisture which will create an environment where mould, mildew
and rot canset inquickly. Please make sure you dry your tent completely before pack up.
8.
If mould and mildew isfound on any part ofthe tent fabric, allow the tent todry thoroughly in the sun to
prevent itspreading. Use a soft bristled brush toremove any particles. Mildew remover may be effective but test
first on an obscure part ofthe tent fabric. DONOTuseany bleach solutions on the fabric asthey may discolor
the tent and damage the PUcoating on the fabric. The best cure for mould and mildew istoprevent its growth in
the first place byensuring thetent ispacked and stored thoroughlydry.
6.
Cautions, Storage and Care guide lines continued

10
7. Warranty Terms andConditions
The ARB Touring Rooftop Tent comes with a
3-year
(
36
month) warranty, effective from the date of
purchase.
The warranty covers all aspects of workmanship, finish and fabric.
Our goods come with guarantees that cannot be excluded under the Australian Consumer Law.
You are entitled to a replacement or refund for a major failure and compensation for any other
reasonably foreseeable loss or damage. You are also entitled to have the goods repaired or
replaced if the goods fail to be of acceptable quality and the failure does not amount to a major
failure.
If this product requires warranty, please return to your closest ARB store accompanied with your
receipt of purchase, batch code number located on the hinge of the tent. Warranty period of 3
years from Date of purchase applies to this product.
ARB Corporation Ltd excepts no responsibility for any damage caused by external factors, i.e. trees,
corrugations, shopping center carparks, packing the tent away wet etc.
ARB Corporation Limited
Ph: +61 3 9761 6622
www.arb.com.au
Table of contents
Other ARB Touring Tent manuals
Popular Tent manuals by other brands

encompass
encompass ETP2-1818 instruction manual

Nordcap
Nordcap NARVIK Build-up instructions

Zempire
Zempire NEO Series quick start guide

Boutique Camping
Boutique Camping LUNA EMPEROR instruction manual

ZANE ARTS
ZANE ARTS ROGA-4 owner's manual

Harbor Freight Tools
Harbor Freight Tools BIG TOP 92928 Assembly instructions

Harbor Freight Tools
Harbor Freight Tools 69456 Owner's manual & safety instructions

Eureka
Eureka Twin Tube manual

Ozark Trail
Ozark Trail W883 Assembly instructions

for Living
for Living A101003501 Assembly instructions

Living Culture
Living Culture Onetangi manual

tahoe gear
tahoe gear TGT-CARSON-18 Assembly instructions