arbin KITE Standard User manual

1
Users manual Kite Powered air Visors ....................................................3
Bedienungsanleitung Kite Gebläse Atemschutzgeräte ................... 19
Gebruiksaanwijzing Kite ademluchtvizieren ..................................... 37
Mode d'emploi visières à ventilation assistée Kite........................... 53
KITE Standard
KITE Welding
KITE Opti
Partnr 30.340
May 28, 2015

2

3
Users manual Kite
Warning: The user and/or the users employer is fully responsible for the correct
selection, use and maintenance of this products. Please read these instructions and store
them in a safe place for future reference.
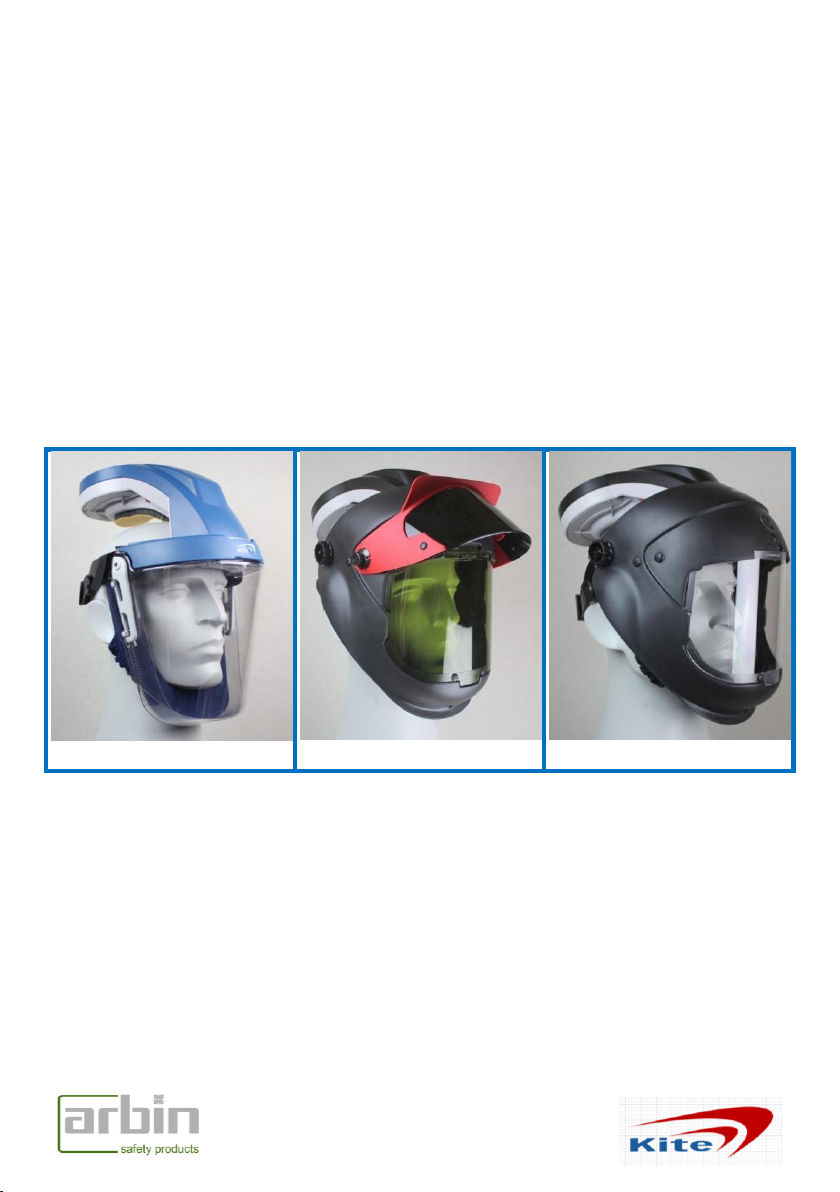
1 This manual refers to the following products
Partnr: 10.000 KITE STANDARD powered air visor.
Including: charger, 1x set spare comfort pads, 1x disposable dusthood,
2x P3 filters, 3x tear-off visors.
Partnr: 10.050 KITE WELDING powered air visor.
Including: charger, 1x set spare comfort pads, 1x fire retardant hood,
2x P3 filters. Big visor shade 1.7, flip up visor shade 8.
Partnr: 10.060 KITE OPTI powered air visor.
Including: charger, 1x set spare comfort pads, 1x disposable dusthood,
2x P3 filters. Big clear visor.
Remark: For detailed information concerning the welding helmet, please read separate
manual Euromaski enclosed in the packaging.
2 Description
The KITE is intended for protection against solid and liquid Aerosols. The KITE supplies an
overcapacity of clean and filtered ambient air, and allows the user to breathe in air
without having to overcome the resistance of filters. This overcapacity ensures a slight
over pressure and thus a high degree of protection. With a fully charged battery the KITE
can provide a flow rate of 160 litres per minute for approximately 7 hours, depending on
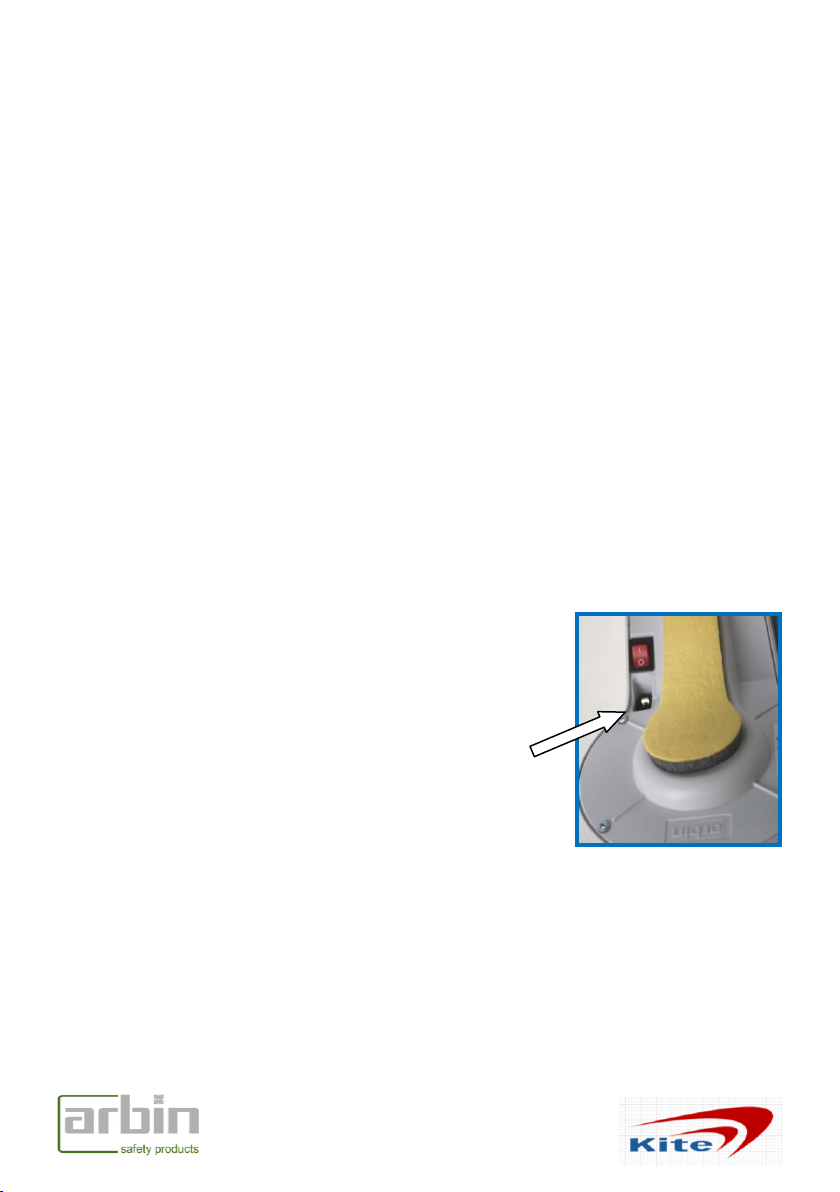
the filter used and the condition of the battery. The KITE is equipped with an acoustic
warning system to warn the user about reduced air supply during use. The KITE may be
equipped with the standard visor, with disposable protection visors, but also with a
welding visor with variable shades of welding filters or an automatic welding lens.
Furthermore a wide range of spares and accessories is available to enlarge the field of
application.
3 Requirements and limitations for use
3.1 General
•National regulations must be adhered to.
•Before use the user must have become familiar with the warning signal, see 4.7.
•The user must be familiar with and trained for the use and maintenance of the KITE.

4
•Warning: Only use the KITE with the blower switched on. In the power-off state no
respiratory protection is to be expected, and there will be a rapid build up of carbon
dioxide and depletion of oxygen may occur.
•For reasons of hygiene, the KITE should preferably be used by one individual.
•Use additional hearing protection.
3.2 Working field
•The area in which the KITE is to be used must have an oxygen content of at least
19%.
•Warning: Do not use the KITE where dangerous gases and/or vapours are present.
•Inadequate warning characteristics of dangerous substances require special rules of
use.
•Warning: Do not use the KITE in closed rooms, confined spaces, non ventilated
containers, excavations and small rooms.
•Air flow speeds of more than 2 m/s can affect the protection factor.
•In the case of physical exertion it is possible that there may be a temporary negative
pressure in the air hood which leads to a reduction in the protection offered by the
system.
4 Use
4.1. Charging the battery
•New KITE units are delivered with a battery in uncharged
state.
•Connect the charger with the charging plug in the
bottom of the blower unit. Connect the charger to the
mains power supply (100-240V AC).
•The red LED on the charger will be flashing during
charging.
•When the battery is fully charged, the red LED will light
continuously.
•It will take approximately 4 hours to charge a new or fully discharged battery.
•The micro-controller inside the charger prevents damage to the batteries when the
charging time is exceeded.
•The charger is for indoor use only and should be used and stored in a dry place.
•The running time of a fully charged battery in combination with a new KITE filter is
approximately 7 hours.
•Warning: never charge batteries in a potentially explosive atmosphere.

5
4.2 Filter
•The KITE unit may only be used in combination with
original KITE filters.
•The filter of the KITE must be used in accordance
with the characteristics of the hazardous materials
which are encountered, see instructions provided
with the filter.
•Warning: Particle filters type P R SL do not protect
against gases and vapours.
•Warning: Filters cannot be cleaned, replace when
needed.
•Make sure that the filter seal is correctly fitted.
Make sure that the contact surface of the filter seal
is clean and not damaged
•Important: The filter must be placed in such a way
that both icons of the open padlocks are in an
opposite postion. Turn the filter firmly clockwise till a
click is audible.
•Important: the icons of closed padlocks are now in
an opposite position.
“Click !”

6
4.3. Check of flow
•Switch the KITE on by pressing the ON/OFF
button. After +/- 15 seconds a signal sounds
to confirm the correct function of the
electronic control unit.
•Wait for another 1 minute in order to be sure
that the motor speed is constant.
•Place the flow meter on the air outlet in such
way that the flow meter is in vertical position.
•The indicator ball should be above the minimum
level.
If not, the air flow is not sufficient.
•Warning: placing the flowmeter on the outlet will
increase the flow resistance. The electronic flow
control will start compensating by increasing the
flow. Therefore checking of the flow should not take
more time than 3 seconds.
•After checking the flow, switch off the KITE.
See section 7 for troubleshooting.
Minimum level
Warning: Do not close the slits of the flow meter by
fingers as this will influence the correct function.

7
4.4 Donning
•Make sure the comfort pads on the Velcro in
the front part, the upper part and the
headband are placed.
•Switch the KITE on by pressing the ON/OFF
button. After +/- 15 seconds a signal sounds to
confirm the correct function of the electronic
control unit.
•Put the KITE on the head, and adjust the
headband by pushing and turning the
adjustment wheel on the back.
Fold the elastic face seal around the chin by
pulling the face seal backwards.
•Warning: the face seal must be in full contact
with the skin around the face in order to give
maximum protection. Over time the face seal
will lose its elasticity and therefore it will not
function adequately. In doubt replace the face
seal.

8
4.5 Accessories
Place a maximum of 3 disposable visors on
the visor (Only KITE Standard).
4.6 Accessories KITE Welding/Opti
See separate manual Euromaski.
4.7 During use, leave the working area immediately in case one or more of the following
circumstances occur during use:
•The air supply drops suddenly or fails completely.
•The wearer becomes dizzy or unwell or can smell or taste contaminants.
•The breathing becomes difficult.
•Any part of the respirator becomes damaged.
•The acoustic warning signal for low battery voltage sounds. This is a serie of small
beeps, repeated every 30 seconds. After 15 minutes the unit will be switched off
automatically. Recharge the unit.
•The acoustic warning signal for clogged filter sounds. This is a beep repeated every
second till the unit is switched off manually. Replace the filter.
4.8 After use
•Switch off the KITE by pressing the ON/OFF button.
•Recharge the battery. See 4.1.
•For cleaning and maintenance, see 5.

9
5 Maintenance and Inspection
After every use the following parts should be examined in order to ensure safe and
comfortable use.
5.1 Filter
•Filter: the filter cannot be cleaned; replace when needed.
•Warning: do not use compressed air in attempt to clean the filter.
5.2 Face seal Kite
•Face seal: This part must be highly elastic and may not have holes. In case of doubt
exchange according to the following procedure:
Step 1: remove the fore head comfort pad.
Step 2: remove the Velcro straps left and
right.
•Step 3: turn screws left and right 2 turns anti-
clockwise. Don not remove the screws
completely.
•Step 4: slide the plastic strip from the face
seal backwards.
•Step 5: slide the plastic strip backwards from
the inner edge of the disposable visor clamps.

10
Step 6: remove the face seal.
•Step 7: place a new face seal by starting with
the right side, and sliding the plastic strip
under the screw. Turn the screw clockwise,
but do not over tighten.
•Step 8: slide the plastic strip on the right side
under the inner edge of the visor clamp.
Step 9: do the same on the left side, after that
the result should be as shown.
•Step 10: place a new forehead comfort pad on
the inside of the motor unit.

11
5.3 face seal Kite Welding/Opti
•Face seal: This part must be highly elastic and may not have holes. In case of doubt
exchange according to the following procedure:
Step 1: remove the forehead comfort pad.
Step 2: slide the black plastic strip from the
face seal away from the screws.
•Step 3: remove the face seal.
•Step 4: Place a new face seal by starting with the left or right side, and sliding the
plastic strip under the screwhead.
•Step 5: Do the same on the opposite side.
•Step 6: Check if the plastic pin placed in the lower
helmet shell, fits in the hole in the plastic strip of the
face seal.
•Step 7: Place a new comfort pad on the
inside of the motor unit.
5.4 Visor Kite
•The visor must be crystal clear without
scratches or cracks. In case of doubt exchange,
see pictures.
•Step 1: Remove comfort pad.

12
Step 2: Open and remove the visor clamp.
•Step 3: Slide the motor unit from the
corresponding slides in the visor.
•Step 4: Remove the face seal. See 5.2
•Step 5: Remove the headgear.
•Step 6: Take new visor and slide the motor
unit back into the corresponding slides in the
visor. Mount the visor clamp left and right in
the corresponding holes in the visor and close
the visor clamp downwards till a click is audible.
5.5 Comfort pads
•When they have lost elasticity or when they are dirty, replace.

13
5.6 Batteries
•Defective batteries can only be replaced by authorised distributor workshops.
5.7 Charger
•A defective charger cannot be repaired but has to be replaced by a new one.
5.8 Cleaning and disinfecting
•Clean the KITE using a cloth with a mixture of water and a mild detergent. Do not
use any solvents. During cleaning ensure that no water is allowed to enter the
blower unit. The blower unit must not be immersed in fluid.
•Use a disinfecting spray like Incidur (Ecolab Healthcare) on the inside of the visor
and face seal to remove bacteria and germs. Let it be on the surfaces for 1 minute.
•Dry the KITE with a cloth and/or leave it to dry in the open air.
•Warning: do not open the motor unit as all guarantee will be invalidated.
•Warning: never modify or alter this product as all guarantee will be invalidated.
5.9 Checking the flow alarm (optional)
•Make sure the battery is fully charged.
•Place the alarm checking device partnr 30.019
(not included) and secure it by turning
clockwise till it locks in the same as a filter.
See 4.2.
•Switch the KITE on by pressing the ON/OFF
button. After +/- 15 seconds 4 short beeps
sounds to confirm the correct function of the
electronic control unit.
•Wait for another 1 minute in order to be sure that the motor speed is constant.
•Close one small hole by using a piece of adhesive tape and wait at least 30 seconds
till the motor speed is constant.
•Close a second small hole and wait at least 30 seconds till the motor speed is
constant.
•Continue closing the other small holes in the same way till the warning signal is
audible. This is a beep repeated every second.
•Now check the flow, see 4.3.
•Warning: do not close the big holes.

14
6 Storage
Before the KITE is put away it should be completely dry. Store the KITE in a clean area.
The storage temperature should be between -10 °C and +40 °C. The humidity content
must not exceed 80%. Do not store any dirty filters with the KITE in the same area. The
shelf life for the filters is indicated on the filter itself.
7 Faults, troubleshooting and repair
Warning: In case of doubt concerning the proper functioning of the product, please
contact the supplier or Arbin Safety Products.
Problem
Reason
Solution
KITE beeps every second
Filter clogged
Replace filter
KITE beeps every 30 seconds
Battery empty
Charge battery
KITE does not produce any air
Switch is turned off
Turn switch on
Motor is defective
Return to dealer
Electronic problems
Return to dealer
Battery empty
Charge battery
KITE supplies insufficient air
Battery is almost empty
Charge battery
Filter is clogged
Replace filter
Battery discharges too quickly
Charger defective
Use new charger
Battery defective
Return to dealer
8 Technical specifications
KITE
•EN 12941, class TH2P
•EN 166, class B medium impact
•Airflow: 160 litres /minute
•Operating time: approx. 7 hours
•Filters: 1
•Weight: 810 g, excluding filter
•Dimensions: 400 x 220 x 220mm
KITE Welding/Opti
•EN 12941, class TH2P
•EN 166, class B medium impact
•EN 169, 170
•Airflow: 160 litres/minute
•Operating time: approx. 7 hours
•Filters: 1
•Weight: 990 g, excluding filter
•Dimensions: 400 x 240 x 220 mm
Battery
•Type: Li-Ion rechargeable
•Charging time: 4 hours max
•Charging cycles: at least 500
Battery charger
•Type: Fully automatic
•Weight: 100 g
•Dimensions: 80 x 80 x 45 mm
•IP class: IP 20

15
9 Statutory stipulations and regulations
•European directive for personal protection devices (89/686/ EC)
•Standard EN 12941:1998+A1:2003+A2:2008: Respiratory protective devices -
Powered filtering protective devices incorporating a helmet or hood.
•Standard EN 166: personal eyeprotection.
•System approval by: DEKRA EXAM GmbH Personal Protective Equipment, Gas
Measuring Equipment Adlerstr. 29 * 45307 Essen, Germany.
Notified body mark on the system DEKRA EXAM GmbH Zertifizierungsstelle,
Dinnendahlstraße 9 * 44809 Bochum, Germany. CE 0158
10 General
Arbin Safety Products (ASP) cannot in general accept responsibility for damage incurred
by the owner, user, other people who use the safety product, or third parties which
result either directly or indirectly from the incorrect use and/or maintenance of the
safety product, including non designated use of the apparatus and/or non compliance
with or incomplete adherence to procedures contained in these instructions and/or in
connection with repairs to the safety product which are not carried out by ASP or under
contract to ASP. The general sales and supply conditions of ASP are applicable to all
transactions. ASP continually strives to improve its products and reserves the right to
change the specifications mentioned in this manual without prior notification.
11 Guarantee
Arbin Safety Products will repair or, if necessary, replace this product free of charge in
the event of a material or manufacturing defect within 12 months of the purchase date,
provided that the product has only been subjected to normal usage in accordance with
the user manual. Use of substitute, non-original spare parts, invalidates the CE approval
and, also, all rights regarding guarantee. Original spare parts can be recognised by the
affixed code numbers, supplemented with the manufacturer's mark and the "CE
approval". The guarantee is invalidated if the type or serial number marking is modified,
removed or made illegible.
Manufacturer: Arbin Safety Products, Boord 39, 5674 NB Nuenen, The Netherlands. www.arbinsafety.com

16
12 Spare parts
20.010
30.020
20.030
20.031
Particle filter P R SL
Alarm checking
device
Face seal Kite
Standard
Face seal Kite
Welding/Opti,
fire retardant
Pack of 4
1 pcs
1 pcs
1 pcs
20.035
20.037
30.443
30.444
Comfort dust hood,
disposable
Comfort dust hood,
fire retardant
Neck cover leather
Neck cover large
fabric
Pack of 5
1 pcs
1 pcs
1 pcs
20.058
20.055
30.017
30.015
Set of sweatbands
Set of comfort pads
Flowmeter
Charger
Set of 5
Set
1 pcs
1 pcs
30.010
30.011
30.000
30.002
Headband Kite
Standard
Headband Kite
Welding/Opti
Motorunit Kite
Standard
Motorunit Kite
Welding/Opti
1 pcs
1 pcs
1 pcs
1 pcs

17
30.414
30.145
30.416
30.445
Visor mounting stud
Visor mounting
screw
Spring washer
Visor mounting
screw, for large
welding visor
Set of 2
Set of 2
Set of 2
Set of 2
20.040
20.043
30.425
20.045
Disposable visor
Disposable visor
Clear visor Opti
Visor, with visor
clamps
Pack of 10
Pack of 100
1 pcs
1 pcs
30.418
30.436
30.441
30.442
Mask visor,
shade 1,7
Mask visor,
shade 3
Large welding visor,
shade 10
Large welding visor,
shade 11
1 pcs
1 pcs
1 pcs
1 pcs
30.437
30.438
30.439
30.440
Welding visor,
shade 8
Welding visor,
Shade 9
Welding visor
Shade 10
Welding visor
Shade 11
1 pcs
1 pcs
1 pcs
1 pcs

18
30.422
30.012
20.047
20.060
Welding visor frame
red
Visor clamps
Anti fog gel
Battery extender
1 pcs
Set of 2
1 pcs
1 pcs
© No part of this document may reproduced and/or published by printing, photocopying, microfilm, audio tape
or by any other means whatsoever without the prior written consent of the publisher. Pictures and
specifications do not necessarily relate to the standard version of the products on all local markets. Although
best knowledge has been used in compiling this information, no liability for any inaccuracy that may occur in
this information will be accepted and the right to change technical specifications without prior notice will be
reserved.

19
Bedienungsanleitung KITE
Achtung: Der Anwender und/oder der Arbeitgeber des Anwenders ist für die korrekte
Auswahl, Benutzung und Wartung dieses Produktes verantwortlich. Bitte lesen Sie diese
Gebrauchsanweisung sorgfältig und bewahren Sie diese für späteren Gebrauch sicher
auf.
1 Diese Betriebsanleitung gilt für die folgenden Produkte
Partnr: 10.000 “KITE STANDARD“ Gebläse Atemschutzgerät.
Mit Ladegerät, 1x Satz Komfort-Polsters, 1x Einweg-Hauben,
2x P3 Filter, 3 x Einweg-Visiere.
Partnr: 10.050 “KITE WELDING Gebläse Atemschutzgerät.
Mit Ladegerät, 1x Satz Komfort-Polsters, 1x feuerfesten Haube,
2x P3 Filter. Getöntes Innenvisier 1.7, Getöntes Klappvisier 8.
Partnr: 10.060 “KITE Opti” Gebläse Atemschutzgerät.
Mit Ladegerät, 1x Satz Komfort-Polsters, 1x Einweghaube,
2x P3 Filter. Klare Innenvisier.
Anmerkung: Für detaillierte Informationen bezüglich des Schweißer Helmes, lesen
Sie bitte die separat beiliegende Anleitung „Euromaski“.
2 Beschreibung
KITE dient zum Schutz gegen feste und flüssige Aerosole. Es liefert eine Überkapazität an
sauberer gefilterter Umgebungsluft und ermöglicht dem Anwender angenehmes Atmen
ohne Überwindung eines Luftwiderstandes. Durch die Überkapazität entsteht ein
Überdruck in der Haube, dieser garantiert höchste Sicherheit. Mit vollgeladener Batterie
liefert der KITE einen Luftstrom von bis zu 160 Liter pro Minute über einen Zeitraum von
ca. 7 Stunden (abhängig von den genutzten Filtern, Zustand der Batterie). KITE ist mit
einem akustischen Warnsystem ausgestattet, welches den Anwender über eine mögliche
Verringerung der Luftzufuhrt warnt. KITE ist in verschiedenen Ausstattungen erhältlich:
Standard Visier, Einweg-Schutz-Visier, Schweißer-Visier in variablen Filterschutzklassen
und Visier mit automatischem Schweißglas. Zur Erweiterung des Anwenderbereiches
bieten wir ein breites Sortiment an Ersatzteilen und Zubehör.
3 Anforderungen und Nutzungsbeschränkungen
3.1 Allgemein
Die jeweiligen gültigen nationalen Vorschriften sind einzuhalten.
Vor Verwendung muss sich der Anwender mit dem Gerät und den jeweiligen
Warntönen vertraut machen (siehe 4.7 ).

20
Der Anwender muss mit der Handhabung des KITE vertraut und geschult sein.
Warnhinweis: Benutzen Sie den KITE nur bei eingeschaltetem Gebläse. Bei
ausgeschaltetem Gerät kann keine oder nur eine geringe Atemschutzfunktion des
Gerätes erwartet werden. Es besteht die Gefahr einer sofortigen, starken
Anreicherung von Kohlendioxid.
Aus hygienischen Gründen sollte der KITE nur von einer Person benutzt werden.
Bitte benutzen Sie zusätzlichen Gehörschutz.
3.2 Arbeitsbereich
KITE darf nur in einer Umgebung mit einem Sauerstoffgehalt von mindestens 19%
benutzt werden.
Warnhinweis: Benutzen Sie den KITE nicht in Umgebungen mit gefährlichen Gasen
und/oder Dämpfen.
Schadstoffe die nicht durch Geruch wahrnehmbar sind bedürfen besonderer
Einsatzvorschriften.
Warnhinweis: Benutzen Sie den KITE nicht in geschlossenen Räumen, engen
Räumlichkeiten, ungelüfteten Containern und Baugruben.
In Umgebungen mit einer Luftstromgeschwindigkeit über 2m/s, kann sich der
Schutzfaktor reduzieren.
Bei sehr starker körperlicher Anstrengung mit erhöhter Atmung kann es zu
kurzzeitigem Unterdruck im Kopfteil kommen, welches zu einer Reduzierung der
Schutzklasse führt.
4 Verwendung
4.1. Laden der Batterie
Hinweis: Neue KITE Einheiten werden grundsätzlich
ungeladen geliefert.
Verbinden Sie den Außenstecker des Ladegerätes mit
der Ladebuchse, welche sich unten an der Gebläse-
Einheit befindet. Verbinden Sie das Ladegerät mit
dem Stromnetz (100-240V AC).
Während des Ladevorgangs blinkt die rote LED am
Ladegerät.
Die Batterie ist vollständig geladen sobald das rote
LED dauerhaft leuchtet.
Der vollständige Ladezustand einer neuen oder vollständig entladenen Batterie wird
nach ungefähr 4 Stunden erreicht.
Der im Ladegerät eingebaute Mikrocontroller verhindert bei Überschreitung der
Ladezeit Beschädigungen an der Batterie.
This manual suits for next models
2
Table of contents
Languages:
Popular Motorcycle Accessories manuals by other brands

kellermann
kellermann BL 1000 PL installation instructions

Sena
Sena SP51 quick start guide

Suzuki
Suzuki 990D0-17K10-CRB installation instructions

Memphis Shades
Memphis Shades 2320-0029 Mounting instructions

Parkside
Parkside PSH 3 A1 Assembly, operating and safety instructions

Petzl
Petzl Vertex Best Duo manual