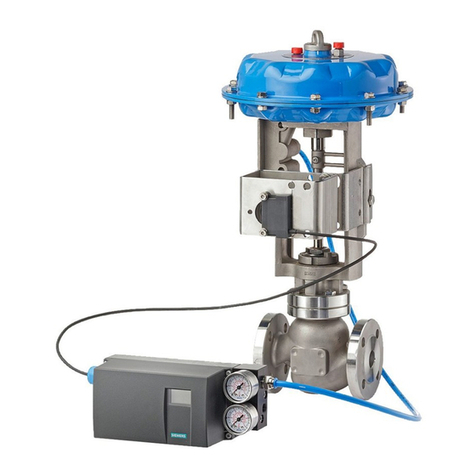
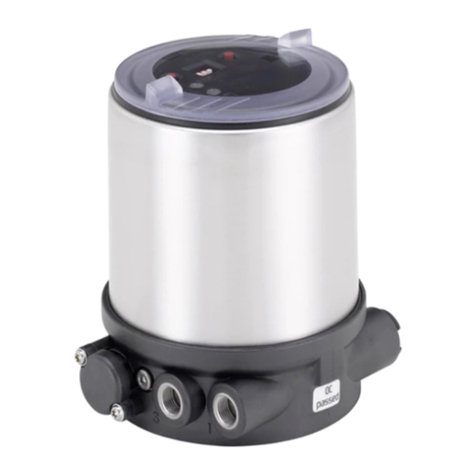
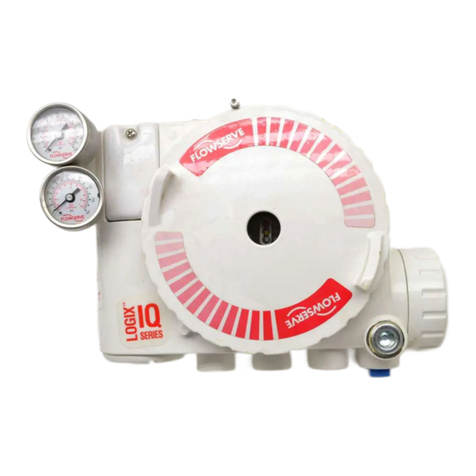
ARCA 824 series User manual

Operating manual
Electro-pneumatic positioners
Series 824
09.2018 / 1.0

Original instructions
© ARCA Regler GmbH. All rights reserved.
Cover picture background: Freepik.com

Table of contents
1 General data...........................................................................................................................5
1.1 Validity of the manual ..............................................................................................................5
1.2 Contact details.........................................................................................................................5
1.3 Other applicable documents....................................................................................................5
1.4 Place of storage of the manual................................................................................................5
2 Safety......................................................................................................................................6
2.1 Introduction..............................................................................................................................6
2.2 General safety information ......................................................................................................6
2.3 Explanation of symbols and notices ........................................................................................6
2.4 Warning symbols on the device ..............................................................................................7
2.5 Intended use............................................................................................................................7
2.6 Improper modifications to the device.......................................................................................8
2.7 Qualified Personnel .................................................................................................................8
2.8 Laws and regulations ..............................................................................................................8
2.9 Liability disclaimer ...................................................................................................................8
2.10 Conformity to European directives .......................................................................................... 8
3 Transport, storage and packaging .................................................................................... 10
3.1 Transport ...............................................................................................................................10
3.2 Storage..................................................................................................................................10
3.3 Packaging..............................................................................................................................10
4 Nameplate ............................................................................................................................11
5 Type key ...............................................................................................................................12
6 Exploded view .....................................................................................................................14
7 Parts list ...............................................................................................................................15
7.1 Positioner ..............................................................................................................................15
8 Description...........................................................................................................................17
8.1 Function and structure...........................................................................................................17
8.1.1 Cam plate ..............................................................................................................................18
9 Installation ...........................................................................................................................19
9.1 Safety instructions for assembly............................................................................................19
9.2 Mounting a linear actuator.....................................................................................................20
9.2.1 Installation according to DIN/IEC 534 T6 (NAMUR).............................................................. 20
9.2.2 Integrated mounting on actuators series 812 ........................................................................ 22
9.2.3 Integrated mounting on actuators series 813 ........................................................................ 24
9.3 Installation of the swivel actuator ..........................................................................................28
9.3.1 Installation according to VDI/VDE 3845 ................................................................................28
9.3.2 ARCA mounting on swivel actuator series 840 (external piping) .......................................... 29
9.3.3 Integrated mounting on actuators series 840 ........................................................................ 29
ARCA Regler GmbH Table of contents
Series 824 3 / 4609.2018 / 1.0

10 Pneumatic connection ........................................................................................................31
11 Electrical connection ..........................................................................................................32
11.1 I/P transducer ........................................................................................................................32
11.2 Limit value transmitter ..........................................................................................................32
11.2.1 Normal version (2-wire, N) ....................................................................................................32
11.2.2 Safe design (2-wire, SN) .......................................................................................................32
11.2.3 Direct switching version (3-wire, E2) ..................................................................................... 33
11.3 Position feedback ..................................................................................................................33
11.3.1 Feedback potentiometer........................................................................................................33
11.3.2 Position transducer 3-wire.....................................................................................................33
11.3.3 Position transducer 2-wire.....................................................................................................33
12 Configuration.......................................................................................................................34
12.1 Normal / Inversion .................................................................................................................34
12.1.1 Changeover switch................................................................................................................34
12.1.2 Select cam plate....................................................................................................................35
13 Commissioning ...................................................................................................................36
13.1 Adjustment of zero point and stroke/angle of rotation ........................................................... 36
13.2 Limit value transmitter ..........................................................................................................37
13.3 Position feedback ..................................................................................................................37
13.3.1 Feedback potentiometer........................................................................................................37
13.3.2 Position transducer................................................................................................................37
14 Service and maintenance ...................................................................................................38
15 Retrofit / exchange / repair .................................................................................................39
15.1 I/P module .............................................................................................................................39
15.1.1 Standard................................................................................................................................39
15.2 Limit value switch ..................................................................................................................39
15.3 Feedback potentiometer and measuring transducer.............................................................40
15.4 Manometer block...................................................................................................................40
15.5 Spring ....................................................................................................................................40
15.6 Piston lever............................................................................................................................40
15.7 Complete diaphragm chamber ..............................................................................................41
15.8 Control piston bushing and wire ............................................................................................41
16 Technical Data .....................................................................................................................42
16.1 General data..........................................................................................................................42
16.2 Data for the basic device.......................................................................................................42
16.3 Electrical data for options – inductive limit value transmitter................................................. 43
16.4 Electrical data for options – potentiometer and position feedback ........................................ 44
17 Disposal and recycling .......................................................................................................45
Table of contents ARCA Regler GmbH
4 / 46 Series 82409.2018 / 1.0

ARCA Regler GmbH 1 General data
Series 824 5 / 4609.2018 / 1.0
1 General data
This operating manual contains instructions that enable the product to
be safely and properly installed, put into operation and maintained.
The target group for this operating manual is exclusively specially
trained and authorised technical personnel.
Please contact the manufacturer if you encounter problems that cannot
be solved with the aid of this operating manual.
The product is subject to technical changes at any time.
1.1 Validity of the manual
This operating manual applies to the product in the version described in
the device pass.
1.2 Contact details
Further information about the product can be obtained from:
Manufacturer's address ARCA Regler GmbH
Kempener Str. 18
D-47918 Tönisvorst
Tel.: +49 (0) 2156-7709-0
Fax: +49 (0) 2156-7709-55
E-mail: [email protected]
www.arca-valve.com
1.3 Other applicable documents
The product can be delivered as part of an actuator and equipped with
additional components that are described in their own operating manu-
als. The instructions as well as the warning and safety information con-
tained therein must also be observed.
Furthermore, the following documents apply in addition to this operating
manual.
▪ Device pass
▪ Installation drawing
1.4 Place of storage of the manual
The operating manual and all other applicable documents are part of the
product.They must be kept in the immediate vicinity of the product and
must be accessible to the personnel at all times.

2 Safety ARCA Regler GmbH
6 / 46 Series 82409.2018 / 1.0
2 Safety
2.1 Introduction
This manual contains all the information you need for the connection and
commissioning of the device.
It is addressed to people who mechanically mount, electrically connect
and commission the device, as well as service and maintenance techni-
cians.
We expressly state that the contents of this device manual do not form
part of or modify a former or existing agreement, assurance or of a legal
relationship. All obligations are specified in the particular purchase con-
tract which also contains all the applicable warranty regulations. These
contractual warranty conditions are neither extended nor restricted by
any statements in this document.
The contents reflect the technical state at the time of printing.
We reserve the right to make technical changes in the course of further
development.
WARNING
Use of a damaged or incomplete device
Risk of explosion!
► Do not use damaged or incomplete devices.
2.2 General safety information
Requirement for safe use
This equipment has been supplied from the factory in a totally safe con-
dition. To maintain this condition and to ensure safe operation of the
device, follow these instructions and observe all safety-relevant informa-
tion.
Pay attention to the notices and symbols on the device. Do not remove
any notices or symbols from the device. Keep the notices and symbols
in a fully legible condition at all times.
2.3 Explanation of symbols and notices
This documentation contains notes that you must observe for your own
personal safety and for the avoidance of damage to property. Notes con-
cerning personal safety are highlighted by a warning triangle; notes con-
cerning only damage to property are not marked by a warning triangle.
Depending on the danger level, the warning notes are shown in decreas-
ing order of severity as follows:
DANGER
means that death or serious injuries will occur if the corresponding
preventive measures are not taken.

ARCA Regler GmbH 2 Safety
Series 824 7 / 4609.2018 / 1.0
WARNING
means that death or serious injuries can occur if the corresponding
preventive measures are not taken.
CAUTION
with a warning triangle means that slight injury and/or damage to
property can occur if the corresponding preventive measures are
not taken.
NOTICE
indicates an important item of information about the product itself
or how the product should be handled, to which special attention
should be paid.
CAUTION
without a warning triangle means that damage to property can occur if
the corresponding preventive measures are not taken.
ATTENTION
indicates that an undesirable event or condition can occur if the corres-
ponding instructions are not observed.
If several danger levels occur, the warning note for the respectively
highest level will always be used. If a warning note with a warning tri-
angle warns against personal injury, a warning against damage to prop-
erty may be included in the same warning note.
2.4 Warning symbols on the device
Symbol Explanation of the warning symbols on the device
Observe the operating manual
2.5 Intended use
Observe the following:
WARNING
ARCA positioners may be used only for the applications specified
in the associated technical documentation. Proper transport, stor-
age, erection, assembly, installation, commissioning, operation and
maintenance are required for trouble-free and safe operation. The
permissible environmental conditions must be maintained. Notices
in the associated documentation must be observed.

2 Safety ARCA Regler GmbH
8 / 46 Series 82409.2018 / 1.0
2.6 Improper modifications to the device
WARNING
Modification to the device
Modifications and repairs to the device can result in danger to the per-
sonnel, plant and environment!
► Modify or repair the device only as described in the instructions de-
livered with the device. The manufacturer's warranty and the product
approvals are rendered null and void if this is ignored.
2.7 Qualified Personnel
The device may be set up and operated only in conjunction with this
documentation. Commissioning and operation may be performed only by
qualified personnel. Qualified personnel within the meaning of the
safety instructions in this documentation are persons authorised to com-
mission, earth and mark devices, systems and circuits according to the
safety standards.
Qualified persons are those who are familiar with the erection, assembly,
commissioning and operation of the product. These persons have the
following qualifications:
▪ They are authorised and have been trained or instructed to operate
and maintain devices and systems in accordance with the safety
standards for electrical circuits, high pressures and aggressive and/
or hazardous media.
▪ They have been trained or instructed in the care and use of appropri-
ate safety equipment in accordance with safety standards.
2.8 Laws and regulations
The test certificates, regulations and laws applicable to your country
must be observed for the connection, assembly and operation.
These are, for example:
▪ The Work Health and Safety Regulations
2.9 Liability disclaimer
We have checked the contents of this instruction for correspondence to
the device described. Nevertheless, deviations cannot be ruled out;
therefore we cannot give any guarantee for full correspondence. The
specifications are checked regularly and any necessary corrections will
be included in subsequent editions.
2.10 Conformity to European directives
The CE mark on the device indicates its conformity to the following
European directives:
2014/30/EU
EMC
Directive of the European Parliament and of the
Council on the approximationof the Laws of the
Member States regarding electromagnetic com-
patibility.

ARCA Regler GmbH 2 Safety
Series 824 9 / 4609.2018 / 1.0
2006/42/EC Directive of the European Parliament and of the
Council on Machinery (Machinery Directive for
short)
The applied standards can be found in the EC Declaration of Conformity
for the device.

3 Transport, storage and packaging ARCA Regler GmbH
10 / 46 Series 82409.2018 / 1.0
3 Transport, storage and packaging
3.1 Transport
Transport at a temperature lower than -40 °C or higher than +80 °C is
not permissible.
3.2 Storage
NOTICE
Improper storage!
There is a danger of the product no longer functioning if it is stored im-
properly.
► Storage at a temperature lower than -40 °C or higher than +80 °C is
not permissible.
► It must be stored in roofed-over storage places and that are weather-
proof.
Openings are sealed with suitable means to prevent the ingress of dirt.
These should be removed by technical personnel at the place of installa-
tion.
CAUTION
Inadequate protection during storage
The packaging offers only limited protection against moisture and infiltra-
tion!
► Provide additional packaging if necessary.
3.3 Packaging
The product is packed in a PE film inside the outer packaging (card-
board box, wooden crate, pallet, lattice box).
If the packaging, in particular the PE film, has been opened, the product
must be stored immediately in a heated room.
The product must be packed in weatherproof or seaworthy packaging for
transport by ship, rail or truck.

ARCA Regler GmbH 4 Nameplate
Series 824 11 / 4609.2018 / 1.0
4 Nameplate
1
2
3
45
7
6
8
9
1 Manufacturer
2 Device name
3 Type
4 Observe the operating manual
5 Protection class
6 Nominal signal range
7 Auxiliary energy (supply air)
8 Auxiliary energy (voltage)
9 Fabrication number
Illustration1: Nameplate

5 Type key ARCA Regler GmbH
12 / 46 Series 82409.2018 / 1.0
5 Type key
824. P 0 0 0 - 0 0 0
[1] [2] [3] [4] [5] [6] [7] [8]
1 Series
824.
2 Operating mode
P pneumatic
E electro-pneumatic, not explosion-proof
3 Output signal
1 single-acting
2 double-acting
4 Input signal
0 0.2 - 1.0 bar
1 4 - 20 mA
2 0 - 20 mA
3 0.2 - 0.6 bar
4 0.6 - 1.0 bar
5 4 - 12 mA
6 12 - 20 mA
7 0 - 10 mA
8 10 - 20 mA
5 For lifting / turning movement
0 Stroke ≥ 20 mm
1 Stroke < 20 mm
3 Angle of rotation 90°
4 Angle of rotation 60°
6 Auxiliary pneumatic equipment
0 without
1 Manometer block
7 Limit switches
0 without
1 inductive, standard design SJ3.5N
2 inductive, safety circuit SJ3.5SN
3 inductive, direct-switching SJ3.5E2
8 Feedback
0 none
1 ./.
2 Potentiometer
3 Position transducer 3-wire
4 Position transducer 2-wire

ARCA Regler GmbH 5 Type key
Series 824 13 / 4609.2018 / 1.0
Example of type designation 824.E110-100
Positioner 824 – electro-pneumatic, not explosion-proof – single-action –
input signal 4 - 20 mA – for stroke ≥ 20 mm – with manometer block –
without limit value switch – without feedback

6 Exploded view ARCA Regler GmbH
14 / 46 Series 82409.2018 / 1.0
6 Exploded view
Illustration2: Detail drawing

ARCA Regler GmbH 7 Parts list
Series 824 15 / 4609.2018 / 1.0
7 Parts list
7.1 Positioner
Item Name
1 Mounting block
2 Control bushing
3 O-ring
4 Plug
5 Bayonet clips
6 Spring
7 Control piston
8 Piston lever
9 Diaphragm chamber
10 Spring suspension
11 Washer
12 Cylinder head bolt
13 Stop screw
14 Washer
15 Hex nut
16 Washer
17 Hex nut
18 Grip ring
19 Cylinder head bolt
20 Shaft
21 Circlip
22 Gear segment
23 Washer
24 Cam plate
25 Position indicator
26 Washer
27 Cylinder head bolt
28 Return plate
29 Return lever
30 Circlip
31 Zero point setting screw
32 Range setting screw
33 Shaft
34 Circlip
35 Ball bearing
36 Washer
37 Circlip
38 Changeover switch
39 O-ring
40 Cylinder head bolt
41 O-ring
42 Sealing plate
43 Cylinder head bolt
44 I/P module (standard)
45 Terminal set
46 Cylinder head bolts
47 Cable gland
48 Cover
49 Spacer screw
50 Spacer screw
51 Cover

7 Parts list ARCA Regler GmbH
16 / 46 Series 82409.2018 / 1.0
52 Cylinder head bolt
53 Screw plug
54 Earthing block
55 Lug
56 Spring lock washer
57 Cylinder head bolt
58 Earthing block
59 Lug
60 Spring lock washer
61 Cylinder head bolt
62 Control wire
63 Plain bearing
64 Screw plug
65 Screw plug
66 Dirt strainer
80 Limit value transmitter module
81 Cylinder head bolt
82 Cylinder head bolt
83 Washer
84 Cylinder head bolt
85 Limit value transmitter
86 Vane
87 Terminal set
90 Feedback module
91 Potentiometer
92 Position transducer
93 Washer
94 Cylinder head bolt
100 O-ring
101 Manometer block
103 Cylinder head bolt
105 O-ring
106 Mounting block
107 O-ring
108 I/P module (pressure-resistant)
109 Cylinder head bolt
110 O-ring

ARCA Regler GmbH 8 Description
Series 824 17 / 4609.2018 / 1.0
8 Description
8.1 Function and structure
▪ The positioner operates in accordance with the force comparison
principle and controls the position of actuators proportionally. The
signal air pressure at the input is converted into force by a diaphragm
in the diaphragm chamber (9) and compared with the return force of
the spring (6). At force equilibrium the positioner is in the steady
state. If the input pressure increases, the piston lever (8) is deflected
upwards so that the piston (7) is also raised. Supply air now flows via
the output into the pneumatic actuator, as a result of which it is
moved (downwards in the case shown). The pretension of the return
spring (6) is thereby increased via the lifting or rotary lever, the cam
plate (24) and the return lever (204). This takes place until the spring
force and the diaphragm are in equilibrium (steady state). Actuator
stroke and input signal pressure are thus correlated in accordance
with the cam plate contour. If the input signal falls, this has the re-
verse effect on the valve stroke. The piston moves downwards, shuts
off the supply air and vents the pneumatic actuator via the vent hole
in the piston bushing of the positioner. As a result of this the actuator
changes its position towards the original position.
▪ The functional sequence is the same with the double-action position-
ers, however the piston now controls two outputs. If the piston is de-
flected upwards it vents the output y2, while supply air flows in
through the output y1. The relationships at the outputs y1 and y2 are
the opposite when the piston lever moves downwards.
▪ The actuation speed of the cylinder can be regulated in both direc-
tions by additionally adjustable throttle check valves in the actuation
signal lines Y1 and Y2 to be provided by the customer. As a result of
this a more or less strong fixation of the cylinder actuator is also
achieved asymmetrically.
▪ In the case of the I/P module the impressed DC current I flows
through a fixed coil (44.1) as the input signal. This magnetises a
magnetically soft yoke (44.2). The field lines of this system exposed
at an air gap (44.3) exert a force proportional to the input current on
a small magnet (44.4) that is made of a highly coercive alloy. To-
gether with a baffle plate (44.5) the small magnet forms the rotary
system of the device. The impact plate covers a nozzle (44.6) to a
greater or lesser extent, the air from the nozzle exerting a resetting
force that is in equilibrium with the force at the magnet. The nozzle is
provided via a throttle (44.7) with air from the output of the control
part (44.8), which is influenced by the change in pressure in front of
the nozzle. Thus a linear correlation between the electrical input sig-
nal and the pneumatic output signal exists.
▪ Split ranges are used if, for example, two actuators with positioners
in different control ranges are to be controlled by one controller. One
valve would operate with the input signal range 0.2 – 0.6 bar and the
other with the split range 0.6 – 1.0 bar. The split ranges differ by dif-
ferent springs, which are marked in colour.

8 Description ARCA Regler GmbH
18 / 46 Series 82409.2018 / 1.0
Illustration3: Functional description
8.1.1 Cam plate
The cam plate (24) of the positioner has three characteristics, which are
designed for a 60° angle of rotation equivalent to a 100% stroke or a 90°
angle of rotation for a 90° opening angle with rotary valves. For the basic
version, the linear curve (no. 1 in fig. 1) is provided normally. The on/off
curve (no. 2) and the equal percentage curve (no. 3) are also shown in
this diagram.
Figs. 1 and 2 show how these curves affect the flow rate of valves with
different opening characteristics. The linear curve (no. 1) linearly assigns
the valve stroke to the input signal, i.e. the input signal is mapped dir-
ectly to the valve stroke so that the effect of the valve's own opening
characteristic is retained. The use of the curves (nos. 2 & 3) offers the
possibility to change the effect of valve characteristics.
Fig. 1 Fig. 2 Fig. 3
Valve characteristics Flow characteristics Flow characteristics
depending on the input signal
with various cam plates
with various cam plates and
equal-percentage valve cone
depending on the input signal
with various cam plates and
linear valve cone depending
on the input signal

ARCA Regler GmbH 9 Installation
Series 824 19 / 4609.2018 / 1.0
9 Installation
Check whether the desired principle of operation - "normal" or "inverted"
- is set correctly. To do this, look at the rear side of the positioner and
check the setting. If it should be necessary to change the setting, refer to
the chapter [12.1] Normal / Inversion "Configuration".
9.1 Safety instructions for assembly
CAUTION
Improper installation
Improper installation can result in damage to the device, its destruction
or the impairment of its function.
Ascertain that the device shows no visible signs of damage each time
before installing it.
Ascertain that the process connections are clean and that suitable seals
and cable glands are used.
Install the device using suitable tools.
CAUTION
Mechanical impact
It is essential that the following sequence is observed during installation
in order to avoid injury or mechanical damage to the positioner/mounting
kit:
► Mechanically mount the positioner
► Connect the pneumatic auxiliary energy
► Connect the auxiliary electrical energy supply
► Carry out the commissioning procedure
ATTENTION
The device protection class becoming null and void
Damage to the device due to open or improperly closed housing. The
protection class specified on the nameplate is no longer guaranteed.
CAUTION
Humid environment/dry compressed air
If the environment is humid, mount the positioner in such a way that
there is no chance of the control axis freezing (getting stuck) at low am-
bient temperatures.
Make sure that water does not enter an open housing or threaded joint.
If the positioner cannot be immediately and permanently mounted and
connected on site, it is possible for water to enter.
In general, only dry compressed air may be used to operate the posi-
tioner. Also refer to the chapter [16.2] Data for the basic device. You
should therefore make use of the usual water separators. In extreme
cases it may be necessary to use an additional dryer. The use of dryers
is particularly important if you operate the positioner at low ambient tem-
peratures. When mounting on the valve block, set the purging air switch
above the pneumatic connections to the "OUT" position.

9 Installation ARCA Regler GmbH
20 / 46 Series 82409.2018 / 1.0
9.2 Mounting a linear actuator
9.2.1 Installation according to DIN/IEC 534 T6 (NAMUR)
Refer also to fig. 5 "Installation 824/Namur":
▪ Seal the actuation pressure output A36 (M8 thread) on the rear side of
the positioner with the blanking plug (53).
– Also refer to the chapter [10] Pneumatic connection.
▪ Mount the spring wire (201) on the drive lever (200) in accordance
with fig. 4.
–NOTICE!The version ("N" or "I") is visible on the cam plate (24).
▪ Mount the drive lever (200) on the stroke indicator using cylinder
head bolts (203).
▪ Mount the stroke setting screw (205) with the washer (206) on the
pivot lever (204) using nut (207).
–NOTICE!Observe the stroke scale on the pivot lever (204)!
▪ Mount the pivot lever (204) on the positioner using the nut, bolt and
spring lock washers (208-210).
▪ Bolt the mounting plate (231) to the positioner with the spring lock
washers (234) and bolts (235).
▪ Position the positioner against the actuator such that the stroke set-
ting screw (205) protrudes into the slot of the drive lever (200).
– Refer here to fig. 4.
▪ Mount the complete positioner with mounting plate (231) on the cast
iron or pillar yoke according to fig. 5.
Cam plate N (normal) Cam plate I (inverted)
Illustration4: Drive lever
Table of contents