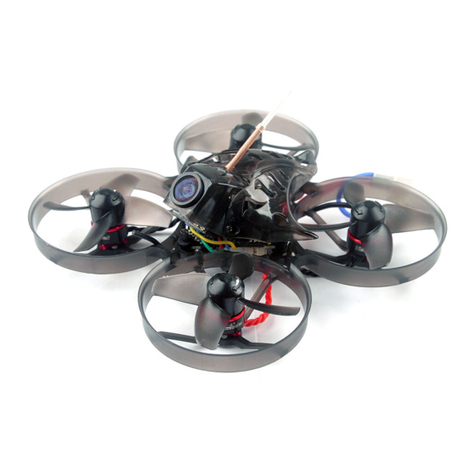
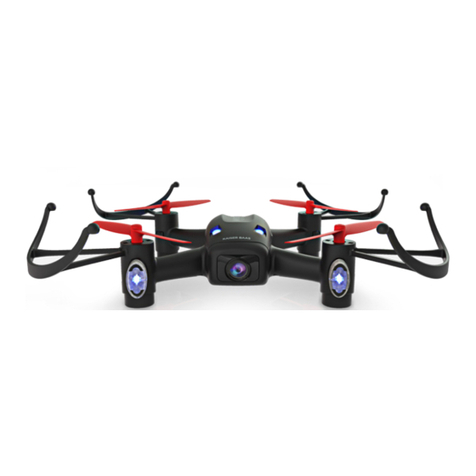
Arcade Pico CAM 2.0 User manual

User Manual
All trademarks are acknowledged as the property of their respective owners.
Unless otherwise stated their use does not imply that the trademark owner
is aliated with Kondor or endorses the products herein.
Contents may vary to image shown.
JB. 6004 -A / ARCPCM20 / Made in China / © kit: is a trademark of Kondor Limited, 2017.
Christchurch, Dorset, BH23 4FL, UK
Please recycle this packaging responsibly.
Do not dispose of Lithium coin cell batteries with general waste.
Please return it to battery recycling collection point.
Your product and batteries must be recycled or disposed of properly.
Products showing the ‘Crossed Through’ wheelie bin symbol must be recycled separately from
household waste at the end of their useful life. Please DO NOT dispose of this appliance in normal
household waste. Your local appliance retailer may operate a ‘take-back’ scheme when you are ready to
purchase a replacement product, alternatively contact your local government authority for further help
and advice on where to take your appliance for recycling.

23
Contents
Box contents 3
Pico Cam 2.0 functions 4
Controller functions 6
Pre-ight preparation
Charging the batteries 8
Remote controller 9
Surroundings 10
Replacing the blades 11
Flying your Pico Cam 2.0 12
Landing your Pico Cam 2.0 13
Emergency stop 13
Basic ight controls 14
Trimming the Drone 15
Auto Trim calibration 16
Speed settings 18
Flips and rolls 19
Return home 21
Headless mode 23
Using the camera 25
Troubleshooting 25
Safety information 29
Maintenance 31
Specications 32
Please read this manual carefully before use.
Box contents
• Pico Cam 2.0 Drone
• Battery
• Remote controller
• USB charging cable
• 4 x Blade guards
• 4 x Spare blades
• Screwdriver
• User manual

45
Pico Cam 2.0 functions:
1) Blade
2) Blade guard
3) LED indicators
4) Battery port
5) Power switch
6) Battery cradle
7) Micro SD Card Slot*
8 ) C a m e r a
*Micro SD card not included
ONOFF
OFF ON
1
ONOFF
OFF ON
2
3
ONOFF
OFF ON
ONOFF
OFF ON
ONOFF
OFF ON
side view
4
7
67
8

67
ONOFF
OFF ON
24 23
ONOFF
OFF ON
9) Photo/Video button
10) One key take-o / Land / Emergency stop
11) Left throttle / Speed setting / Return home
12) Trim button (left spin)
13) Trim button (right spin)
14) Power LED indicator
15) Drone cover
16) Battery cover
17) Trim button (forward)
18) Trim button (backwards)
19) Right throttle / Flip / Headless mode
20) Trim button (right)
21) Trim button (left)
22) Function LED indicator
23) Accessories cover
24) Power switch
Controller functions:
9
10
11
12 18
20
19
13 17
22
21
16
14
15

89
Remote controller
1) Carefully remove the Battery cover (16), using the Screwdriver provided
and insert 4 x AA batteries*, according to indicated polarity. Then replace
the back cover of the controller
2) Make sure the batteries (AA) are correctly installed under the supervision of
an adult. Refrain from mixing old and new batteries as well as dierent types
*Note: Batteries are not included.
Pre-ight preparation
Charging the battery
1) Ensure the battery is removed from the Drone
2) Using the supplied USB charging cable, connect one end to the
battery and connect the USB end to a power supply
3) An indicator light on the USB charging cable will turn ON to
indicate it is charging
4) Charge for 45 minutes to ensure the battery is fully charged
5) When fully charged, the indicator light will turn OFF
6) Repeat this process for recharging the battery each time
Note: We recommend charging the battery outside of the Drone to reduce heat build.
High temperatures can damage both the Drone and the battery.

10 11
A
A
AB
B
B
ONOFF
OFF ON
ONOFF
OFF ON
ONOFF
OFF ON
Surroundings
• The Pico Cam 2.0 Drone is fast, so when taking o, move the
Left throttle (11) upwards gradually to prevent rising too high, too quickly
• To avoid injury or damage, the Drone should not be own within
2 metres / 7 feet from people or objects
• To reduce the risk of damaging the Drone, objects or injuring other
people, we recommend ying outside with plenty of clear/open space
• To prevent irreparable damage, keep the Drone dry and away
from water. Do not y in rainy conditions
• Avoid ying the Drone in strong wind, especially at high altitude,
to avoid the Drone drifting away
• Always keep the Drone in clear sight when ying
Finally, before flying, check the Drone for any signs of damage
(e.g. broken blade). If damage is found, do not y the Drone until
repairs have been made, as this may result in further damage.
Replacing the blades
When replacing blades, take care to ensure that they are placed onto the
correct motor as shown in the diagram (using the screwdriver provided to
remove and replace the holding screw).
There are two Type A blades, and two Type B blades on the Drone.
The blades are labelled A or B, as are each motor on the Drone to help
match these up.

12 13
Flying your Pico Cam 2.0
Taking o
1) To start the Drone motors, move the Left throttle (11) to the bottom left
corner and the Right throttle (19) to the bottom right corner, at the
same time (as shown in the diagram)
2) Next, to raise the Drone, gently push the Left throttle (11) upwards.
The Drone will take off quickly, so be careful to only push the
Left throttle (11) slightly upwards, whilst ensuring the Drone has enough
clearance above it. Alternatively, once the motors have started, you can
press One key take-o (10), and the Drone will take o
ONOFF
OFF ON
Landing
To land the Drone, pull the Left throttle (11) downwards. Once the Drone lands
on the surface, the motors will automatically turn OFF. You can also land the
Drone by pressing One key land (10), and the Drone will land itself.
ONOFF
OFF ON
Emergency stop
If the Drone has crashed and/or has become stuck on an object, you can
quickly turn o the motors by holding down Emergency stop (10). If the
Drone becomes stuck and the motors are allowed to continue spinning,
this will cause damage to the blades and possibly irreversible damage to
the motors.
Note: When the Drone’s LED indicators (3) begin to ash, it is indicating that the
battery is running low. You should y the Drone back to where you are and land as
soon as possible. The Drone will automatically begin to descend, so ensure you direct
the Drone to a safe landing place.

14 15
Backward
Trim
Forward
Trim
ONOFF
OFF ON
ONOFF
OFF ON
ONOFF
OFF ON
ONOFF
OFF ON
Forward
Backward
Backward trimmer
Forward trimmer
Up/Down
Left spin/
Right spin
Forwards/
Backwards
Left/Right
Basic ight controls
ONOFF
OFF ON
ONOFF
OFF ON
ONOFF
OFF ON
ONOFF
OFF ON
[continued…]
Trimming the drone
Sometimes you will find the Drone will start to drift in a particular
direction of its own accord. To correct this, you can manually ‘trim’
the Drone to allow it to adjust its flight.
Below shows you how to rectify the drifting (Black arrows indicate
drift direction; the white arrows indicate the corrective trim direction):

16 17
Note: some manual trimming may be required after performing this function.
See Trimming the Drone for further instructions on how to do this manually.
Leftside Trim
Rightside
Trim
Left spin Trim
Right spin
Trim
Leftside trimmer
Rightside trimmer
Left spin trimmer
Right spin trimmer
ONOFF
OFF ON
ONOFF
OFF ON
ONOFF
OFF ON
ONOFF
OFF ON
ONOFF
OFF ON
ONOFF
OFF ON
ONOFF
OFF ON
ONOFF
OFF ON
ONOFF
OFF ON
ONOFF
OFF ON
Auto Trim calibration
You can use this function to reset the Drone. Ensure the Drone
is on a level surface before Auto Trimming.
Push both the Left throttle (11) and Right throttle (19) to the
bottom left corners, at the same time. Once the lights stop
flashing, the calibration is complete.
ONOFF
OFF ON

18 19
Flips and rolls
You can perform flips and rolls with your Drone in any of the speed
settings. In order to safely perform these manoeuvres, ensure the
Drone maintains a clearance of minimum 1 metre above and below
the Drone, and from any obstacles.
To roll to the left: Press down the Right throttle (19) so that it clicks
and then push it to the left.
ONOFF
OFF ON
To roll to the right: Press down the Right throttle (19) so that it clicks
and then push it to the right.
ONOFF
OFF ON
Speed settings
The Pico Cam 2.0 has 3 different flight speeds to choose from; low,
medium and high. To select your desired speed, press down the
Left throttle (11) so that it clicks. The controller will then indicate
which speed mode you have selected in the following ways:
Low speed: the controller will beep once, and the
Power LED indicator (14) will flash once.
Medium speed: the controller will beep twice, and the
Power LED indicator (14) will flash twice.
High speed: the controller will beep three times, and the
Power LED indicator (14) will flash three times.
[continued…]

20 21
[…continued] To do a front flip: Press down on the Right throttle (19)
so that it clicks and then push it upwards.
ONOFF
OFF ON
To do a back flip: Press down on the Right throttle (19) so that it clicks
and then push it downwards.
ONOFF
OFF ON
Return home
This function can be used as a tool to help you retrieve your Drone by
sending it in a backwards direction from where it started facing.
When the Drone rst takes o, the way it is facing will act as its front
direction as default.
For example, if you take o with the Drone in front of you and facing
forwards, when you press the Left throttle (11) for 3 seconds, the Drone
will y in a backwards direction.
Take o Move forward Press return home Drone returns
ONOFF
OFF ON
ONOFF
OFF ON
ONOFF
OFF ON
[continued…]

22 23
[…continued] Return home
The Drone remembers which direction was originally forward. So, if you
were to take o and then spin the Drone 90 degrees to face to the right,
when you press the Left throttle (11) for 3 seconds, the Drone will y to
its right.
Set ‘forward’
direction
Fly Drone to face a
dierent direction
Press one key
return button
Drone moves backwards
from set forward
direction
ONOFF
OFF ON
ONOFF
OFF ON
ONOFF
OFF ON
Note: this Drone does not have GPS and so cannot return to its starting position.
Headless mode
When rst turning on the Drone, it will start with Headless mode turned o.
This means that when you change direction on the controller, the Drone will
respond by moving in relation to the way it is facing. E.g.:
ONOFF
OFF ON
Drone facing right Select backwards
direction
Drone moves backwards from
way its facing
ONOFF
OFF ON
Sometimes this can be tricky to y the Drone, especially when the Drone is
facing a dierent way to you. To help make ying the Drone easier, you can turn
on Headless mode. This mode means that the Drone will y in relation to you.

24 25
Turning on Headless mode
1. Place the Drone in front of you, facing forward
2. When the Drone takes-o it will set the way it is facing as the forward direction
3. Turn on Headless mode by pressing down the Right throttle (19)
for 3 seconds
4. The Drone will now respond to your change of direction commands in relation
to which way was set as forward, regardless of which way it now faces
ONOFF
OFF ON
ONOFF
OFF ON
ONOFF
OFF ON
Press
Headless mode
Drone can face
any direction
Select backwards
direction
Drone moves
backwards
Take o
To turn OFF Headless mode, hold down Right throttle (19) for 3 seconds.
Using the camera
1. Whilst the Drone is turned OFF, insert a Micro SD card (not included)
into the Micro SD Card Slot (7)
2. Turn on the Drone by putting the Power switch (5) in the ON position
3. To take a photo, press Photo/Video (9) once. The Function LED
Indicator (22) will ash once to indicate a photo has been taken
4. To start recording a video, hold Photo/Video (9) for 2 seconds.
The Function LED Indicator (22) will continually ash whilst recording.
To stop recording, hold down Photo/Video (9) for 2 seconds
5. The photos and videos will automatically save on to your Micro SD Card
6. To view your recorded les, turn o the Drone by putting the Power
switch (5) into the OFF position and remove the Micro SD Card.
Note: You will require a Micro SD Card Reader (not included) to be able to transfer
the les onto a PC/laptop and view your saved les.
Note: Your Micro SD Card will need formatting before use. Please refer to your
PC/laptop instructions on how to do this.
Note: The Pico Cam 2.0 records using FAT32 format. We recommend using a
Micro SD Card of up to 64 GB, and Class 8 and above.

26 27
Troubleshooting
The Drone doesn’t activate and Power LED indicator (14) keeps ashing.
There is not enough battery power in either the Drone or the controller.
Recharge the Drone battery and try again. If the Drone still won’t y,
change the batteries in the Controller.
The Drone’s blades are turning but the Drone doesn’t fly.
Either the blade(s) has been damaged (and so the Drone is not able to y)
or there is not enough battery power in the Drone and will need recharging.
Change any damaged blades using the spares included in the box and/or
recharge the battery.
The Drone doesn’t fly in the direction that it should.
This is usually because one or more of the blades have been damaged.
If a blade is damaged, replace it with one of the spare blades. It is also
advisable to reset the Drone by turning OFF and ON; returning back to
its default ight mode. It is also suggested to reset the gyroscope and
‘compass’ using the re-calibration methods mentioned in the manual.
[continued…]
Remote controlled aircraft: responsible ying
There are certain laws that you need to follow when you are using
your Drone – for your own safety, and the safety of others:
1. When using the Drone, you are completely responsible for it
2. You should always be able to see your Drone when you are ying it
3. As you are in control of the Drone, it is up to you to ensure that it does
not crash into other people, or other objects
4. Residential streets and town centres are examples of congested areas.
Drones must stay away from congested areas by at least 150 metres
5. Your Drone must be at least 50 metres away from any vehicles,
buildings or structures, or any person whether alone or in a group –
irrespective of the height of your Drone
6. The Civil Aviation Authority (CAA) must be informed if you intend to use
any camera footage from your Drone to earn money
7. You should not y your Drone near any aireld or airport, or near any
power installations such as pylons

28 29
[…continued] Remote controlled aircraft: responsible ying.
Remember: UK Aviation Law is there to protect you and everyone else,
and there are severe repercussions if you break these laws, including the
potential of criminal prosecution.
For more details on this, and information about how to y your Drone
safely, visit: www.caa.co.uk/uas
Please check the local regulations and legislations before you y your Drone.
[continued…]
Safety information
• This product is intended for outdoor use (subject to suitable
ying conditions)
• Only use the USB cable provided
• The control distance will be reduced if the Drone or controller is not
fully charged
• If the Drone becomes damaged, stop using it immediately
• Always remove the batteries from the Drone and the controller
before storage
• Do not touch the Drone whilst ying or the blades are turning, to avoid
injury to yourself
• Do not touch the motor during or straight after use, to avoid
burning yourself
• Ensure the area is clear of people and obstacles before ying the Drone
• Not suitable for children under 14 years old. Children should be
supervised by an adult at all times

30 31
Maintenance
Care for your Arcade Drone
Please DON’T
• Get the Arcade Drone wet or use near water
• Open up the Arcade Drone as there are no user serviceable parts inside
• Use any other mains adaptor than the one supplied
• Expose the Arcade Drone to extreme temperatures or rapid changes of
hot to cold or vice versa
Please DO
• Clean the Arcade Drone with a soft dry cloth and no detergents
• Check the Drone and accessories for damage before each use.
If damage is found, do not use the Drone
[…continued] Safety information
• Small parts can pose a choking hazard; keep out of reach of children
aged less than 36 months
• Ensure replacement blades are attached correctly to avoid damage to
the user or property
• Do not dispose of parts in your normal recycling bin. All parts should be
disposed of at your local recycling centre
• Do not dispose of batteries in the bin. These must be taken to your
nearest used battery recycling collection point

32 33
Specications
Battery type and capacity 3.7 V, 150 mAh, LiPo
Charging time up to 45 minutes
Play time up to 5.5 minutes
Camera specications 640 x 480 @ 30 fps
Frequency 2.4 GHz
Controller batteries 4 x AA (not included)
Dimensions H30 x W90 x D90 (mm)
Weight 19 g
Operation distance up to 50 m
If you experience any unusual issues with your Arcade Drone, bring it down
safely, turn o the controller and the Drone immediately.
The use and operation of this Drone is beyond our control. Warranty of the
Drone is limited to defects caused by faulty manufacture or defects in
materials only.
Please ensure you operate this product with total care and attention at all
times. We cannot be held responsible for any damage whatsoever that
may be caused to you or anyone else.
This does not aect your statutory rights.
Hereby, Kondor Ltd declares that the radio equipment type, Pico Cam 2.0
ARCPCM20, is in compliance with Directive 2014/53/EU.
The full text of the EU declaration of conformity is available at the following internet
address: http://kondor.co.uk/product-documents

34
We apologise for any inconvenience caused by minor inconsistencies in these instructions, which may
occur as a result of product improvement and development.
Please do not attempt to open this product. There are no user serviceable
parts inside, in particular if your product has an embedded, non-replaceable
battery, do not attempt to access or remove the battery as this may cause
personal injury and will damage the product.
Making any attempt to open the product or carry out repair voids any and
all warranties.
We hope you now have all the information you need to get started, but if
you’re having problems with anything, please feel free to contact us at:
support@kondor.co.uk
Please quote the code ARCPCM20 to receive help specically for this Drone.
Table of contents
Other Arcade Drone manuals
