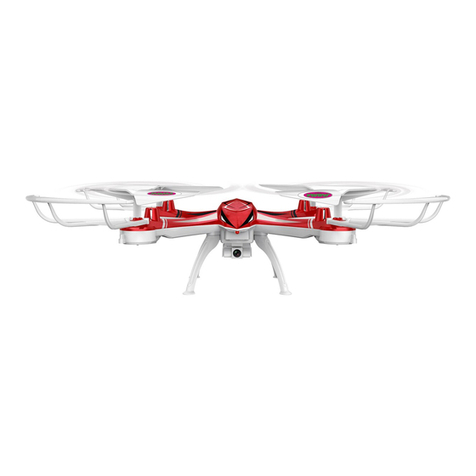
Arcade Orbit Overwatch Drone User manual

User manual
Please recycle this packaging responsibly.
All trademarks are acknowledged as the property of their respective owners.
Unless otherwise stated their use does not imply that the trademark owner
is aliated with Kondor or endorses the products herein.
Contents may vary to image shown.
JB. 5925-a / ARCDC6 / Made in China / © Arcade is a registered trademark of Kondor Ltd 2017.
Christchurch, Dorset, BH23 4FL, UK
ORBIT
OVERWATCH

2 3
Please read this manual carefully before use
Box contents
• Orbit Overwatch Drone and battery
• Remote controller
• USB charging cable
• 4 x Blade guards
• 4 x Spare blades
• Screwdriver
• User manual
Orbit Overwatch functions
1) Propeller
2) Propeller guard
3) LED indicator
4) Landing feet
5) Power switch
6) Camera port
7) Micro SD card slot*
8) 720p camera
9) Camera bracket
10) Battery cover
*Micro SD card not included
CAM
OFF/ON
5
7
8
9
10
6
CAM
OFF/ON
1
3
2
4

4 5
CAM
OFF/ON
Pre-ight preparation
Charging the battery
Ensure the battery is removed from the Drone. Using the supplied USB charging cable, connect one end to the battery
and connect the USB end to a power supply. An indicator light on the USB charging cable will turn ON to indicate
it is charging. Charge for 45 minutes to ensure the battery is fully charged. When fully charged, the indicator light will
turn OFF. Repeat this process for recharging the battery each time.
Note: We recommend charging the battery outside of the Drone to reduce heat build. High temperatures can
damage both the Drone and the battery.
Remote controller
1. Carefully remove the Battery cover (31), using the Screwdriver provided and insert 3 x AA batteries*, according to
indicated polarity. Then replace the back cover of the controller
2. Make sure the batteries (AA) are correctly installed under the supervision of an adult. Refrain from mixing old and
new batteries as well as dierent types
*Note: Batteries are not included.
Surroundings
• The Orbit Overwatch is fast, so when taking o, move the Left stick (13) upwards gradually to prevent rising
too high, too quickly
• To avoid injury or damage, the Drone should not be own within 2 metres/7 feet from people or objects
• To reduce the risk of damaging the Drone, objects or injuring other people, we recommend ying outside
with plenty of clear/open space
• To prevent irreparable damage, keep the Drone dry and away from water. Do not y in rainy conditions
• Avoid ying the Drone in strong wind, especially at high altitude, to avoid the Drone drifting away
• Always keep the Drone in clear sight when ying
• When ying using the VR Headset, ensure the area around you is clear of obstacles/hazards
Drone
Finally, before ying, check the Drone for any signs of damage (e.g. broken blade). If damage is found, do not y
the Drone until repairs have been made, as this may result in further damage.
When replacing blades, take care to ensure that they are placed onto the correct motor as shown in the diagram
(using the screwdriver provided to remove and replace the holding screw). There are two Type A blades, and two
Type B blades on the Drone. The blades are labelled A or B, as are each motor on the Drone to help match these up.
11) Power button
12) Speed button
13) Left stick (throttle)
14) Headless mode
15) LED ON/OFF switch
16) Emergency stop
17) Trim button (left spin)
18) Photo button
19) One key return
20) Trim button (right spin)
21) LED indicator
22) Trim button (left)
23) Video button
24) Trim button (backwards)
25) Trim button (right)
26) One key land
27) One key take-o
28) Trim button (forwards)
29) Right stick (rudder)
30) Flip button
31) Battery cover
Remote controller functions
CAM
OFF/ON
11
12
13
15 27
29
30
16 26
14
17 18
19
20 22
23
24 28
25
21
31
A1 B1
B2 A2
CAM
OFF/ON

67
Flying your Orbit Overwatch Drone
Controller commands
CAM
OFF/ON
Headless
ying (14)
Left trim
(22)
Backward
trim (24)
Forward trim (28)
Flip (30)
Speed button (12)
Low – 1 beep
Med – 2 beeps
High – 3 beeps
Left stick/Throttle (13)
Ascend/Descend
Horizontal spin
Right stick/Rudder (29)
Forward/Backward
Left/Right
Take o (27)
Landing (26)
Emergency stop (16)
Left spin trim (17)
One key
return (19)
Right spin
trim (20)
Right
trim (25)
Taking o
To start the Drone motors, move the Left stick (13) to the bottom left corner and the Right stick (29) to the bottom
right corner, at the same time (as shown in the diagram).
CAM
OFF/ON
CAM
OFF/ON
CAM
OFF/ON
Next, to raise the Drone, gently push the Left stick (13) upwards. The Drone will take o quickly, so be careful to
only push the Left stick (13) gently upwards, whilst ensuring the Drone has enough clearance above it.
Alternatively, once the motors have started, you can press the One key take-o button (27), and the Drone will take o.
Landing
To land the Drone, pull the Left throttle (13) downwards. Once the Drone lands on the surface, the motors will automatically
turn OFF. You can also land the Drone by pressing the One key land button (26), and the Drone will land itself.
Emergency stop
If the Drone has crashed and/or has become stuck on an object, you can quickly turn-o the motors by holding down
Emergency stop (16). If the Drone becomes stuck and the motors are allowed to continue spinning, these will cause
damage to the blades and possibly irreversible damage to the motors.
*Note: Only use this feature if absolutely necessary to avoid damage or injury. DO NOT use this feature to land the
Drone. The motors will cut out if in ight, meaning the Drone will fall from the air and cause damage to itself, and
anything below it.
Connecting your Drone and Controller
Unlock the Drone
1. Turn on the Controller by pressing the Power button (11)
2. Place the Drone on at, level surface, and then turn on the Drone using the Power switch (5)
3. Push the Left stick (13) up to the top position and then pull down to the bottom position
4. A beep will sound and the LED indicators (3) on the Drone will stop ashing; indicating that it has been unlocked

8 9
Trimming the Drone
Sometimes you will nd the Drone will start to drift in a particular direction of its own accord. To correct this, you can
manually ‘trim’ the Drone to allow it to adjust its ight.
Below shows you how to rectify the drifting (black arrows indicate drift direction; the white arrows indicate the
corrective trim direction):
Left/Right spin trim
CAM
OFF/ON
CAM
OFF/ON
CAM
OFF/ON
Leftward/Rightward trimming
CAM
OFF/ON
CAM
OFF/ON
Forward/Backward trimming
CAM
OFF/ON
CAM
OFF/ON
Auto Trim calibration
You can use this to function to reset the Drone. Ensure the Drone is on a level surface before Auto Trimming.
Note: some manual trimming may be required after performing this function. See Trimming the Drone for further
instructions on how to do this manually.
Push both the Left stick (13) and Right stick (29) to the bottom left corners, at the same time. Once the lights stop
ashing, the calibration is complete.
CAM
OFF/ON
CAM
OFF/ON
CAM
OFF/ON
Speed settings
The Orbit Overwatch has 3 dierent ight speeds to choose from; low, medium and high. To select your desired
speed, press down the Speed button (12). The Controller will then indicate which speed mode you have selected
in the following ways:
Low speed: The controller will beep once
Medium speed: The controller will beep twice
High speed: The controller will beep three times
Basic ight controls
Ascend/Descend
CAM
OFF/ON
CAM
OFF/ON
CAM
OFF/ON
CAM
OFF/ON
Left spin/Right spin
CAM
OFF/ON
CAM
OFF/ON
CAM
OFF/ON
CAM
OFF/ON
CAM
OFF/ON
Forward/Backward
CAM
OFF/ON
CAM
OFF/ON
CAM
OFF/ON
CAM
OFF/ON
Leftward y/Rightward y
CAM
OFF/ON
CAM
OFF/ON
CAM
OFF/ON
CAM
OFF/ON
Note: When the Drone’s LED indicators (3) begin to ash, it is indicating that the battery is running low. You should y
the Drone back to where you are and land as soon as possible. The Drone will automatically begin to descend, so
ensure you give you direct the Drone to a safe place to land.

10 11
One key return
This function can be used as a tool to help you retrieve your Drone by sending it in a backwards direction from where
it started facing.
When the Drone rst takes o, the way its camera is facing will act as its front direction as default.
For example, if you take o with the Drone in front of you and facing forwards, when you press the One Key Return Button (19)
the Drone will y in a backwards direction:
Take o Move forward Press one key return Drone returns
CAM
OFF/ON
CAM
OFF/ON
CAM
OFF/ON
CAM
OFF/ON
CAM
OFF/ON
CAM
OFF/ON
The Drone remembers which direction was originally forward. So, if you were to take o and then spin the Drone
90 degrees to face to the right, when you press One key return (19), the Drone will y to its right:
Set ‘forward’ direction Fly drone to face dierent
direction
Press one key return Drone moves backwards
from set forward
direction
CAM
OFF/ON
CAM
OFF/ON
CAM
OFF/ON
CAM
OFF/ON
CAM
OFF/ON
CAM
OFF/ON
Note: This Drone does not have GPS and so cannot return to its starting position. The Drone will also not land itself;
you will still need to control the height of the Drone.
Flips
You can perform ips with your Drone in any of the speed settings. In order to safely perform these manoeuvres,
ensure the Drone maintains a clearance of minimum 3 metres above and below it and from any obstacles.
To perform one of these acrobatic moves, press the Flip button (30) and then move the Right stick (29) either UP
or DOWN depending on which direction you wish the Drone to ip.
Note: You will need to stabilize the Drone and adjust its height after it completes the manoeuvre.
Forward ip
CAM
OFF/ON
CAM
OFF/ON
CAM
OFF/ON
CAM
OFF/ON
Backward ip
CAM
OFF/ON
CAM
OFF/ON
CAM
OFF/ON
CAM
OFF/ON

12 13
Using the Camera
The Orbit Overwatch Drone can take photos and videos through the use of the controller and you can record your
photos and/or videos onto a Micro SD card (not included).
Recording photos and videos
If you wish to record onto a Micro SD card, please insert into the Camera (8) as shown:
1. To take a photo, press the Photo button (13) once
2. To record a video, press the Video button (23) to begin lming. To stop lming, press the Video button again (23).
The video will then automatically save to the Micro SD card
Reviewing photos and videos
To review your recorded content, you will need a Micro SD card reader.
Note: Before you remove the Micro SD card from the camera, ensure the Drone is powered OFF.
Headless mode
When rst turning on the Drone, it will start with Headless mode turned o. This means that when you change
direction on the controller, the Drone will respond by moving in relation to the way it is facing. E.g.
Drone facing right Select backwards direction Drone moves backwards
from the way its facing
CAM
OFF/ON
CAM
OFF/ON
CAM
OFF/ON
CAM
OFF/ON
CAM
OFF/ON
Sometimes this can be tricky to y the Drone, especially when the Drone is facing a dierent way to you. To help make
ying the Drone easier, you can turn on Headless mode. This mode means that the Drone will y in relation to you.
Turning on Headless mode
1. Place the Drone in front of you, facing forward
2. When the Drone takes-o it will set the way it is facing as the forward direction
3. Turn on Headless mode by pressing the Headless mode (14). You will hear a beep to indicate this mode has
been activated
4. The Drone will now respond to your change of direction commands in relation to which way was set as forward,
regardless of which way it now faces
Take o Press Headless mode Drone can face
any direction
Select backwards
direction
Drone moves
backwards
CAM
OFF/ON
CAM
OFF/ON
CAM
OFF/ON
CAM
OFF/ON
CAM
OFF/ON
CAM
OFF/ON
CAM
OFF/ON
CAM
OFF/ON
CAM
OFF/ON
To turn o Headless mode, simply press Headless mode (14).

14 15
Remote controlled aircraft: responsible ying
This drone is a toy, but that does not mean that you should not take care when you are ying it, both inside and outside.
If your drone has a camera attached, or it is being own for a commercial reason, the UK law states that your drone
will be treated like any other aircraft. This means that there are certain laws that you need to follow when you are
playing with your drone – for your own safety, and the safety of others:
1. When you play with the drone, you are completely responsible for it.
2. You should always be able to see your drone when you are ying it.
3. As you are in control of the drone, it is up to you to ensure that it does not crash into other people, or other objects.
4. Residential streets and town centres are examples of congested areas. Drones must stay away from congested
areas by at least 150 metres.
5. Your drone must be at least 50 metres away from any vehicles, buildings or structures, or any person whether
alone or in a group – irrespective of the height of your drone.
6. The Civil Aviation Authority (CAA) must be informed if you intend to use any camera footage from your drone to
earn money.
7. You should not y your drone near any aireld or airport, or near any power installations such as pylons.
Remember: UK Aviation Law is there to protect you and everyone else, and there are severe repercussions if you
break these laws, including the potential of criminal prosecution.
For more details on this, and information about how to y your drone safely, visit: www.caa.co.uk/uas
Your drone has a camera, which means that you also need to be aware of the Data Protection legislation that exists in the UK.
In accordance with Data Protection legislation (Data Protection Act 1998) consent should be obtained from any
individual who is the focus of a video recording in order to process his/her personal data fairly. Where a recording
involves individuals other than the main players, then, in some circumstances, the images of other individuals may
constitute personal data and the data protection regime may come into play, particularly where the video conveys
information of biographical signicance to the individual concerned. However, where lming takes place in a public
place, the fact that a passer-by is captured in the lm in the background and is able to be identied by individuals who
know him/her does not in itself make the image personal data and consent is unlikely to be required to put the video
on YouTube or incorporate it in an Open Educational Resource (OER).
If you want to read more about the Data Protection Act, or you want to learn more about how this aects you, go to
www.legislation.gov.uk/ukpga/1998/29/contents
Please check the local regulations and legislations before you y your drone.
Troubleshooting
The Drone doesn’t activate and LED Indicator (21) keeps ashing.
There is not enough battery power in either the Drone or the controller. Recharge the Drone battery and try again.
If the Drone still won’t y, change the batteries in the controller.
The Drone’s blades are turning but the Drone doesn’t y.
Either the blade(s) has been damaged (and so the Drone is not able to y) or there is not enough battery power in the
Drone and will need recharging. Change any damaged blades using the spares included in the box and/or recharge
the battery.
The Drone doesn’t y in the direction that it should.
This is usually because one or more of the blades have been damaged. If a blade is damaged, replace it with one of the
spare blades. It is also advisable to reset the Drone by turning OFF and ON; returning back to its default ight mode.
It is also suggested to perform the ‘Auto Trim’ function (as described in the manual) as this will reset the gyroscope.

16 17
Care for your Orbit Overwatch Drone
Please DON’T:
• Get the Arcade Drone wet to avoid irreparable damage
• Open up the Arcade Drone as there are no user serviceable parts inside.
• Use any other mains adaptor than the one supplied
• Expose the Arcade Drone to extreme temperatures or rapid changes of hot to cold or vice versa
Please DO:
• Clean the Arcade Drone with a soft dry cloth and no detergents
• Check the Arcade Drone and accessories for damage before each use. If damage is found, do not use the Drone
Safety information
• This product is intended for outdoor use (subject to suitable ying conditions)
• Only use the USB cable provided
• The control distance will be reduced if the Drone or controller is not fully charged
• If the Drone becomes damaged, stop using it immediately
• Always remove the batteries from the Drone and the controller before storage
• Do not touch the Drone whilst ying or the blades are turning, to avoid injury to yourself
• Do not touch the motor during or straight after use, to avoid burning yourself
• Ensure the area is clear of people and obstacles before ying the Drone
• Not suitable for children under 14 years old. Children should be supervised by an adult at all times
• Small parts can pose a choking hazard; keep out of reach of children aged less than 36 months
• Ensure replacement blades are attached correctly to avoid damage to the user or property
• Do not dispose of parts in your normal recycling bin. All parts should be disposed of at your local recycling centre
• Do not dispose of batteries in the bin. These must be taken to your nearest used battery recycling collection point

18 19
If you experience any unusual issues with your Arcade Drone, bring it down safely, turn o the controller and the
Drone immediately.
The use and operation of this Drone is beyond our control. Warranty of the Drone is limited to defects caused by
faulty manufacture or defects in materials only. Please ensure you operate this product with total care and attention
at all times. We cannot be held responsible for any damage whatsoever that may be caused to you or anyone else.
This does not aect your statutory rights.
Hereby, Kondor Ltd declares that the radio equipment type, Orbit Overwatch ARCDC6,
is in compliance with Directive 2014/53/EU.
The full text of the EU declaration of conformity is available at the following internet address:
http://kondor.co.uk/product-documents
Please do not attempt to open this product. There are no user serviceable parts inside, in particular if your product
has an embedded, non-replaceable battery, do not attempt to access or remove the battery as this may cause
personal injury and will damage the product.
Making any attempt to open the product or carry out repair voids any and all warranties.
We hope you now have all the information you need to get started, but if you’re having problems with anything, please feel
free to contact us at: support@kondor.co.uk. Please quote the code ARCDC6 to receive help specically for this drone.
We apologise for any inconvenience caused by minor inconsistencies in these instructions, which may occur as a result of product
improvement and development.
Battery capacity 650 mAh 3.7 V LiPo
Charging time up to 60 mins
Play time up to 8 mins
Frequency 2.4 GHz
Controller batteries 3 x AA 1.5 V (not included)
Drone size H100 x W370 x D370 (mm)
Drone weight 135 g
Operation distance (controller) up to 100 m
Maximum SD card capacity 32 GB
Camera resolution 1280 x 720p (30 fps)
Specications
Table of contents
Other Arcade Drone manuals
