Archos TV+ User manual

Annex No.5
Page 1 of 81
User Manual
(User Manual ARCHOS TV+ V0.9)
ARCHOS TV+ (model54205) WIFI

Dear Customer,
Thank you for choosing this ARCHOS product. We hope that you will enjoy
using it and that it will give you satisfaction for many years to come.
Please do register your product on our website (www.archos.com/register) to
ensure that you get access to our help line and to be informed of free software
updates for your product.
Wishing you the best multimedia experience,
The ARCHOS Team.
All the information contained in this manual was correct at the time of
publication. However, as we are often updating and improving our prod-
ucts, your device’s software may have a slightly different appearance or
modified functionality than presented in this manual.
ENGLISH
Please visit www.archos.com/manuals to download the latest version of this manual.
TV+
ENGLISH USER MANUAL Version 0.9
Entertainment
way

MANUAL
V0.9
TV+ TABLE OF CONTENTS > P. 2
TABLE OF CONTENTS
INTRODUCTION........................................................................................4
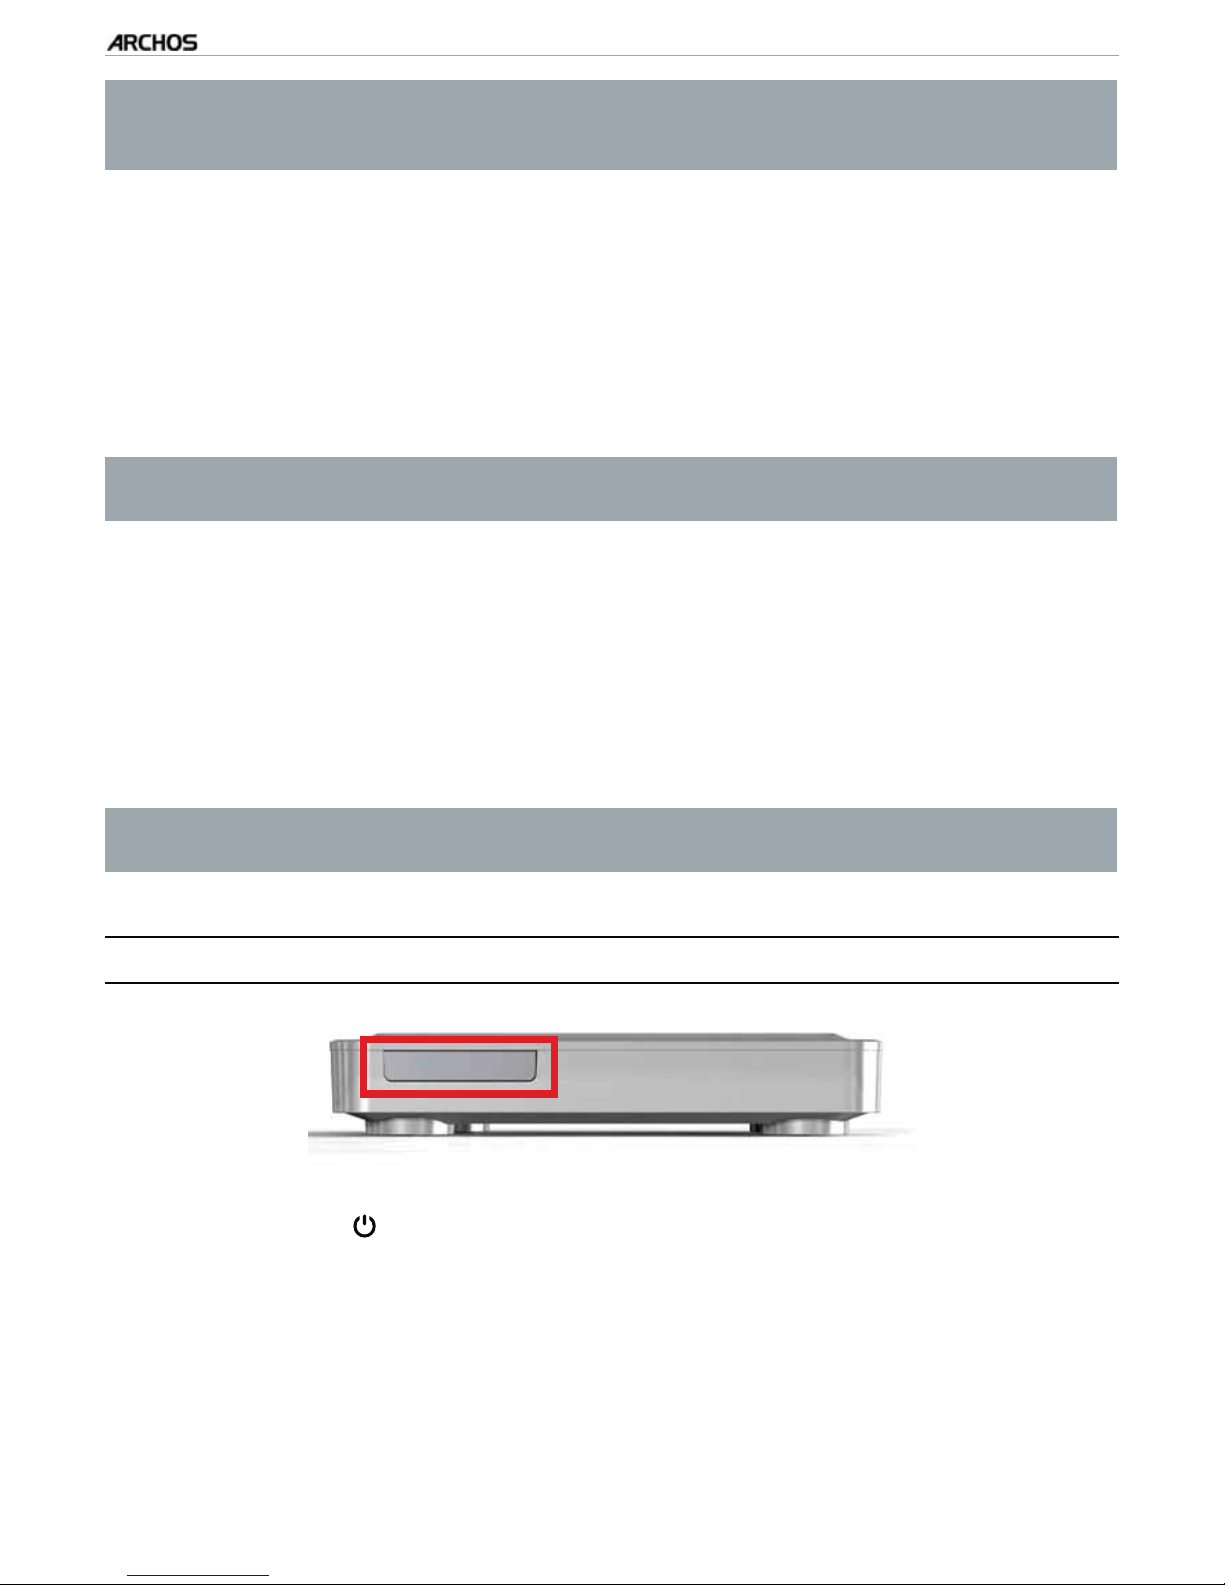
ARCHOS DESCRIPTION ......................................4
CONNECTING THE ARCHOS TO YOUR TV .........................7
TURNING THE ARCHOS ON/OFF ................................8
USING THE ARCHOS INTERFACE ...............................9
CHANGING THE LANGUAGE ..................................10
PRODUCT CARE ...........................................11
1. PLAYING VIDEO .................................................................................12
1.1 BROWSING THROUGH YOUR VIDEOS ........................12
1.2 VIDEO PLAYBACK .......................................13
1.3 VIDEO PLAYER SETTINGS.................................15
1.4 PUTTING VIDEOS ONTO YOUR ARCHOS ......................16
1.5 RECORDING VIDEO ......................................17
1.6 PLAYING YOUR PC’S SHARED VIDEOS.......................18
2. PLAYING MUSIC...............................................................................19
2.1 BROWSING THROUGH YOUR MUSIC FILES....................19
2.2 MUSIC PLAYBACK ......................................20
2.3 MUSIC PLAYER SETTINGS ................................22
2.4 PLAYLISTS ............................................24
2.5 PUTTING MUSIC ONTO YOUR ARCHOS.......................26
2.6 RECORDING ANALOGUE AUDIO ............................28
2.7 PLAYING YOUR PC’S SHARED MUSIC .......................28
3. VIEWING PHOTOS ..........................................................................29
3.1 BROWSING THROUGH YOUR PHOTOS........................29
3.2 PHOTO VIEWER.........................................30
3.3 PHOTO VIEWER SETTINGS ................................32
3.4 PLAYING A SLIDESHOW ..................................32
3.5 VIEWING PHOTOS WHILE LISTENING TO MUSIC ...............33
3.6 PUTTING PHOTOS ONTO YOUR ARCHOS......................33
3.7 PLAYING YOUR PC’S SHARED PHOTOS ......................34
4. USING THE FILE BROWSER ......................................................35
4.1 NAVIGATION ...........................................35
4.3 USING THE FILE BROWSER WHILE LISTENING TO MUSIC ........37
4.4 BROWSING OTHER COMPUTERS ON THE NETWORK ............37
4.5 USING THE PDF READER .................................38
TABLE OF CONTENTS CONTINUED ON NEXT PAGE...

MANUAL
V0.9
TV+ TABLE OF CONTENTS > P. 3
5. USING THE INTERNET FEATURES ...................................... 40
5.1 BROWSING THE WEB ....................................40
5.2 PLAYING YOUR PC’S SHARED MEDIA FILES ..................42
5.3 THE ARCHOS CONTENT PORTAL. . . . . . . . . . . . . . . . . . . . . . . . . . . . 44
6. TRANSFERRING FILES................................................................ 46
6.1 CONNECTING THE ARCHOS TO A COMPUTER .................46
6.2 USB HOST CONNECTION .................................49
7. MAIN SETTINGS..............................................................................50
7.1 “SOUND” SETTINGS .....................................50
7.2 “TV SETTINGS”.........................................51
7.3 “APPEARANCE” SETTINGS................................52
7.4 “NETWORK” SETTINGS ..................................53
7.5 “LANGUAGE AND REGION” SETTINGS .......................57
7.6 “TV CONTROL” SETTINGS ................................57
7.7 “CLOCK” SETTINGS .....................................58
7.8 “POWER” SETTINGS.....................................59
7.9 “FIRMWARE AND PLUG-INS” SETTINGS .....................59
7.10 UPDATING THE FIRMWARE ..............................60
7.11 “SYSTEM” SETTINGS...................................61
8. SCHEDULING A TV RECORDING .............................................63
8.1 HARDWARE SETUP......................................63
8.2 SCHEDULING TV RECORDINGS ............................65
8.3 TRANSFERRING THE PROGRAM DATA TO THE ARCHOS .........66
9. OTHER RECORDING FUNCTIONS............................................72
9.1 RECORDING AUDIO MANUALLY ............................72
9.2 RECORDING VIDEO MANUALLY ............................73
9.3 EDITING YOUR RECORDINGS ..............................74
TROUBLESHOOTING ..........................................................................76
RESETTING YOUR ARCHOS ..................................76
SYSTEM RECOVERY ........................................76
REPAIR AND FORMATTING TOOLS.............................77
TECHNICAL SPECIFICATIONS........................................................78
TECHNICAL SUPPORT INFORMATION .......................................................................... 80

MANUAL
V0.9
TV+ INTRODUCTION > P. 4
INTRODUCTION
ARCHOS DESCRIPTION
LED INDICATORS
On the front of the device, on the left side:
Red light:
light on: the ARCHOS is in standby mode.
flashing: the ARCHOS is rebooting.
Green light:
light on: the ARCHOS is on.
CONNECTORS
On the back of the device:
HDMI Out
DC in
Ethernet connector
Audio L&R
In & Out
S-Video
In & Out
Composite Video
In & Out
RGB or YPbPr
video In & Out
SPDIF Out
Reset button
•
•
•

MANUAL
V0.9
TV+ INTRODUCTION > P. 5
On the right side of the device:
USB BConnector (for
computer connection)
USB AConnector
(for USB Host)
See Transferring Files to learn how to connect the ARCHOS to a computer or to
a USB external device.
USING THE REMOTE CONTROLREMOTE CONTROL
You will need the remote control in order
to control your ARCHOS device.
Your ARCHOS device has an infrared re-
ceiver located on the front of the device,
on the left side (next to the LED indica-
tors). Point the supplied remote control
towards the infrared receiver.
•
•
1
This part of the remote control is used for the Web Browser and the Widgets.
Use the direction pad to move the cursor that appears on the screen.
Pressing this button will activate 2 modes at the same time:
the “left button lock” mode: the direction pad will act as if you moved
a mouse while holding its left button at the same time. It will allow
you, for example, to use sliders or other dragging controls.
the navigation buttons, at the top right, will allow you to move from
one link/field to another (normally they scroll the page up/down).
Press again to disable these 2 modes.
-
-

MANUAL
V0.9
TV+ INTRODUCTION > P. 6
This button is like a mouse’s left button. Depending on where you are in
the interface, it will allow you to open a link, execute a function, etc.
This button is like a mouse’s right button. Depending on where you are in
the interface, pressing this button will display a contextual menu.
2
These are the main buttons:
Navigation buttons: move from one item to another
Enter/Accept or Play/Pause/Resume
Exit button: Escape/Back/Stop
Up Accelerator button: High-speed fast forward, list scrolling or zoom in
Down Accelerator button: High-speed fast rewind, list scrolling or zoom out
Menu button: Display a text description of the available menu icons
Switch the display of the image between the ARCHOS and a tuner (if you have con-
nected one to the ARCHOS’ output connectors: See Using the Recording Function).
Power button: Turn on the ARCHOS / put it into standby mode
Volume buttons: Increase/decrease volume
Mute sound
Tab button:Tab between available screens
3
The keyboard can be used, for example, to enter a Web address, write an e-
mail, name/rename a folder, etc:
Caps Lock key
Green Alt key: enable the keys’ green secondary functions
Blue Alt key: enable the keys’ blue secondary functions
Shift key
delete character before cursor
In order to type one of the green/blue secondary characters in capital letters
(é, è, ç, etc.), press Caps Lock, then Alt green/blue, and press the correspond-
ing key.

MANUAL
V0.9
TV+ INTRODUCTION > P. 7
CONNECTING THE ARCHOS TO YOUR TV
See Scheduling TV Recordings to learn how to connect a tuner to the ARCHOS
in order to schedule a TV recording (manually or via the TV Program Guide).
Connection Diagram for Europe:
Wjefp!Pvuqvu!dbcmf
Dmjdl" VL
FV
Ufmfwjtjpo
Connection Diagram for North America:
Boufoob
Bvejp!'!Wjefp!Pvu
Ufmfwjtjpo
t.wjefp!jo
wjefp!jo
Bvejp!!M S
*

MANUAL
V0.9
TV+ INTRODUCTION > P. 8
* North America: If either your tuner or TV does not have S-video connections,
use a standard RCA video cable (- - - - ) instead of the S-video cable. In this
case, set the TV Connection to “Composite”. See “TV Settings”.
Connect the included charger/adapter to the jack labeled DC-IN on the back of
the ARCHOS.
Then plug the other end of the charger/adapter into an available wall socket.
If you have correctly connected the charger/adapter, the red LED indicator (on
the front of the device, on the left side) will start blinking while the device is
booting. When the ARCHOS is on, the green LED will light up.
Use only the supplied ARCHOS charger/adapter as other adapters may dam-
age this device (even if they give the same voltage rating).
Connect the ARCHOS’ outputs to your TV’s inputs. See the Connection Diagrams
for Europe and North Armerica (previous page).
Make sure that your TV is switched to the AV input that is used to connect the
ARCHOS.
When the image of the ARCHOS appears on your TV, follow the instructions on
screen (installation wizard) to finish installing the ARCHOS.
Make sure that you set the ARCHOS “TV Settings” based on how you have
connected the ARCHOS to your TV. See “TV Settings”.
TURNING THE ARCHOS ON/OFF
Press and hold the button, on the remote control, to turn on your ARCHOS or put
it into standby mode.
The green LED indicator, on the front of the device, lights up when the device is
on. The red LED indicator lights up when the device is in standby mode.
1.
2.
3.
4.
5.
•
•

MANUAL
V0.9
TV+ INTRODUCTION > P. 9
USING THE ARCHOS INTERFACE
INTERFACE DESCRIPTION
Status Bar
In the top right corner of the screen, the status
bar indicates the ‘network connection’ status
(WiFi or Ethernet), the volume level and the cur-
rent time of your device.
•
Tabs
In the top left corner of the screen, the tabs area
shows other available applications and screens. They
vary, depending on where you are in the interface.
When there is only one tab available, the Tab icon
in the top left corner is grayed out.
•
•
Contextual Menu
In the lower right corner of the screen, the contextual menu area
shows the menu icons.The available options will vary, depending on
where you are in the interface.
In the Home screen, choose the “Settings” menu item to access
the main settings of your ARCHOS.
In the Home screen, the “Resume” menu item allows you to re-
sume the last-played music or video file, if it was interrupted before
the end. If the “Resume” menu icon does not appear, it means that
no music or video file playback can be resumed.
•
•
•
Home Screen
This is the main screen of your ARCHOS, showing
its main functions.
•
Main Button Actions:
To open an application/screen via its icon or item, use the Navigation buttons to
highlight the icon/item and press .
•

MANUAL
V0.9
TV+ INTRODUCTION > P. 10
In the different applications, you can go back one level in the hierarchy by press-
ing the Exit button once. Wherever you are in the hierarchy, you can go back
directly to the Home screen by holding the Exit button.
When several tabs are available, you can switch between them by pressing the
Tab button .
To execute a menu icon’s function, press the Menu button , select a menu item
with the navigation buttons, and press .
While playing a video, song or photo slideshow, you can pause/resume it by
pressing .
Other Button Actions
When watching a video or listening to music, you can hold the left/right
Navigation buttons to move the cursor in the progression bar to another
location in the video or song.
To increase/decrease volume, use the Volume buttons ( / ).
In the different browsers (File, Music, Video, Photo), you can hold the up/
down Navigation buttons to scroll the file list up and down.You can also
scroll faster by using the Accelerator buttons.
In the Web browser and the PDF viewer, you can scroll up and down by
holding the up/down Navigation buttons.
•
•
•
•
CHANGING THE LANGUAGE
The interface of your ARCHOS is available in various languages.
If your language is not available, go to the ARCHOS website
(www.archos.com/firmware) and download and install the latest ver-
sion of the firmware. New languages are included in the firmware as
they become available. See
Updating the Firmware
.
•
•
To change the system’s language:
In the Home screen, select the “Settings” menu item, and choose “Language
and Region”.
Select a different language using
the left/right arrows (your settings
are saved instantly).
2.
Close the screen (Exit button ) to exit and go back to the Home screen.
•
•
•
•
1.
3.

MANUAL
V0.9
TV+ INTRODUCTION > P. 11
PRODUCT CARE
Your ARCHOS is an electronic product that needs to be treated with care:
Do not subject it to unnecessary shock or vibration.
Do not subject it to heat, keep it ventilated (especially when connected to a computer).
Keep it away from water and excessively humid areas.
Keep it away from high electromagnetic fields.
Do not open it up.There are no user-serviceable parts inside. Opening will void
your warranty.
•
•
•
•
•

MANUAL
V0.9
TV+ PLAYING VIDEO > P. 12
1. PLAYING VIDEO
In the Home screen, select the “Video” icon to enter the Video mode.
1.1 BROWSING THROUGH YOUR VIDEOS
The “Video” browser allows you to navigate through the Video folder of the
ARCHOS’ hard drive.
You can go back one level in the hierarchy by closing the current screen (Exit but-
ton ). Wherever you are in the hierarchy, you can go back directly to the Home
screen by pressing and holding down on the Exit button.
THE VIDEO BROWSER
The first screen of the Video mode
shows you all the videos and sub-
folders located in the Video folder.
To play a video, highlight it, then
open it.
If a video is in a subfolder of the
Video folder, open the subfolder, and
you will see your video.
•
•
•
In the “Video” browser, each video file appears with a thumbnail, displayed
on the left of the file’s name.
To define a new thumbnail for a video file, open the video, select the “Set”
menu item, and choose “Thumbnail” (see: Video Playback Menu Items).
•
•
VIDEO BROWSER MENU ITEMS
“Info”
displays a message box with information about the highlighted video file.-
•
•

MANUAL
V0.9
TV+ PLAYING VIDEO > P. 13
“File Management”
“Rename”: allows you to change the name of the highlighted video file using
the keyboard. See:
The Remote Control
.
“Delete”: allows you to delete the highlighted video file. A confirmation
screen will pop up.
-
-
“Bookmark”
“Resume”: will resume playing the highlighted video from the bookmark.
“Clear”: will remove the bookmark from the highlighted video file.
-
-
“Bookmark” only appears in the menu when a bookmarked video file is high-
lighted.
“Settings”
you can choose to display the Video Player settings screen (see:
Video Player
Settings
) or the “Sound” settings screen (see:
“Sound” Settings
).
-
1.2 VIDEO PLAYBACK
To play a video, highlight the file and open it. The menu overlay will disappear auto-
matically after a few seconds.
VIDEO PLAYBACK SCREEN
1. Exit icon
2. video file name
3. Tab icon
4. volume level
5. play / pause icon
6. video progression bar
7. menu items

MANUAL
V0.9
TV+ PLAYING VIDEO > P. 14
VIDEO PLAYBACK BUTTON CONTROLS
press once: stop the video and go back to the “Video” browser
hold: exit the Video mode and go back directly to the Home screen.
-
-
pause/resume the video
accelerated fast forward
left/right: fast rewind/forward
accelerated fast rewind
display/hide the menu overlay
display available menu items
increase/decrease volume
Mute sound
VIDEO PLAYBACK MENU ITEMS
“Info”
displays a message box with information about the current video file.-
“Soundtrack” and/or “Subtitles”
allows you to select a different audio track*.
allows you to choose subtitles**.
-
-
* Only if the video file contains several audio tracks.
** Only if the subtitles are in a separate file. The supported file types are: .srt,
.ssa, .sub (text based) and .smi.
“Format”
allows you to change the way the image is displayed.
“Auto”: adjusts the video size to best adapt to the TV.
“Full Screen”: enlarges the picture to fill the screen. In order to fit the
ARCHOS’ screen, your device might need to cut small parts of the image,
most likely at the top and bottom.
“Maximized”: enlarges the picture to fill the screen, considering the image is
encoded in 2.35 format with black bands at the top and bottom.
“Original”: displays the entire picture in its original format.
-
-
-
-
-

MANUAL
V0.9
TV+ PLAYING VIDEO > P. 15
“Speed”
will play the current video in slow motion or high speed.
while paused in slow motion, you can advance frame by frame, using the right
arrow.
-
-
“Set”
“Bookmark”: sets a bookmark at the current spot in the video. Only one
bookmark per file is allowed.You can bookmark up to 32 files. Bookmarked
videos will appear, in the “Video” browser, with a bookmark symbol and a
progression bar.
to resume playing a video from a bookmark, go to the “Video” browser and
highlight the bookmarked video file. Select the “Bookmark” menu item, then
choose “Resume” (“Clear” will remove the bookmark from the video).
“Thumbnail”: saves the current image as a new thumbnail for this file. In the
“Video” browser, the video’s thumbnail will be replaced by the new one.
“Wallpaper”: the current image will be defined as your device’s background
image.
-
-
-
-
“Settings”
you can choose to display the Video Player settings screen (see:
Video Player
Settings
) or the “Sound” settings screen (see:
“Sound” Settings
).
-
1.3 VIDEO PLAYER SETTINGS
In the Video mode, you can access the Video Player settings screen by using the
“Settings” menu item .
Use the left/right arrows to select a different setting for a parameter.
“PlayMode”, “Repeat & Shuffle”
the following table explains how the video player will work according to the set-
tings you chose in “PlayMode” AND “Repeat & Shuffle”.
•
•
-

MANUAL
V0.9
TV+ PLAYING VIDEO > P. 16
“PlayMode” “Repeat &
Shuffle” What the video player does...
“Single”“Normal”plays the current video file and stops.-
“Repeat”plays the current video file repeatedly.-
“Folder”“Normal”plays all the video files of the current folder
one after the other, and then stops.
-
“Repeat”plays all the video files of the current folder
one after the other. This will be repeated in-
definitely.
-
“Shuffle” plays all the videos of the current folder ran-
domly.
-
“UPnP Thumbnails”
here you can enable/disable the video thumbnails while browsing through your
PC’s shared videos (see:
Playing your PC’s Shared Media Files
). If you choose
“Disabled”, you will be able to browse through your PC’s shared videos faster.
1.4 PUTTING VIDEOS ONTO YOUR ARCHOS
On the ARCHOS Content Portal, you have the possibility to purchase videos
directly from your ARCHOS, without using a computer. See: The ARCHOS
Content Portal.
There are three main methods to transfer the videos stored on your computer onto
the ARCHOS:
Windows Media® Player: copy your videos using Windows Media®Player 10 or
higher*:
Use Windows Media®Player 10 or higher* (Sync tab) to synchronize
your computer’s video files with the ARCHOS.
See
Putting Files onto the ARCHOS
to learn more about how to transfer
your computer’s video files with Windows Media®Player.
-
-
* For best performance, we recommend that users update to Windows Media®
Player 11 or higher.
-
1.

MANUAL
V0.9
TV+ PLAYING VIDEO > P. 17
Windows® Explorer: Copy and paste your video files from your computer into the
Video folder of your ARCHOS.
To learn how to connect/disconnect the ARCHOS from your computer, see the
Transferring Files
section.
You can also use the following methods to transfer videos onto your ARCHOS:
Connect a USB external device to your ARCHOS’ USB host port. See: USB
Host Connection.
Copy files from your PC, via a WiFi / Ethernet connection. See: Browsing
Other Computers on the Network.
•
•
CREATING COMPATIBLE VIDEO FILES WITH YOUR COMPUTER
If some of your videos don’t play on your ARCHOS, you may need to convert them to
a compatible format:
The easiest way to do this is by using Windows Media® Player 10 or higher to
transfer videos to your ARCHOS. Windows Media® Player will automatically con-
vert most formats to the WMV format that your device can play.
See your Windows Media
®
Player help instructions for more information.
If you don’t want to use Windows Media® Player, a search on the Internet should
allow you to find suitable utility programs to do this job.
If you would like to simply copy and paste unprotected DVD video files from
your PC onto your ARCHOS without converting them to WMV format, you can
purchase the Cinema plug-in from the ARCHOS website (www.archos.com). The
same is also true for video podcasts in the H.264 format. In this case, purchase
the Video Podcast plug-in.
1.5 RECORDING VIDEO
Your ARCHOS gives you the possibility to record video from most
any standard video source.
See:
Recording Audio/Video Manually
.
•
•
You will also have the possibility to schedule TV recordings easily,
via the TV Program Guide (EPG).
See:
Scheduling TV Recordings.
•
•
2.
•
•
•

MANUAL
V0.9
TV+ PLAYING VIDEO > P. 18
1.6 PLAYING YOUR PC’S SHARED VIDEOS
Using a WiFi or Ethernet connection, your ARCHOS gives you the
possibility to watch, directly on your device, shared videos stored in
your PC’s Windows Media® Library.
For this to work, you will need a WiFi or Ethernet connection and
Windows Media® Player 11 or higher* installed on your PC.
The ARCHOS uses the UPnP (Universal Plug-and-play) standard to
stream shared videos from your PC’s Windows Media® Library.
See:
Playing your PC’s Shared Media Files
.
•
•
•
•
* There are other products on the market that also can share media files using
the UPnP standard.

MANUAL
V0.9
TV+ PLAYING MUSIC > P. 19
2. PLAYING MUSIC
In the Home screen, select the “Music” icon to enter the Music mode.
2.1 BROWSING THROUGH YOUR MUSIC FILES
There are two types of views for you to browse through your songs: the Music
Library and the Music Browser.
In both views, you can go back one level in the hierarchy by closing the current
screen (Exit button ). Wherever you are in the hierarchy, you can go back direct-
ly to the Home screen by pressing and holding down on the Exit button.
THE MUSIC LIBRARY
The Music Library (default view)
shows your music sorted by cat-
egories (Artist, Album, Genre, etc.) if
your music files contain these song
information tags.
When new music is copied to the
ARCHOS, the Music Library will be
updated automatically.
If some of your music files do not
contain information tags, they will
be classified as (Unknown) in the
Music Library.
•
•
•
THE MUSIC BROWSER
The music browser allows you to
navigate through the Music folder
of your device’s hard drive.
To use it, select “Hard Drive” (or
“Internal Memory”) in the initial
Music Library view.
•
•
•
•
Other manuals for TV+
1
This manual suits for next models
1
Table of contents
Other Archos Media Player manuals
Popular Media Player manuals by other brands

Ferguson
Ferguson HDplayer 110 quick start guide

Panasonic
Panasonic CQ-C5401U installation instructions

CeeNee
CeeNee MiniPlus 2013 user manual

Sony
Sony DAV-C450 - Dvd Home Theater System operating instructions

Hyundai
Hyundai H-CCR8191M instruction manual

Freecom
Freecom NETWORK MEDIAPLAYER 350 WLAN user manual