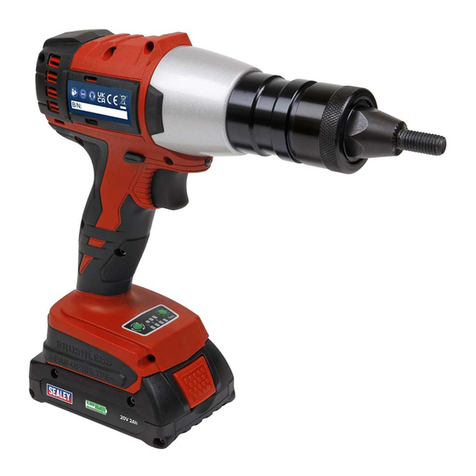
Arconic Marson BT-3A User manual

INSTRUCTION MANUAL FOR U.S. OPERATIONS
INSTRUCCIONES ORIGINALES DE USO
MANUEL D’UTILISATION D’ORIGINE
16 V BATTERY POWERED INSTALLATION TOOL
20 V BATTERY POWERED INSTALLATION TOOL


4|
h
l2
d
B
C D
E
A
I
H
G
F
O
M
L
l1
b

| 5
C
B
1
4
3
2
B
3
2
1
B
3 1;
2
IV.III.
I. II.
K
J

English
SCOPE OF DELIVERY
1. Riveter
2. Nose piece box with nose pieces
3. Combination wrench for changing the nose
pieces
4. Collecting container
5. Cover cap
6. Hanging clip
7. Belt clip
8. Battery with state-of-charge indicator
9. Universal quick charger 220 V ~ 12/16/20 V
10. Connecting cable with IEC power connector
11. Operating instructions
12. L-Boxx with inlay
SAFETY PRECAUTIONS
EXPLANATION OF THE SYMBOLS /
PICTOGRAMS IN THE SAFETY PRECAU-
TIONS
This symbol draws attention to that
fact that hazards exist for the life
and health of persons.
Caution! Important safety precauti-
on or directive that must be strictly
observed in order to avoid the
risk of personal injury or machine
damage!
Wear protective goggles!
Before commissioning, read and
observe the operating instructions
and safety precautions!
Remove the main plug
General points to be observed
GENERAL SAFETY PRECAUTIONS
Read all the safety precautions and
instructions. Store all safety precautions
and instructions in a safe place for future
reference.
Failure to observe safety precautions and
instructions can result in electric shock,
fire and/or serious injuries.
SAFETY AT THE PLACE OF WORK
Keep your place of work clean and well
illuminated. Untidiness or inadequately
illuminated places of work can result in
accidents.
Do not work with the riveter in potentially explosive
atmospheres where they may be inflammable
liquids, gases or dusts. Riveters generate sparks
that could ignite the dusts or vapours.
Keep children and other persons away when
working with the riveter. If distracted, you may lose
control over the riveter.
ELECTRICAL SAFETY
The plug of the fast charger must fit
properly into the plug socket. The plug
must not be modified in any way. Do not
use adapter plugs in conjunction with
earthed fast chargers. Non-modified plugs and
matching plug sockets reduce the risk of an electric
shock.
Avoid physical contact with earthed surfaces such
as those of pipes, heaters, cookers and refrigera-
tors. There is an increased risk of electric shock if
your body is earthed.
Keep riveters away from water or rain. The ingress
of water into a riveter increases the risk of an
electric shock.
Do not misuse the cable, e.g. for carrying or
hanging up the fast charger or for pulling the plug
out of the plug socket. Keep the cable away from
heat, oil, sharp edges or moving equipment parts.
Damaged or twisted cables increase the risk of an
electric shock.
When using a riveter outdoors, use for the fast
charger only extension lead that are also suitable
for outdoor use. The use of an extension lead that
6| English

English | 7
is suitable for outdoor use reduces the risk of an
electric shock.
If the use of the riveter in a damp environment is
unavoidable, use for the fast charger a residual
current circuit breaker. Use of a residual current
circuit breaker reduces the risk of an electric shock.
PERSONAL SAFETY
Be careful, pay attention to what you are
doing and work sensibly when using a
riveter.
Do not use a riveter when you are tired or under
the influence of drugs, alcohol or medication. One
moment of inattention when working with the rivet-
er can result in serious injuries.
Wear personal protective equipment and
use protective goggles at all times. The
wearing of personal protective equipment
such as a dust mask, non-slip safety
shoes, a helmet or ear protectors, depending on
the type and application of the riveter, reduces the
risk of injuries.
Avoid inadvertent starting of the riveter. Ensure
that the riveter is switched off before attaching the
battery (F), picking it up or carrying it. Having your
finger on the trigger when carrying the riveter can
lead to accidents.
Remove the setting tools or wrenches before
switching on the riveter. A tool or wrench connect-
ed to a rotating part of the riveter can result in
injuries.
Avoid abnormal body postures.
Ensure a secure footing and maintain your balance
at all times. This will enable you to control the
riveter in unexpected situations.
Wear suitable clothing. Do not wear loose clothing
or jewellery. Keep hair, clothing and gloves away
from moving parts. Loose clothing, jewellery or
long hair can become entangled in moving parts.
If the mandrel collecting containers can
be fitted, ensure that they are properly
connected and used correctly. By-pass-
ing of the safety switch is prohibited.
DIMENSIONS AND DESCRIPTION
OF THE TOOLS
A Nose piece
B Front sleeve
C Hole for hanger clip
D Fault indicator (red/yellow LED)
E Mandrel collecting container
F Battery with charging status indication
G Battery lock/release (latch)
H Riveting point light (white LED)
I Trigger
BT-2A BT-3A
inch dim. mm inch dim. mm
d .906 23 .906 23
l1 2.606 66 3.110 79
l2 11.063 281 12.205 310
h 10.827 275 11.142 283
b 2.992 76 2.992 76

TECHNICAL DATA
BT-2A BT-3A
Nom. blind rivet working range [Ø] 3/32“ - 3/16“ /
2.4 mm - 5.0 mm
3/16“ - 1/4“ /
4.8 mm - 6.4 mm
Max. stud diameter .134“ / 3.4 mm .122“ / 4.8 mm
Riveter weight incl. battery 4 lbs / 1.8 kg 4.5 lbs / 2.0 kg
Total stroke .826“ / 21 mm 1.181“ / 30 mm
Drive (DC / BLDC) DC BLDC
Tensile force 2,248 lbs / 10,000 N 4,496 lbs / 20,000 N
Sound emissions LpA / K // LWA / K [dB] <65 / 3 // <76 / 3 <74 / 3 // <85 / 3
Vibrations ah / K [m/s²] < 2.5 / 1.5
Service interval [number of rivets] 100,000 300,000
Battery 16 V 20 V
Battery 2.0 Ah
Battery cells [number] 4 5
Battery weight 0.71 lbs / 0.32 kg 0.82 lbs / 0.37
Battery working temperature 23 deg F to 113 deg F / -5°C to 45°C
Charger input voltage [V AC / Hz] 100 to 240 / 50 to 60
Charger output voltage [V DC] 7.0 to 21.0
Charger output current 4 Ah
Charger working temperature 32 deg F to 104 deg F / 0°C to 40°C
Charger charging time to 90 % / 100 % 22 min. / 30 min.
Charger weight without cable 1.21 lbs / 0.55 kg
OPERATION AND HANDLING OF
THE RIVETER
Do not overload the tool. Use the proper
riveter for your work. You will work better
and safer in the specified performance
range by using the appropriate riveter.
Do not use a riveter whose switch is defective. A
riveter that can no longer be switched on or off is
dangerous and must be repaired.
Remove the battery (F) before making
adjustments to the tool, changing
accessories or putting the tool away. This
precautionary measure prevents any
unintentional starting of the riveter.
Keep the riveter out of the reach of children when
not in use. Do not allow persons to use the tool
who are not familiar with it or who have not read
these instructions. Riveters are dangerous if they
are used by inexperienced persons.
Maintain riveters with care. Check that moving
parts function correctly and do not jam, and that
parts are not broken or damaged in such a way
that the function of the riveter is impaired.
Have damaged parts repaired before using the
tool. Many accidents are caused by poorly serviced
riveters.
Use riveter, accessories, attachments, etc. only
as described in these instructions. Give consid-
eration to the working conditions and the work to
be carried out. The use of riveters for other than
the intended applications can lead to dangerous
situations.
8| English

OPERATION AND HANDLING OF
THE BATTERY
Charge the batteries (F) only in chargers
recommended by the manufacturer.
There is a risk of fire if a charger
designed for a given type of battery is
used with other batteries.
Use only the specified batteries in the riveters. The
use of other batteries can lead to injuries and the
risk of fire.
Keep battery (F) not in use away from paper clips,
coins, keys, nails, screws or other small metal
objects that could cause bridging of the contacts. A
short circuit between the battery contact can cause
burns or a fire.
If improperly used or damaged, liquid can escape
from the battery (F).
Avoid contact with this liquid. In the event of acci-
dental contact, wash off with water. If the liquid gets
into the eyes, obtain additional medical assistance.
Escaping battery liquid can cause skin irritation or
burns.
SERVICE
Have your riveter repaired only by
qualified specialist personnel and only
with original spare parts. This will ensure
that the safety of the riveter is main-
tained.
COMMISSIONING
CHARGING THE BATTERY
Note: The battery (F) is partially charged on
delivery. In order to ensure the full performance of
the battery (F), charge the battery (F) completely in
the charger before the first use. Observe the notes
on the state of charge on the charger. The Li-Ion
battery (F) can be recharged at any time without
shortening its service life. Interruption of the charg-
ing cycle does not damage the battery (F). The
charger is equipped with a temperature monitoring
device that permits charging only in the tempera-
ture range between 0 °C and 40 °C.
PREPARING THE RIVETER – BT-2A
Fit the mandrel collecting container (E) by turning
to the right. Push the battery (F) into the foot of the
riveter from the front and ensure that the battery
(F) is properly engaged. Press the trigger (I) and
hold it depressed. Fit the appropriate nose piece
(A) for the rivet you wish to set using the combi-
nation wrench supplied. After changing the nose
piece, release the trigger.
PREPARING THE RIVETER – BT-3A
Fit the stud collector by turning to the right. Push
the battery (F) into the foot of the riveter from the
front and ensure that the battery (F) is properly
engaged. Press the trigger for 5 seconds (until the
white LED on the tool starts to flash 1/sec) and
release again. The riveter remains in the rearmost
position. Fit the appropriate nose piece (A) for the
rivet you wish to set using the open-jaw wrench
supplied. After changing the nose piece, press
the trigger again briefly and the tool moves to its
starting position again.
WORKING WITH THE RIVETER
RIVETING
Insert the mandrel of the rivet into the nose piece
(A). Now insert the rivet into the parts to be riveted.
For a good riveting result, ensure that the parts and
the head of the rivet are resting on one another
without a gap. Press the trigger until the mandrel
is sheared. Hold the riveter so that the mandrel
collecting container is facing downwards to ensure
that the sheared mandrel drops into the mandrel
collecting container.
When working with cover cap, hold the riveter with
the nose piece (A) facing downwards after each
set rivet to ensure that the sheared mandrel drops
out of the riveter to the front. Do not use fixed or
retainer nose pieces together with the cover cap.
This would result in damage to the riveter!
EXTENDED TRIGGER FUNCTIONS
(BT-3A ONLY)
Riveter BT-3A has two further functions that are
controlled with the trigger.
1. Service position: Press the trigger for 5
seconds (until the white LED on the tool starts
to flash 1/sec) and release again. The riveter
remains in the rearmost position. The nose
English | 9


piece (A) can now be easily changed or the
clamping mechanism serviced. Press the
trigger briefly and the tool moves to its starting
position again.
2. Auto and Manual mode: In Manual mode, hold
the trigger depressed during setting of the
rivet until the mandrel is sheared off. In Auto
mode you only have to press the trigger briefly
and the riveter controls the riveting process
automatically. To change from one mode to the
other, hold the trigger pressed for 10 seconds
(until the white LED on the tools starts to flash
2/sec) and release again. Press the trigger
briefly and the tool moves to its starting positi-
on again.
MALFUNCTION
If rivets are used beyond the specified performance
capability of the riveter, the riveter stops and the
red LED (D) comes on. Wait until the LED (D) goes
out and press the trigger briefly again. The tool
then moves to its starting position again.
When the battery (F) is discharged, the riveter is
protected by a protection circuit. The riveter com-
pletes the cycle and then stops. The LED (D) lights
up yellow. Replace the discharged battery with a
charged battery (F). The yellow LED (D) goes out
and you can continue to work.
STUD HOLDER
Both riveters are equipped with a safety switch,
the “stud holder”, and thus conform also to the
Machinery Directive. This prevents the riveter being
used without stud collector (E). Never operate the
riveter without stud collector (E) or stud securing
cap (J). Never bypass the safety switch. If you have
to work in confined spaces, the stud securing cap
(J) can be fitted instead of the stud collector (E).
When working with stud securing cap (J), hold the
riveter with the nose piece (A) facing downwards
after each set rivet to ensure that the sheared
mandrel drops out of the riveter to the front. Do not
use fixed or retainer nose pieces together with the
stud securing cap (J). This would result in damage
to the riveter!
HANGER CLIP
If you wish to use the riveter on a balancer, you
can attach the hanger clip supplied (K) to the two
bores (C) provided. Take care not to stretch the
hanger clip (K) too far apart so that it does not lose
its tension. Check that the hanger clip (K) is fitted
securely before using the riveter.
BELT CLIP
Attach the belt clip (O) to the foot of the riveter us-
ing the screw (M). A corresponding thread and two
slots (L) are recessed in the foot of the housing on
both sides of the riveter. Check at regular intervals
that the clip (O) is still securely attached, otherwise
retighten the screw (M).
MAINTENANCE AND SERVICE
SERVICING AND CHANGING THE CLAMP-
ING JAWS
Depending on the mandrel material, shear force
and surface finish, the clamping jaws have to be
cleaned and replaced at regular intervals.
I Loosen and remove front sleeve (B) using a
SW 27 comination wrench.
II Loosen and remove clamping sleeve (1) from
adapter (3) using two SW 17 combination
wrenches and remove the 3-piece clamping
jaws (2) from clamping sleeve (1). Clean clam-
ping jaws (2) and inspect for wear. Replace
clamping jaws (2), if necessary.
III Clean the inside and outside of clamping slee-
ve (1). Grease the inside of clamping sleeve
(1) lightly with graphite grease using a brush
(4).
IV Place clamping jaws (2) into clamping sleeve
(1).
Install clamping sleeve (1) with clamping jaws
(2) on adapter (3) again and finally fit front
sleeve (B).
Important: Tighten the clamping sleeve using two
SW 17 combination wrenches to ~22 Nm, other-
wise the gearing may be destroyed!
10 | English

RIVETER SERVICE
In order to ensure proper and safe operation of the riveter, it should be sent to a service centre either
directly or via your dealer.
What? BT-2A BT-3A Who?
Visual inspection of the riveter Daily Operator
Battery charge state Daily Operator
Check the tight fit of the clamping
sleeve and retighten with min. 22 Nm
Weekly Operator
Cleaning and greasing the clamping
mechanism
Between 1,000 and 10,000, depending on the
rivet type
Operator
Changing the clamping jaws When the rivet can no longer be set in one
stroke
Operator
Changing the mouthpiece Every 25,000 to 50,000 rivets Operator
Inspection* 100,000 or once a
year
300,000 or once a
year
Arconic Service
* The inspection includes the examination, maintenance and possibly repair or replacement of all riveter
components, such as gearing, motor and electronics
UNIVERSAL FAST CHARGER
Connect the charger to a plug socket using the
cable supplied. Push the battery (F) carefully and
without force into the holder. Remove the battery (F)
in the same way. The universal fast charger charges
the battery (F) in 30 minutes; the battery is 90 %
charged after approx. 22 minutes. Observe the
corresponding indicators on your charger.
The cells used for the Li ion batteries (F) of the
Arconic riveters are high quality and state-of-the-art.
The optimum charging and discharging tempera-
ture for Li-Ion cells is 25 °C. No complete charging
or discharging capacity can be reached above and
below 25 °C.
Use only the connecting cable supplied (with IEC
power connector). Different national versions are
available.
Charge only BT-2A and BT-3A batteries (F).
Charge only in a temperature range between 0 and
40 °C.
BATTERY
The battery (F) has a latch (G) on the front side.
To insert or remove the battery, press the latch
downwards and push the battery (F) into the riveter
foot or pull it out.
Use the battery (F) in the riveter only in the speci-
fied temperature range between -5 and 45 °C.
Charge the battery (F) only in a temperature range
between 0 and 40 °C.
Use only the approved charger.
Never short-circuit the battery (F).
If the battery (F) shows signs of visible damage, do
not use it any longer.
Keep the battery (F) away from moisture and
liquids.
Dispose of the battery (F) in the proper manner.
BATTERY STORAGE
Protect the battery (F) from moisture and liquids.
Store the battery (F) only in the optimum tempera-
ture range between -30 °C and 25 °C. The batter-
ies (F) can be stored as follows without recharging:
Storage period between -30 ~ 25°C – 1.5 years
Storage period between -30 ~ 45 °C – 3 months
Storage period between -30 ~ 60 °C – 1 month
Do not leave the battery (F) in the car, e.g. in the
summer.
A significantly shorter operating time after recharg-
ing indicates that the battery (F) is worn out and
has to be replaced.
Observe the instructions on disposal.
BATTERY DISPOSAL
Li ion: Do not throw the battery (F) into the do-
mestic waste, fire or water. Batteries/rechargeable
English | 11

batteries (F) are collected and recycled or disposed
of in an eco-friendly manner.
For EU countries only:
In accordance with Directive 91/157/EEC, defective
or old batteries (F) must be recycled.
Batteries (F) that can no longer be used can be
returned to your dealer or directly to Arconic.
DISPOSAL OF RIVETER AND FAST
CHARGER
Riveters, chargers, accessories and packagings
should be recycled in an eco-friendly manner.
For EU countries only:
Do not throw riveters into the domestic waste!
In accordance with European Directive 2002/96/EC
on Waste Electrical and Electronic Equipment and
its implementation in national law, riveters must be
collected separately and recycled in an eco-friendly
manner at the end of their useful life.
12 | English

Español
EL SUMINISTRO INCLUYE
1. Remachadora
2. Caja con boquillas
3. Llave de boca para cambiar las boquillas
4. Depósito
5. Tapa de protección
6. Asa de colgar
7. Clip para correa
8. Batería con indicador de estado de carga
9. Cargador rápido universal 220 V ~ 12/16/20 V
10. Cable de conexión con conector
IEC-60320 C13
11. Instrucciones de uso
12. L-Boxx con revestimiento
AVISOS DE SEGURIDAD
ACLARACIÓN DE LOS AVISOS SIMBO-
LOS DE DE SEGURIDAD / PICTOGRAMAS
Este símbolo indica peligro para la
vida y salud de las personas.
¡Atención, aviso de seguridad o
prescripción importante que debe
respetarse para evitar riesgos
y/o daños para las personas o la
propia máquina!
¡Llevar gafas de protección!
¡Antes de la puesta en marcha
leer las instrucciones de uso y los
avisos de seguridad, y respetarlos
estrictamente!
Retirar el enchufe
Cuestiones generales que hay que
respetar
AVISOS GENERALES DE SEGURIDAD
Lea todos los avisos de seguridad e
indicaciones. Guarde bien todas las
indicaciones para el futuro.
Si no respeta lo comentado en las
indicaciones y avisos de seguridad,
puede recibir una descarga eléctrica,
provocar un incendio y/o sufrir lesiones
graves.
SEGURIDAD EN EL PUESTO DE TRABAJO
Mantenga la zona de trabajo limpia y
bien iluminada. El desorden y la
iluminación deficientes de las zonas de
trabajo pueden provocar accidentes.
No trabaje con la remachadora eléctrica en entor-
nos con riesgo de explosiones, en los que haya
líquidos, gases o polvo combustibles. Las rema-
chadoras eléctricas generan chispas que podrían
inflamar el polvo o los vapores.
Mantenga a los niños y a las personas en general
alejadas de la remachadora eléctrica durante el
uso de la misma. Si se distrae puede perder el
control sobre el aparato.
SEGURIDAD ELÉCTRICA
El conector de la remachadora eléctrica
debe corresponder a la toma. El conector
no se puede alterar de ninguna manera.
No use conectores adaptadores con
remachadoras eléctricas puestas a tierra. Trabajar
con conectores no modificados y con tomas
adecuadas disminuye el riesgo de descarga
eléctrica.
Evite el contacto corporal con superficies puestas
a tierra como tubos, radiadores, cocinas y frigorífi-
cos. Hay un riesgo elevado de descarga eléctrica
cuando su cuerpo está conectado a tierra.
Mantenga la remachadora eléctrica alejada de
la lluvia/humedad. La entrada de agua en la
remachadora eléctrica aumenta el riesgo de una
descarga eléctrica.
No use el cable para transportar la remachadora
eléctrica, para colgarla o para tirar del conector
metido en la toma de corriente. Mantenga el cable
alejado del calor, aceite, bordes cortantes o partes
móviles del aparato. Los cables dañados o enreda-
dos aumentan el riesgo de una descarga eléctrica.
Español | 13

Si trabaja con la remachadora eléctrica en exte-
riores, use solo alargadores que sean adecuados
para este tipo de entornos. El uso de un alargador
adecuado para exteriores disminuye el riesgo de
una descarga eléctrica.
Si no se puede evitar el uso de la remachadora
eléctrica en una zona con humedad, emplee un
interruptor de corriente de defecto. El uso de un
interruptor de corriente de defecto disminuye el
riesgo de una descarga eléctrica.
SEGURIDAD DEL PERSONAL
Preste atención a lo que hace y proceda
de forma lógica al trabajar con la
remachadora eléctrica.
No use la remachadora eléctrica si está cansado
o bajo los efectos de drogas, alcohol o medica-
mentos. Un solo instante de distracción al usar la
remachadora eléctrica puede provocar lesiones
graves.
Lleve un equipo de protección personal y
unas gafas de protección siempre. Llevar
un equipo de protección personal, como
mascarilla antipolvo, calzado de
seguridad antideslizante, casco de protección o
protectores auditivos (según el tipo y uso de
remachadora eléctrica) disminuye el riesgo de
sufrir lesiones
Evite una puesta en marcha accidental. Asegúrese
de que la remachadora eléctrica está desconecta-
da antes de conectarla al suministro de corriente
y/o batería (F), de tomarla en la mano/limpiarla o
de transportarla. Si al trasladar la remachadora
eléctrica tiene un dedo en el interruptor o conecta
el aparato al suministro de corriente, puede provo-
car un accidente.
Retire las herramientas de ajuste o llaves de tuer-
cas antes de conectar la remachadora eléctrica.
Una herramienta o llave sobre una parte giratoria
del aparato puede provocar lesiones.
Evite las posturas corporales poco naturales.
Asegúrese de estar en una posición estable y
mantenga en todo momento el equilibrio. Con ello
podrá controlar mejor la remachadora eléctrica en
situaciones inesperadas.
Lleve una ropa adecuada. No lleve ropa ancha o
joyas, adornos, etc. Mantenga el cabello, ropa y
guantes lejos de las partes móviles. La ropa suelta,
los adornos/joyas o el cabello largo pueden quedar
atrapados por las partes móviles.
Si se pueden montar los depósitos,
asegúrese de que los mismos estén
conectados y se usen bien. Está
prohibido puentear el interruptor de
seguridad.
DIMENSIONES Y DESCRIPCIÓN
DE LOS APARATOS
A Boquilla
B Casquillo delantero
C Orificio para asa de colgar
D Indicador de averías (LED rojo/amarillo)
E Depósito
F Batería con indicador de estado de carga
G Bloqueo/desbloqueo de batería
H Iluminación de punto de remache (LED blanco)
I Gatillo
BT-2A BT-3A
inch dim. mm inch dim. mm
d .906 23 .906 23
l1 2.606 66 3.110 79
l2 11.063 281 12.205 310
h 10.827 275 11.142 283
b 2.992 76 2.992 76
14 | Español

Español | 15
DATOS TÉCNICOS
BT-2A BT-3A
Rango de trabajo nominal para remaches
ciegos [Ø]
3/32“ - 3/16“ /
2.4 mm - 5.0 mm
3/16“ - 1/4“ /
4.8 mm - 6.4 mm
Diámetro máx. pasador .134“ / 3.4 mm .122“ / 4.8 mm
Peso del aparato incl. batería 4 lbs / 1.8 kg 4.5 lbs / 2.0 kg
Carrera total .826“ / 21 mm 1.181“ / 30 mm
Accionamiento (DC / BLDC) DC BLDC
Fuerza de tracción 2,248 lbs / 10,000 N 4,496 lbs / 20,000 N
Emisión de ruidos LpA / K // LWA / K [dB] <65 / 3 // <76 / 3 <74 / 3 // <85 / 3
Vibraciones ah / K [m/s²] < 2.5 / 1.5
Intervalo de mantenimiento [unidad remaches] 100,000 300,000
Batería 16 V 20 V
Batería 2.0 Ah
Celdas de batería [número] 4 5
Peso de batería 0.71 lbs / 0.32 kg 0.82 lbs / 0.37
Temperatura de trabajo de batería 23 deg F to 113 deg F / -5°C to 45°C
Tensión de entrada cargador [V AC / Hz] 100 to 240 / 50 to 60
Tensión de salida cargador [V DC] 7.0 to 21.0
Corriente de salida de cargador 4 Ah
Temperatura de trabajo de cargador 32 deg F to 104 deg F / 0°C to 40°C
Tiempo de carga de cargador 90 % / 100 % 22 min. / 30 min.
Peso de cargador sin cable 1.21 lbs / 0.55 kg
USO Y MANIPULACIÓNE DE LA
REMACHADORA ELÉCTRICA
No sobrecargue el aparato. Use para su
trabajo la remachadora eléctrica prevista
en cada caso. Con la remachadora
eléctrica adecuada trabajará mejor y con
mayor seguridad en el rango de potencia previsto.
No use remachadoras eléctricas con interruptores
en mal estado. Una remachadora eléctrica que
ya no se puede conectar o desconectar, resulta
peligrosa y debe repararse.
Saque el conector de la toma de
corriente y/o retire la batería (F), antes de
hacer ajustes en el aparato, sustituir
accesorios o dejar de trabajar con el
aparato. Esta medida preventiva impide que la
remachadora eléctrica se ponga en marcha
accidentalmente.
No deje las remachadoras eléctricas al alcance
de los niños cuando no se están usando. No deje
usar el aparato a personas que no sepan cómo
funciona o que no hayan leído estas indicaciones.
Es muy peligroso que personas sin experiencia
usen las remachadoras eléctricas.
Haga un mantenimiento minucioso de la rema-
chadora eléctrica. Controle si las piezas móviles
funcionan correctamente y no se atascan, que no
haya partes rotas o tan dañadas que comprome-
tan el correcto funcionamiento de la remachadora
eléctrica.
Haga que las piezas dañadas se reparen antes
de usar el aparato. Muchos accidentes tienen su
origen en un mal mantenimiento de las remacha-
doras eléctricas.

Use la remachadora eléctrica, accesorios, herra-
mientas, etc. respetando estas indicaciones. Tenga
en cuenta para ello las condiciones de trabajo y la
actividad que está ejecutando. El uso de rema-
chadoras eléctricas para otros usos no previstos
puede provocar situaciones muy peligrosas.
Uso y manipulación de la
battería
Cargue las baterías (F) solo en cargado-
res recomendados por el fabricante. Si
un cargador está previsto para un tipo
determinado de baterías, hay un riesgo
de incendio si se usa con otro tipo de baterías.
Use solo las baterías previstas para la remacha-
dora eléctrica. Emplear otro tipo de baterías puede
provocar lesiones e incendios.
Mantenga la batería no usada (F) alejada de clips,
monedas, llaves, clavos, tornillos y otros pequeños
objetos metálicos, que podrían causar un puen-
teado en los contactos. Un cortocircuito entre los
contactos de la batería puede provocar quemadu-
ras o fuego.
Si se usa mal o se daña la batería (F), puede salir
el líquido que hay dentro.
Evite el contacto con el mismo. En caso de contac-
to accidental lavar con agua. Si el líquido entra en
contacto con los ojos, acuda además a un médico.
El líquido que sale de la batería puede provocar
irritaciones en la piel y quemaduras.
SERVICIO
Asegúrese de que su remachadora
eléctrica se repare exclusivamente por
profesionales cualificados y usando
piezas de repuesto originales. Con ello
se garantiza la seguridad de la remachadora
eléctrica.
PRIMERA PUESTA EN MARCHA
CARGAR LA BATERÍA
Aviso: La batería (F) se suministra parcialmente
cargada. Para garantizar un rendimiento pleno
de la batería (F), cargue por completo la batería
(F) en el cargador antes del primer uso. Respete
para ello los avisos sobre el estado de carga en el
cargador. La batería de iones de litio (F) se puede
cargar en cualquier momento sin acortar su vida
útil. La interrupción del proceso de carga no daña
la batería (F). El cargador viene con un control de
temperatura que solo permite la carga en el rango
de temperaturas entre 0 °C y 40 °C.
PREPARAR LA REMACHADORA BT-2A
Ponga el depósito (E) girando hacia la derecha.
Meta la batería (F) desde adelante en el pie de la
remachadora, y asegúrese de que la batería (F)
esté encajada. Apriete el gatillo (I) y manténgalo
apretado. Con la llave de boca suministrada ponga
la boquilla adecuada (A) para el remache que quie-
re aplicar. Tras la sustitución de la boquilla suelte
el gatillo.
PREPARAR LA REMACHADORA BT-3A
Ponga el depósito girando hacia la derecha. Meta
la batería (F) desde adelante en el pie de la rema-
chadora, y asegúrese de que la batería (F) esté
encajada. Apriete el gatillo durante 5 segundos
(hasta que el LED blanco en el aparato comience
a parpadear 1 vez por segundo) y suéltelo. La
remachadora queda en la posición trasera. Con la
llave de boca suministrada ponga la boquilla ade-
cuada (A) para el remache que quiere aplicar. Tras
sustituir la boquilla, active brevemente el gatillo, el
aparato vuelve a la posición de partida.
TRABAJAR CON EL APARATO
PONER EL REMACHE
Meta el vástago del remache en la boquilla (A).
Meta ahora el remache en las piezas que se van a
remachar. Para un buen resultado en el remacha-
do, asegúrese de que las partes constructivas y la
cabeza del remache queden juntas sin resquicio
entre ellas. Active el gatillo hasta que el vástago se
parta. Sostenga la remachadora de forma que el
depósito apunte hacia abajo, para garantizar que
el vástago roto caiga en el depósito.
16 | Español

Español | 17
Si trabaja con la tapa de protección, después de
poner cada remache mantenga el aparato con
la boquilla (A) hacia abajo para garantizar que el
vástago roto salga del aparato hacia adelante. No
use boquillas de bloqueo o retención con la tapa
de protección. ¡Esto podría dañar el aparato!
FUNCIONES AMPLIADAS DEL GATILLO
(SOLO BT-3A)
BT-3A incluye otras dos funciones que se controlan
con el gatillo.
1. Service Position: Apriete el gatillo durante 5 se-
gundos (hasta que el LED blanco en el aparato
comience a parpadear 1 vez por segundo) y
suéltelo. La remachadora queda en la posición
trasera. Ahora puede cambiar con facilidad
la boquilla (A) o hacer el mantenimiento del
mecanismo de tensado. Apriete brevemente
el gatillo y el aparato vuelve a la posición de
partida.
2. Modo auto y manual: En el modo manual,
mantenga el gatillo apretado en el proceso de
colocación del remache hasta que el vástago
se parta. En el modo auto solo debe tocar bre-
vemente el gatillo y el aparato guía el proceso
de remachado por sí mismo. Para pasar de
un modo al otro, mantenga el gatillo apretado
10 segundos (hasta que el LED blanco en el
aparato comience a parpadear 2 veces por se-
gundo) y suéltelo. Apriete brevemente el gatillo
y el aparato vuelve a la posición de partida.
AVERÍA
Si usa remaches que superan el rendimiento indi-
cado del aparato, el mismo se detiene y se ilumina
el LED rojo (D). Espere hasta que el LED (D) se
apague y accione una vez
brevemente el gatillo. Con ello el aparato vuelve a
la posición de partida.
Con la batería (F) descargada, la remachadora
eléctrica se asegura con un circuito de protección.
La remachadora termina el ciclo y se detiene. El
LED (D) se ilumina en amarillo. Cambie ahora la
batería (F) vacía por otra cargada. El LED amarillo
(D) se apaga y puede seguir con su trabajo.
PROTECCIÓN DE PASADOR
Los dos aparatos vienen con un interruptor de
seguridad, la llamada protección de pasador, y
cumplen así la Directiva Máquinas. Con esto se
evita que el aparato pueda actuar sin depósito (E).
No use nunca el aparato sin depósito (E) o sin tapa
de protección (J). Nunca puentee el interruptor de
seguridad. Si debe trabajar en sitios estrechos,
en vez del depósito (E) puede emplear la tapa de
protección (J). Si trabaja con la tapa de protección
(J), después de poner cada remache sostenga el
aparato con la boquilla (A) hacia abajo para garan-
tizar que el vástago roto salga del aparato hacia
adelante. No use boquillas de bloqueo o retención
con la tapa de protección (J). ¡Esto podría dañar el
aparato!
ASA DE COLGAR
Si quiere usar su aparato en un equilibrador, puede
aplicar el asa de colgar (K) suministrada en los dos
orificios (C) previstos al efecto. Cuide de que el
asa (K) no se abra demasiado para que no pierda
su capacidad de tensión. Compruebe antes de
colgar el aparato si el asa (K) está bien sujeta.
CLIP PARA CORREA
Fije el clip para correa (O) mediante el tornillo
(M) en el pie del aparato. A ambos lados del
aparato hay una oportuna rosca y dos ranuras
(L) practicadas en la carcasa, en la zona del pie.
Compruebe con regularidad que el clip (O) sigue
estando firmemente sujeto, en otro caso reapriete
los tornillos (M).
MANTENIMIENTO Y SERVICIO
MANTENIMIENTO Y SUSTITUCIÓN DE
LAS MORDAZAS
Las mordazas deben limpiarse y sustituirse de for-
ma periódica según el material del vástago, fuerza
de rotura y superficie.
I Suelte y retire el casquillo delantero (B) con
una llave de boca de ancho 27.
II Suelte y retire con dos llaves de boca de
ancho 17 el casquillo tensor (1) del adaptador
(3) y retire las mordazas de 3 piezas (2) del
casquillo tensor (1). Limpie las mordazas (2) y
compruebe el desgaste. Sustituya en su caso
las mordazas (2).
III Limpie el casquillo tensor (1) por dentro y
fuera. Lubrique un poco por dentro el casquillo
tensor (1) con un pincel (4), usando grasa de
grafito.
IV Ponga las mordazas (2) en el casquillo tensor
(1).
Monte de nuevo el casquillo tensor (1) con las
mordazas (2) en el adaptador (3) y luego el
casquillo delantero (B).

Importante: ¡Apriete el casquillo tensor con dos
llaves de boca de ancho 17 con ~22 Nm, en otro
caso puede destruirse la transmisión!
SERVICIO DE APARATOS
Para garantizar un funcionamiento impecable del aparato debe enviar el mismo a punto de servicio, direc-
tamente o mediante su representante local.
¿Qué? BT-2A BT-3A ¿Quién?
Control óptico del aparato A diario Usuario
Estado de carga de batería A diario Usuario
Compruebe el ajuste ajustado del
manguito de sujeción y vuelva a
apretar con mín. 22 Nm
Semanal Usuario
Limpiar y engrasar el mecanismo de
tensado
Entre 1000 y 10.000 según el tipo de rema-
che
Usuario
Sustitución de las mordazas Cuando el remache ya no se puede colocar
de una sola vez
Usuario
Sustitución de la boquilla cada 25.000 - 50.000 remaches Usuario
Inspección* 100.000 o una vez
al año
300.000 o una vez
al año
Servicio de
Arconic
*La inspección comprende el control, mantenimiento y en su caso reparación o sustitución de todos los
componentes del aparato como p. ej. transmisión, motor y electrónica
CARGADOR RÁPIDO UNIVERSAL
Conecte el cargador con el cable suministrado.
Meta la batería (F) en el soporte con cuidado y
sin hacer fuerza. Retire la batería (F) de la misma
forma. El cargador rápido universal carga todas las
baterías (F) con tensiones 12 / 16 / 20 V en 30 mi-
nutos, el 90 % están cargadas en ca. 22 minutos.
Observe para ello las indicaciones respectivas en
su cargador.
Las baterías (F) de iones de litio de las remacha-
doras usan celdas de gran calidad y de última
tecnología. Las celdas de iones de litio tienen su
óptimo de temperatura para carga y descarga a 25
°C, por debajo y por encima de 25 °C no se puede
llegar a la capacidad total de carga y descarga.
Use exclusivamente el cable de conexión suminis-
trado (conector IEC-60320 C13). Los hay disponi-
bles en distintas versiones según el país.
Cargue solo una batería BT-2A y BT-3A (F).
Cargue solo a temperaturas entre 0 y 40 °C.
BATERÍA
La batería (F) tiene un bloqueo/desbloqueo (G) en
la parte delantera. Para meter o sacar la batería
del aparato, apriete el bloqueo/desbloqueo hacia
abajo y meta la batería (F) en el pie del aparato, o
extráigala.
Use la batería (F) en la remachadora solo con el
rango de temperaturas permitido, de -5 a 45 °C.
Cargue la batería (F) solo en un intervalo de tem-
peraturas entre 0 y 40 °C.
Use exclusivamente el cargador autorizado.
Nunca cortocircuite la batería (F).
En caso de daños externos no siga usando la
batería (F)
Mantenga la batería (F) lejos de la humedad y de
los líquidos.
Elimine la batería (F) de forma correcta
ALMACENAMIENTO DE BATERÍAS
Proteja la batería (F) de la humedad y del agua.
Almacene la batería (F) solo en un rango óptimo
de temperaturas de -30 °C a 25 °C. Puede guardar
18 | Español

Español | 19
las baterías (F) sin carga como sigue:
Duración de almacenamiento a
-30 ~ 25 °C – 1,5 años
Duración de almacenamiento a
-30 ~ 45 °C – 3 meses
Duración de almacenamiento a
-30 ~ 60 °C – 1 mes
No deje por ejemplo la batería (F) en el coche en
verano.
Si el tiempo de funcionamiento tras la carga ha
disminuido mucho, quiere decir que la batería (F)
se ha gastado y hay que sustituirla.
Respete los avisos sobre eliminación
ELIMINACIÓN DE LA BATERÍA
Iones de litio: No arroje la batería (F) a la basura
doméstica, al fuego o al agua. Las baterías (F) se
recogen, reciclan o se eliminan de forma respetuo-
sa con el medio ambiente.
Solo para países de la UE:
Según la Directiva 91/157/CEE las baterías (F)
defectuosas o gastadas deben reciclarse.
Puede entregar las baterías (F) que ya no se pue-
dan usar a su proveedor o directamente a Arconic.
ELIMINACIÓN DE REMACHADORA Y
CARGADOR RÁPIDO
Las remachadoras eléctricas, cargadores, ac-
cesorios y embalajes deben reciclarse de forma
respetuosa con el medio ambiente.
Solo para países de la UE:
¡No arroje la remachadora eléctrica a la basura
doméstica!
Según la directiva europea 2002/96/CE sobre
equipos eléctricos y electrónicos desechados y su
transposición al derecho nacional, las remacha-
doras eléctricas que ya no sean utilizables deben
recogerse por separado y llevarse a reciclado de
forma respetuosa con el medio ambiente.

Français
CONTENU DE LA LIVRAISON
1. Outillage de pose
2. Boîtier avec nez de pose
3. Clé plate pour le remplacement des nez de
pose
4. Récupérateur de tiges
5. Embout de fermeture de tige
6. Étrier de suspension
7. Clip ceinture
8. Batterie avec indicateur du niveau de charge
9. Chargeur rapide universel 220 V ~ 12/16/20 V
10. Câble de raccordement avec connecteur CEI
60320 C13
11. Manuel d’utilisation
12. L-Boxx avec habillage
CONSIGNES DE SÉCURITÉ
EXPLICATION DES SYMBOLES DES
CONSIGNES DE SÉCURITÉ / PICTO-
GRAMMES
Ce symbole indique un danger pour
la vie et la santé des personnes.
Prudence, consigne de sécurité
importante ou consigne devant être
impérativement respectée pour éviter
tout danger et/ou toute blessure ou
toute détérioration de la machine !
Porter les lunettes de protection !
Lire et suivre les manuels d’utilisation
et les consignes de sécurité avant la
mise en service !
Débrancher la prise du secteur
Consigne générale à respecter.
CONSIGNES DE SÉCURITÉ GÉNÉRALES
Lire toutes les consignes de sécurité et
toutes les instructions. Conserver toutes
les instructions pour la suite.
Tout manquement au respect de ces
consignes de sécurité et instructions peut
entraîner des décharges électriques, un
incendie et/ou de graves blessures.
SÉCURITÉ SUR LE POSTE DE TRAVAIL
Veiller à ce que l’espace de travail reste
propre et bien éclairé. Des espaces de
travail en désordre ou non éclairés
peuvent entraîner des accidents.
Ne jamais travailler avec l’outillage de pose élec-
tronique dans un environnement explosif, dans
lequel se trouvent des liquides, des gaz ou des
poussières inflammables. Les outillages de pose
électroniques génèrent des étincelles, pouvant
allumer la poussière ou les vapeurs.
Les enfants et toutes les autres personnes doivent
se tenir à distance lors de l‘utilisation de l’outillage
de pose électronique. Toute distraction peut faire
perdre le contrôle de l’appareil.
SÉCURITÉ ÉLECTRIQUE
La fiche de l’outillage de pose électro-
nique doit pouvoir être branchée dans la
prise. La fiche ne doit aucun cas être
modifiée. Ne pas utiliser d’adaptateur
avec les outillages de pose électroniques reliés à
la terre de protection. Les fiches non modifiées et
les prises adaptées réduisent le risque de
décharge électrique.
Éviter tout contact avec les surfaces reliées à
la terre, telles que les tubes, les chauffages, les
cuisinières et les réfrigérateurs. Il y a un risque
élevé de décharge électrique lorsque le corps est
relié à la terre.
Tenir les outillages de pose électroniques éloignés
de la pluie ou de l’humidité. La présence d’eau
dans un outillage de pose électronique augmente
le risque de décharge électrique.
Ne pas utiliser le câble pour porter, accrocher l’ou-
tillage de pose électronique ou pour retirer la fiche
de la prise. Tenir le câble éloigné de la chaleur, de
l’huile, des bords tranchants ou des pièces mobiles
20 | Français
This manual suits for next models
1
Table of contents
Languages:
Other Arconic Rivet Tools manuals
Popular Rivet Tools manuals by other brands

Cherry Aerospace
Cherry Aerospace G902 Original instructions

Power Fist
Power Fist 8843708 manual

Mighty Seven
Mighty Seven PB-1310 manual

Gesipa
Gesipa PowerBird Pro Gold Edition Operating manual with spare parts list

Titgemeyer
Titgemeyer RL20-2 operating manual

Bollhoff
Bollhoff Portable C RIVSET instruction manual