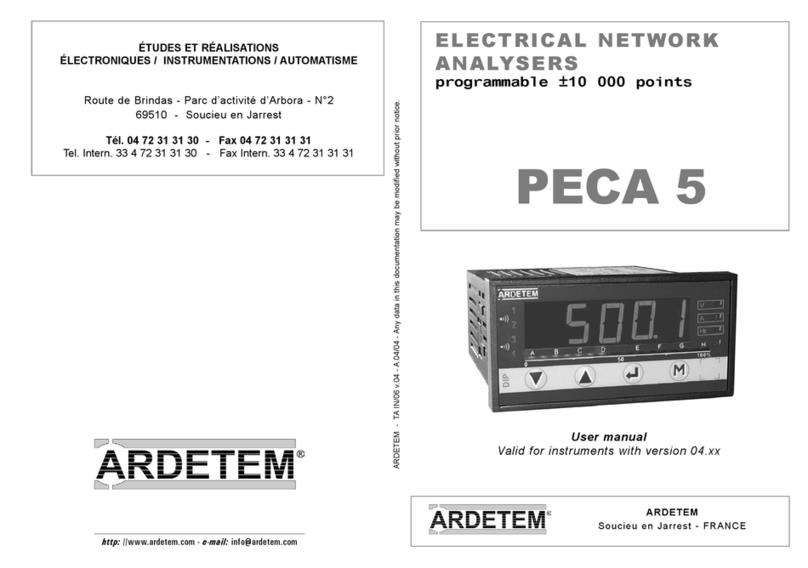
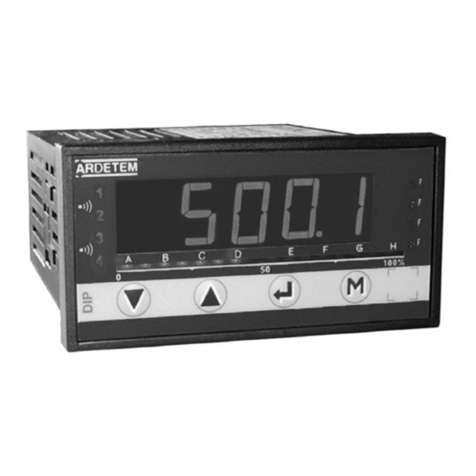
ARDETEM DIP 506 Instruction Manual

ÉTUDES ET RÉALISATIONS
ÉLECTRONIQUES / INSTRUMENTATIONS / AUTOMATISME
Route de Brindas - Parc d’activité d’Arbora - N°2
69510 - Soucieu en Jarrest
Tél. 04 72 31 31 30 - Fax 04 72 31 31 31
Tel. Intern. 33 4 72 31 31 30 - Fax Intern. 33 4 72 31 31 31
ARDETEM - TA IN/54 v.03 -A 01/10 - Any data in this documentation may be modified without prior notice.
ARDETEM
Soucieu en Jarrest - FRANCE
http: //www.ardetem.com - e-mail: [email protected]
DIGITAL PANEL METERS
programmable -10 000 / +100 000 points
User handbook
Valid for instruments with version 03.xx
DIP 506

p1
Technical manual DIP506
Summary
Technical manual DIP506
Summary
1 . INTRODUCTION P2
2 . SPACE REQUIREMENTS P3
3 . CONNECTINGS P3
4 . PROGRAMMING P4
4.1 Communicating with the instrument p4
4.2 Oritentation through the programming p5
4.3 Main menu p5
4.4 Programming menu p6
4.4.1 Input programming p6
4.4.2 Display programming p7
4.5 Input features and programming limits p11
4.6 Output features and programming limits p11
4.6.1 Analog output p11
4.6.2 Digital output p12
4.6.3 Relay output p12
4.6.4 Safeties p13
4.6.5 Display features p13
4.7 Instrument configuration p15
4.8 Reading of the configuration p16
4.9 Access code p16
4.10 New programming p16
4.11 Functions accessible in the main menu p17
4.11.1 Display simulation p17
4.11.2 Analog output simulation p17
4.11.3Menu : Clear .Deleting of the recorded alarms p17
4.11.4 Menu : t.tare p17
4.11.5 Menu ClrM deleting of the min and Max values p18
4.11.6 Menu Inf Display of the min value p18
4.11.7 Display of the Max. sup value p18
5.1 Other functions p18
5.1 Visualisation of the direct mesasure p18
5.2 Visualisation and adjusting of the alarm setpoints p18
5.3 Automatic setting p19
6. APPLICATION EXAMPLES P20
7. ERROR MESSAGES P20
8. GENERAL WARRANTY CONDITIONS P20
9. LEXIQUE P20
10. MODBUS ANNEXE P24

p2
The DIP506 is a high accuracy programmable panel meter, for gauge
bridge inputs. It is equipped on its front face with a red display of five
14mm high digits, whose brighness suits applications in industrial control
rooms perfectly.
It allows display, control and transmission of data from all types of strain
gauges or pressure sensors.
• The DIP506 entails as standard version:
4 bidirectionnal voltage calibers:
± 10mV, ±20mV, ±50mV, ±100mV
Accuracy = 0,05% of the measure range at 25°C
Thermic drift < 200 ppm/°C
Measurable overstepping from -5% to 5% of caliber
Enlarging effect
Special linearisation in 20 points
Bridge excitation voltage:
Programmable 5V ±0,1% or 10V ± 0,1%, 120mA max.
Line resistance: 20 Ω max.
• The DIP506 S is the fast version of DIP506 with 50 acquisitions per
second instead of 10 acquisitions for the standard version
AVAILABLE OPTIONS: (specify on order)
Insulated analog output: A
Active or passive current output, or voltage output.
Programmable scale ratio with enlarging effect.
Relay output: R or R4
2 or 4 relays: mode setpoint or window.
Latching function.
Time delay and hysteresis adjustable on each setpoint.
Alarm messages
Insulated digital output: N
RS 485 2 wires, protocole MODBUS-JBUS.
LOGIC input 2 insulated LOGIC inputs with programmable functions
Display hold,
1. INTRODUCTION Decimal point moving,
Function tare,
min. and Max. zero reset.
Bargraph: (display 16 leds) : B
Allows fast evaluation of the measured value variations.
Programmable scale factor
GENERAL FEATURES
• Number of acquisitions per second:
DIP506: 10
DIP506 S: 50
• Input impedance ≥ 100 MΩ
• Common mode rejection rate: 120 dB
• Zero drift compensation
• Insulation: Input / Power supply: 2,5 kV eff. 50Hz-1min
Input / Output: 1 kV eff. 50Hz-1min
• Power supply: (specify on order)
2 Versions: High Voltage or Low Voltage
High Voltage: 90...270 VAC and 88 ...350 VDC 50/60/400 Hz
Low Voltage: 20...53 VAC and 20...75 VDC 50/60/400 Hz
• Power draw: 6 W max. 9 VA max.
• Complies with standards EN 50081-2 on emission and EN 50082-2;
on immunity (in industrial environment)
EN 61000-4-2 level 3, EN 61000-4-3 level 3,
EN 61000-4-4 level 4, EN 61000-4-6 level 3.
CE marking according to Directive EMC 89-336

p3
Protection:
Front face: IP 65
Case: IP20
Terminals: IP 20
Case:
Self-extinguishing casing in
black UL 94 V0 ABS.
2. SPACE REQUIREMENTS
Case dimensions: (with terminals)
96 x 48 x 124 mm
Panel mounting
Cut out 44 x 91 mm
external
seal
Fitting panel
Max. thickness
case
tightenings
Terminals
Connectors plug-off connectors on rear
face for screwed connections (2,5mm²,
flexible or rigid)
Display:
-10 000/+100 000 points (14 mm)
Electroluminescent red (green optional)
4 alarm Leds
+ 4 Leds with programmable functions
3. CONNECTINGS
4 5 6789
INPUTS
A+ A-
R+ R-
S+ S-
LOGIC INPUTS
(optional)
For a wiring in 4 wires,
connect terminal 4 to terminal 5 and
terminal 8 to terminal 9
32
33
34
LOG 1
LOG 2
COM
2 channels
or
A
23
24
25
LOG 1
LOG 2
COM
2 channels
C
E
20
21
22
1 2 3 4 5 6 7 8 9
Drawing of terminals location
(view of case rear side)
23
24
25
26
27
28
29
30
31
32
33
34
35
36
37
CE
D
B
A
123
-
~
~
+
AC
DC
POWER SUPPLY
A

p4
OUTPUTS (options)
26
27
28
29
30
31
2 RELAYS
T1
C1
R1
T2
C2
R2
T : NO
C : Common
R : NC
0-4/20mA active
ACTIVE CURRENT
0-4/20mA passive
external source 30 V max.
VOLTAGE
PASSIVE CURRENT
32
33
34
35
36
37
4 RELAYS
20
21
22
DIGITAL
Data link RS 485
B
A
COM
T3
C3
R3
T4
C4
R4
or
+
23
24
25
V
Lr
+
-
+ -
23
24
25
mA
CC
E
D
B
20
21
22
1 2 3 4 5 6 7 8 9
Location of terminals
(view of case rear side)
23
24
25
26
27
28
29
30
31
32
33
34
35
36
37
CE
D
B
A
4. PROGRAMMING
4.1 Communicating with the instrument
Alarms
Led 1
Led 2
Led 3
Led 4
Functions
Led 5
Led 6
Led 7
Measure dis-
play
From the measuring, several funtions are available simply by
pressing 1 key, or 2 simultaneously.
All accesses to these functions can be modified in the menu
SEt.CF. (see page 10 ).
As standard, these functions are:
Direct access by pressing 1 key:
Display of the min. value (AF.inF see page 18 ).
Display of the Max. value (AF.SUP see page 18 ).
zero reset of the min. and Max. values (clr.M see page 18 ).
Access to the main menu (not modifiable, see page 5 ).
Direct measure visualising (see page 18 );
Visualising and setting of alarm setpoints (see page 18)
Access to menu tare (see page 18 );
Zero reset of alarm memories (see page 17 );
Tare zero reset (see page 18 );
Automatic input setting (not modifiable,
see page 19 );
Reading convention:
Move through main menu
Return to main menu
Blinking display: awaiting validation or setting
Alternating information display
+
M
+
+
+
M
+
M
+
M
«
M

Between each entering, confirm
the cipher with
p5
4.3 Main menu
Mode
configuration
reading
(see p 16 )
If code correct,
access to the
programming
menu
(see p 6 )
Analog out-
put simula-
tion
(see p 17 )
Authorized by
access code*
Deleting of
the recorded
alarms
(see p 17 )
and
6888
6588
6528
6520rEAd ProG
CodE
8 888
GEnE. CLEAr
«
CLr.M
«
SUP.
«
«
«
«
«
Programming
of the access
code
(see p 17 )
Display
simulation
(see p 17 )
Authorized by
access code*
(relay / analog
output)
(analog
output) (relay output)
P.CodE SIMUL
«
«
Zero reset of
the min. and
Max.
(see p 18 )
Visualisation
of the Max.
value
(see p 18 )
InF.
«
Visualisation
of the min.
value
(see p 18 )
Access to
menu tArE
(see p 18 )
Authorized by
access code*
t.MEnu
«
scrolling of
menus
vertical
move
Entering of the access code.
The access to the programming menu is
protected by a 4-cipher code. The code is
0000 on factory exit (to change this code
see page 17)
Entering of a parameter:
First start by increasing or decreasing:
The 1st digit and the sign: from -9 to +9.
The 2nd from 0 to 9.
The 3rd from 0 to 9.
The 4th from 0 to 9.
The 5th from 0 to 9.
Main menu
(continuation)
4.2 Orientation through the programming
The dialogue is ensured by 4 keys located on the front face.
Move through the menus
downwards, or decreasing
of the displayed value
Validation of the displayed parameter
or access to a sub-menu
Exit from a sub-menu to
access the next menu / access
to the programing exit menu
Note: In mode programming, the instrument will automatically revert to
the measure with the previous configuration if no key is pressed during
1min.
Move through the menus
upwards or increasing of
the displayed value
M
65280
M

p6
M
InPut
InPut
4.4 Programming menu (according to options)
dISPL.
OUt.MA OUt.U
JbuS
tor
rELAY
SECU
Pr.diS
SAvE
SAvE
Access to the input programming
p6
Access to the scale factor programming p7
Access to the analog output programming p7
(option analog output)
Access to the communication parameters (RS485) p8
(option digital output)
Access to the programming of the LOGIC inputs p8
(option LOGIC inputs)
Access to the programming of the relays (2 or 4 relays) p8
(option relay output)
Access to the programming of the output and the relays p9
in case of self-diagnosis error
(option analog or relay output)
Access to the display programming: p9
Leds, Bargraph, Display brightness
Access to the instrument configuration menu p10
Access to the programming exit menu, with or p11
without configuration saving
Note:
⇒ Press key to revert to the menu
⇒ In mode programming, the instrument will automatically resume
measure with the previous configuration if no key is pressed during
1min.
M
diSPL.
Note:
Press key to revert to menu
SEt.CF
or
M
Note:
Press key to go on to next menu
Move through menus / choice
Upwards move / increase
Validation / vertical move
Downwards move /
decrease
Exit / menu access
M
4.4.1 Programming of the process
signals input
caliber choice
down scale
-110.0 < x < 110.0 (mV)
Note: For the entering of the
down and full scale and the
linearisation points, (value in
mV), the decimal point must
be adjusted after
programming the 4th digit.
For the automatic setting
see page 19.
If special linearisation
enter the number of points
from 1 to 18
special linear
functions
«
«
d.in
«
00.00
diSPL.
10.00 100.0
20.00 50.00
«
nb
«
0018
«
A01
«
00.00
«
A18
(1)
(1) (1)
full scale
«
F.in
«
100.0
(1)
(1)
«
«
«
«
CALib
«
Li.SPE
«
Funct.
«
00.00
InPut
linear
functions
«
LinEA. (1)
If special courve

p7
4.4.2 Display programming
Entering of the decimal
point location
* The changing of this param-
eter requires re-programming all
parameters related to the relays
and the analog ouptut, the bar-
graph as well as all following dis-
play parameters:
SPxx, hystx, do.diS, Fo.diS d.bArG,
F.bArG, d.diSP, FdiSP, bxx, Cut.oF
⇒ The instrument will
automatically resume
measure with the
previous configuration
if no key is pressed dur-
ing 1min.
«
04.00
«
dO.diS
Out.MA
Out.U
diSPL.
-.---
«
d.diSP
«
0000
«
F.diSP
«
5000
«
b01
Entering of the input down
scale “d.in” diplay from
-9999 to +99999
Analog output down scale
Analog output full scale
entering, display corresponding to the output down scale
entering, display corresponding to the output full scale
Entering of the input full
scale “F.in” display from
-9999 to +99999
Entering of the lineari-
sation points data from
-9999 to +99999
Setting in display points of
the same number of ordi-
nates “bxx” and abscisses
“Axx”
Setting in display
points
entering of the
cut-off from -9999
to +99999
according to options
IntEG : entering of the coefficient from 0 to 10
Integration indice
if integ ≠ 0
«
2000
«
b18
«
Cut.oF
«
4000
«
YES
«
2000
Out.MA
Out.U JbuS tor rELAY SECU
«
IntEG.
«
0010
«
no
or
or or or or
entering of the filtering action span in % of the measure range
0.5
0. 1 1510 100
or
or or or or
JbuS tor rELAY SECU
or or or
See also output features page 11
(4)
00.00 < x < 22.00 (mA)
00.00 < x < 11.00 (V)
(4)
(4)
Option analog output
«
«
Point
«
dISPL.
«
20.00
«
0000
«
2000
«
d.out
«
F.out
«
FO.diS
special linearisation
Out.MA
Out.U
or
M
Note :
Press key to go on to next menu
Move through menus / choice
Upwards move / increase
Validation / vertical move
Downwards move /
decrease
Menu acess / exit
M
«
F.bAnd
⇒ The instrument will automatically resume measure with the previous con-
figuration if no key is pressed during 1min.

p8
Communication parameters
slave number
entering of the slave number
between 1 and 255
transmission speed
function
decimal
point
moving
function
min. and
Max.
zero
reset
function
display
hold
function tare
«
SLAvE
«
0001
«
bAUd
tor
«
2400
«
4800
«
9600
«
19200
«
1200
tor rELAY SECU
or
or
or Pr.diS
or
rELAY SECU or Pr.diS
«
tArE
«
Point
«
--.--
«
HoLd
«
CLr.M
Time delay before any answering sequence
OFF: no delay
On : time delay 75ms
«
On
«
OFF
«
dELAY
JBuS
See also the digital data link
features p12
See also LOGIC input features p11
Option digital ouptut
Option LOGIC inputs
«
tArE
«
Point
«
--.--
«
HoLd
«
CLr.M
«
tor 1
«
tor 2
JBuS
tor
M
Note:
Press key to go on to next menu
Move through menus / choice
Upwards move / increase
Validation / vertical move
Downwards move /
decrease
Menu access / exit
M
⇒ The instrument will automatically resume measure with the previous
configuration if no key is pressed during 1min.
«
rEL.1
rELAY
«
AL.1
«
On
«
ModE.1
«
SP 1 0200
«
HYSt.1 0024
«
«
«
tiME.1 000.0
«
LEd 1
«
SP1.1
«
3000
«
SP1.2
«
3100
«
rEL.3
«
rEL.4
hysteresis
0 < hys. < 99999
in display points
0 < tIME < 025.0
in 0,1 sec. increases
latching function
function display of an alarm message
Entering of 4 letters + the point
If option 2 relays, at end of menu REL.2,
If option 4 relays, at end of menu REL.4
access to or
choice of the relay associated Led
status
ON: Led lit when relay active
OFF: Led still when relay active
time delay on the relay
SPI.2 must be ≥ SPI.I
active
alarm
idem
rEL.1
idem
rEL.1
idem
rEL.1
not active
mode window
mode setpoint
access to SP1 access to SP1.1
Pr.diS
«
OFF
«
On
«
MEM.1
«
no
«
YES
«
MESSI
«
no
AbCd.
rEL.2
SECU Pr.diS
«
«
«
YES
Choice of the relay
operating mode:
setpoint or window
p12
(5)
(5)
rELAY
See also relay
output features
p12
If entering of SP1.1 >
SP1.2 then SP1.2 is
enforced
If entering of SP1.2 <
SP1.1 then Err.1
Option output 2 or 4 relays
«
OFF
if mode window programmed
if mode setpoint programmed
«
rEL.2
M
Press key to go on to
next menu
«
If time.1 ≠ 0. Programming of the relay time
delay position
«
doubl
«
SiMPL
t.Act.1

SECU
option 2 or 4 relays
option analog output
option bargraph
if a return value has been entered
p9
«
rEL.1
Pr.diS
«
no
«
tArE
«
tor 1
«
YES
«
no
«
LO HI
«
OFF
out.MA out.U
1111
«
br.bAr
1111
«
L.dIG
«
nuLL
«
rS
«
Auto.0
SAvE
«
LEd5
«
tor 2
«
LEd6
«
8000
«
d.bArG
«
0200
«
F.bArG
setting of the displays brightness
on 4 levels
on 4 levels
brightness of bargraph and leds
deleting of the unsignificant zeros
idem
idem
idem
display corresponding to
0% of the bargraph
display corresponding to
100% of the bargraph
rounded up to the last digit (right hand side)
Programming of Leds,
birghtness, displays and
bargraph
status of relay 1 in case of self-diagnosis error
«
rEL.4
«
LO HI
«
OFF
status of the relay in case of
self-diagnosis error
or
or
«
YES
«
«
output value in case of self-diagnosis error
00.00<rEPLI<22.00 (mA)
00.00<rEPLI<11.00 (V)
See also display features p14
See also the safety features p13
Safeties
OFF: self-diagnosis
not active on relay
In case of self-diagnosis
LO: relay not active
HI: relay active
no: Led not used
tArE: Led lit if a tare has been entered
tor 1: Led indicates LOGIC input 1
tor 2: Led indicates LOGIC input 2
rS: Led lit in case of transmission on
the RS
Auto.O : Led lit while the instrument is
preforming an internal self-calibration
Pr.diS
«
SECU
«
br.diG
Pr.diS
«
«
«
rEL.2
«
no
«
rEPLi
«
02.00
«
LEd8
«
LEd7
«
1
«
2
«
5
«
10
«
20
«
50
«
100

p10
SEt.CF
Programming menu
of the accesses to
the functions
Possible key combinations for
access to the functions:
Features see page 15.
Note: The key and the code
can not be modified.
43--
M
Instrument configuration
SEt.CF
Instrument
configuration
«
SEt.CF
«
«
50 60
«
FrE.
«
«
yES no
«
Auto.0
«
«
5.000 10.00
«
ALIM.
«
«
StAnd.
«
SAvE.
«
butto.
«
«
AF.InF 4 - - -
«
«
AF.SuP - 3 - -
«
«
CLrM - - - 1
«
«
dir.In 4 - 2 -
«
«
AF.SPt - 3 2 -
«
«
CLEAr - 3 - 1
«
«
t.MEnu 4 - - 1
«
«
CLr.tA - - 2 1
SEt.
Fast version
only
4 - - -
- 3 - -
- - - 1
4-2 -
4 - - 1
-32-
-3-1
- - 2 1
M
M
M

Note: Exit from programming mode saving the configuration (SAVE, YES) will
automatically reset to zero the tare, min. and Max. as well as the recording of
alarms.
In case of modification of the decimal points location, the instrument will then
offer after a SAVE YES all parameters related to the decimal point which have
not been modified (see page 7 )
p11
SAvE
SAvE
no
YES
Programming exit with or without saving
exit saving
configuration exit without
saving the con-
figuration
return to measure
display
Features
Measurable input limits: -5 to +5% of measure range
Example for caliber 100mV : from -110 to +110mV
Special linearisation:
For specific applications, the meter can memorise an unlinear curve
programmable in X and in Y.
The curve resulting from your equation can be replaced by a series of lin-
ear segments, with a maximum of 20 points
(19 segments).
Note: The values of the abscisses (x) have to go increasing d.in < A01
value < A02 value ...< F.in.
The adjusting of the points can be either manual or automatic (see page
19).
4.5 Input features and programming limits
Display
resolution
Input stage
resolution Accuracy
Caliber
from -10 to +10mV
from -20 to +20mV
from -50 to +50mV
from -100 to
+100mV
± 1 digit 14 bits 0,05% of the
measure range
Li.SPE
«
LOGIC inputs (optional)
• Board of 2 LOGIC inputs : Input signal 24 Vdc
Possible functions:
Display holding in case function LOGIC is activated .
The display and the analog output remain unchanged even if
the input signal varies. The relays still react to the input signal.
Zero reset of min. and Max. The activation of function LOGIC
will reset min. and Max. to zero
Activation of the function tare.
The meter switches to mode tare, the tare being the display
value present at the time of this activation.
Function moving of the decimal point
4.6 Output features and programming limits
4.6.1 Analog output or
Current output 0/4-20mA active or passive (Vmax.=30VDC) or
voltage output 0-10V
• Accuracy 0.1 % in relation to display (at +25°C)
• Residual drift ≤ 0,2%
• Admissible load 0Ω ≤ Load resistance ≤ 500Ω (current)
Load resistance ≥ 2 kΩ (voltage)
• Programmable scale ratio with enlarging effect
• Response time : 40 ms in relation to display
Analog output down scale (eg. 04.00 (4mA))
Analog output full scale (eg. 20.00 (20mA))
Display value corresponding to the output down scale
Display value corresponding to the output full scale
In mode measure the analog output can not exceed 10% of the greatest
of the 2 values: d.out and F.out
HoLd
CLr.M
tArE
Point
_.___
Out.MA Out.U
F.out
dO.diS
FO.diS
d.out
In case function LOGIC is activated, the decimal
point goes to its programmed location.

p12
4.6.2 Digital output:
- Data link RS485 (2 wires)
- Protocoles MODBUS-JBUS format of data: integer and double integer
- Single transmission format : 1 start bit
8 bits without parity
1 stop bit
Slave number between 1 and 255
Transmission speed between 1200 and 19200 bauds
Time delay before any answer
Table of modbus addresses, used functions: see annexe
4.6.3 Relay outputs:
2 relay outputs
or 4 relay outputs
• Hysteresis programmable independently in the display unit
• Time delay programmable independently from 0 to 25 s in 0,1s. increases
• NO-NC contact 8 A - 250 V on resistive load
Activation or de-activation of alarm x
The state of relay x depends on the entered programming
Relay x remains still.
Choice of the operating mode:
• Mode setpoint
• Mode window
• Mode setpoint
• Mode window
Choice of the state of the relay associated Led
The Led indicates the alarm state.
The Led is lit when the relay is active (coil supplied)
the Led is still when the relay is active (coil supplied)
Hysteresis setting in display points .
The hysteresis is active on switching from Led lit to Led still; i.e.
during switching out of alarm, as the Led represents the alarm
state.
SLAvE
bAud
dELAY
rEL.1 rEL.2
AL.X
On
OFF
rEL.1 rEL.2 rEL.3 rEL.4
OFF
OFF OFF OFF
ON
ON ON ON
setpoint
setpoint stpt stpt
Legend:
ON coil supplied
OFF coil not supplied
or
or
ModE.x
SP.X
SP.X
- Hystx
HYSt.x
LEdx
On
OFF
setpoint OFF
ON
SPX.1
SPX.1
-Hyst.x
SPX.2 SPX.2
+Hyst.x
led lit
led lit
SPX.2
SPX.1 SPX.2
SPX.1
led still
led still
led still

p13
OFF
LO
HI
tiME.x
MEM.x
CLEAr
MESSx
• Time delay on the alarm
The relay time delay is adjustable from 000.0 to 025.0s. in 0.1s.
increasesIt is active both on switching and switching back.
• Time delay position
Time delay on switching on alarm
Time delay on switching on alarm and off alarm
• Latching function
Allows recording of the alarm after passing of the setpoint. When
measure reverts under the alarm setpoint, the relay remains switched
and the Led blinks to warn the user that the setpoint has been passed (to
reset the alarm recordings to zero see menu page 17)
Note : Exit from mode programming saving the configuration will reset the
alarm recordings to zero.
• Display of the alarm messages
A programme alarm message can be made to appear alternating with
measure . The message will appear only during the alarm state, when the
associated Led is lit.
• Setting of setpoints: There are 2 ways to adjust setpoints:
- either in mode programming by entering the correct access code
- or by pressing simultaneously on and if the access to a fast
entering has been authorized during programming of the code (see p18)
· On the relays:
No influence of error detections on the relay
Relay desactivated (coil not supplied) in case of error
detection
Relay activated (coil supplied) in case of error detection
Note : The Led is either still or lit according to its programming in menu
rELAY.
· On the analog output
If a return value has been programmed
Value included between: 0 and 22 mA (current output)
or 0 and 11 V (voltage output)
4.6.4 Safeties:
The meter permanently watches some of its internal parameters. In case
it detects any odness on one or several of these parameters, it will warn
the user.
The error information can be reported:
· On the display: An error message appears alternating with measure;
an error code is registered and can be read in menu About (see p16)
Coding:
1 : Programming error
2 : Offset error
4 : Offset drift
8 : Input calibration error
16 : Output calibration error
32 : Internal drift
64 : Input upper or lower electrical overstepping
If the instrument detects for instance an offset error (2) and an offset drift
error (4) the error code value will be 6 (2+4).
M
4.6.5 Display features:
Decimal point location
Display corresponding to the input down scale
Display corresponding to the input full scale
− If display full scale > display down scale and if display
≤ cut off value, then it is enforced at down scale
− if display full scale < display down scale and if display
≥ cut off value, then it is enforced at down scale
• Filtering:
In order to optimise the filtering and response time, the instrument is
provided with a digital filter, programmable on 2 parameters.
Filtering integration indice: programmable from 0 to 10
Measure range on which the filter will be active, set in %
(0,1; 0,5; 1 ; 5; 10 ;100 %)
eg : IntEG : 3 F.band : 0,5 %
The indice 3 filter is active when measure varies by ± 0,5% . When it
overstepps 0,5% it is no longer filtered. This allows a min. response
time, while cutting off a parasite noise of ±0,5% covering the signal and
causing an unsteady measure. If F.band = 100% the filter becomes
active on the whole measure range.
Point
d.diSP
F.diSP
Cut.oF
IntEG.
F.band
t.Act.X
SIMPL
doubL

• Response time:
Note: For the analog output response time, 40ms must be added to
the values indicated in the table.
For the relays: the reacting time of the relay (7ms) and the time delay
programmed on the alarms must be added.
• Setting of the digits brightness:
Lowest brightness Strongest brightness
p14
br.diG
1111
Auto.O
rS
4444
1111 4444
br.bAr
L.dIG
nuLL
nuLL YES
=
nuLL no
YES
=
=
nuLL
d.bArG
LEd x
no
tor 1
tor 2
tarE
F.bArG
no
YES
=
=
• Adjusting of the bargraph and Leds brightness
Lowest brightness Strongest brightness
The brightness level is visualised directly on Leds 5 and 8 and on the
bargraph.
Caution: during setting, the 4 Leds and the bargraph no longer represent
the measure, even in mode reading.
• Last digit (LSB)
In mode programming, the menu L.dIG allows a choice for the rounding
up of the last digit : 1, 2, 5, 10, 20, 50 or 100.
• Deleting of the unsignificant zeros
Deletes the unsignificant zeros on the left hand side.
Eg : Display value 0015
Display 0015
Display 15
Eg : Display value 00.15
Display 00.15
Display 0.15
• Bargraph display factor (option bargraph only)
Display corresponding to still bargraph (0%)
Display corresponding to fully lit bargraph (100%)
In case of overstepping, the bargraph starts to blink.
• Programming of Leds 5 to 8
Each Led numbered from 5 to 8 can be individually associated to one of
following functions in menu
Led still (no associated function)
The Led is lit when LOGIC input 1 is active
The Led is lit when LOGIC input 2 is active
The lit Led indicates a registered tare
The Led is lit during sending of the sequence, response of
the instruments digital data link
The Led is lit when the instrument is internally
performing a self-calibration
Typical
response
time at
90%
100 ms
DIP
506 325 ms 600 ms
intEG 0 1 2
1 s
3
1,5 s
4
2 s
23 ms
DIP
506 S
Typical
response
time at
90%
DIP
506
intEG
DIP
506 S
43 ms 63 ms 100 ms 180 ms 270 ms
5
3 s 5 s 7,5 s
6 7 8
10 s
9
15 s
360 ms 530 ms 880 ms 1,3 s 1,8 s
10

• 4.7 Configuration of the instrument
Programming of the auxiliary power supply frequency, in order
to optimise the rejection of the parasite noise it may send
disturbing the measure.
50 Hz
60 Hz
Note: if the instrument is supplied in DC, programme the standard
operating network frequency.
Programming menu of the internal self-calibration.
• Internal self-calibration: the insrument will at intervals perform an
internal self-calibration, in order to catch up with any drifts of its
components.
During this operation, the instrument response time can be of 120 ms in
mode fast and 360 ms in mode normal.
These self-calibrations are performed every 10 seconds during the 10
minutes following a setting on tension (time necessary for stabilisation
of the components).
After this time, the instrument will perform a self-calibration if the
internal temperature varies by approx. 3°C.
This self-calibration can be deleted by programming in the case where
the variations temperature variations are not too significant, where the
instrument response time is necessary and a light drift in temperature of
the measure can be admitted.
Programming menu of the internal self-calibration.
Deleting of the self-calibration on the temperature variation
Activation of the self-calibration on the temperature variation
Note:
The insrument will also perform 3 self-calibrations during the 30 sec-
onds following a programming exit with configuration saving (SAvE, YES)
or after an electrical overstepping on the input (if input > 110% of the
caliber).
SEt.CF
FrE.
50
Auto.O
Auto.O
60
no
YES
Only for the fast version
(DIP506S)
p15
Programming of the bridge excitation voltage
5.000 . 5V
10.00 . 10V
Programming menu of the accesses to functions directly by
pressing 1 key, or 2 simultaneously, in mode mesure.
Standard configuration
Re-configuration
Functions:
min. value display
Max. value display
min. and Max. zero reset
Direct input measuring
Reading and program. (if authorized, see p16) of setpoints
Zero reset of alarm recordings
Access to menu tare
Tare zero reset
• Modification of the keys configuration
ALiM
butto.
AF.InF
AF.SuP
CLrM
dIr.In
AF.SPt
CLEAr
tMenu
CLr.tA
StAnd
SEt
Possible key combinations for
access to the functions:
Choose the desired function in the
menu, and enter.
The current key code appears.
(See p 10)
Note: The key and the code
can not be modified.
43--
M
Press the keys cor-
responding to the
new access and keep
pressing until thenew
key code appears.
Then the menu will
pass on to next
function.
«
«
AF.InF 4--- 4 - - -
- 3 - -
- - - 1
4-2-
4 - - 1
-32-
- 3 - 1
--21
M
M
M

4.9 Access code
An access code adjustable from 0000 to 9999 serrves to protect the
instrument and its setpoints from unauthorized programming, and to lock
access to some functions.
0 0 0 0 Factory code
x x x x
0 to 5 Access to the automatic setting
6 to 9 No access
0 to 5 Access to the display and output simulations
6 to 9 No access
0 to 5 Access to the menu “tare”
6 to 9 No access
0 to 5 Access to the fast entering of alarm setpoints
6 to 9 No access p16
rEAd
rEAd
InPut
diSPL
Out.MA Out.U
JbuS
Pr.diS
SEt.CF
About
4.8 Reading of the configuration
Reading of the input parameters
Reading of the measure display parameters
Reading of the analog output parameters
(option analog output)
Reading of the communication parameters
(option digital output)
Reading of the LOGIC input parameters
(option LOGIC input)
Reading of the alarm parameters
(option 2 or 4 relais)
Reading of the safety parameters
Reading to the display programming
parameters (Leds, bargraph Leds...)
Reading of the instrument configuration menu
Reading of the instrument own parameters
In each reading submenu, use keys and , to move, and key
to visualise parameters.
If no key is pressed during 20 s., the instrument will automatically
resume measure display.
or
Validation / Vertical move
rELAY
SECU
tor
About
D506
n0
A0123
ProG
02.00
0Pt10.
Ar4--.
Err.
0000
CH.SUM
FC4E
Validation / Vertical
move
Instrument type
Submenu
instrument number
programme version
code of installed
options
error code in case of
error self-diagnosis
check sum of the flash
memory
X1 : - : No analog output
A : Analog output
X2 X3 : - - : No relay output
r- : Output 2 relays
r4 : Output 4 relays
X4 : - : No RS output
n : RS output
X5 - : No LOGIC input
t : 2 LOGIC inputs
(.) : decimal point still :
not bagraph
“.” : decimal point lit :
option bargraph
XXXXX
12345.
XXXXX
12345.

p17
4.10 New programming of the access code
P.CodE
no
Enter previ-
ous code
if code not valid
(old)
display during 2s.
and revert to the
measure display
new code
registered Revert to the measure
display
if code correct
(old)
Enter new
code
SIMUL
SIMUL
Display value
M
Press Menu to
revert to the
measure
display.
if
4.11 Functions accessible in the main menu
4.11.1 Display simulation
(accessible according to the programmed access code and with
option relays or analog output)
The display can be simulated with the meter in order to validate the
analog output and relays configuration in the system.
Note: During the simulation, the instrument no longer measures, the ana-
log output and the relay outputs react according to the entered display.
If alarm messages have been programmed, they may appear during the
simulation.
M
Press Menu to
revert to meas-
ure display.
GEnE.
GEnE.
Output value
M
if
Enter value to
be injected
Note: During simulation, the instrument keeps measuring, only the
analog output no longer reacts to the measure.
(accessible according to the programmed
access code and with option analog output)
CLEAr
4.11.3 Menu : Deleting of the recorded alarms
Accessible in the main menu and by keys , standard direct access
If the latching function has been programmed:
After a setpoint has been passed, the status of the relay will be recorded.
If the setpoint is passed back the other way, the relay status does not
change and the corresponding Led starts to blink.
To come back to the normal status (Led not blinking and relay in the
correct state) use menu CLEAr.
CLEAr
the recorded alarms will
not be deleted
Deleting of the recorded
alarms, and revert to the
measure display
Note: An exit from the programming mode with configuration saving will
automatically reset the alarm recordings to zero.
Reminder: If no key is pressed during 1 min, the instrument will
automatically resume measure display.
Entering of a new dis-
play value
4.11.2 Analog output simulation (mode generator)

p18
t.MEnu
t.Auto
t.MAnu
t.CALC
CLr.tA
InF
InF
4.11.4 Menu : Menu tare (Standard direct access by + )
Accessible according to the programmed access code and if measure is not
in overstepping (display ...)
3 types of tare are possible
Automatic tare
The mesure present on the input is registered as tare
The display is then brought back to d.diSP
Manual tare
Pressing on opens access to the tare entering menu.
The value programmed in display points will be taken as tare.
Calculated tare
Pressing on opens access to the NET value entering
menu. The tare value will be the measure present on the input less the
NET value entered in display points.
(Standard direct access : + )
Pressing on deletes the recorded tare and reverts to the normal
measure display.
Note: The tare will be saved in case of power supply cut.
One of the Leds from 5 to 8 can be programmed to check if the measure
is taking into account a tare or not (see p 14).
4.11.5 Menu : deleting of the min. and max. values
(Accessible by in standard direct access).
Pressing on will delete the min. and Max. values
These values will not be saved in case of power supply cut.
4.11.6 Menu min. value display.
(Accessible by in standard direct access)
Pressing on allows visualising the min. recorded value, shown
alternating with message
Revert to measure with or after 20 seconds)
dir.In
5.1 Direct measure visualising
Accessible by + in standard direct access
Pressing on these 2 keys allows visualising the signal directly in mV,
without processing: scale factor or linearisation.
M
M
M
M
Ajusting of setpoints: There are 2 ways to adjust setpoints.
- either in mode programming by entering the correct safety access code
(see page 16)
- or by pressing simultaneously on + in standard direct access
The meter will then show message SP.x or SPx.x alternating with the
corresponding setpoint value.
The various setpoint values can be accessed by and .
These setpoints can then be modified (if access code < 6000
by pressing
When the setpoint is adjusted press to come back to the
setpoints reading menu.
Once all setpoints are adjusted, just press key
and the meter will revert to mode measure, taking the new values into
account.
If no key is pressed during 60 s. the meter will resume measure
display without modifying the setpoints value.
5.2 Visualisation and setting of alarm setpoints
5. FURTHER FUNCTIONS
M
Option 2 or 4 relays
4.11.7 Display of the Max. value.
(Accessible by in standard direct access)
Pressing on allows visualising the min. recorded value shown
alternating with message
Revert to measure with or after 20 seconds)
CLrM
SuP
SuP
M

p19
M
M
5.3 Automatic setting
(according to programmed access code see p 16)
Menu accessible by pressing keys +
in mode measure.
Note : The instrument must be connected to the sensor and under volt-
age since15 min. at least before the setting in order to have a steady
temperature.
Before performing the automatic setting, the input caliber, the type of
curve (linear or special) as well as the number of points in the case of
the special curve (see page 11) must be defined in the programming
menu.
Apply on the sensor the value corresponding to the point to be set.
Press simultaneously on keys + to access the menu and use
or to select the point to be adjusted.
After pressing key the instrument will indicate during 3 seconds
the value in mV it is measuring, and then the value of the scale factor
corresponding to this point.
Confirm or enter a new value by .
Pressing key during the display or entering of the scale factor
allows to go on to the next point setting without saving the previously
set point.
Pressing key during the display of d.in Axx or F.in allows exit from
the automatic setting. The instrument will then offer to save the setting,
or not.
Note: The instrument will automatically revert to mode measure without
saving the settings if no key is pressed during 15 min.
If the caliber defined in the programming is not well adapted in relation
to the adjusted points, the instrument will show message out.rA during 3
seconds on setting exit.
To obtain a better accuracy, it is then preferable to programme a lower
caliber and go through the setting again.
Message out.rA also appears during an electrical overstepping during
the setting. In this case, choose the higher caliber in the programming
menu.
idem
If special
curve
* If pressing on Menu , on to next
point without saving the previous
point.
*
exit without
saving
value in mV
exit saving the adjusted
points
idem
idem
Value of the
corresponding
scale factor
xx.xx d.diSP
Value of the new
scale factor
3s.
d.in
SAvE
YES no
M
M
YES no
A01
AXX
F.in
SAvE
This manual suits for next models
1
Table of contents
Other ARDETEM Measuring Instrument manuals