Ardisam Rivers Edge Treestands CAGE R30 User manual

Get parts online at
www.HuntRiversEdge.com
P/N: 34982
C/N: 35790
REV1: 08/24/2020
© 2020 Ardisam
All Rights Reserved
Operator's Manual
MODEL CBR30T
CAGE™
PERMANENT HUB BLIND
R30

Check for parts online at www.HuntRiversEdge.com or call 800-345-6007 M-F 8-5
2
Operator's Manual
CAGE™ R30
INTRODUCTION
If for any reason you have a problem with your product or are missing any parts, DO NOT return to the retailer,
contact Rivers Edge® Customer Service Department at 800-345-6007 for assistance.
CONTENTS
Introduction/Warranty ..................................................................................................................................................................................................................2
Warnings.............................................................................................................................................................................................................................................3
Service Parts List..........................................................................................................................................................................................................................4-5
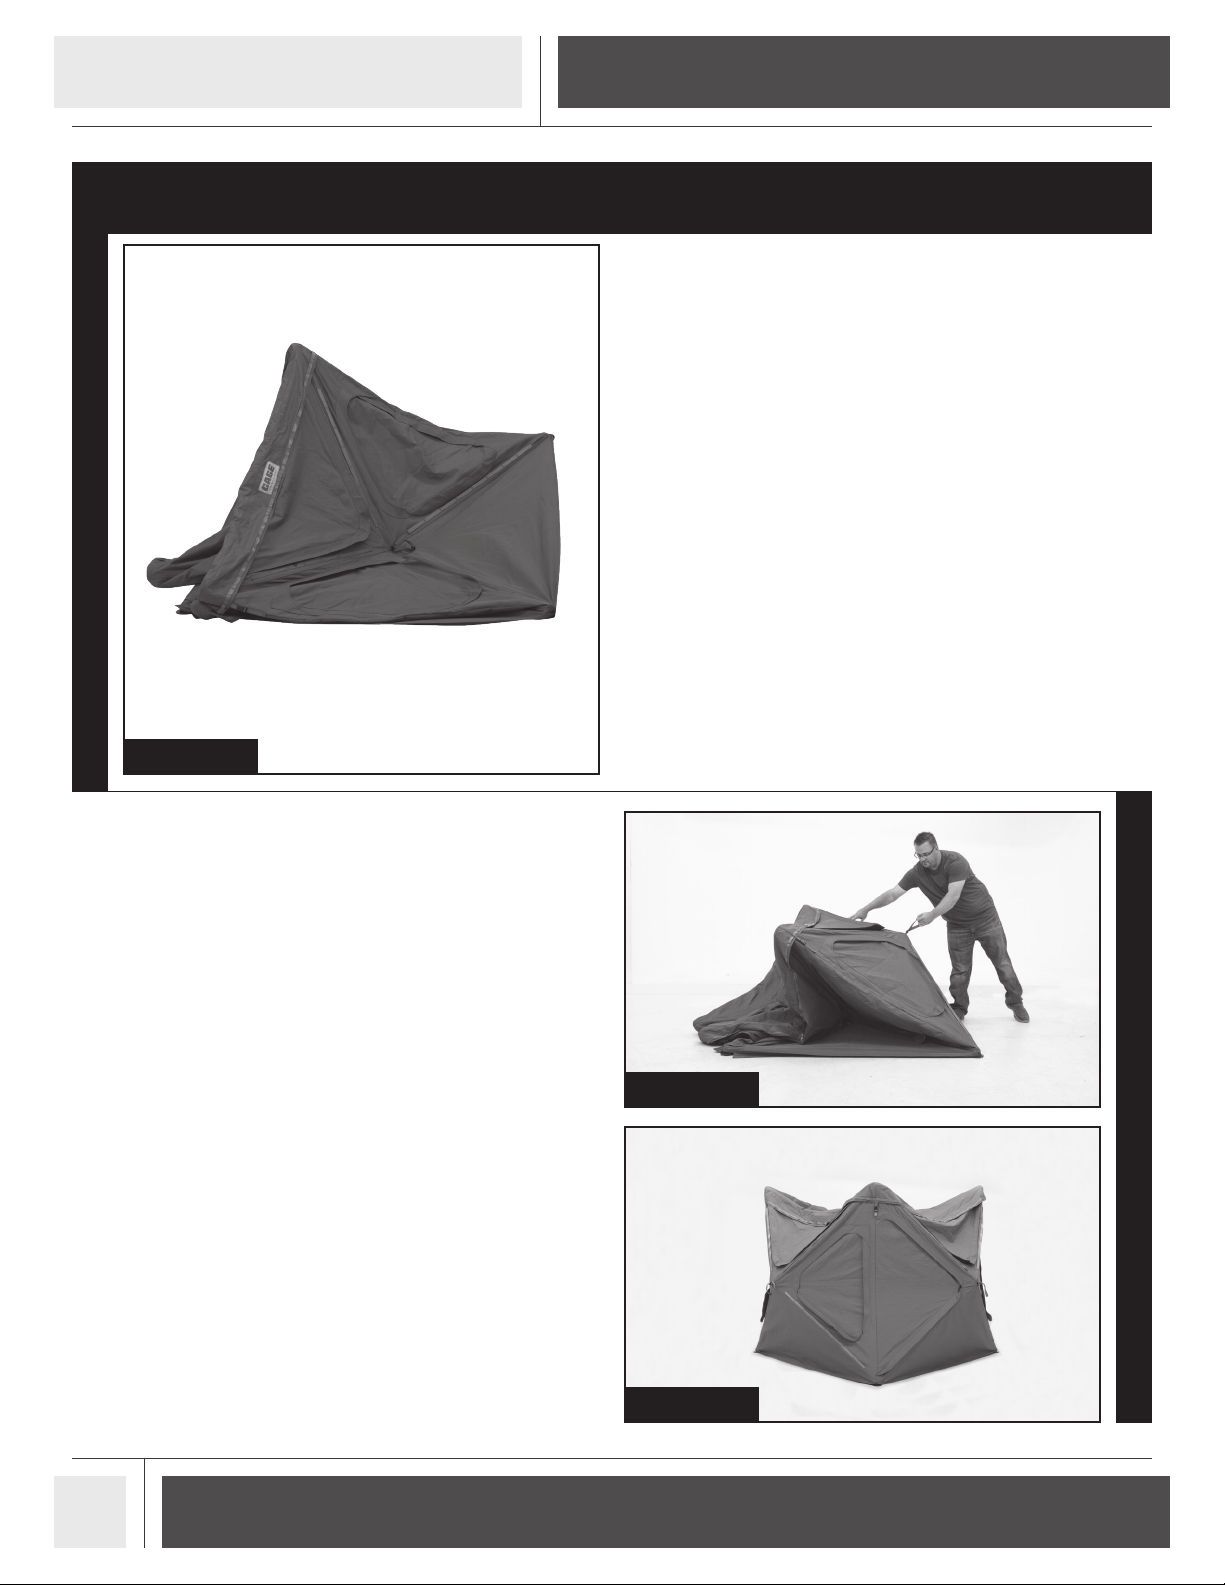
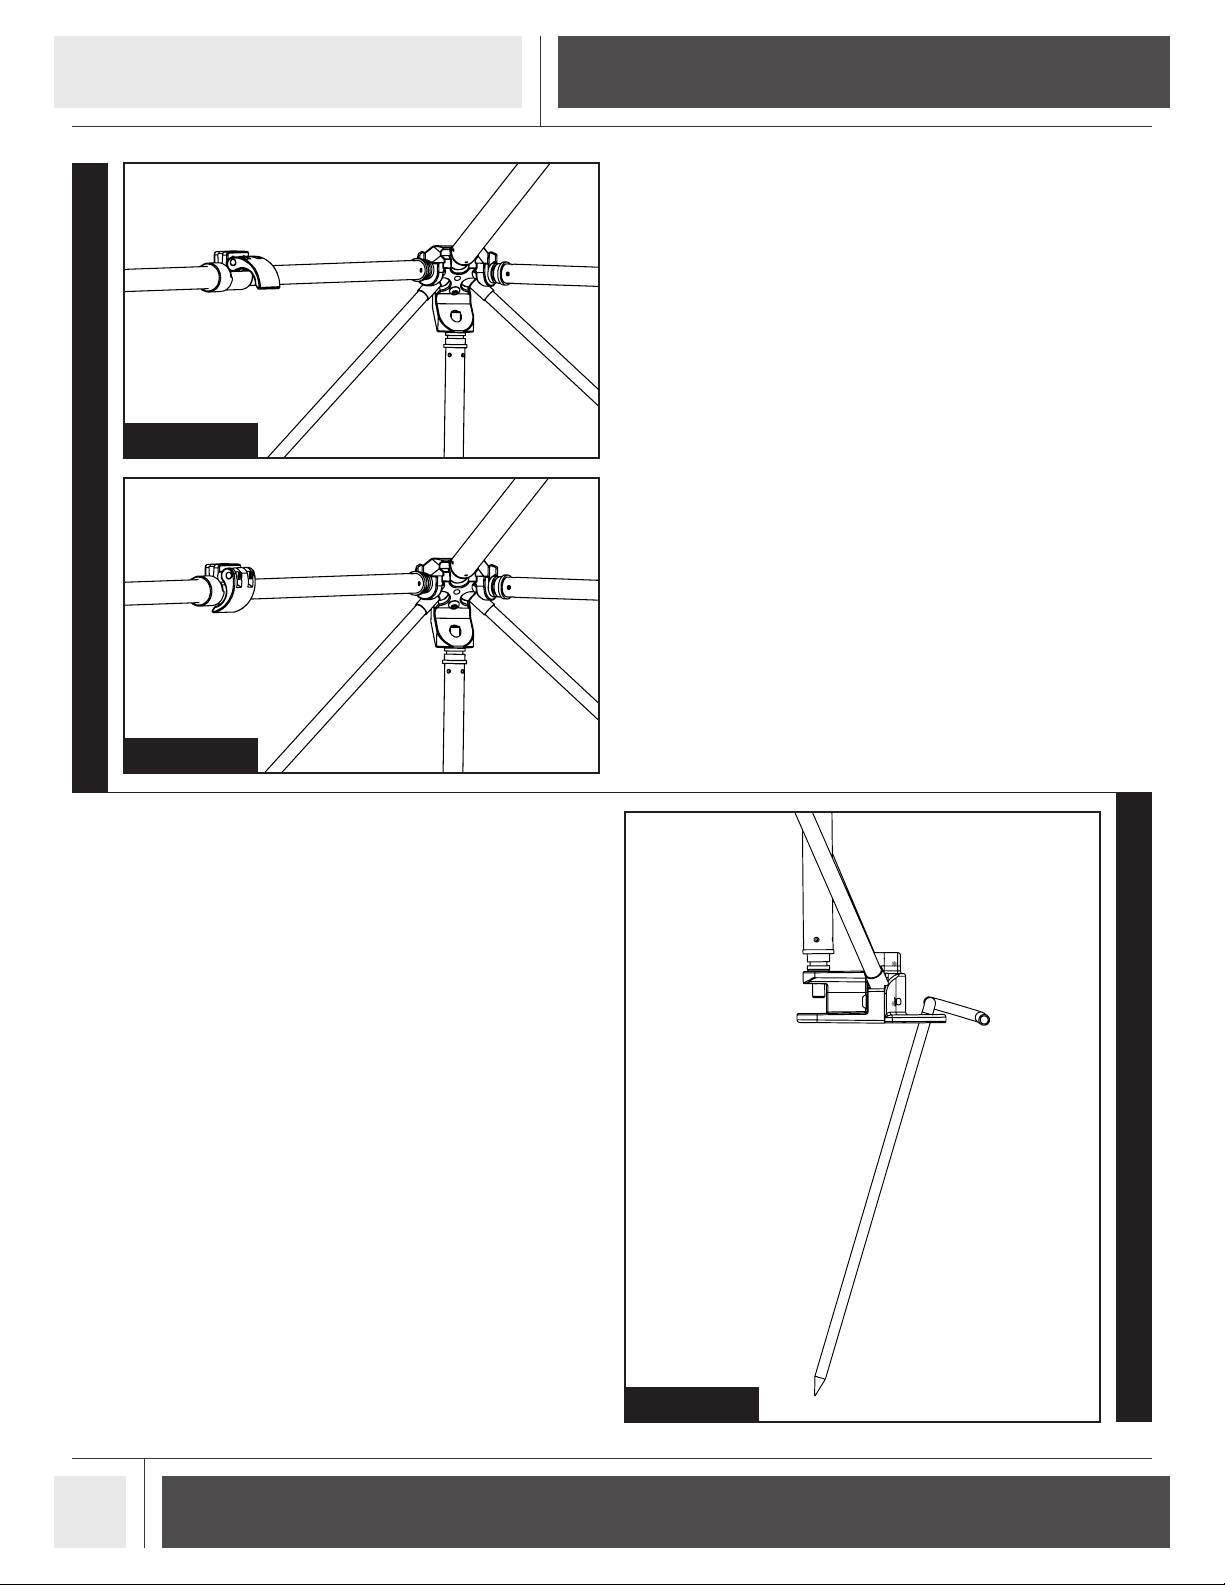
Set-Up and Use Instructions................................................................................................................................................................................................. 6-11
Take-down Instructions .......................................................................................................................................................................................................12-13
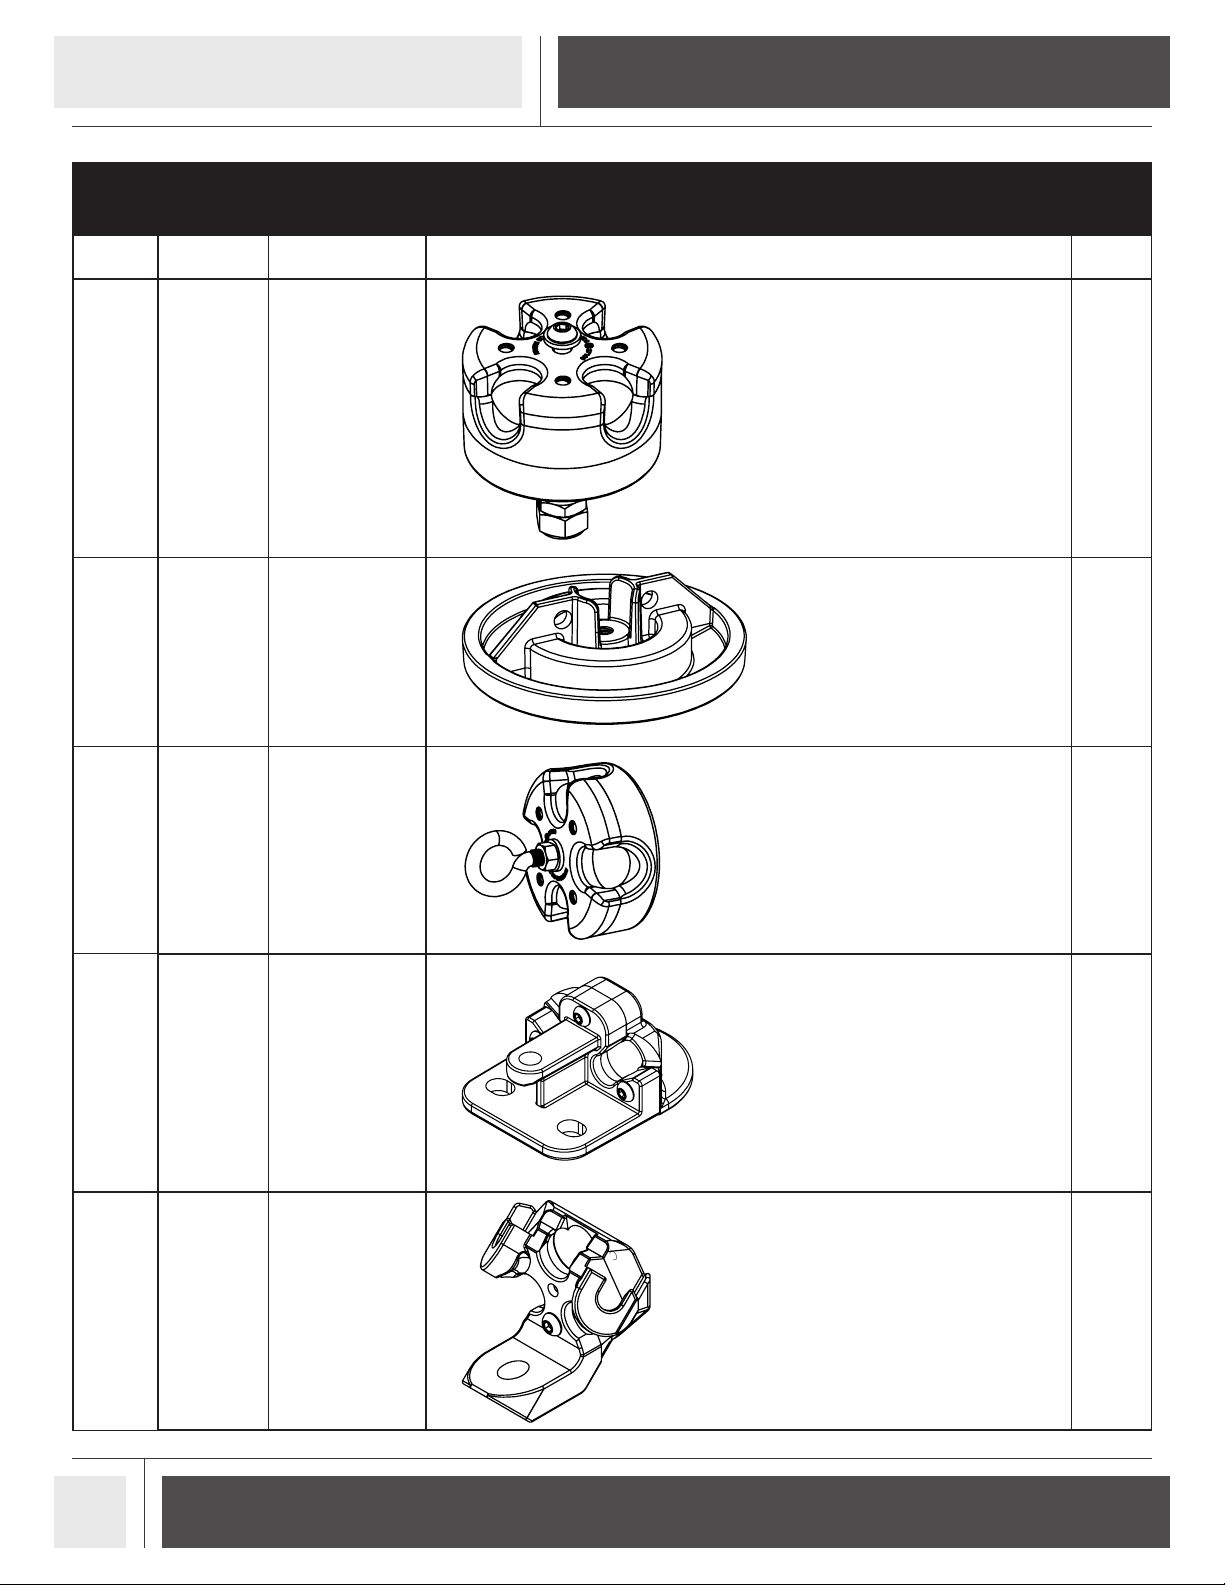
Illustrated Parts Breakdown................................................................................................................................................................................................14-15
WARRANTY
This warranty applies to the original owner that provides a proof of purchase of the unit. The warranty is not transferable. The warranty
period begins on the date of purchase by the rst retail consumer or commercial end user. Any unit used in a commercial application
is covered for a period of 90 days after purchase. For the warranty to be valid, the product must be registered online at huntriversedge.
com, within 30 days of purchase. This warranty applies only to products which have not been subjected to negligent use, misuse, uses
other than those indicated in the product’s owner’s manual, alteration, accident, use of unauthorized parts, failure to perform periodic
maintenance as specied in product’s owner’s manual, or normal wear and tear. There is no other expressed warranty. Implied warranties,
including those of merchantability and tness for a particular purpose, are limited to one year from purchase, or to the extent permitted
by law. All other implied warranties are excluded. Liability for incidental or consequential damages are excluded to the extent exclusion
is permitted by law. RETI does not assume, and does not authorize any other person to assume for us, any liability in connection with the
sale of our products. P
roducts for which warranty work has been approved must be sent directly to RETI and performed by RETI. To obtain warranty
service and/or replacement instructions, you must obtain prior approval from RETI before shipping your package to us by calling our customer
service department at 800-345-6007 or by writing to: Ardisam, Inc., P.O. Box 755, 1160 Eighth Avenue, Cumberland,WI 54829 for a return material
authorization number (RMA#). All items must be shipped prepaid. RETI will, at no charge, repair or replace, in RETI’s sole discretion, any product that
satises the conditions stated above. RETI retains the right to change models, specications and price without notice
. RETI shall not be obligated to
ship any repair or replacement product to any location outside of the United States of America or Canada. For more warranty information
contact Ardisam, Inc. at 800-345-6007.
If you choose to elevate this product to use above ground (on a tower type structure), only use RETI original designed structures to do
so. *Using man-made structures or structures not manufactured by RETI will void your warranty and waive any and all claims for liability
against the manufacturer RETI. If you choose to elevate this product on a RETI brand tower structure, the warranty listed in the tower
structure manual will apply to this product in addition to the warranty statement in this owner’s manual.

Check for parts online at www.HuntRiversEdge.com or call 800-345-6007 M-F 8-5 3
Operator's Manual
CAGE™ R30
This tent is made with fabric that meets CPAI-84
specications for ame resistance. It is not re proof.
The fabric will burn if left in continuous contact with any
ame source.
Heat sources burn oxygen and emit carbon monoxide.
Use caution with heaters and vent properly.
• Do not use candles, matches or open ames of any kind in
or near a tent.
• Do not cook inside a tent.
• Build campres downwind and several meters away from a
tent and be sure to fully extinguish campres before leaving
a campsite or before retiring for the night
• Exercise extreme caution when using fuel-powered lanterns or
heaters inside a tent and use battery-operated lanterns before
going sleep
• Extinguish or turn o all lanterns before going to sleep
• Do not refuel lamps, heaters or stoves inside a tent
• Do not smoke in a tent
• Do not store ammable liquids inside a tent
Proper securing of blind is necessary to avoid damage to
blind due to high winds or unattended use. Secure blind
to the ground using provided ground anchors and tie-o
straps or to tower structure using provided hardware per
instructions.
Always use the provided rainy is to prevent unnecessary
leaking through roof.
It is recommended to close all windows while not in use
to block out wind, rain and avoid unnecessary damage.
Always check local laws and regulations for blaze orange
requirements before using a hunting blind. When gun
hunting, you should always attach a blaze orange safety
cap to the roof of blind for added safety from other
hunters.
Never allow children to play in this product.
Never allow the material to cover your face. This material
can cause suocation and death if it is placed over your
face.
Always wear eye and ear protection!
READ AND UNDERSTAND THE FOLLOWING WARNINGS BEFORE ASSEMBLY
STOP
WARNING
• Never put blind away wet. Always put away dry to avoid
mildew.
• Take down blind when not in use to avoid unnecessary
damage and fading.
• Seal the seams with seam sealer and the walls and roof
with silicon spray if leaking occurs.
• Use extra tie-downs during excessive winds.
INSPECTION AND MAINTENANCE
WARNING
Only use approved RETI parts. Failure to do so may result
in serious injury or death!
UV WARNING
Ultraviolet light breaks down lightweight fabric bers.
the material will fade, lose strength and eventually
disintegrate if left in prolonged sunlight. To extend the
life of your ground blind, avoid leaving it out in direct
sunlight for extended periods of time. Set it up in a shady
area whenever possible. Fading or discoloring of blind is
not covered under your warranty.

Check for parts online at www.HuntRiversEdge.com or call 800-345-6007 M-F 8-5
4
Operator's Manual
CAGE™ R30
SERVICE PARTS LIST NOT TO SCALE
Item Part No. Description Image Qty
1 # 38396 ROOF HUB
ASSEMBLY 1
2 # 37034 ROOF LOCK 1
3 # 37113 WALL HUB
ASSEMBLY 4
4 # 38395 BOTTOM CORNER
HUB ASSEMBLY 4
5 # 38390 TOP CORNER
HUB ASSEMBLY 4

Check for parts online at www.HuntRiversEdge.com or call 800-345-6007 M-F 8-5 5
Operator's Manual
CAGE™ R30
Item Part No. Description Image Qty
6 # 36283 FIBERGLASS POLE
ASSEMBLY 16
7 # 35791
HORIZONTAL
SPREADER POLE
ASSEMBLY
4
8 # 35795
VERTICAL
SPREADER POLE
ASSEMBLY
4
9 # 35806
ROOF POLE
ASSEMBLY
CBR30BT
4
10 #25162
TIE DOWN
CORKSCREW
STAKE
4
11 # 35279 GROUND STAKE
12 IN 4
12 # 35293 TIE DOWN
STAKES KIT 1
13 # 29801 CAM STRAP LONG
ASSEMBLY 4
SERVICE PARTS LIST NOT TO SCALE
14 # 36620 HUB STRAP LOOP ASSEMBLY 4
15 # 35609 ASSEMBLY STRAP FOR PACKING BLIND 1
16 # 35832 CARRYING CASE SEWN CBR30T 1
17 # 35831 RAINFLY SEWN CBR30T 1

Check for parts online at www.HuntRiversEdge.com or call 800-345-6007 M-F 8-5
6
Operator's Manual
CAGE™ R30
SETUP INSTRUCTIONS
STEP 1 & 2
STEP 3 & 4
1. Remove the blind from carry bag.
2. Lay the blind at on the ground so any wall panel is facing
upward. Be completely sure there is no material twisted or
overlapping the ends of any poles. SEE FIGURE 1.
3. Grab the handle on the eyelet located in the center of wall and
pull upward so it pops open. SEE FIGURE 2.
NOTE: Walls are meant to be strong/ridged and will require a
fair amount of force to pop over center for set up
4. Repeat step 3 for the remaining walls so the blind is standing up.
SEE FIGURE 3.
FIGURE 1
WALL
FIGURE 2
FIGURE 3

Check for parts online at www.HuntRiversEdge.com or call 800-345-6007 M-F 8-5 7
Operator's Manual
CAGE™ R30
STEP 5
STEP 6 - VERY IMPORTANT STEP!
5. Unzip the door and enter the blind. Place palm of your hand on
the roof hub and push the spring loaded roof straight up until it
pops over center. SEE FIGURE 4.
NOTE: For easier set up, it’s best to open up some window panels
to allow light into blind for better visibility.
NOTE: The roof hub is under spring tension; use extreme caution
when popping roof up and collapsing roof down to avoid injury
to face, head or hands. Keep ngers clear of roof hub/pole ends
to avoid pinching ngers.
6. Spin the roof lock clockwise (upward) to lock roof poles in place. SEE FIGURE 5A. You must push upward on roof fabric to make sure
roof lock fully engages and that ALL (4) poles are on the outside rim of roof lock.
The roof lock should be nested tightly with roof poles on outside edge of the roof lock SEE FIGURE 5A. The roof lock is installed wrong
if the roof poles are on top of the roof lock leaving a gap SEE FIGURE 5B.
FIGURE 4
FIGURE 5A - CORRECT INSTALLATION WITH ROOF POLES
ON OUTSIDE EDGE OF LOCK HUB
FIGURE 5B - WRONG INSTALLATION WITH ROOF POLES
ON TOP OF LOCK HUB
PUSH HUB UP
TURN UP &
CLOCKWISE
TO LOCK
WRONG
CORRECT

Check for parts online at www.HuntRiversEdge.com or call 800-345-6007 M-F 8-5
8
Operator's Manual
CAGE™ R30
STEP 7 - 9
STEP 10
7. Unpack the horizontal and vertical spreader poles from the pole
bag.
8. Starting with the (4) horizontal spreader poles with the disc
shaped ends, place one end into slot on any top corner hub. Make
sure clamp is in the unlocked position. SEE FIGURE 6A & 6B.
Insert opposite end of spreader pole into slot of top corner
hub located across the same side of blind. Slight rotation of the
spreader pole will help with full engagement of each pole end
into the slots.
9. Repeat step 8 for remaining (3) horizontal spreader poles.
DO NOT lock clamps yet.
10. Attach Velcro around spreader poles located in center top.
SEE FIGURE 7.
FIGURE 6A
UNLOCKED
CLAMP
UNLOCKED
CLAMP
FIGURE 6B
FIGURE 7

Check for parts online at www.HuntRiversEdge.com or call 800-345-6007 M-F 8-5 9
Operator's Manual
CAGE™ R30
STEP 12 - 14
STEP 11
11. Install (4) vertical spreader poles with the round peg ends. With
clamp on the vertical pole in the unlocked position, place peg
into hole on bottom corner hub. SEE FIGURE 8A & 8B.
NOTE: The larger diameter pole should go towards the bottom
corner.
12. Slide the pole up and place peg into hole in top corner hub. You
will need to keep pressure on bottom pole to ensure both pegs
stay located in the hubs. SEE FIGURE 9A & 9B.
13. While keeping vertical poles spread apart, ip clamp lever on the
vertical pole into the locked position.
14. Repeat step 12 for remaining (3) vertical spreader poles.
FIGURE 8A
FIGURE 9A
FIGURE 9B
FIGURE 8B
INSERT
PEG

Check for parts online at www.HuntRiversEdge.com or call 800-345-6007 M-F 8-5
10
Operator's Manual
CAGE™ R30
STEP 16
STEP 15
16. Remove the ground stakes from bag. Pull each corner outward
(taut). Pound a long straight ground stake in hole located on
outside bottom corner hub. SEE FIGURE 10. Repeat for all four
corners.
NOTE: Pounding the stake at an angle is a more eective way to
stake down your blind.
15. Go back to the (4) horizontal spreader poles; while spreading
them outward (tight), ip clamp lever into the locked position.
SEE FIGURE 9A & FIGURE 9B.
NOTE: Once all of the poles are clamped locked return to the
roof lock and give it one nal twist to ensure it is tight.
FIGURE 9A
FIGURE 9B
UNLOCKED
CLAMP
LOCKED
CLAMP
FIGURE 10
TIP:
POUND STAKE
AT AN ANGLE

Check for parts online at www.HuntRiversEdge.com or call 800-345-6007 M-F 8-5 11
Operator's Manual
CAGE™ R30
STEP 19 - 21
17. Anchor the side walls by attaching the short part of the strap to
eye bolt. SEE FIGURE 11.
18. Attach the long strap to spiral anchor. SEE FIGURE 12.
19. Measure the distance from side wall eye bolt to approximate
location of spiral anchor, and twist anchor into ground.
20. Feed end of long strap through cam lever on short strap on eye
bolt. Pull tight. SEE FIGURE 13.
21. Repeat steps 17-20 for remaining sides.
STEP 17 - 21
FIGURE 11
FIGURE 12
FIGURE 13

Check for parts online at www.HuntRiversEdge.com or call 800-345-6007 M-F 8-5
12
Operator's Manual
CAGE™ R30
TAKEDOWN INSTRUCTIONS
STEP 1 - 6
STEP 7
1. Remove all ground stakes and store them in the provided bag.
2. Remove all native brush from brush holder straps.
3. Unscrew the roof lock fully by rotating counter-clockwise until it
hits nut on bottom of bolt. SEE FIGURE 14A & 14B.
4. Unlock all vertical and horizontal spreader poles and remove.
Horizontal poles may need a twist to remove from slots.
5. Slide spreader poles to shortest length and lock all clamps before
storing in pole bag provided.
6. Close all windows.
7. Carefully pull roof down by placing your hands on two roof poles
opposite of each other. Place hands 4-6 inches away from center
hub. SEE FIGURE 15.
NOTE: The roof hub is under spring tension; use extreme caution
when popping roof up and collapsing roof down to avoid injury
to face, head or hands. Keep ngers clear of roof hub/pole ends
to avoid pinching ngers.
FIGURE 14A - LOCKED POSITION
FIGURE 14B - UNLOCKED POSITION
FIGURE 15
PULL HUB
DOWN
TURN
COUNTER
CLOCKWISE

Check for parts online at www.HuntRiversEdge.com or call 800-345-6007 M-F 8-5 13
Operator's Manual
CAGE™ R30
STEP 8 - 11
8. Zip door closed.
9. From outside of blind push in each wall allowing them to fold
onto themselves. SEE FIGURE 16.
10. Blind will be back in its at stage just as it was when it was
unfolded out of the backpack bag. Gather all corners of the blind
and fold together. Do not force the blind when folding. Watch
for entanglement of poles. Use the long packing strap to wrap
around blind and tighten.
11. Place folded blind back into the backpack carry case with the
hubs toward the bottom end of bag always.
FIGURE 16

Check for parts online at www.HuntRiversEdge.com or call 800-345-6007 M-F 8-5
14
Operator's Manual
CAGE™ R30
ILLUSTRATED PARTS BREAKDOWN
6
3
1
2
5
9
7
8
4

Check for parts online at www.HuntRiversEdge.com or call 800-345-6007 M-F 8-5 15
Operator's Manual
CAGE™ R30
PARTS LIST
Item Part No. Description Qty
1 # 38396 ROOF HUB ASSEMBLY 1
2 # 37034 ROOF LOCK 1
3 # 37113 WALL HUB ASSEMBLY 4
4 # 38395 BOTTOM CORNER HUB
ASSEMBLY 4
5 # 38390 TOP CORNER HUB ASSEMBLY 4
6 # 36283 FIBERGLASS POLE ASSEMBLY 16
7 # 35791 HORIZONTAL SPREADER POLE
ASSEMBLY 4
8 # 35795 VERTICAL SPREADER POLE
ASSEMBLY 4
9 # 35806 ROOF POLE ASSEMBLY CBR30BT 4
PARTS NOT SHOWN
Item Part No. Description Qty
10 # 25162 TIE DOWN CORKSCREW STAKE 4
11 # 35279 GROUND STAKE 12 IN 4
12 # 35293 TIE DOWN STAKES KIT 1
13 # 29801 CAM STRAP LONG ASSEMBLY 4
14 # 36620 HUB STRAP LOOP ASSEMBLY 4
15 # 35609 ASSEMBLY STRAP FOR PACKING
BLIND 1
16 # 35832 CARRYING CASE SEWN CBR30T 1
17 # 35831 RAINFLY SEWN CBR30T 1

*All weights, specications and features are approximate and are subject to change without notice. Due to continuous product improvements, product images may not be exact. Warning labels in some product
images may have been removed for photography purposes only. Props shown in photos not included. Some assembly may be required.
Rivers Edge® Treestands,
A Division of Ardisam, Inc.
1160 Eighth Avenue, PO Box 755
Cumberland, WI 54829
Phone: 800-345-6007
Fax: 715-822-2124
www.huntriversedge.com
This manual suits for next models
1
Table of contents
Other Ardisam Tent manuals
Popular Tent manuals by other brands

SEMCOM
SEMCOM Transpaforza Canopies Smart Veranda &... Assembly

Coleman
Coleman 2000010784 instructions

SereneLife
SereneLife SLSWNG350 user manual

Let's Go Aero
Let's Go Aero Tentris TreeHaus TRE-07 owner's manual

Aqua Products
Aqua Products M3 COMPACT Instruction guide

KLUTRONIC
KLUTRONIC 4GROW BS 60 Assembly instructions