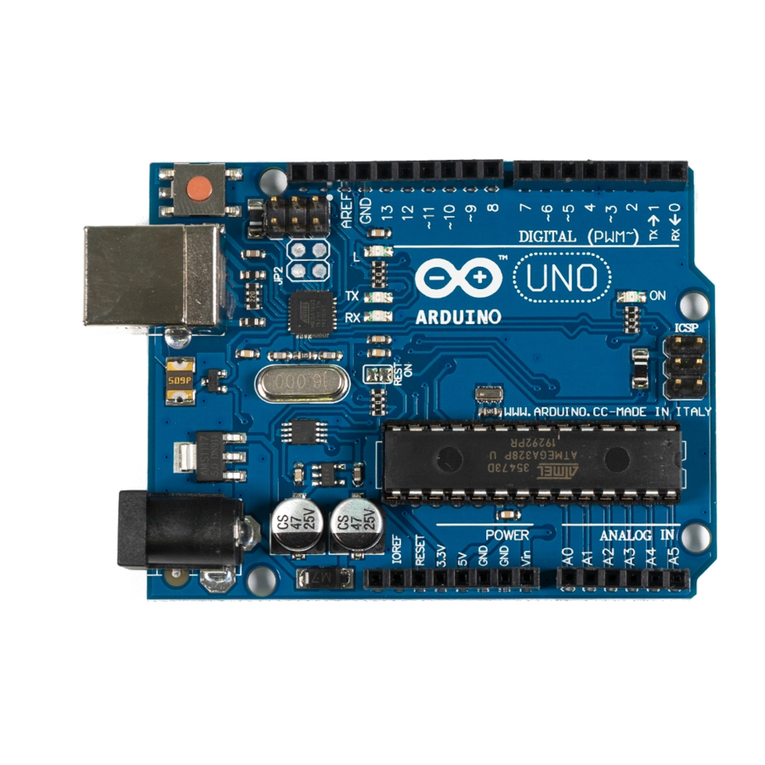
Arduino uno User manual

Motor Driver Shield for Arduino Uno and Arduino Mega2650
(MOT-L298P) Manual
DESCRIPTION
L298 2Amp Motor Driver Shield for Arduino is based on L298 motor driver integrated circuit, a full- bridge
motor driver. It can drive two separate 2A DC motors or 1 2A step motor. Motor's velocity and directions
can be controlled separately and there are 6 connectors connected to Arduino analogue pins. This motor
driver shield with PWM speed control mode and the PLL mode, using a jumper to switch. This also has a
Bluetooth interface where you can directly attach Bluetooth module to the shield.
KEY FEATURES OF L298P MOTOR DRIVER SHIELD
•Drive 2 DC motors at 4.8-24V at up to 2A peak (2.5A peak) current.
•Built-in Schottky diodes to protect against motor back EMF.
•Drive 1 servo motor with a dedicated 5V regulated power.
•Built-in buzzer.
•Remote reset switch.
•Bluetooth connector (x2).
•Ultrasonic Range Finder Ping connector.
•RGB LED connector
•6 Analog/digital pins brought out to 3-pin headers with 5V and Gnd available for each input for
easy sensor hookup.
•Stacking female connectors for supporting another daughter card.
•Can optionally power have attached Arduino off the shield.
LOGIC POWER SUBSYSTEM
The Arduino 5V is brought up to the shield and is available on the 6 sets of red sensors 5V pins, the yellow
Ping connector for Ultrasonic Rangefinders and the 2 blue digital connectors. It is also used to power the
logic portion of the L298P chip. This ensures that they have good clean 5V power independent of what the
motors are doing. The Arduino 3.3V is brought up to the shield and is available on the 2 Bluetooth
connectors. The Arduino can be powered separately using the normal USB or DC power connector or it
can also be powered from the Shield. To select this, there is a jumper near the electrolytic cap
labeled ‘OPT’. When this jumper is removed, the Arduino must be powered separately. When the jumper
is installed, the power from the motor VMS power connector is connected to the Vin pin on the Arduino
which feeds the Arduino on-board 5V regulator. To use this option, the motor power input must be at least
6.5V to feed the regulator. If powering the Arduino off the shield, the DC power jack on the Arduino
should not be used to avoid a power conflict, but the USB can be used.
Motor Power Subsystem The motor power comes in on the 2-pos screw terminal. The VMS is the positive
motor voltage which can range from 4.8 to 24V. If you are using this input to power the Arduino by
installing the ‘OPT’ jumper, the maximum input voltage on this terminal should be limited to 12V to avoid
overheating the Arduino regulator.
•1 x 2 Screw Terminal (Motor Power)
•VMS = Motor Vcc which must be between 4.8 and 24V.
•GND = Motor Ground
This motor power is fed to a 5V regulator that is mounted to the bottom of the shield. This 5V feeds the
white servo connector. This isolates any servo electrical noise from getting back into the main 5V that
powers the logic. For this 5V regulator to function, the VMS voltage must be at least 6.3V.
Note that if you have the OPT jumper in place and USB connected, but there is nopower on the VMSmotor
connector, it will try to use the USB power to power the DC motors. This should be avoided.
If you have the OPT jumper in place and power coming on the DC Jack on the Arduino, it will work but
the DC motor noise will be coupled into the 5V logic power supply and may cause eradicate behavior and
so it is not really recommended. In general, if you are using the motors, you should plan to bring the motor
power in on the VMS power connector for the most stable operation.
Driving DC Motors
The L298P contains two full H-Bridge drive channels that provide full speed and direction control. The 2
DC motor drive channels can operate at voltages from 4.8 –24V and at currents of up to 2.0A (2.5A peak)
per channel.
You can also have 2 motors share a motor drive channel if the combined current stays within the 2A and
you do not mind the motors turning the same direction and speed. This is typically the case when you have
a 4-wheel drive robotic vehicle and the 2 wheels on each side operate at the same speed and direction.
The L298P motor driver uses Arduino pins D10, D11, D12 and D13 for motor control. Pins 10 & 11 are
PWM pins and connect to the chip EN pins to provide speed control by modulating the enable input. D10
controls speed of motor A and D11 controls speed of motor B.
Pins 12 & 13 are connected to the IN inputs to provide direction control. Pin 12 controls direction of motor
A and Pin 13 controls direction of motor B. Usually there are 2 pins used to determine the direction of
rotation for each motor, but this shield has an inverter that provides an inverted version of the signal to the
two pins. This reduces thenumber of pins used onthe Arduino, butit does remove the abilityto do dynamic
braking which usually isn’t an issue for most projects. Reducing the speed control pins to a PWM value of
zero will get things stopped.
Speed Pins
Speed Control
Direction Pins
Direction Control
Motor
A
D10
PWM 0-100
D12
HIGH = Forward
LOW = Reverse
Motor
B
D11
PWM 0-100
D13
HIGH = Forward
LOW = Reverse
DC Motor Connections
The motor connections are via a 4-screw terminal block with 2 terminals for each motor that are labeled
MOTORA and MOTORB. The +/- pins for each motor are not labeled, so it is somewhat arbitrary how
your wire them and relative to what you consider forward vs reverse motor operation. Basically, if the
motor goes in the opposite direction than you expect, simply reverse the wiring for that motor.

•1 x 4 Screw Terminal (Motor Control)
•Motor A Positive Lead
•Motor A Negative Lead
•Motor B Positive Lead
•Motor B Negative Lead
These motor connection points are also mirrored on a 4-pin female header for a little more flexibility.
These motor drive leads also have yellow and green LEDs attached to them. Their brightness will vary
depending on the strength of the PWM signal
•1 x 4 Female Header (Black)
•MA = Motor A connection (x2)
•MB = Motor B connection (x2)
Servo Motor Connections
Servo motors are 3 wire devices. They require 5V, Ground and a PWM signal to set its position. The shield
uses D9 for the PWM signal. One nice feature of these modules is that it has a dedicated 5V regulator to
power the servo to prevent electrical noise from getting back into the main 5V logic power.
Servos are typically used to turn a small steering wheel or to rotate a sensor, such as an ultrasonic
rangefinder for obstacle avoidance. To use the servo, you will need to have a minimum of 6.3V on the main
motor power connector for the regulator to operate. If you are not using aservo, D9 as well as this dedicated
5V is available for other uses.

•1 x 3 Servo Header (White)
•G = Ground
•+5V = Dedicated 5V for powering servo motor
•9 = D9 is the PWM pin that the servo is driven off. This pin is available for other use if not using
it to drive a servo motor.
Arduino to Shield Pin Connections
All of the I/O is brought up to stackable female headers on the shield except for the IOREF and the two I2C
pins hear the USB connector so it can support a daughter shield as long as it does not conflict with the pins
in use. In addition, many of these pins are broken out to other headers for easy hookup.
The shield uses the following pins which remain available if you are not using that function:
•Ultrasonic Sensor Ping Control = D7, D8
•Servo motor control = D9
•DC motor control = D10,D11, D12, D13
•Buzzer = D4
•Bluetooth
There are two Bluetooth connectors on the board
The first connector is a 4-pin header that brings out 3.3V power, ground, TX, and RX. This type of
connector is compatible with HC-06 Bluetooth modules and perhaps some others. The Receive pin has a
1K/2K voltage divider to level shift the TX output of the Arduino to be 3.3V compatible which is a nice
feature.
•1 x 4 Bluetooth ‘BT2’ Female Header (Black)
•‘+‘ = 3.3V
•‘–‘ = Ground
•T = D0 (RX)
•R = D1 (TX)

The other Bluetooth header is a 12-pin male header. The TX, RX 5V and ground are hooked up to this
header. The only 12-pin Bluetooth connectors are generally associated with automobiles, so this connector
does not seem to be of much use. The pin spacing is also 2mm rather than the standard 2.54mm
Ultrasonic Rangefinder
A common robotic interface is Ultrasonic Rangefinders such as the HY-SRF05. These work by sending
out a ping of ultrasonic sound and timing how long it takes for the ping to come back. The board has a
dedicated 4-pin header to connect the sensor.
•1 x 4 Ping Male Header (Yellow)
•+ = 5V
•R = Return (D8)
•T = Trigger (D7)
•G = Ground
Analog / Digital Sensors
A common issue when hooking sensors up to an Arduino is that many require ground/Vcc connections as
well as an analog input or digital I/O. This board brings out the A0-A5 pins to a row of headers that also
provide separate power and ground points for each A0-A5 pin. The white headers are the signal lines, the
red headers provide 5V and the black headers provide ground.
The A0-A5 pins can be used either for analog inputs or as digital I/O, so both types of sensors can be
supported.

•3 x 6 Header (White/Red/Black)
•A0 / 5V / Ground
•A1 / 5V / Ground
•A2 / 5V / Ground
•A3 / 5V / Ground
•A4 / 5V / Ground
•A5 / 5V / Ground
There is also a 3-pin blue header that that brings out 5V, ground and D2 that can be used for a digital sensor
or other remote connection
•1 x 3 Header (Blue)
•G = Ground
•‘+‘ = 5V
•S = D2 –digital I/O
•RGB LED
And for good measure, there is a 5-pin header that brings out D3, D5, D6, 5V and Ground. This puts 3
PWM outputs along with power and ground on a single connector which can be handy for several things
like driving an RGB LED.
•1 x 5 Header (Blue)
•‘ ‘ = 5V –This pin is unmarked but sits next to D7
•B = D6 –B could be used for Blue on RGB LED
•G = D5 –G could be used for Green on RGB LED
•‘-‘= Ground

•R = D3 –R could be used for Red on RGB LED
Buzzer
The buzzer is wired to D4. It is active HIGH
Reset Switch. The shield has a remote reset button located on it for easy access.
OUR EVALUATION RESULTS:
These shields are quite flexible and a significant step-up in versatility from the older L293 based modules,
albeit at a higher price. The weakest point is the L298P motor driver IC which limits the size of motors
that it can control, but if your requirements fall within its 2A per channel rating as most smaller robotic
vehicles do, this can be a nice option for putting together a robotic project. The header pins are quite long
and flexible. You will need to coax them into alignment as you insert the shield into the Arduino
board. Also note that the shield can sit down on the top of the USB connector of some boards. To avoid
any shorting concern, a little electrical or Kapton tape can be used to insulate the top of the connector.
The program below runs the DC motor control portion through an automated sequence of events.
Be sure to connect a valid motor voltage to the motor VMS screw terminal and connect one or more smaller
motors to the MotorA / MotorB screw terminals
L298P Motor Driver Shield Example Program
CODE:
* L298P Motor Shield
* Code for exercising the L298P Motor Control portion of the shield
* The low level motor control logic is kept in the function 'Motor'
*/
// The following pin designations are fixed by the shield
int const BUZZER = 4;
// Motor A
int const ENA = 10;
int const INA = 12;
// Motor B
int const ENB = 11;
int const INB = 13;
int const MIN_SPEED = 27; // Set to minimum PWM value that will make motors turn
int const ACCEL_DELAY = 50; // delay between steps when ramping motor speed up or down.
//==========================================================================
=====
// Initialization
//==========================================================================
=====
void setup()
{
pinMode(ENA, OUTPUT); // set all the motor control pins to outputs
pinMode(ENB, OUTPUT);
pinMode(INA, OUTPUT);
pinMode(INB, OUTPUT);
pinMode(BUZZER, OUTPUT);

Serial.begin(9600); // Set comm speed for serial monitor messages
}
//==========================================================================
=====
// Main
//==========================================================================
=====
void loop()
{
// Run both motors Forward at 75% power
Motor('C', 'F', 75);
delay(3000);
// Run both motors in Reverse at 75% power but sound beeper first
Motor('C', 'F', 0); // Stop motors
delay(1000);
digitalWrite(BUZZER,HIGH);delay(500);digitalWrite(BUZZER,LOW);
delay(500);
digitalWrite(BUZZER,HIGH);delay(500);digitalWrite(BUZZER,LOW);
delay(1000);
Motor('C', 'R', 75); // Run motors forward at 75%
delay(3000);
// now run motors in opposite directions at same time at 50% speed
Motor('A', 'F', 50);
Motor ('B', 'R', 50);
delay(3000);
// now turn off both motors
Motor('C', 'F', 0);
delay(3000);
// Run the motors across the range of possible speeds in both directions
// Maximum speed is determined by the motor itself and the operating voltage
// Accelerate from zero to maximum speed
for (int i = 0; i <= 100; i++)
{
Motor('C', 'F', i);
delay(ACCEL_DELAY);
}
delay (2000);
// Decelerate from maximum speed to zero
for (int i = 100; i >= 0; --i)
{
Motor('C', 'F', i);
delay(ACCEL_DELAY);
}
delay (2000);

// Set direction to reverse and accelerate from zero to maximum speed
for (int i = 0; i <= 100; i++)
{
Motor('C', 'R', i);
delay(ACCEL_DELAY);
}
delay (2000);
// Decelerate from maximum speed to zero
for (int i = 100; i >= 0; --i)
{
Motor('C', 'R', i);
delay(ACCEL_DELAY);
}
// Turn off motors
Motor('C', 'F', 0);
delay (3000);
}
/*
* Motor function does all the heavy lifting of controlling the motors
* mot = motor to control either 'A' or 'B'. 'C' controls both motors.
* dir = Direction either 'F'orward or 'R'everse
* speed = Speed. Takes in 1-100 percent and maps to 0-255 for PWM control.
* Mapping ignores speed values that are too low to make the motor turn.
* In this case, anything below 27, but 0 still means 0 to stop the motors.
*/
void Motor(char mot, char dir, int speed)
{
// remap the speed from range 0-100 to 0-255
int newspeed;
if (speed == 0)
newspeed = 0; // Don't remap zero, but remap everything else.
else
newspeed = map(speed, 1, 100, MIN_SPEED, 255);
switch (mot) {
case 'A': // Controlling Motor A
if (dir == 'F') {
digitalWrite(INA, HIGH);
}
else if (dir == 'R') {
digitalWrite(INB, LOW);
}
analogWrite(ENA, newspeed);
break;
case 'B': // Controlling Motor B
if (dir == 'F') {
digitalWrite(INB, HIGH);
}
else if (dir == 'R') {

digitalWrite(INB, LOW);
}
analogWrite(ENB, newspeed);
break;
case 'C': // Controlling Both Motors
if (dir == 'F') {
digitalWrite(INA, HIGH);
digitalWrite(INB, HIGH);
}
else if (dir == 'R') {
digitalWrite(INA, LOW);
digitalWrite(INB, LOW);
}
analogWrite(ENA, newspeed);
analogWrite(ENB, newspeed);
break;
}
// Send what we are doing with the motors out to the Serial Monitor.
Serial.print ("Motor: ");
if (mot=='C')
Serial.print ("Both");
else
Serial.print (mot);
Serial.print ("t Direction: ");
Serial.print (dir);
Serial.print ("t Speed: ");
Serial.print (speed);
Serial.print ("t Mapped Speed: ");
Serial.println (newspeed);
}
*CODE END

TECHNICAL SEPECIFICATIONS
Operating
Ratings
Voltage range (Vcc)
4.8 –24 VDC
Max current per bridge (peak)
2.5 A
Max current per bridge (sustained)
2 A
Dimensions
PCB Board (L x W)
70 x 54 mm (2.75 x 2.1″)
Other manuals for uno
4
This manual suits for next models
1
Other Arduino Computer Hardware manuals

Arduino
Arduino PRO Portenta X8 User manual

Arduino
Arduino MKR IoT Carrier Rev2 User manual

Arduino
Arduino AKX00034 User manual

Arduino
Arduino UNO R4 WiFi User manual

Arduino
Arduino Portenta C33 User manual

Arduino
Arduino Portenta Vision Shield User manual

Arduino
Arduino Nicla Voice User manual

Arduino
Arduino PRO Portenta ASX00027 User manual

Arduino
Arduino TC4+ User manual

Arduino
Arduino XY-J02 User manual