Arexx BS-30 User manual

1
BS-30
©2015 AREXX - HOLLAND - CHINA
HAVINGA SOFTWARE - HOLLAND
USB Receiver with micro SD --- USB Empfänger mit Mikro SD
**Deutsch ** English ** Français ** Nederlands

2
*DINFORMATION BS-30
1. Anleitung 5
2. Fehler suche 10
Technische Daten 12
*GB BS-30 INFORMATION
1. Manual 14
2. Trouble shooting 19
Technical details 20
*F L’Enregistreur de Température BS-30
1. AREXX BS-30 Mode d’Emploi 23
2. Diagnostic de Défaillance 28
Caractéristiques techniques 29
*NL BS-30 INFORMATIE
1. Handleiding 32
1. Fout zoeker 37
Technische gegevens 38
D
E
U
T
S
C
H
E
N
G
L
I
S
H
F
R
A
N
Ç
A
I
S
N
E
D
E
R
L
A
N
D
S

3
Impressum
©2015 AREXX Engineering
Nervistraat 16
8013 RS Zwolle
The Netherlands
Tel.: +31 (0) 38 454 2028
Fax.: +31 (0) 38 452 4482
E-Mail: [email protected]
Diese Bedienungsanleitung ist urheberrechtlich geschützt.
Der Inhalt darf ohne vorherige schriftliche Zustimmung des
Herausgebers auch nicht teilweise kopiert oder übernommen
werden! Änderungen an Produktspezikationen und
Lieferumfang vorbehalten. Der Inhalt dieser Bedienungsan-
leitung kann jederzeit ohne vorherige Ankündigung geändert
werden.
Neue Versionen dieser Anleitung erhalten Sie kostenlos auf
http://www.arexx.com/
“BS-30” sind eingetragenes Warenzeichen von AREXX Engineering.
Alle anderen Warenzeichen stehen im Besitz ihrer jeweiligen Eigentümer. Wir sind nicht
verantwortlich für den Inhalt von externen Webseiten, auf die in dieser Anleitung
verlinkt wird!
Hinweise zur beschränkten Garantie und Haftung
Die Gewährleistung von AREXX Engineering beschränkt sich auf Austausch oder Reparatur
des Geräts und seines Zubehörs innerhalb der gesetzlichen Gewährleistungsfrist bei
nachweislichen Produktionsfehlern, wie mechanischer Beschädigung und fehlender oder
falscher Bestückung elektronischer Bauteile, ausgenommen aller über Steckverbinder/So-
ckel angeschlossenen Komponenten. Es besteht keine Haftbarkeit für Schäden, die unmit-
telbar durch, oder in Folge der Anwendung des Geräts entstehen. Unberührt davon bleiben
Ansprüche, die auf unabdingbaren gesetzlichen Vorschriften zur Produkthaftung beruhen.
Sobald Sie irreversible Veränderungen (z.B. Anlöten von weiteren Bauteilen, Bohren von
Löchern etc.) am Modul oder seinem Zubehör vornehmen oder der Modul Schaden infolge
von Nichtbeachtung dieser Anleitung nimmt, erlischt jeglicher Garantieanspruch!
Die Garantie gilt nicht bei Nichtbeachtung dieser Anleitung! Außerdem ist AREXX Enginee-
ring nicht verantwortlich für Schäden jeglicher Art, die infolge der Nichtbeachtung dieser
Anleitung entstanden sind. Bitte beachten Sie unbedingt die „Sicherheitshinweise“.
Es kann nicht garantiert werden, dass die mitgelieferte Software individuellen Ansprüchen
genügt oder komplett unterbrechungs- und fehlerfrei arbeiten kann. Weiterhin ist die Soft-
ware beliebig veränderbar und wird vom Anwender in das Gerät geladen. Daher trägt der
Anwender das gesamte Risiko bezüglich der Qualität und der Leistungsfähigkeit des Gerätes
inklusive aller Software. Bitte beachten Sie auch die entsprechenden Lizenzvereinbarungen
auf der CD-ROM! Prüfen Sie bei Problemen auf www.arexx.com ob es ein neue Soft-
ware version gibt.
WICHTIG
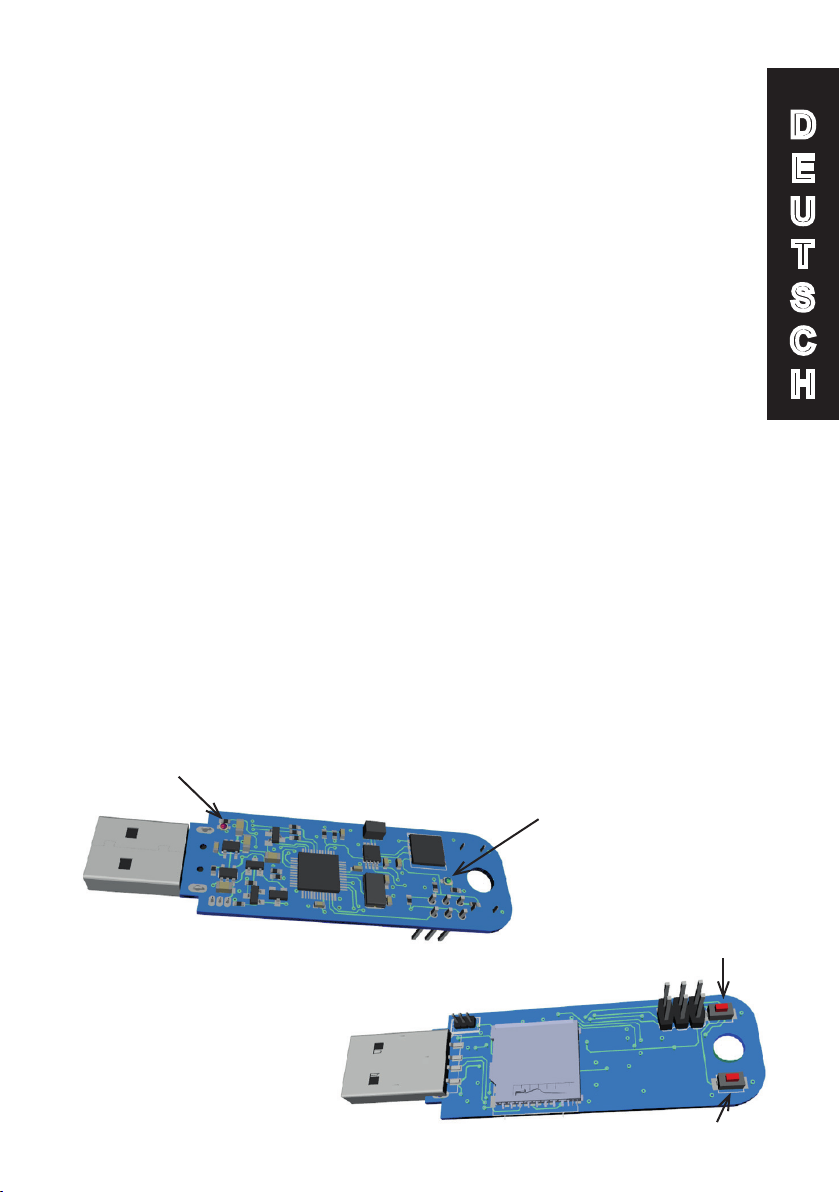
Vor dem ersten Gebrauch dieses BS-30 USB Temperatur- und Luftfeuchtigkeit Logger lesen
Sie bitte zuerst die Gebrachs-anleitung aufmerksam durch! Sie erklärt die richtige Handha-
bung und informiert Sie über mögliche Gefahren. Zudem enthält sie wichtige Informationen,
die nicht allen Benutzern bekannt sein dürften
D
E
U
T
S
C
H

4
Symbole
Im Handbuch werden folgende Symbole verwendet:
Das “Achtung!” Symbol weist auf besonders wichtige Ab-
schnitte hin, die sorgfältig beachtet werden müssen. Wenn
Sie hier Fehler machen, könnte dies ggf. zur Zerstörung des
Roboters oder seines Zubehörs führen und sogar Ihre eigene
oder die Gesundheit anderer gefährden!
Das “Information” Symbol weist auf Abschnitte hin, die nüt-
zliche Tipps und Tricks oder Hintergrundinformationen en-
thalten. Hier ist es nicht immer essentiell alles zu verstehen,
aber meist sehr nützlich.
Sicherheitshinweise
- Prüfen Sie die Polung der Akku.
- Halten Sie die Modul stets trocken. Wenn das Gerät einmal nass geworden ist, entfernen
Sie sofort die Batterien und die Stromversorgung
- Bei längerem Nichtgebrauch die Stromversorgung trennen.
- Bevor Sie das Modul in Betrieb nehmen, prüfen Sie stets seinen Zustand sowie auch den
der Kabel.
- Wenn Sie meinen, dass das Gerät nicht länger sicher betrieben werden kann, trennen Sie
es sofort von der Stromversorgung und stellen Sie sicher, dass es nicht unabsichtlich be
nutzt werden kann.
- Befragen Sie einen Fachmann, wenn sie sich der Bedienung, Sicherheit oder Anschluss des
Moduls nicht sicher sind.
- Niemals das Modul in Räumlichkeiten oder unter ungünstigen Bedingungen betreiben.
- Das Modul besitzt hochempndliche Bauteile. Elektronische Bauteile sind sehr gegen
statische Elektrizität empndlich. Fassen Sie das Modul nur an den Rändern an und
vermeiden Sie direkten Kontakt mit den Bauteilen auf der Platine.
Normaler Gebrauch
Die BS-30 USB Logger registriert und Speichert Temperatur- und Luftfeuchtigkeit für AREXX
Multilogger System mit einen Zeitstempel.
Jede andere Einsatzart als oben beschrieben kann zu Schäden und Risiken wie Kurzschluss,
Brand, Stromschlag usw. führen
D
E
U
T
S
C
H

5
BS-30 ANLEITUNG
Der BS-30 ist ein USB Multilogger Empfänger für Temperatur und
Luftfeuchtigkeit mit einem Mikro-SD Anschluss. Die BS30 Registriert
den Temperatur und Luftfeuchtigkeit Messdaten und speichert diese
Messdaten auf einem eine Mikro-SD Speicherkarte.
Der Betrieb eines BS-30
Wir nehmen an, dass Sie bereits die Multilogger Software auf Ihrem
PC installiert haben. Schließen Sie nun den BS-30 auf den PC an.
Beim erstmaligen Anschluss wird der USB-Treiber des BS-30
(RF_USB) installiert. Normale weise started auch das Laden von die
Akku. Die Lade LED (Rot) Blinkt 2 mal kurz wann die Akku fast
leer ist.
Bei korrekter Installation der Treiber und Verbindung zur BS-
30 sehen Sie ins “Synchronisierung” Fenster der Multilogger
Software die Anzeige ‘USB@x’ und dazu auch die Version der
Firmware des Moduls.
Die BS30 wird nun die Messdaten automatisch zum PC weiterreichen.
Auf dem Monitor der Multilogger Software kann man diese Aktivität
auf der Sensorenliste und Synchronizatioon beobachten: in die Sen-
sorliste werden die aktuellste Messdaten aller Sensoren angezeigt.
Solange die BS-30 Batteriespannung hat und die SD-Karte instal-
liert ist, kann das Modul die Messdaten Speichern. Die Speicher LED
(Blau) blinkt bei jeder Speicher Aktion!
Falls die BS-30 mit PC ins Verbindung steht oder mit ein 5V
USB Spannungs Versorgung wird die Temperatur ins gehause
etwa 2 Grad hoher und ist die Messung nicht mehr
zuverlässig.
Sie können die Akku mit ein 5 Volt USB Netzadapter oder direkt mit
PC Laden. Die BS-30 kann deshalb ohne USB-Stromversorgung
autark („selbständig“) arbeiten.
Die Multilogger Software (Templogger Software) ist geeignet für Win-
dows XP und nachfolgende Varianten, und zwar in der 32 Bits und 64
Bits Ausführung. Die Software ist verfügbar in 4 Sprachen.
Die aktuellste Version kann heruntergeladen aus dem Bereich:
http://www.arexx.com.
D
E
U
T
S
C
H

6
D
E
U
T
S
C
H
Stromversorgung
Die BS-30 kann selbstständig arbeiten durch die interner Lithium
Akku. Die Daten werden dann auf die SD-Karte gespeichert, falls
diese installiert worden ist. Auaden von die Lithium Akku Dauert
etwa 3 Stunden.
LED INDIKATOR
Die BS-30 verfugt über 2 LED indikatoren:
Die Rote LED in die nahe von die USB Konnektor leucht bei laden
von die Lithium Batterie. Die Blaue LED am ende blinkt ein mal
wann es ein messung gibt. Die Rote LED Blinkt 2 mal pro 10
Sekunden wann die Akku fast leer ist. Die blaue LED Blinkt 3 mal
kurz wann es kein SD-Karte gibt (Nur bei PC Verbindung).
Interne Realtime Uhr
Das BS-30 verwendet eine interne Uhr (RTC), mit dem die Daten
von einem Zeitstempel versehen werden. Die Uhr wird von der Mul-
tilogger Software synchronisiert sobald eine Datenverbindung auf-
gebaut wird. Falls die Uhr nicht anläuft, weil zum Beispiel die Akku
leer war und/oder mit ein Externer USB Spannungsadapter geladen
ist, kann das System keine Daten verarbeiten, weil keine gültige
Zeitstempel zur Verfügung stehen.
Das Problem kann behoben werden indem man die BS-30 auf
einen PC mit einer installierten Multilogger Software anschließt. Die
Software wird die Uhr synchronisieren, so dass der Datenlogger den
Betrieb wiederaufnehmen kann.
Daten auf der SD-Karte
Sobald die SD-Karte entfernt wird, hält der Sensor an und unter-
bricht das System die eventuell vorhandene USB-Verbindung. Die
SD-Karte kann mit einem standard SD-Kartenleser ausgewertet
werden.
Als Dateiname wird folgende Konvention benutzt:
m<id><Jahr><Monat>.txt
mit
id: die id-Nummer des Sensors in hexadezimal-Format
(4 oder 8 Bytes).
Jahr: das Jahr in 4 Dezimalen
Monat: der Monat in 2 Dezimalen
Das Format ist ein kommagetrennter Text und kann von der Tem-
peraturlogger-Software importiert werden oder in Excel eingelesen
werden.

7
Wenn die Templogger-Software läuft und der BS-30-Sensor mit dem
PC verbunden ist, wird das Programmsystem die Daten aus dem Sen-
sor übernehmen. Der Datentransfer umfasst den heutigen und den
vorherigen Monat, sodass Daten aus einem maximal zwei Monaten
langen Zeitraum vorliegen. Sie können auch sämtliche Daten von der
SD-Karte einlesen. In diesem Fall gibt es keine Zeitraumbegrenzung.
Die Registrierung der Daten wird ständig stattnden solange
der BS30 Sensor mit dem PC verbunden ist. Falls jedoch der
Akku aufgeladen wird, steigt die Temperatur des BS30 einige
Grad und beeinträchtigt die Genauigkeit der Temperaturmes-
sung.
Die aktuellste Temperaturlogger-Software kann auch mehr als eine
USB-Basismodul gleichzeitig bedienen. Normalerweise ist ein einziges
Basismodul ausreichend, aber der in diesem Handbuch beschriebene
USB-Sensor kann in den gleichen PC eingesteckt werden, der bereits
ein normales USB-Basismodul bedient.
TOOLBESCHREIBUNG
Die Software umfasst nebst der Logger-Applikation auch die USB-
Treiber,den Messenger und eine Vielzahl extra Tools.
Auf der Website nden Sie auch eine ausführliche Information zur
Multilogger-Produktpalette. Diese Tools arbeiten alle zusammen mit
diese Software.
Der Sensor kann mit dem BS30-Kongurationstool konguriert
werden, das zum Umfang der Temperaturelogger Software Version
v2.1.20 gehört.
In diesem Werkzeug werden zwei Zahlenformate verwaltet:
• Der Sensor-ID kann im Zahlenbereich Hexadezimal 0x90000xa000
(beziehungsweise in Normalsprache 36864-40960) registriert
werden. Falls ein fehlerhafter Eintrag eingegeben wird, ndet au
tomatisch eine Korrektur statt.
• Das Messdatenintervall kann (zwischen 30 Sekunden und 1 Stunde)
festgelegt werden. Dieser Parameter ermöglicht eine Optimierung
der Messhäugkeit und des Batterieverbrauchs. Jede Messung ver
braucht eine gewissen Energiemenge, sodass überüssige Messun
gen die Betriebszeit der Batterie verringern.
D
E
U
T
S
C
H

8
Folgende Zeitangaben können als Richtwerte gelten:
Messintervall (Minuten) Messzeitraum (Akku-Dauer-Tage)
1 10
5 40
10 61
30 93
60 107
Das Programm ermöglicht ihnen das Modul zu lesen und zu be-
schreiben. Außerdem können Sie die Konguration in eine Datei
speichern.
Das Werkzeug erzeugt eine XML-Datei, die auf der SD-Karte abge-
legt wird.
Diese Kongurationsdatei (die sich auf der SD-kart in /con-
g/cong.xml bendet) enthält folgende Informationen:
Modul Beschreibung
Konguration Root-element
T – Intervall Periode zwischen Messungen in Sekunden (minimal 30,
maximal 3600 Sekunden)
device Die Modulnummer in Dezimalformat
Die Firmware wird die Zahl auf ein Format zwischen 0x9000 und
0xa000 anpassen. Diese Kongurationsdatei für Modul 0x9000,
würde (bei einer Messung pro Minute) folgendermaßen aussehen:
<?xml version=”1.0” encoding=”UTF-8”?>
<cong>
<interval>60</interval>
<device>0</device>
</cong>
Die SD-Speicherkarte
Die SD-Karte muss formatiert werden. Oft wird die Karte jedoch
bereits vorformatiert ausgeliefert. Sie können die Karte mit Ihrem
PC notfalls auch selbst einfach formatieren mit FAT32. Wann Sie
die BS-30 einstecken ins PC wordt auf die SD-Karte automatisch ein
‘log’ und “Kong” File (ordner) geschrieben.
D
E
U
T
S
C
H
D
E
U
T
S
C
H

9
D
E
U
T
S
C
H
Als Dateiname wird folgende Konvention benutzt:
m<id><Jahr><Monat>.txt
mit
id: die id-Nummer des Sensors in hexadezimal-Format
(4 oder 8 Bytes).
Jahr: das Jahr in 4 Dezimalen
Monat: der Monat in 2 Dezimalen
Das Format ist ein kommagetrennter Text und kann von der Tempera-
turloggersoftware importiert oder in Excel eingelesen werden.
Der Datenbereich LOG FILE
Alle Daten, die sich auf die im (Ordner) Filenamen vorhandenen Infor-
mationenwerden dem Datensatz hinzugefügt. Nach einem
Bestandskopfdatensatz wird pro Zeile einen Messdatensatz erzeugt:
<Zeitstempel>, <Wert (T)><Wert (LF)>
mit
Zeitstempel: yyyy-mm-dd hh:mm:ss (UTC)
Wert: Messwert in Gleitkomma-Format.
Diese Datei können Sie auch mit Excel oder andere Programme bear-
beiten
Spezialfunktionen
Update der Firmware
Die Firmware des BS30 Sensors kann erneut programmiert werden in
folgenden Schritten:
1. Verbinde den Sensor über USB mit dem PC
2. Drücke gleichzeitig die Tasten RESET und PGM und lasse zuerst
RESET und erst danach PGM los.
3. Normalerweise wird dann ein Explorerfenster geöffnet (mit dem
Titel ‘CRP DISABLD’) in dem nur eine Datei enthalten ist mit dem
Namen: rmware.bin.
4. Löschen Sie nun diese Datei.
5. Verschieben nun die neue Datei rmware.bin in den leeren Bereich.
6. Starten Sie das Modul jetzt erneut indem Sie die RESET-Taste
drücken.

10
2. Problem suche
Unterschiedliche Randbedingungen können den Datentransfer der
USB Sensor beeinträchtigen.
Mögliche Ursachen sind:
- Die BS30 ist nicht Korrekt mit dem USB auf dem
Computer angeschlossen
- Die BS30 Sensor wurde nicht korrekt installiert
- Unbekanntes Software/Treiber Problem im Computer
Lösungswege:
- Kontrolliere die BS-30 Akku
(Beachten Sie bitte die Lade LED!)
- Überprüfen Sie bitte die korrekter Installation der Trei
ber und Verbindung zur BS-30 sehen Sie ins
“Synchronisierung” Fenster der Multilogger Software
die Anzeige ‘USB@x’ und dazu auch die Version der
Firmware des Moduls.
- Entfernen Sie das BS30, warten Sie nun 10 Sekunden
und schließen Sie die BS30 wiederum an.
- Deinstallieren Sie die Temperaturlogger Software und
wiederholen Sie die Installation.
- Falls Sie keine neu erzeugte Sensordaten empfangen, sollten
Sie in der Software überprüfen ob die Sensorliste aktiv ist.
Eventuell schalten Sie diese Sensorliste vorübergehend ab.
D
E
U
T
S
C
H
Lade LED (Rot)
Mess LED (Blau)
Reset
PGM
LEDS
UND
SCHALTER

11
Technische Daten
Type: BS30
USB: USB 2.0, Multilogger USB-Protokoll.
Stromversorgung: 5 – 7.5V DC / 100mA
Akku: Lithium-Polimer 3,7V
SD Speicherkarte: Mikro SD (SD, SDHC) ≥1 GB
Messdaten Speichergroße: 30 Byte pro Messung, bei ein Messung
pro Minute ist das 20MB Pro Jahr
Abmessung (LxBxH): 70 x 25 x 22 mm
Gewicht (Gram): 25
Bereich und genauigkeit:
Temperatur;
• >±1°C von +10°C bis +40°C
• >±1,5°C von -10°C bis +50°C
• >±2,5°C von -40°C bis +100°C
Luftfeugtigkeit;
*± 0,5° von 20% bis 80%
*± 7° von 0-20% und 80-100%
Software: http://www.arexx.com
D
E
U
T
S
C
H

12
Impressum
©2015 AREXX Engineering
Nervistraat 16
8013 RS Zwolle
The Netherlands
Tel.: +31 (0) 38 454 2028
Fax.: +31 (0) 38 452 4482
E-Mail: [email protected]
This manual is protected by laws of Copyright. Any full or
partial reproduction of the contents are forbidden without prior
written authorization by the European importer.
Product specications and delivery contents are subject to chan-
ges. The manual is subject to changes without prior notice.
You can nd free updates of this manual on
http://www.arexx.com/
“BS-30 and Multilogger” are registered trademarks of AREXX Engineering.
All other trademarks are the property of their owners. We are not responsible for the
contents of external web pages that are mentioned in this manual!
Information about limited warranty and responsibility
The warranty granted by AREXX Engineering is limited to the replacement or repair of the
BS-30 and its accessories within the legal warranty period if the default has arisen from pro-
duction errors such as mechanical damage or missing or wrong assembly of electronic com-
ponents except for all components that are connected via plugs/sockets.
The warranty does not apply directly or indirectly to damages due to the use of the BS-30.
This excludes claims that fall under the legal prescription of product responsibility.
The warranty does not apply in case of irreversible changes (such as soldering of other com-
ponents, drilling of holes, etc.) of the BS-30 or its accessories or if the BS-30 is
damaged due to the disrespect of this manual.
The warranty is not applicable in case of disrespect of this manual! In addition, AREXX
Engineering is not responsible for damages of all kinds resulting from the disrespect of this
manual! Please adhere above all to the „Safety recommendations“ in the BS-30 manual.
Please note the relevant license agreements on the CD-ROM!
IMPORTANT
Prior to using this BS-30 USB sensor for the rst time, please read this manual thoroughly up
to the end. it explains the correct use and inform you about potential dangers. Moreover it
contains important information that might not be obvious for all users.
Important safety recommendation
This module is equipped with highly sensitive components. Electronic components are
very sensitive to static electricity discharge. Only touch the module by the edges and avoid
direct contact with the components on the circuit board.
E
N
G
L
I
S
H

13
Symbols
This manual provides the following symbols:
The “Attention!” Symbol is used to mark important details.
Neglecting these precautions may damage or destroy the
module and/or additional components and additionally you
may risk your own health or the health of other persons!
The “Information” Symbol is used to mark useful tips and
tricks or background information. In this case the information
is to be considered as “useful, but not necessary”.
Safety recommendations
- Check the polarity of the power supply.
- Keep all products dry, when the product gets wet remove the power directly.
- Remove the power when you are not using the product for a longer period.
- Before taking the module into operation, always check it and its cables for damage.
- If you have reason to believe that the device can no longer be operated safely,
disconnect it immediately and make sure it is not unintentionally operated.
- Consult an expert if you are unsure about the function, safety or connection to the module.
- Do not operate the module in unfavourable conditions.
- This module is equipped with highly sensitive components. Electronic components are
very sensitive to static electricity discharge. Only touch the module by the edges and avoid
direct contact with the components on the circuit board.
Normal use
This product was developed as an receiver for the AREXX Multilogger system. It will only
work together with other AREXX Multilogger sensors and products. With the BS-30 you can
LOG and store the temperature and humidity data on an SD card.
It may be used indoors only. The product must not get damped or wet. Also be careful with
condense when you take it from a cold to an warm room, give it time to adapt to the new
conditions before you use it.
Any use other than that described above can lead to damage to the product and may
involve additional risks such as short circuits, re, electrical shock etc.
Please read all the safety instructions of this manual.
E
N
G
L
I
S
H

14
E
N
G
L
I
S
H
BS-30 MANUAL
The BS-30 is a USB Multilogger sensor for temperatur and humidity
with an micro SD cardslot. The BS-30 registers the temperatur and
humidity data and stores it on the internal micro SD memorycard.
BS-30 operation
We assume that you already installed the Multilogger software on
your PC. Connect the BS-30 to an USN port of your PC. When you
connect the BS30 for the rst time the BS-30 USB driver (RF_USB)
ill be installed rst. Normally also the charching of the internal accu
will directly start (red LED). The charging LED (Red) will blink 2
times shortly when the accu is almost empty.
After a correct installation of the driver you will see in the
“Synchronisation” screen of the Multilogger software ‘USB@x’
and the BS-30 rmware version.
The BS30 will store directly the measured data in the Multilogger
software. You can monitor the latest measurement in the sensor list
screen of the software and the activity in the synchronisation screen.
As long the BS-30 has (battery)power and the SD card is installed,
the module will store the data on the SD card. During charging
when the BS-30 is connected with a PC or with an 5V USB
power source the temperature in the BS30 housing will raise a
few degrees and the measurement will not be accurate any-
more.
You can charge the internal lithium accu with an 5 Volt USB power-
souce or directly with your PC. The BS-30 can opperate without the
USB power as stand alone device.
The Multilogger software (Templogger software) has been designed
for Windows 7 (and also for subsequent Windows versions) and is
available for 32 bits and 64 bits systems. The software has been
equipped with 4 languages. You can download the most recent soft-
ware versions from:
http://www.arexx.com.

15
E
N
G
L
I
S
H
Powersupply
The BS-30 can work stand-alone because the internal lithium accu.
The data is is stored on the SD card (when you installed one). Char-
ching the internal accu takes about 3 hours.
LED INDICATOR
The BS-30 has 2 LED indicarors:
The red LED near the USB connector will light during the charching
of the accu. The blue LED at the end blinks once when it measures
data. The blue LED blinks 3 times short when it is connected to the
PC and there is no SD card installed.
Internal Realtime clock
The BS-30 module uses an internal clock (RTC) to supply measurement data
with a time-stamp. The clock will be synchronized by the Multilogger soft-
ware as soon as a data link has been established. If the clock restarts – for
instance to be caused by an empty accu cell – the missing time-stamp
prevents the system to record new data. The error will cause that the
blue LED will not blink anymore.
This error can be solved by connecting the module to the PC in order to syn-
chronize the module with the Multilogger software. The software will synchro-
nize the clocks, which allows the Multilogger process to restart further logging.
Data on the SD card
When the SD-card is ejected, the sensor stops, and disconnects
the USB connection, if present. The SD-card can be read with a
standard SD-card reader.
The log les will reside on the directory /log, and are named
mxxxxyyyymm.txt;
with
• xxxx the sensor number in hexadecimal format;
• yyyy the year number;
• mm the month number.
The format is comma separated text; and can be imported by the
temperature-logger software and in Ecel or Word for further proces-
sing.

16
E
N
G
L
I
S
H
When the temperature logger software is running and the sensor is
connected to the PC, the software will start download the data of the
sensor. It will download the current month and the previous month –
so data between 1 and 2 months length. You can also read the data
from the SD card directly with a card reader in this case there is no
2 months limit. Logging will continue when the sensor is con-
nected to the PC. In case the accu will charge the temperature
raises a few degrees and the measurements will not be accu-
rent during the charging time of the accu.
The latest temperature logger software is able to connect to more
than one USB base-station simultaneously. Normally just one station
will sufce, but this USB-sensor can be plugged in into the same PC
already using a normal USB base-station.
CONFIGURATION
The software package for the logger application also includes the
USB-driver, the messenger and a great number of extra tools.
The website also provides users with detailed information to the
Multilogger series of products.
The sensor can be congured with the BS30 Conguration Tool,
available from temperature logger software v2.1.21.
In this tool two gures can be given:
• The sensor id can be given in the range 0x9000-0xa000
(36864-40960);
• The measurement interval can be given (between 30 seconds
and 1 hour). This makes it possible to make a tradeoff
between sampling frequency and availability of the battery
power: each measurement will consume some power, so more
measurements will shorten the total period of measurement
possible with one battery charge.

17
E
N
G
L
I
S
H
The following times can be considered as an indication for
the accu life time:
Measurement interval (minutes) Measurement period (accu days)
1 10
5 40
10 61
30 93
60 107
The program allows you to read from and write to the device; and
also save the conguration to a le.
The tool creates an xml le that is stored on the SD card.
This conguration le (located at /cong/cong.xml of the
SD card) has the following elements:
Element Description
cong root element
interval measurement interval specied in seconds
(min 30 secs, max 3600 secs)
device The device number in decimal. The rmware
will adjust the number such that it is within the
range 0x9000 and 0xa000
The conguration le for device 0x9000, measuring every minute
would look like this:
<?xml version=”1.0” encoding=”UTF-8”?>
<cong>
<interval>60</interval>
<device>0</device>
</cong>
Initially the SD card must be formatted (FAT32). Often cards which
already have been formatted are delivered, but if needed you can
also format a card by PC-software in a card reader. The Software will
create a directory ‘log’ automatically as a location to store the log-
ging les. At the log-directory the system will generate a text le for
each sensor and each month.

18
The naming convention for the log-les is:
m<id><year><month>.txt
in which
id: the id-number of the sensor in hexadecimal format
(4/8 bytes).
year: the year in 4 decimals
month: the month in 2 decimals
The format is comma separated text; and can be imported by the
temperature-logger software and in Ecel or Word for further proces-
sing.
The data in the LOG le
All data which refers to the le-name’s criteria will be added to
the relevant data-le on the SD card. A data le starts with a le
header, followed by individual lines for each data-record for one
measurement data set.
<time-stamp>, <value>
in which
time-stamp: yyyy-mm-dd hh:mm:ss (UTC)
value: measurement data value in oating point format.
Delivered from an SD-card these data sets can also be imported to
a PC and processed with e.g. Excel-software. The SD-cards’ data
however also can be imported to the logger software. Import from
the SD-cards to the logger software can be controlled by the import
function – see menu: le --> import.
Special functions
Update rmware
The rmware of the BS30 sensor can be (re)programmed by the
following steps:
1. Connect the sensor to the PC via USB
2. Press both switches RESET and PGM simultaniously, and release
the RESET before releasing the PGM switch.
3. Normally, a le explorer window will open up
(called ‘CRP DISABLD’) with one le called rmware.bin.
4. Delete this le
5. Move the new rmware.bin le to the empty folder
6. Start the BS-30 again by pressing the reset button
E
N
G
L
I
S
H

19
2. Troubleshooting
The USB sensor but fails to registrate.
Potential problems:
- Accu is empty or are at a low level
- PC does not registrate the BS30
Potential causes:
- USB is not properly connected to the PC
- USB driver is not installed corectly
- Unknown software or driver problem
Suggested solutions:
- Fully charge the accu in the USB sensor (see charge LED).
- Check the “Synchronisation” window in the temperature
loggersoftware.Theeldistodisplaythevalue‘USB@x’
andtheversionnumber.
- Remove the USB sensor wait for 10 seconds and connect it again.
- Deinstall the Multiloggerlogger Software and do a reinstallation
with the latest versions. (see www.arexx.com)
wiederholen Sie die Installation.
- Check the sensor list if the sensornumbers are available
Charge LED (Red)
Measure LED (Blue)
Reset
PGM
LEDS
AND
SWITCHES
E
N
G
L
I
S
H
E
N
G
L
I
S
H

20
E
N
G
L
I
S
H
Technical details
Type: BS30
USB: USB 2.0, Multilogger USB-Protocol.
Stromversorgung: 5 – 7.5V DC / 100mA
Akku: Lithium-Polimer 3,7V
SD Speicherkarte: Mikro SD (SD, SDHC) ≥1 GB
Messdaten Speichergroße: 30 Byte per measurement, with 1
measurement per minute it is 20MB Per
year
Dimensions (LxWxH): 70 x 25 x 22 mm
weight (Gram): 25
Range and accurancy:
Temperature;
• >±1°C from +10°C to +40°C
• >±1,5°C from -10°C to +50°C
• >±2,5°C from -40°C to +100°C
Humidity;
*± 0,5° from 20% bis 80%
*± 7° from 0-20% to 80-100%
Software: http://www.arexx.com
Table of contents
Languages:
Other Arexx Receiver manuals