Argo CLIMIA CMK 4000 WiFi User manual

Version 1.0
english
V
V
CLIMIA
Room air conditioner with remote condenser CMK 4000 WiFi
Operating instructions

1
ALERT SYMBOLS
The following symbols used in this manual, alert you to potentially dangerous conditions to users, service personnel or the
appliance:
This symbol refers to a hazard or unsafe practice which can result in severe personal injury
or death.
This symbol refers to a hazard or unsafe practice which can result in personal injury or product
or property damage.
01 - SAFETY INSTRUCTIONS
Read this booklet carefully before using this air conditioner. If you still have any diculties or problems, consult your
dealer for help.
This air conditioner is designed to give you comfortable room conditions for domestic use. As far as industrial and professional
activities are concerned, Argoclima declines all responsibility for any unsuitability of the appliance depending on its characteristics
and the purposes it should be responsible for.
Never use or store gasoline or other ammable vapour or liquid near the air conditioner. It is
very dangerous. Moreover, never install electrical equipment, which is not protected with IPX1
protection (protection against vertical water drop), under the unit.
The manufacturer assumes no responsibilities if the safety regulations or local codes are
not observed.
Never use neither the power main switch or the power plug to start or stop the air conditioner.
Always use the ON/OFF button.
• Do not stick anything into the air outlet of the air conditioner. This is dangerous because the fan is rotating at high speed.
• Do not let children play with the air conditioner.
• Do not cool the room too much if babies or invalids are present.
• This air conditioner can be used by children aged from 8 years and above and persons with reduced physical, sensory or mental
capabilities or lack of experience and knowledge if they have been given supervision or instruction concerning use of the air
conditioner in a safe way and understand the hazards involved.
• Cleaning and user maintenance shall not be made by children without supervision.
• For safety, be sure to turn the air conditioner o and also to disconnect the power before cleaning.
Room air conditioner with remote condenser CMK 4000
Contents
01 SAFETY INSTRUCTIONS 1
02 INSTALLATION LOCATION 2
03 ELECTRICAL REQUIREMENTS 2
04 PRODUCT IDENTIFICATION 3
05 MONITOR PANEL 3
06 AIR CONDITIONER INSTALLATION 4
07 IMPORTANT ADVICE 4
08 USING THE REMOTE CONTROL UNIT 5
09 REMOTE CONTROL UNIT 6
00 HOW TO SET THE CLOCK 7
00 COOLING/AUTOMATIC MODE 7
00 DEHUMIDIFYING MODE (DRY) 7
00 FAN ONLY MODE 7
00 ADJUSTING THE FAN SPEED 7
00 NIGHT MODE 8
00 ENERGY SAVING (ECO) 8
00 TURBO MODE 8
00 TIMER SELECTION 8
00 RESET BUTTON 8
00 HOW TO SET SCHEDULES 8
10 PARAMETERS SETTING 9
11 WiFi CONFIGURATION 11
12 ADJUSTING THE AIR FLOW DIRECTION 15
13 OPERATION WITHOUT THE REMOTE CONTROL UNIT 15
14 CARE AND CLEANING. 15
15 ACCESSORIES (SUPPLIED ON REQUEST) 16
16 TIPS FOR ENERGY SAVING 17
17 TROUBLESHOOTING 18
WARNING
CAUTION
WARNING
CAUTION

CLIMIA
2
02 - INSTALLATION LOCATION
• Do not install this air conditioner where there are fumes or ammable gases, or in an extremely
humid space such as a green house.
• Do not install the air conditioner where excessively high heat-generating objects are placed.
• Do not install the air conditioner where the atmosphere is extremely damp or humid (e.g. greenhouse or laundry) it could be
wetted by drops of water (i.e. in laundries).
AVOID:
To protect the air conditioner from heavy corrosion, avoid installing the outdoor unit where salty sea water can splash directly
onto it or in sulphurous air near a spa.
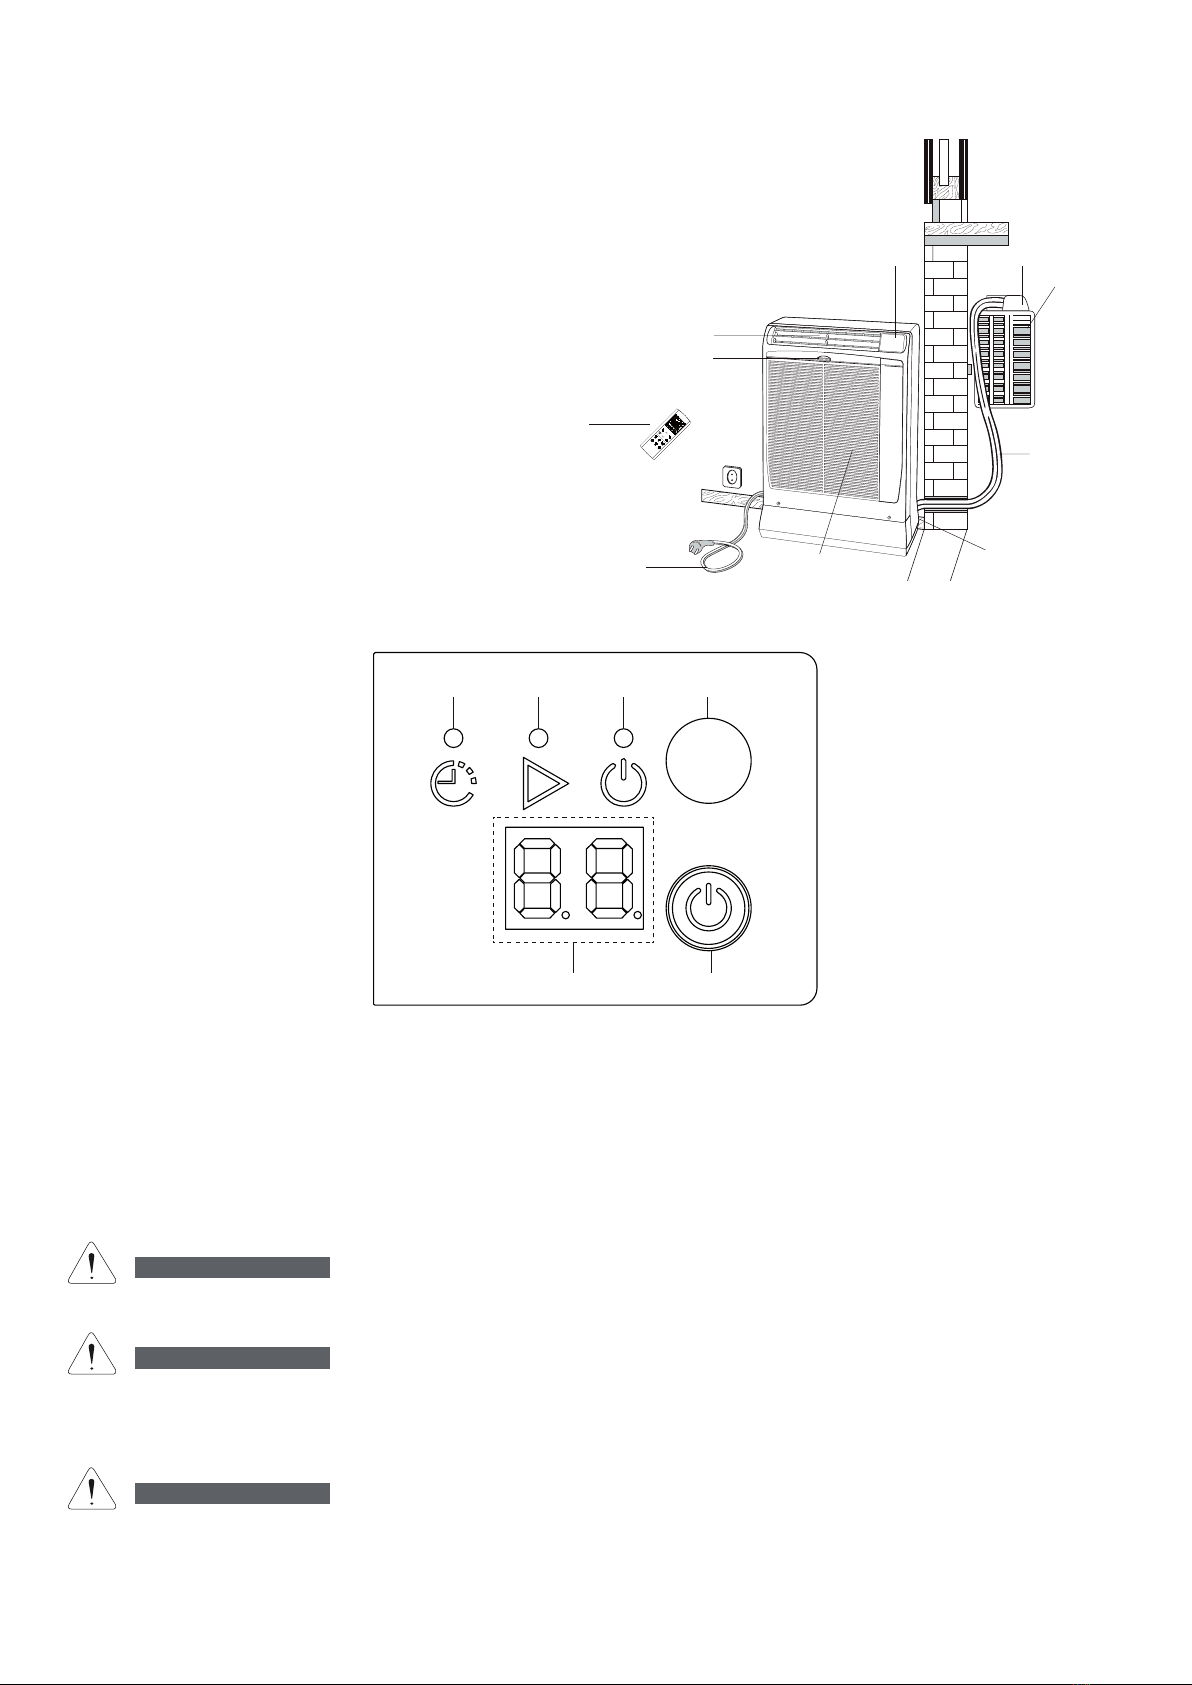
Make sure that there are no obstacles around the indoor unit aecting the free circulation of air. Do not block the air intake and
outlet of the unit with curtains or other.Never put objects on the top of the unit.
03 - ELECTRICAL REQUIREMENTS
Before using the appliance
• Check that the power supply at the location where the air conditioner is going to be used is 220/240 volt, single phase.
• For your safety care check periodically the conditions of the electric supply cable; the electrical connection of the unit is Y type
with cable prepared in a special way; in case you should notice any damage due to usage, call the nearest After Sale Service to
get the cable replaced.
• Before connecting the air conditioner to a power socket, make sure that the socket is provided with an earth connection.
• Verify that the available power supply is sucient for running other electrical domestic appliances in use simultaneously from
the same supply. See the data plate on the unit showing the max. absorbed powers.
• Install a double-pole switch, protected fuses of the delayed type, upstream the electricity wall socket 10A.
• Make sure that circuit breakers, fuses, etc. are of sucient capacity to handle start - up current (normally for no longer than a
second).
• All wiring must conform to the local electrical codes. Consult your dealer or a qualied electrician for details.
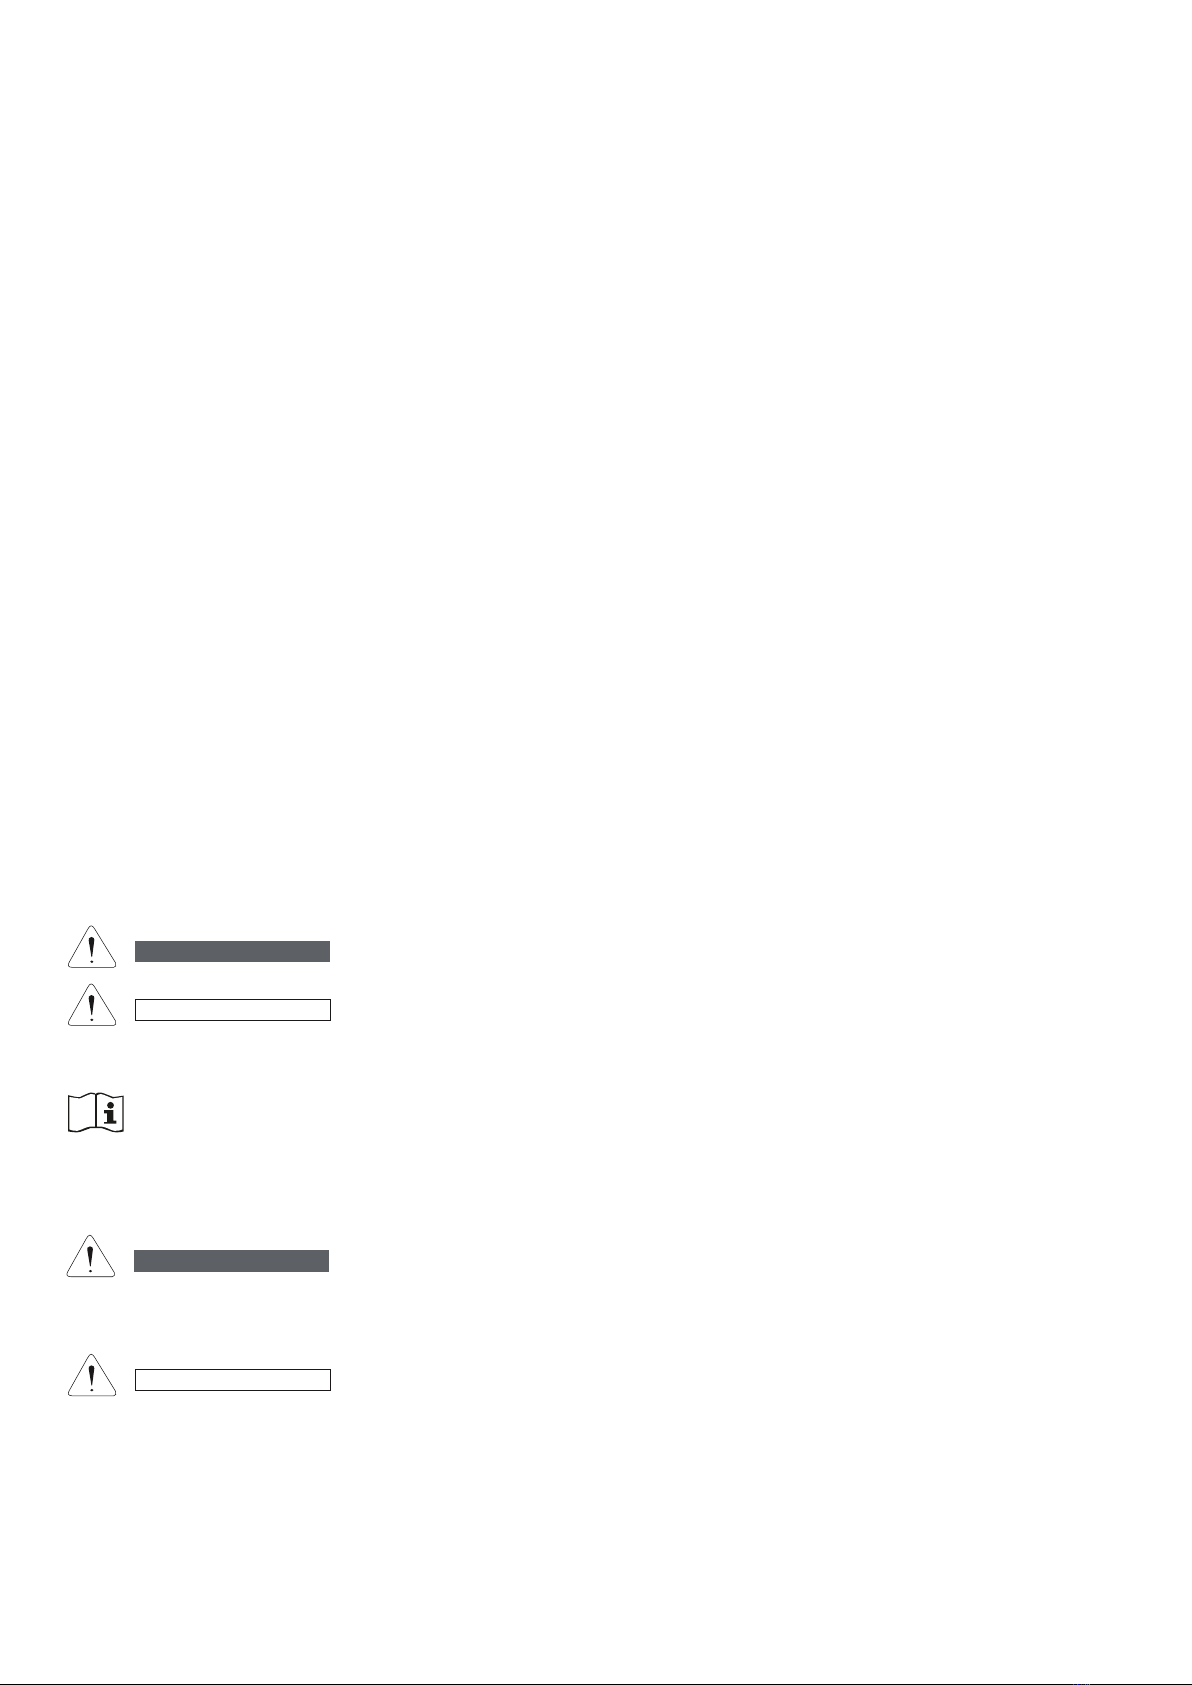
WARNING!
The air conditioner is provided with a time-guard system, which does not allow re-starting of compressor until after 3 minutes
from a previous stop.
NOTE
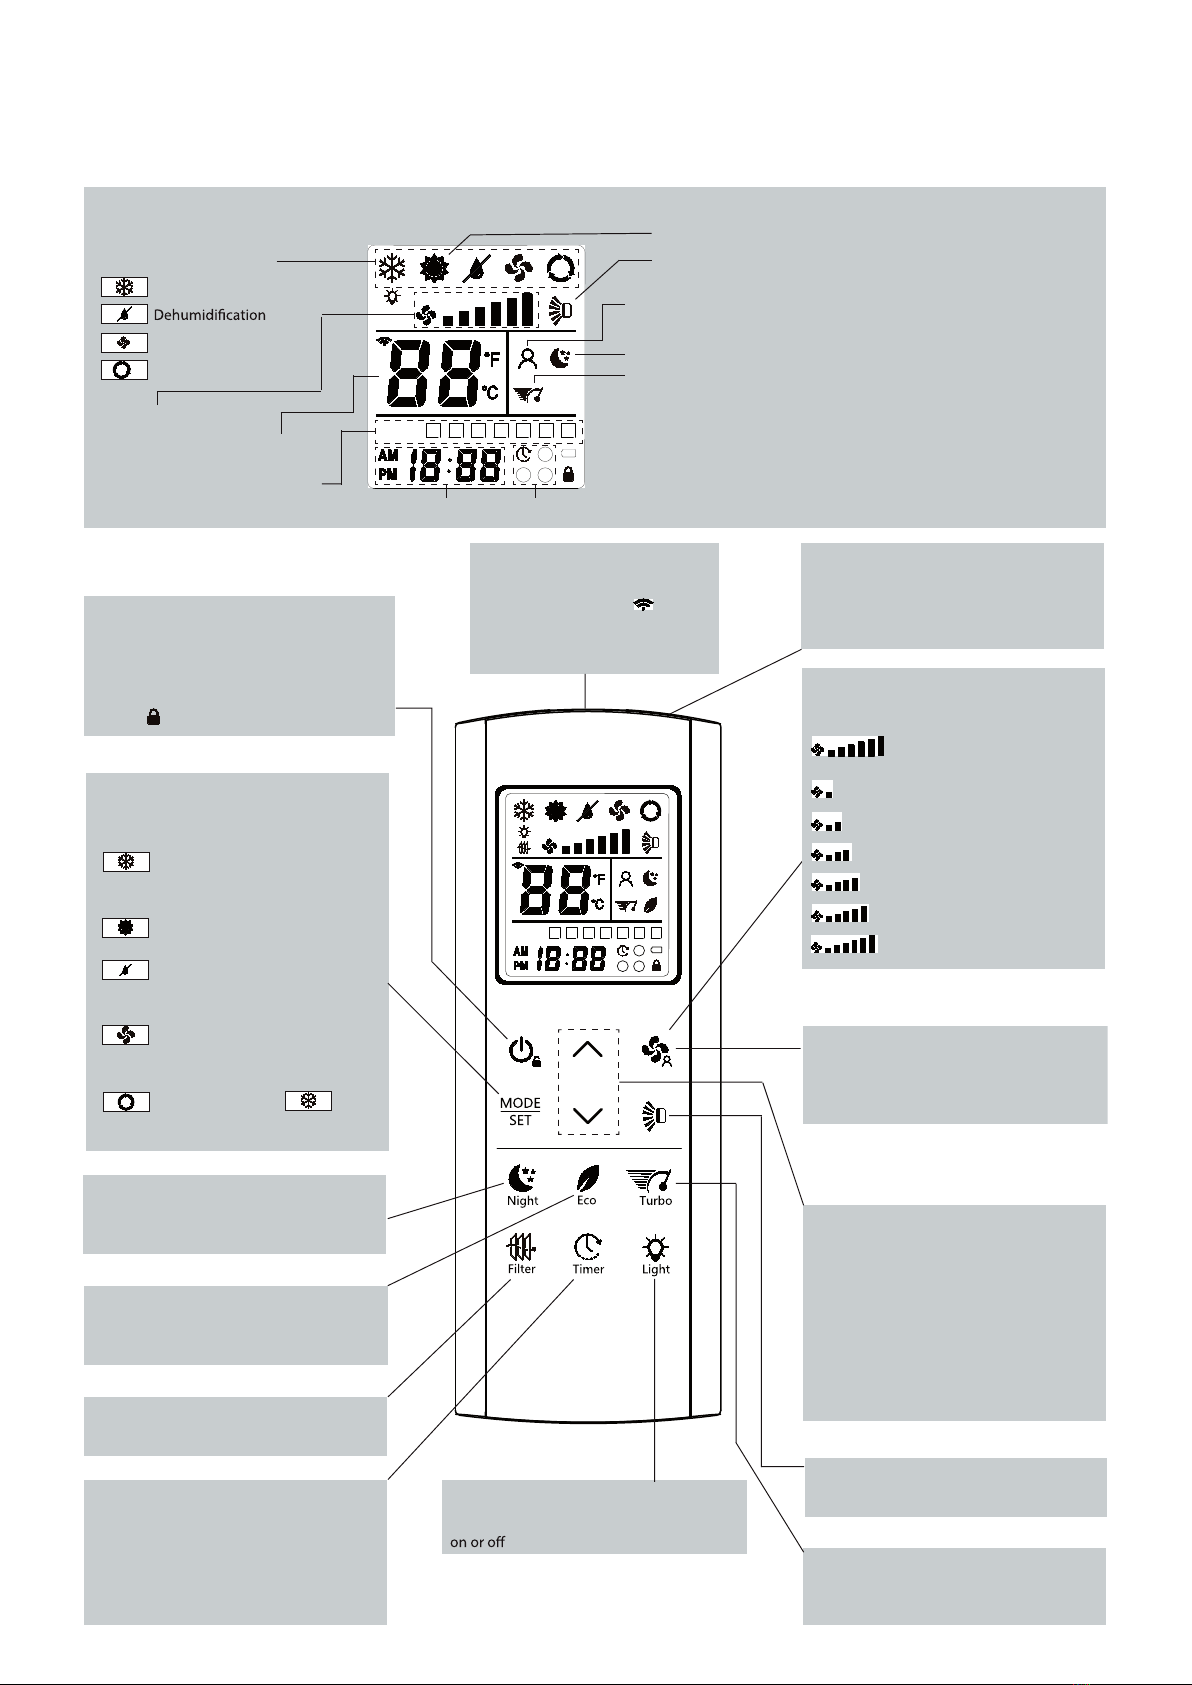
This air conditioner is equipped with cooling, drying and fan functions. Details on these functions are provided here following;
refer on these descriptions when using the air conditioner.
OPERATING LIMITS
COOLING
MAXIMUM CONDITIONS OUTDOOR TEMPERATURE 46°C D.B.
ROOM TEMPERATURE 32°C D.B./23°C W.B.
MINIMUM CONDITIONS OUTDOOR TEMPERATURE 19°C D.B.
ROOM TEMPERATURE 19°C D.B./14°C W.B.
DECLARATION OF CONFORMITY
This product is marked with the CE mark because it conforms to the following directives:
– Low Voltage Directive 2006/95/CE. (Standard: EN60335-2-40:2003 (incl. Corr.:2006) + A11:2004 + A12:2005 + A13:2012 + A1:2006 +
A2:2009 with EN 60335-1:2002 + A11:2004 + A1:2004 + A12:2006 + A2:2006 + A13:2008 + A14:2010 + A15:2011).
– Electromagnetic compatibility 2004/108/CE, 92/31 EEC and 93/68 EEC. (Default: EN55014-1(2006) + A1(2009) + A2(2011), EN 55014-2 (1997)
+ A1(2001) + A2 (2008), EN 61000-3-2 (2006) + A1(2009) + A2(2009), EN 61000-3-3 (2008)
– RoHS2 n.2011/65/EU.
– Regulation (EU) no. 206/2012, of March 6, 2012, on the specications for ecodesign of air conditioners and fans.
– Regulation (EU) no. 626/2011, of May 4th, 2011, on the labeling of energy consumption of air conditioning systems.
In the event of incorrect use of the device and/or non-observance of even just parts of the operating manual and the installation instructions
this declaration becomes invalid.
Argoclima S.p.A.
Via Alfeno Varo 35, 25020 Alanello (BS)
WARNING

04 - PRODUCT IDENTIFICATION
Room air conditioner with remote condenser CMK 4000
3
05 - MONITOR PANEL
Denition of the LED lamps:
Timer = YELLOW
Operation = GREEN
Standby = RED
11. Infrared rays remote control unit
12. Monitor panel
13. Supply air deector
14. Return air grille
15. Outdoor unit
16. Flexible tube
17. Air lter
18. Power cable with plug (about 2.30 m)
19. Service tube for condensate evacuation
10. Quick coupling cover
2
7
10
5
6
1
8
3
49
S
1
MW
TTFS
AUTO
WEEK
SET
23
A
1243
5
6
1. Time setting lamp (TIMER): This lamp lights up when a timer is activated (see section “TIMER SELECTION”).
2. OPERATION lamp: This lamp lights up when you switch on the unit.
3. STANDBY lamp: This lamp lights up when the air conditioner is connected to the power and ready to receive the remote
control command.
4. Receiver: It receives signals transmitted from the remote control.
5. Operation button (without remote control): Push the button to switch on or o the unit (see section “OPERATION WITHOUT
REMOTE CONTROL UNIT”). Press and hold this button for 5 seconds to enable the WiFi conguration (Only for WiFi models, see
“WiFi INSTRUCTIONS” manual).
The OFF position does not disconnect the power. Use the main power switch to turn o power completely.
NOTE
WARNING
Please note that the color representation of the control panel on the device may vary and that the representation in these
operating instructions may dier. However, this does not aect the functionality and is purely optical in nature.
NOTE
Only if an error message is displayed, it may be necessary to carefully unplug the indoor unit to drain excess water. In other
cases, the plug should not be removed.

CLIMIA
4
06 - AIR CONDITIONER INSTALLATION
Min. 25 cm.
M6 x 20
M6 x 20
TYP A
HALTER
TYP B
140
Löcher
3 x ø 10
100 min.
200
WAND-
HALTERUNG
NEIN!
NEIN!
The air conditioner is made of two units interconnected by a exible
tube. The indoor unit must be placed in the room to be air condi-
tioned, near a window, a balcony-door or a perimeter wall. The out-
door unit, that provides to the disposal of heat and condensation,
must be located outside, on a window sill, on a balcony or hanged
to the wall.
NOTE
It is strongly recommended to place a neutral pad under the feet of
the unit to protect the oor from possible indentations.
Place the outdoor unit, which dissipates the heat and through which
the condensed water is disposed of, on the balcony, on a window sill
or hang it on the outside wall.
POSITIONING OF OUTDOOR UNIT
The outdoor unit must always be kept in vertical position and le-
velled. Make sure that there are no obstacles around the unit aec-
ting the free circulation of air. A lug at the rear bottom of the unit
ensures the minimum distance from the wall (3 cm). The unit must be
kept at a minimum distance of cm. 15 (sidewise) and cm. 80 (frontally)
from any walls.
INSTALLATION TYPE A
If your room has a balcony or a window-sill of sucient depth (min.
25 cm) you may rest the unit freely onto it. For safety’s sake, you may
anchor the unit to the window-sill using one M6 x 20 expansion bolt in
the slot of the lug at the rear bottom of the unit. The exible tube may
easily pass through the balcony door or window shutters set ajar.
INSTALLATION TYPE B USING THE OUTDOOR UNIT SUPPORT BRACKET
KIT (NOT SUPPLIED)
You can buy separately the support bracket kit to x the outdoor unit
to the wall, as follows:
1. Fix the support guide to the wall below the window sill.
2. Insert the support in the handle of outdoor unit, and turn the out-
door unit upside down as shown in the picture.
3. Place the support and secure it at the edge of the unit, using the
screws.
4. Insert the support, xed on the unit, at the guide xed to the wall.
Make sure it is levelled.
IMPORTANT ADVICE
IMPORTANT ADVICEOUTDOOR UNIT
1. When you move the outdoor unit, always hold it by the handle, never pull it by the exible tube.
2. Never let the outdoor unit hang on the exible tube.
3. When you recover the outdoor unit after operation, drain away any remaining condensate by tilting the unit.
TYPE A
TYPE B
Holes
Wall mount
Bracket
NO!
NO!

Room air conditioner with remote condenser CMK 4000
5
08 - USING THE REMOTE CONTROL UNIT
HOW TO INSTALL BATTERIES
• Remove the lid in the rear part of the remote control unit.
• Insert two AAA alkaline batteries of 1,5 V-DC making sure that point in the direction marked in the battery
compartment.
• Set the clock (see procedure on page 8). Remote controller is now ready for operation.
• The batteries last about six months. Depending on how much you use the remote control unit. Remove the
batteries if you do not use the remote control unit for more than one month. Replace the batteries when
the battery symbol appears on the remote control ( ).
• The batteries of the remote control contain polluted substances. Exhausted batteries must be disposed
according to the laws in force.
HOW TO REMOVE BATTERIES
• Remove the lid.
• Press the battery toward the negative end and lift it out by its positive end (as shown in the gure).
• Remove the other battery in the same way.
RESE T
-+
-+
RESET
-+
-+
TEMPERATURE SENSOR SELECTOR
• Under normal conditions the room temperature is detected and checked by the temperature sensor placed in the remote
controller ( IFEEL icon displayed ).This function is designed to provide a comfortable room temperature by transmitting the
temperature control command from the location next to you. When using this function, the remote, control should always be
pointed at the air conditioner, therefore it should be placed in a position in which it is visible by the indoor unit (for example,
do not put it in a drawer).
• It is possible to disable the remote controller room sensor pressing the FAN/IFEEL button for a few seconds. In this case the
icon on the remote controller display lights o and the sensor placed in the air conditioner becomes active.
NOTE
The remote control unit transmits signals to the indoor unit each time you press a key and at any temperature change detected by
the internal sensor. In case of troubles (low batteries, remote control placed in a position not visible by the indoor unit,...) room tem-
perature control is automatically switched to the sensor of the indoor unit. In this case, the temperature around the remote control
unit may dier from the temperature detected in the air conditioner position.
PERATION WITH THE REMOTE CONTROL UNIT
When using the remote control unit, always point the unit transmitter head
directly at the air conditioner receiver.
INNENEINHEIT
FERNBEDIENUNG
IR-EMPFÄNGER
IR-SENDER
S
1
MW
T T FS
AUTO
WEEK
SET
23
A
Programming the remote control
• The batteries must be inserted in the remote control.
• When the keyboard is locked (the icon lights up on the display), unlock the keyboard by pressing the power button
Hold for 2 seconds until the icon turns o.
• Press and hold the ECO button for 5 seconds until “02” appears on the display.
The remote control is now congured for use with your unit. This setting is retained even if the batteries are removed.
INDOOR UNIT
RECEIVER
TRANSMITTER HEAD
REMOTE CONTROL UNIT

CLIMIA
6
09 - REMOTE CONTROL UNIT
ON/OFF BUTTON
Press this button to turn the air conditioner
ON / OFF.
Press for 2 seconds to lock / unlock the
buttons
MODE SELECTOR BUTTON
Press this button to modify the air
conditioner mode.
COOLING
The air conditioner makes the room
cooler.
HEATING (not available)
DEHUMIDIFYING (DRY)
The air conditioner reduces the humidity
in the room.
FAN
The air conditioner works only as a
circulation fan.
AUTOMATIC =
A
DISPLAY
Information is displayed when the remote controller is switched on.
Operation mode
Fan speed
I FEEL mode is active
(remote controller sensor
active)
Night mode
Timer: 3 types + delayed timer
Cooling
Fan
Automatic
Clock
A
TRANSMITTER
When you press the buttons of the
remote control unit, the mark
appears on the display to transmit
the setting changes to the receiver
in the air conditioner.
CLOK AND TIMER SETTING BUTTON
Press this button in order to select the
desired timer.
Press for 2 seconds to set the timer
For details refer to paragraphs “HOW
TO SET THE PRESENT TIME”, “TIMER
SELECTION”, and “SETTING THE TIMER”.
S
1
MWTTFS
AUTO
WEEK
SET
23
A
TEMPERATURE SETTING BUTTONS
- (cooler)
Press this button to decrease the set
temperature.
+ (warmer)
Press this button to increase the set
temperature.
USE THESE BUTTONS ALSO FOR TIMER
SETTING
SENSOR
A temperature sensor inside the remote
control unit detects the room temperature.
(see on the back of the remote control unit)
IFEEL MODE
Press this button for a few seconds
to modify the active setting for room
temperature detection (from remote
controller to air conditioner and viceversa).
FILTER BUTTON
(INACTIVE BUTTON)
NIGHT BUTTON
Press this button in order to select the
NIGHT mode.
FLAP BUTTON
(INACTIVE BUTTON)
TURBO BUTTON
Press this button in order to select the
TURBO mode.
ECO BUTTON (not active)
Through the inverter compressor is always
given an ECO operation.
S
1
MW
TTFS
AUTO
WEEK
SET
23
A
TURBO mode
LIGHT BUTTON
Press this button to turn the unit display
Days of the week
Temperature
FAN/IFEEL BUTTON
Press this button to change the fan speed.
Fan speed is automatically
selected by the unit.
Low speed
Medium/low speed
Medium speed
Medium/high speed
High speed
Very high speed
AUTO
HEATING MODE: not active on this unit
FLAP: not active on this unit

Room air conditioner with remote condenser CMK 4000
7
09 - REMOTE CONTROL UNIT
HOW TO SET THE CLOCK
1. Turn on the unit with the ON / OFF
button.
2. Press the button until the
COOLING symbol appears on
the display.
3. Press the buttons to set the
desired temperature (
the temperature
range is between 10 ˚C and 32 ˚C
).
COOLING / AUTOMATIC MODE
NOTES
SET
THE DISPLAY SHOWS THE
SELECTED TEMPERATURE
AND THE WORD “SET”.
AFTER 5 SECONDS FROM THE
REQUIRED TEMPERATURE
SETTING THE DISPLAY
WILL SHOW THE ROOM
TEMPERATURE AGAIN.
4. Press the button to select the fan speed.
1
If the fan is set in automatic mode and the unit stops
because setpoint is reached, also the fan will stop.
If the fan is set in one of the six manual speeds, it will
go on operating at the selected speed, even if the unit
stops due to reaching the setpoint.
When the external or internal temperature is too low,
the unit could limit the speed of the compressor or
formation of ice on the internal heat exchanger.
SMWTTFS
AUTO
WEEK
SET
3
4
2.
3.
button to exit the clock menu.
1. Press for a few seconds the Timer button
Press the button
SMW
TTFS
WEEK
SET
SMW
TTFS
WEEK
ARROWS
2
DEHUMIDIFYING MODE (DRY)
ADJUSTING THE FAN SPEED
1. Turn on the unit with the ON / OFF button
2. Press the button until the DEHUMIDIFYING symbol
appears on the display .
3. Press the buttons to set the desired temperature
(
the temperature range is between 10 ˚C and 32 ˚C
).
•Use DRY operation when you want to reduce the
humidity in the room.
•Once the room temperature reaches the set level, the
•During DRY operation, the fan speed is automatically
set (Remote control lamp is ON) to maximize
•Dry operation is not possible if the indoor temperature
is less than 10 ˚C.
NOTES
If you want to make air circulate without any temperature
control, press the button until the FAN symbol
appears on the display .
FAN ONLY MODE
In FAN ONLY mode, the AUTOMATIC speed corresponds
to the high speed H.
AUTOMATIC
Set with the button the “AUTO” position
. The unit automatically controls the fan speed.
When the air conditioner starts operating, the fan speed
varies according to the thermal load of the room .
NOTE
MANUALE
If you want to manually adjust the fan speed just set the
button as desired:
SET
THE DISPLAY SHOWS THE
SELECTED TEMPERATURE
AND THE WORD “SET”.
AFTER 5 SECONDS FROM THE
REQUIRED TEMPERATURE
SETTING THE DISPLAY
WILL SHOW THE ROOM
TEMPERATURE AGAIN.
AUTO
AUTO
AUTO
LM LM
MHHVH
MH Medium-high
H High
VH Very high
L Low
ML Medium-low
M Medium

CLIMIA
8
09 - REMOTE CONTROL UNIT
A) DELAYED TIMER
This timer is used to start the unit (if it
a certain time, to set the delayed time.
1.
Press the Timer button for a few
seconds.
2. Press the arrow “up” to select the
delayed timer .
3. Press the button : the hour
with the arrows.
4. Press the button again: the minutes
with the arrows.
5.
the button to exit the delayed timer
menu.
B) SCHEDULE
This timer is used to turn the unit on and
1.
Press the Timer button for a few
seconds
.
2. Press the arrow “up” to select the
schedule to be set ( , or ).
3. Press the button : ON indication
4. Press the button again: AM indication
PM with the arrows).
5. Press the button : the hour indication
the arrows.
6. Press the button again: the minutes
with the arrows.
7. Press the button : OFF indication
8. Repeat the same procedure to set AM
or PM, hour and minutes.
9. At this point, press the “up” arrow
9. Press the button : the indication of
set ON or OFF with the arrows, then
9. The indication of the second day of
procedure with every day of the week,
if desired.
10. At the end press to exit the menu.
HOW TO SET SCHEDULES
S
1
MW
TTFS
WEEK
times using the timers.
NOTE
TIMER SELECTION
To select the timer, press the button to switch on the
remote control, then press the button to chose the
desired schedule:
This program is used to increase silence and comfort during
the night.
To activate the Night mode:
1. Press the button to set the air conditioner in cooling
2. Press the button .
3. The symbol
appears on the display
. Press the button
again to release the function.
What does the NIGHT mode mean?
When you select the NIGHT mode, the air conditioner will
modify automatically the set temperature after 60 minutes: it
will be raised by 1˚C.
comfort.
NIGHT MODE
During the NIGHT mode the internal fan speed is automatically
lowered, reduceing the noise.
NOTE
This program is used to increase the maximum power that
can be supplied by the air conditioner, even if it involves less
silence.
To activate the Turbo mode:
1. Press the button to set the air conditioner in cooling .
2. Press the button .
3. The symbol
appears on the display
. Press the button
again to release the function.
TURBO MODE
ARROWS
123
S
1
MW
TTFS
WEEK
ARROWS
1
23
or “OFF”
In the event of a power failure and restoration, the timer
selection must be performed again.
NOTE
123
Press the RESET button on the back of the remote control if
you want to reset all settings and return to the factory setting.
RESET BUTTON
RESET

Room air conditioner with remote condenser CMK 4000
9
10 - PARAMETERS SETTING
To access to the “Parameter menu”, long press “MODE/SET” from the main screen or from the OFF screen:
or ( 2 sec)
(2 sec)
When a parameter has been selected, long press “MODE/SET” to modify the value of the parameter. The value of the parameter
starts blinking and SET symbol switches on:
Press “UP” or “DOWN” to modify the value of the parameter, then press “MODE/SET” to save and transmit the selected value
of the parameter or press“ON/OFF” to restore the previous value of the parameter:

CLIMIA
10
10 - PARAMETERS SETTING
(0.5 sec)
:
Par. Parameter name Min Default Max Values
P00 Factory default reset 0 0 3 0 = No action
1 = Reset all remote control parameters
to factory default value
P01 Software version 0 - 7 Software version of the remote controller
P05 Temperature scale 0 0 1 0 = °C (Celsius)
1 = °F (Fahrenheit)
P06 Transmission channel 0 0 3 0 = Channel #0
1 = Channel #1
2 = Channel #2
3 = Channel #3
P12 ECO mode power input limit 30 75 99 When ECO mode is selected, max electrical
power input of the unit is limited to P12:
Leistung auf P12 begrenzt:
0 = 30% of Max Power Input
31 = 31% of Max Power Input
...
99 = 99% of Max Power Input
NOTE
Parameters not listed in the table are reserved and should not be changed. Changing the parameters not listed can cause the air
conditioner to malfunction.
Press “ON/OFF” to go back to main screen:

Room air conditioner with remote condenser CMK 4000
11
11 - WiFi CONFIGURATION (FIRST START)
1. Connect the unit to the power supply.
2. Check if the WiFi status LED (dot on the bottom right of the display) is ashing. If it is not blinking, unplug the power supply and
wait for the display to turn o. Then reconnect the power supply.
WiFi status LED
3. Within 5 minutes, connect to the „UI_setup“ WiFi network by manually selecting it from the list
of available WiFi networks or by capturing the QR code shown on the side.
4. If the phone reports an internet connection error, e.g. „No internet connection“, select the option
to stay connected to the conguration WiFi „UI_setup“.
5. When the connection to the WiFi network is successfully established, the WiFi status LED will
start ashing faster.
6. Within 10 minutes, connect to the web page from the browser at http://192.168.4.1 with the
smartphone connected to the WiFi network „UI Setup“ or scan the QR displayed on the side-
Code.
7. The conguration screen shown below will appear. Select the network you want
to connect to from the drop-down menu.
8. Enter the password of the selected WiFi network.
9. Press the „WiFi Connect“ button to conrm the entered data and connect to the
WLAN.

CLIMIA
12
10. In the APP account area, the default username and password are displayed
(automatically generated by the unit). Make a note of this information for
future access to the APP.
11. Tap “APP Connect”. If the credentials are correct the conrmation message
„ACCOUNT CREATED OK“ is displayed.
12. Wait for the unit to connect to the WiFi network. If the connection is
successful, the WiFi status LED will stop blinking and stay on.
When properly congured and connected to the internet, the unit can be controlled and monitored via a dedicated web
APP. To use this feature, you must use the username and password previously created during the conguration phase and
have received account creation conrmation (ACCOUNT CREATED OK). In this case you can proceed as follows:
1. Check if the unit is connected to WiFi (WiFi status LED on display is solid).
2. Open the web APP by connecting to the address http://31.128.210/UI/WEBAPP/
webapp.php?logo=Argo or scan the adjacent QR code.
NOTICE:
To access the WEBAPP, the smartphone or tablet must also be connected to the Internet.
3. The login screen shown below will appear:
Enter your username and password and log in.
It is recommended to check the „Remember me“
box for faster access when using it at night.

Room air conditioner with remote condenser CMK 4000
13
4. Once you are logged in, the following page will appear:
Use the APP as a remote control of the unit. For instructions on how to use the remote control, see this guide.
Log out: Finish the process and return to login
APP: Change APP settings (language etc.)
Timer: Setting on and o times
Account: Change or delete account
Software Update: Update device software
Back: return to the main page
Tap this button to change the settings.
The following screen will appear:
Meaning of the symbols
APP and unit communicate with each other over the Internet (WAN)
APP and unit communicate with each other through the router (LAN)
APP is connected to the internet server but not communicating with the unit
APP does not communicate with the unit and cannot access the internet server
5. When using a smartphone or tablet, it is recommended to save the application in the device at home for faster access and
a more functional working screen. To do this, follow the next steps:
If you are using an iOS device: Select „Add to Home“. If it‘s not visible, scroll down, until it appears.
The application icon is added to the HOME screen to access the WEBAPP.

CLIMIA
14
If you are using an ANDROID device:
Tap on the adjacent symbol
(top of screen)
Select „Add to Home Screen“
The screen is displayed:
Enter a name.
WIFI NETWORK RESET
Press the control button of the unit for 5 seconds to reset the WiFi network access data, e.g. to connect to a new network or to
change the settings of the existing network. You will hear a beep and the WiFi status LED will start ashing.
Follow the instructions in the WiFi conguration section again.
CONFIGURATION ISSUES
Error messages: Some error messages may appear during the connection test. Possible Messages are shown below.
USN or PSW ERROR!!: This message may indicate that the username or password for the account you entered is already in use.
Therefore, it is not possible to create an account with these credentials. You will need to change your username and password
and create a new account.
NO WIFI CONNECTION: This message indicates that the connection to the selected WiFi network could not be established.
Possible causes are:
1. Wrong password.
2. Temporary failure of the specied WLAN.
3. Encryption type is not supported. The supported encryption types are listed below:
Open, WEP, WPA_PSK, WPA2_PSK, WPA_WPA2-PSK
WPA2_Enterprise is currently not supported.
NO SERVER FOUND: This message indicates that a connection to the server could not be established. Possible causes are:
1. Lack of Internet connection for the specied WLAN. There may be a problem with the router. Turn o the modem and restart it.
2. Temporary network disruption. Repeat the startup process in 30 minutes. If the problem persists, contact customer service.
Share...
Search on page
Add to home screen

Room air conditioner with remote condenser CMK 4000
12 - ADJUSTING THE AIR FLOW DIRECTION
VERTICAL
Hold the end of the ap and move it up and down to
adjust the vertical air ow.
HORIZONTAL
The horizontal air ow can be adjusted by moving
the vertical blades to the left or right, as indicated
in the following gure.
Set vertical blades to the front position during COOLING/DRY operation if humidity is high. If the vertical blades are set to the
left-most or right-most position, condensation will form around the air outlet and drip o.
13 - OPERATION WITHOUT THE REMOTE CONTROL UNIT
If necessary, the air conditioner can operate without a remote control:
1. WHEN THE AIR CONDITIONER IS OFF
If you want to turn on the air conditioner push the OPERATION BUTTON to select the COOLING mode:
NOTE
The air conditioner will start in HIGH fan speed. The temperature setting is 25°C.
1. WHEN THE AIR CONDITIONER IS ON
If you want to turn o the air conditioner push the OPERATION BUTTON again.
NOTE
Power failure during operation.
In the event of power failure, the unit will stop. When the power is restored, the unit
automatically restarts after 3 minutes. The operating settings are stored 1 minute after
the last remote control signal received from the unit.
14 - CARE AND CLEANING
For safety, be sure to turn the air conditioner o and also to disconnect the power before cleaning.
OUTDOOR UNIT (CASING AND CONDENSING COIL)
• Some metal edges and the condenser ns are sharp and may cause injury if handled improperly; special care should be taken
when you clean these parts.
• Periodically check the outdoor unit to see if the air outlet or air intake are clogged up with dirt or soot.
• The condenser and other components of the outdoor unit must be cleaned periodically.
Consult your DEALER or AFTER SALES SERVICE.
INDOOR UNIT
• Do not pour water on the unit to clean it. This will damage the internal components and cause an electric shock hazard.
• Never use solvents, or chemical agents when cleaning the indoor unit. Do not wipe the plastic casing using very hot water.
Casing and Grille:
Clean the casing and grille of the indoor unit with a vacuum cleaner brush, or wipe them with a clean, soft cloth. If these parts are
stained, use a clean cloth moistened with a mild liquid detergent. When cleaning the grille, be careful not to force the blades out of
place.
BETRIEBSTASTE
15
CAUTION
CAUTION

CLIMIA
AIR FILTER
The air lter must be cheked at least once every two weeks operation. Operation with a dirty lter always causes a lower ef-
cency of the air conditioner and severe product damage. The lter is located at the back of the intake grille in the front of the
air-conditioner and shall be removed from the upper side of the unit.
HOW TO REMOVE THE FILTER
FILTER CLEANING
Use a vacuum cleaner to remove light dust. If there is sticky dust on
the lter, wash the lter in lukewarm, soapy water, rinse it in clean
water, and dry it.
TRANSPORT
Keep the air conditioner in the vertical position during transportation.
STORAGE
If you are not going to use the air-conditioner for a long period, clean the air lters, evacuate the condensate from the indoor
unit through the drain hose at the unit back side. Do not disconnect the exible tube, unless you are obliged to do it: in that case
protect the open halves of the couplings, after disconnecting it and before handling the exible hose and the outdoor unit; uti-
lize the plastic plugs supplied as accessories, that must be tightened with a spanner. After handling, reconnect the exible tube
to the outdoor unit to avoid refrigerant leaks during the storage. Do not put heavy objects on the top of the unit, and protect it
with a cloth or a plastic bag.
14 - ACCESSORIES (SUPPLIED ON REQUEST)
OUTDOOR UNIT SUPPORT BRACKET KIT
140
3 x ø 10
100 min.
200
Wall mount Bracket
16
Holes

17
Room air conditioner with remote condenser CMK 4000
16 - TIPS FOR MAXIMUM COMFORT AND REDUCED CONSUMPTION
AVOID:
• Block the air intake and outlet of the unit. If they are obstructed, the unit will not work well, and may be damaged.
• Let direct sunlight into the room. Use sunshades, blind or curtain.
CHECK:
• Always try to keep the air lter clean. A clogged lter will impair the performance of the unit.
• To prevent conditioned air from escaping, keep windows, doors and any other openings closed.
17 - TROUBLESHOOTING
• The use of portable telephones near the air-conditioner may cause disturbance to its normal operation and must be avoided. In
case abnormal operation is noticed, (OPERATION lamp lights but outdoor unit will not run) to restore normal operation turn-o
electric supply for 60 seconds at least, by disconnecting the main switch or the wall plug, then start again the air-conditioner.
• The blinking OPERATION lamp, together with the stop of the air conditioner for a short time are due to the exceeding condensate
drainage. (see table “AUTO-DIAGNOSIS”)
• If the OPERATION lamp goes on blinking and the air conditioner denitely stops means that the condensate pump is not working
or that the condensate drain pipe in the exible connection pipe is obstructed; in this case contact the AFTER SALE SERVICE. In
case of emergency the air conditioner can work by draining the condensate from the back little pipe into a rather short container:
extract the little pipe and remove the cap.
• If your air conditioner does not work properly, rst check the following points before requesting service. If it still does not work
properly, contact your dealer or service center.
Trouble:
The air conditioner does not run at all. Possible cause: Remedy:
1. Power failure. 1. Restore power.
2. Leakage breaker tripped. 2. Contact service center.
3. Line voltage is too low. 3. Contact service center.
4. Operation button is OFF. 4. Press the button again.
5. Batteries in remote control unit 5. Replace batteries.
have run down.
Trouble:
Compressor runs but soon stops. Possible cause: Remedy:
Obstruction in front of condenser coil. Remove obstruction.
Trouble:
Poor cooling performance. Possible cause: Remedy:
1. Dirty or clogged air lter. 1. Clean air lter to improve airow.
2. Heat source or many people in room. 2. Eliminate heat source if possible.
3. Doors and/or windows are open. 3. Shut them to keep the heat or cold out.
4. Obstacle near air intake or air discharge 4. Remove it to ensure good airow.
port.
5. Thermostat is set too high. 5. Set the temperature lower.
Trouble:
Clicking sound is heard from Possible cause: Remedy:
the air conditioner. Any plastic parts may expand or shrink This is normal, and the sound will
due to a sudden temperature change. disappear when an even
In this event, a clicking sound may occur. temperature is settled.

18
CLIMIA
AUTO-DIAGNOSIS
•
•
OO
• •
•O
•O
O•
O
O
OO
N.
LED
TIMER OPERATION STANDBY POSSIBLE CAUSE REMEDY
Select an available mode
Contact service centre
Heating mode not available
Communication error with HMI receiver PCB (WiFi model only)
Condensate drainage error (float error)
PFC error (over current, over voltage or PFC communication error)
Internal fan malfunction
Inverter PCB overtemperature (compressor module)
Compressor overcurrent
Defective or disconnected indoor air sensor (RAT)
Defective or disconnected coil sensor (ICT)
Defective or disconnected compressor discharge
temperature sensor (CDT)
OO = LED o = LED on = ashing LED
INFORMATION FOR CORRECT DISPOSAL OF THE PRODUCT IN ACCORDANCE WITH THE EUROPEAN DIRECTIVE
2012/19/EU
At the end of its working life this equipment must not be disposed of as an household waste.It must be taken to special local
community waste collection centres or to a dealer providing this service.Disposing of an electrical and electronic equipment
separately avoids possible negative eects on the environment and human health deriving from an inappropriate disposal
and enables its components to be recovered and recycled to obtain signicant savings in energy and resources. In order to
underline the duty to dispose of this equipment separately, the product is marked with a crossed-out dustbin.
INFORMATION FOR CORRECT DISPOSAL OF THE BATTERY IN ACCORDANCE WITH THE EUROPEAN DIRECTIVE
2006/66/EC AND MODIFICATIONS INTRODUCED BY DIRECTIVE 56/2013/EU
Please replace battery when its electricity charge is used up: please do not eliminate this battery together with normal
household waste. It must be taken to special local community waste collection centres or to a dealer providing this service.
Disposing of a battery separately avoids possible negative eects on the environment and human health deriving from an
inappropriate disposal and enables its components to be recovered and recycled to obtain signicant savings in energy and
resources. In order to underline the duty to dispose of this equipment separately, the battery is marked with a crossed-out
dustbin.
REGULATION (EU) No. 517/2014 - F-GAS
The unit contains R32, a uorinated greenhouse gas with a global warming potential (GWP) of 675.
Do not release R32 into the atmosphere.
-
E1
E2
E3
E4
E5
E6
E7
E8
E9
Denition of the LED lamps: Timer = YELLOW / Operation = GREEN / Standby = RED

Intakt GmbH
Climia - Klima- und Wärmetechnik
Niemeierstraße 13
D - 32758 Detmold
Table of contents
Other Argo Air Conditioner manuals

Argo
Argo NEWAGE 9000 UI User manual

Argo
Argo AE2MI56AH User manual

Argo
Argo AEI1G 50 EMX Manual

Argo
Argo dados 9/13 User manual

Argo
Argo AEI1G30EMX User manual

Argo
Argo ASIAS8 User manual

Argo
Argo POLIFEMO FINN User manual

Argo
Argo GREENSTYLE PLUS 9000 UI User manual

Argo
Argo X3I AS52HL Guide

Argo
Argo ODIN PLUS User manual