Argo ECOLIGHT DUAL 18000 UE Operating manual

Please read this manual carefully before installing and using the air conditioner, and
retain for future reference.
V 10/19
USER AND INSTALLATION MANUAL
OUTDOOR UNITS
ECOLIGHT DUAL 14000 UE N
ECOLIGHT DUAL 18000 UE
ECOLIGHT TRIAL 21000 UE
ECOLIGHT QUADRI 28000 UE
ECOLIGHT
MULTI SPLIT AIR
CONDITIONERS – R32
INDOOR UNITS
ECOLIGHT 9000 UI (WIFI)
ECOLIGHT 12000 UI (WIFI)
ECOLIGHT 18000 UI (WIFI)

V 10/19
44
Contents
Information for use
The Refrigerant 45
Precautions for use 46
Description of components 48
Guide to the remote control and display
Remote control buttons 49
Getting to know the display icons 50
Getting to know the remote control buttons 50
Getting to know the button combination functions 53
Operating guide 54
Replacing the remote control batteries 54
WiFi guide 55
Emergency operation 65
Maintenance
Care and cleaning 65
Troubleshooting
Possible faults and solutions 66
Analysing faults and solutions 68
Installation instructions
Installation diagrams 69
Choosing a location for installation 70
Electrical connection requirements 71
Installation
Indoor unit installation 71
Outdoor unit installation 75
Vacuum pump 78
Safety operation of flammable refrigerant 82
Post-installation checks 83
Testing and operation
Functional testing 83
Appendices
Piping configuration 83
Procedure for extending the piping 84
INFORMATION FOR CORRECT DISPOSAL OF THE PRODUCT IN ACCORDANCE WITH THE EUROPEAN
DIRECTIVE 2012/19/EU
At the end of its working life this equipment must not be disposed of as an household waste. It must be taken to special
local community waste collection centres or to a dealer providing this service. Disposing of electrical and electronic
equipment separately avoids possible negative effects on the environment and human health deriving from an
inappropriate disposal and enables its components to be recovered and recycled to obtain significant savings in energy
and resources. In order to underline the duty to dispose of this equipment separately, the product is marked with a
crossed-out dustbin.

V 10/19
45
Exception clauses of manufacturer responsibility
Manufacturer will bear no responsibilities when personal injury or property loss is caused by the
following reasons.
1. Damage of the product due to improper use or misuse of the product.
2. Alter, change, maintain or use the product with other equipment without abiding by the instruction
manual of manufacturer.
3. After verification, the defect of product is directly caused by corrosive gas.
4. After verification, defects are due to improper operation during transportation of product.
5. Operate, repair, maintain the unit without abiding by instruction manual or related regulations.
6. After verification, the problem or dispute is caused by the quality specification or performance of
parts and components produced by other manufacturers.
7. The damage it’s caused by natural calamities, bad using environment or force majeure.
The Refrigerant
•To realize the function of the air conditioner unit, a special refrigerant circulates in the system.
The refrigerant is the fluoride R32 = GWP (Global warming potential). This refrigerant is
flammable and inodorous. It can lead to explosions under certain conditions, however the
flammability of this refrigerant is very low and it can be ignited only by fire.
•Compared to other common refrigerants, R32 is a non-polluting refrigerant with no harm to the
ozonosphere and a lower effect upon the greenhouse effect. R32 has very good
thermodynamic features which lead to a really high energy efficiency. The units therefore need
less filling.
Warning:
Do not try to accelerate the defrosting process or to clean the appliance in different ways other than
those recommended by the manufacturer. Should repair be necessary, contact your nearest authorized
Argoclima Service Centre. Any repairs carried out by unqualified personnel may be dangerous. The
appliance has to be stored in a room that doesn’t have any continuously operating ignition sources.
(for example: open flames, an operating gas appliance or an operating electric heater.) Do not pierce
or burn.
Appliance has to be installed, operated and stored in a room with a floor area larger than X m2. (Please
refer to table "a" in section of " Safety Operation of Inflammable Refrigerant" for Space X.)
For repairs, strictly follow manufacturer’s instructions only for appliances filled with R32 flammable gas.
Be aware that refrigerants do not have any odour.
Appliance filled with flammable gas R32.
Before using the appliance, read the owner’s manual.
Before installing the appliance, read the installation manual.
Before repairing the appliance, read the service manual.

V 10/19
46
INFORMATION FOR USE
Precautions for use
WARNING
•This product is not a toy. Children of less than 3 years should be
kept away unless continuously supervised.
•This
device is not intended for persons (including children aged
from 8 years and above) with reduced physical, sensory or mental
capabilities, or without the necessary experience and knowledge,
unless they have received the necessary supervision or instruction
concerning use of the appliance by a person responsible for their
safety.
•Children aged from 3 and less than 8 years shall only switch on/off
the appliance provided that it has been placed or installed in its
intended normal operating position and
they have been given
instruction concerning use of the appliance in a safe way and
understand the hazards involved. Children aged from 3 years and
less than 8 years shall not plug in, regulate and clean the appliance
or perform user maintenance.
•To prevent
the risk of fire, do not connect the air conditioner to a
multifunction socket.
•Always disconnect the power before servicing or cleaning the unit.
•
To prevent the risk of electric shock or malfunction, do not spray
water on the indoor unit.
•Do not spill water on the remote control.
•To prevent the risk of electrical shock or damage, do not attempt to
repair the air conditioner yourself. After performing the checks in
the troubleshooting section, contact an authorised service centre.
•Do not obstruct the inlet or outlet. Otherwise, a fault may occur.
•
Contact a qualified technician if it is necessary to move the air
conditioner to another location.
•
Do not climb on or place heavy objects on the top panel of the
outdoor unit. Otherwise, there is a risk of damage or personal injury.
•
Do not put fingers or other objects in the air inlet/outlet grilles.
Otherwise, there is a risk of damage or personal injury.
•
The air conditioner must be properly earthed. Improper earthing
can cause electrical shock.
•Always install a circuit breaker. Otherwise, a fault may occur.

V 10/19
47
•The unit must be installed and serviced by a qualified technician.
Otherwise, there is a risk of damage or personal injury.
WARNING
In case of smoke or burning
smell, turn off the power supply
and contact the service center.
If the problem persists, the unit
could be damaged and cause
electrical shock or fire.
It is necessary that power supply
adopts the special circuit with
protection through an air switch
and ensure it has sufficient
capacity . The unit switches on or
off automatically according to
user needs: do not turn on or turn
off the device frequently
otherwise it could suffer harmful
effects.
Do not cut or damage the power
cords and control cables. If the
power cable and the cable of the
control signal are damaged, they
must be replaced by a
professional technician.
The power supply must be
equipped with a special circuit to
prevent fire.
Otherwise, it may result in fire or
electric shock.
Disconnect the power supply if
the air conditioner is not used for
a long time
Otherwise, the accumulation of
dust can cause overheating.
Do not damage the power cord or
use an unauthorized cable.
Otherwise, it may cause
overheating or fire.
When cleaning the unit, stop
operation and turn off the power.
Otherwise, may occur electric
shock or damage.
The voltage rating of this product
is 220 -
240V, 50Hz. The
compressor vibrates strongly if
the voltage is too low, causing
damage to the cool
ing system.
The electrical components are
easily damaged if the voltage is
too high.
Do not attempt to repair the air
conditioner yourself.
An improper repair can cause fire
or electric shock. For this reason,
it is advisable to contact a service
center for repairs.
Check if the installed media is
sufficiently stable.
If damaged, it can cause the
equipment to fall and cause
injury.
Do not climb on the outdoor unit
or place anything on it.
The falling of the outdoor unit can
be dangerous
Earthing: The unit must be
properly grounded. The cable
grounding must be connected
with the appropriate device in the
building.
Operating limits
Operating range:
Cooling mode: from -15°C to +43°C (outdoor temperature)
Heating mode: from -15°C to +24°C (outdoor temperature)

V 10/19
48
Description of components
Indoor unit
The display may vary from the graphic above. Please refer to the purchased product for the actual
display content and positions)
ingresso aria
air inlet
pannellino
panel
filtro
filter
Tasto ausiliario
auxiliary button
Deflettore orizzontale
horizontal flap
uscitadell’aria
air outlet
Spia alimentazione
power indicator
Finestrella ricevitore
receiver window
Spia temperatura
temperature indicator
telecomando
remote control

V 10/19
49
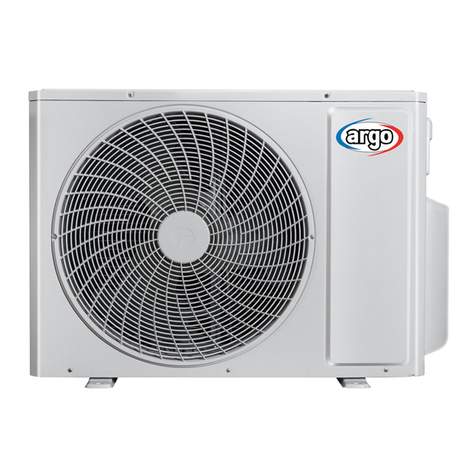
Outdoor unit
Unitàesterna
Outdoor unit
ingresso aria
air inlet
impugnatura
handle
uscita aria
air outlet
GUIDE TO THE REMOTE CONTROL AND DISPLAY
Remote control buttons

V 10/19
50
Getting to know the display icons
Getting to know the remote control buttons
N.B.:
● This is a general use remote controller, it can be used for the air conditioners with multifunction. For
some functions, which the model doesn't have, if you press the corresponding button on the remote
controller the unit will keep the original running status.
●Once connected to the power source, the air conditioner will make a sound. At this point the operation
indicator " " is ON (red indicator). You can now operate the air conditioner by using the remote
controller.
● Pressing the ON/OFF button on the remote controller, the signal icon " " on the display of remote
controller will blink once and the air conditioner will make a sound, this means that the signal has been
sent to the air conditioner. In the ignition state, the display shows the corresponding function icons.
● Pressing once again the ON/OFF button to turn off the unit, the set temperature and the clock icon
will be displayed on the display of remote controller (If timer on, timer off and light functions are set,
the corresponding icons will be displayed on the display of remote controller at the same time);
1. On/Off button
Press this button to turn on or off the unit. The sleep function will deactivate when the unit is turned off.
2. Mode button
Each time you press this button, a mode is selected in a sequence that goes from: AUTO, COOL,
DRY, FAN, and HEAT *, as the following:
•When you select automatic mode, the air conditioner will operate automatically according to the
factory settings. The set temperature cannot be adjusted and will not be displayed. Pressing the
"FAN" button will allow you to adjust the fan speed. Pressing the "SWING" button will allow you to
adjust the angle of airflow.
Send signal
Turbo mode
8℃heating function
Set temperature
Set time
TIMER ON /TIMER OFF
Child lock
Up & down swing
Set fan speed
Light function
Temp. display type
:Set temp.
:Outdoor ambient temp.
:Indoor ambient temp.
Sleepmode
Heatmode
Fan mode
Drymode
Coolmode
Auto mode
Operationmode
I feel function
X-fan mode
health function
ventilation operation
NOTICE:
“ ” This is a general remote controller. Some models have this function while some
do not. Please refer to the actual models.

V 10/19
51
N.B. When several indoor units are connected to the same outdoor unit, do not select the
AUTO mode, unless only one indoor unit is used and the others are switched off. All the
units must in fact operate in the same mode: if the mode selected or automatically defined
is different for the units connected to the same outdoor unit, the system goes into error and
the error E7 appears on the display of the indoor unit.
•When you select cool mode, the air conditioner will run in cool mode. The indicator will illuminate
on the display. Press "▲" or "▼" to adjust the set temperature. Press the "FAN" button to adjust the
fan speed. Pressing the "SWING" button will allow you to adjust the angle of airflow.
•When you select dry mode, the air conditioner will run at low speed in dry mode. The indicator
will illuminate on the display. The fan speed cannot be adjusted in this mode. Pressing the "SWING"
button will allow you to adjust the angle of airflow.
•When you select fan mode, the air conditioner will operate only the fan, blowing air without cooling
or heating. All the indicators will switch off. Press the "FAN" button to adjust the fan speed. Pressing
the "SWING" button will allow you to adjust the angle of airflow.
•When you select heat mode, the air conditioner will run in heat mode. The indicator will illuminate
on the display. Press "▲" or "▼" to adjust the set temperature. Press the "FAN" button to adjust the
fan speed. Pressing the "SWING" button will allow you to adjust the angle of airflow.
N.B.:
To prevent blasts of cold air from being blown into the room, there will be a delay of 1 – 5 minutes
after selecting heat mode before operation begins. (The actual delay will depend on the indoor
ambient temperature).
The temperature can be set between 16 – 30°C and four fan speeds are available: automatic, low,
medium and high.
3. FAN button
Pressing this button will allow you to cycle through and set the fan speed: automatic (AUTO), low
( ), medium ( ) or high ( ). When turning on the unit, the AUTO ventilation speed is
activated automatically. With automatic speed, the unit automatically selects the fan speed best
suited according to the factory settings. In DRY mode (dehumidification), only the low ventilation
speed can be set.
Note:
The fan speed in dehumidification mode is low.
Pressing the ventilation speed button in Cooling or Dehumidification mode for 2 seconds activates
the X-FAN function and the icon appears on the remote control: the unit will continue to ventilate
for a few minutes, even after the unit is turned off, to dry the battery of the indoor unit, thus avoiding
the formation of mold. This function is not available in Auto, Ventilation or Heating mode.
If the X-FAN function has been selected: after turning the unit off with the ON / OFF button, the fan
of the indoor unit will continue to run for a few minutes at low speed. During this time press the
FAN button for 2 seconds to stop the fan.
If the X-FAN function is not selected, when the air conditioner is turned off by pressing the ON /
OFF key, the fan switches off together with the unit.
4. ▲/ ▼ button
Press "▲" or "▼" once to increase or decrease the set temperature by 1°C. (The temperature
cannot be adjusted in automatic mode).
When setting the TIMER ON, TIMER OFF, press "▲" or "▼" to adjust the time.
5. SWING button – vertical oscillation
Press this button to set the swing angle (up/down). You can cycle through and set the fan's angle
of airflow as shown below:
V 10/19
52
nessuna visualizzazione (il deflettore orizzontale si arresta nella
posizione corrente)
no display (the horizontal flap stops in the current position)
6. SLEEP button
In cool, heat or dry mode, press this button to start the SLEEP function. The icon will appear
on the remote control display. Press the button again to exit the SLEEP function. The icon will
disappear from the display.
The temperature will increase or decrease by 2 degrees over two hours according to the function
selected (cool/heat).
7. TEMP button
Pressing this button will allow you to display the set temperature, the indoor ambient temperature,
or the outdoor ambient temperature on the indoor unit's display. You can cycle through the settings
on the remote control display as shown below:
Nessuna visualizzazione
no display
• When you select or “no display” with the remote control, the set temperature will appear on
the indoor unit's display.
• When you select with the remote control, the indoor ambient temperature will appear on the
indoor unit's display.
• When you select with the remote control, the outdoor ambient temperature will appear on
the indoor unit's display.
N.B.:
• It is not possible to display the outdoor ambient temperature on all models. The indoor unit will
receive the signal but will display the set temperature.
• The set temperature will appear on the unit's display on start-up, if enabled to do so.
• When you select to display the indoor or outdoor ambient temperature, the indoor unit will
display the corresponding temperature for three to five seconds, after which it will automatically
revert to displaying the set temperature.
8. TURBO button
In cool/heat mode, press this button to switch to rapid cool/heat mode. The icon will appear on
the remote-control display. Press this button again to exit the TURBO function. The icon will
disappear from the display.
9. I FEEL button
Press this button to start the I FEEL function. The icon will appear on the remote control display.
When you select this function, the remote control will send the detected ambient temperature to
the indoor unit, which will then adjust its operation automatically based on the difference between
the detected temperature and the set temperature.
Press the button again to exit the I FEEL function. The icon will disappear from the display.

V 10/19
53
The remote control should be positioned near the user when this function is selected. The
remote control should not be placed anywhere high or low temperatures may occur to avoid
inaccurate ambient temperature detection.
10. TIMER ON/OFF button
On a working unit, press this button to set the unit's power off time. When the unit is off, press this
button to set the unit's power-up time. By pressing this button, the HOUR ON or HOUR OFF
indicator starts blinking: if you press "▲" or "▼" buttons you can set the time (from 0.5 to 24) to
switch the unit off or on. Hold down the button "▲" or "▼" for 2 seconds to quickly change the time
until the desired time is reached. Press the TIMER button to confirm the TIMER settings and the
HOUR ON or HOUR OFF indication will stop blinking.
If the “HOUR” message flashes but does not follow any setting, it will stop flashing after 5 seconds.
If the TIMER ON or OFF function is activated, press the TIMER button to cancel the setting.
11. Wi-Fi button
Press this button to start the Wi-Fi function. When the Wi-Fi function is active, the "Wi-Fi" icon will
appear on the remote control display. When the remote control is off, press and hold the "Mode"
button and the "Wi-Fi" button simultaneously for 1 sec to return to the factory settings.
12. LIGHT button
Press this button to turn off the indoor unit's display light. The icon will disappear from the
remote control display.
Press this button again to turn on the display light. The icon will appear on the display.
Getting to know the button combination functions
Energy saving function
In cool mode, press the TEMP and CLOCK buttons simultaneously to start or stop the energy
saving function. When you start the energy saving function, "SE" will appear on the remote control
display and the air conditioner will automatically adjust the set temperature according to the factory
settings to achieve the best energy-saving effect. Press TEMP and CLOCK again simultaneously
to exit the energy saving function.
N.B.:
• When the energy saving function is enabled, the fan will operate at the default automatic speed
and cannot be adjusted.
• When the energy saving function is enabled, the set temperature cannot be adjusted. The remote
control will not send a signal to the unit when the TURBO button is pressed.
•The SLEEP and energy saving functions cannot operate simultaneously. If the energy saving
function was set in cool mode, press the SLEEP button to cancel it. If the SLEEP function was
set in cool mode, start the energy saving function to cancel it.
8°C heating function
In cool mode, press the TEMP and CLOCK buttons simultaneously to start or stop the 8°C heating
function. When this function is enabled, and 8°C will appear on the remote control display and
the air conditioner will continue to operate at 8°C. Press TEMP and CLOCK again simultaneously
to exit the 8°C heating function.
N.B.:
• When the 8°C heating function is enabled, the fan will operate at the default automatic speed and
cannot be adjusted. The remote control will not send a signal to the unit when the TURBO button
is pressed.
The SLEEP and 8°C heating functions cannot operate simultaneously. If the 8°C heating function
was set in cool mode, pressing the SLEEP button will cancel it. If the SLEEP function was set in
cool mode, starting the 8°C heating function will cancel it.
• When the temperature display is in °F, the remote control will show that the unit is operating at
46°F.

V 10/19
54
Remote control button lock function
Press "▲" and "▼" simultaneously to enable or disable the remote control button lock function.
When this function is enabled, will appear on the remote control display. If you attempt to
operate the remote control, the icon will flash three times and no signal will be sent to the unit.
Switching temperature display
In OFF mode, press the "▼" and "MODE" buttons simultaneously to switch from a temperature
display in °C to °F.
Operating guide
General operations
1. When you connect the power, press the "ON/OFF" button on the remote control to turn the
air conditioner on.
2. Press the MODE button to select the desired operating mode: AUTO, COOL, DRY, FAN or
HEAT.
3. Press "▲" or "▼" to adjust the desired temperature. (The temperature cannot be adjusted
in automatic mode.)
4. Press the "FAN" button to set the desired fan speed: automatic, low, medium or high.
5. Press the "SWING" button to adjust the fan's angle of airflow.
Optional Operations
1. Press the SLEEP button to set the function sleep
2. Press the timer ON/ timer OFF button to set the timer ON or timer OFF
3. Press the LIGHT button to check the switching on or off of the different parts of the display (this
function may not be possible for some units)
4. Press the TURBO button to activate or deactivate the function TURBO.
Replacing the remote-control batteries
1. Remove the battery compartment cover, marked
with (see image to right), by sliding it in the
direction of the arrow.
2. Use only two AAA – LR03 1.5V batteries. Make sure
the + and – ends are facing the correct direction.
3. Slide the battery compartment cover back into place.
U
se only Lithium / Manganese button batteries
model no.CR2025-3 V, compliant with the Batteries
Directive 2006/66 / UE
and amendments from
Directive 56/2013 / UE
batterie
batteries
reinserimento
close
rimozione
open
Coperchio vano batterie
battery compartment cover
N.B.:
•When the unit is operating, point the remote control's signal transmitter at the indoor unit's
receiver.
•The distance between the transmitter and the receiver must not exceed 8 metres and
should remain free of obstacles.
•If the room contains a fluorescent light or cordless telephone, signal interference can occur.

V 10/19
55
•When the remote control is not used for a month or more, remove the batteries.
•Use batteries of the same type when replacing the batteries, as necessary.
•If the icons on the remote control display are blurred or not visible, replace the batteries.
WIFI GUIDE (ONLY FOR AIR CONDITIONERS WITH WIFI)
How to set and operate the air conditioner with Wifi
1. Make sure that the device (smartphone or Tablet) used is equipped with a standard version of
Android (version 4.4 or higher) and iOS (iOS7.0 or higher) as the operating system. For more details
refer to the App.
2. Units can be connected and controlled only via Wi-Fi network or via Hotspot function.
3. Routers with WEP encryption are not supported.
4. The application interface is universal for all products and many features may not match for all units.
It may vary depending on the operating system used or the update in use. Refer to the current version.
5. If the access protection on your Router is active in the "MAC Filter" / "MAC address filter" item,
enable the access to the network of the MAC address of the device.
Installation and use instruction
1. Frame the QR Code using a QR Code Reader
or search for the "EWPE SMART" application in the app store
download and install the application.
Install the App by referring to its guide. Once the installation is complete, the icon
appears on the smartphone's home page.
INFORMATION FOR THE CORRECT DISPOSAL OF BATTERIES IN ACCORDANCE WITH EUROPEAN DIRECTIVE
2006/66/EC and MODIFICATIONS INTRODUCED BY DIRECTIVE 2013/56/UE
Replace batteries when they are depleted. At the end of their life, batteries must be disposed of separately from unsorted
waste. They must be taken to designated recycling centres or returned to a retailer providing this service. Separate disposal
of batteries helps to reduce the potential harmful effects on the environment and human health caused by their improper
disposal and also enables the recovery and recycling of component materials, saving significant energy and resources. The
requirement for separate disposal is indicated by the crossed-out wheelie bin label affixed to the appliance. Illegal disposal of
the product by the user is subject to administrative penalties as per current regulations.

V 10/19
56
NB:
Before starting any procedure, disconnect the power supply from the product, allow a
few minutes to pass and reconnect it.
2. Registration and access.
After installing the application, open "EWPE SMART" and click Sign up to register.
PLEASE NOTE:
• USERNAME: must be UNIQUE, composed of name + number, without spaces (eg Rossi57)
• Personal email: if already registered, retrieve Username / Password. It is not possible to create
another account with the same mail.
• PASSWORD: must have at least one capital letter, symbols or special characters (- ;, etc.) and
numbers.
• Repeat PASSWORD written above
• EUROPE country
Open the app Make the registration before Access
3. Adding units
Clicking on the icon of the little man opens a menu that includes, among other things, the "Help"
function.
Follow the instructions that appear on your device to add the unit. or add a new unit, press +
in the upper right corner of the homepage.

V 10/19
57
A menu appears with all the categories of devices that can be connected.
Select the relevant type:
In case of residential air conditioner: the fist box on left
After choosing the category of interest, proceed with the reset of the unit.
Different unit reset systems can be chosen depending on the type of unit / system and remote
control (with or without wifi key).
Follow step by step the operative instructions depending on the selected reset system.

V 10/19
58
After performing the reset following the instructions, click on Next to automatically add the unit
(it’s necessary to enter Wi-Fi password).
WIRE CONTROL OR
PORTABLE AIR
CONDITIONER (CONTROL
PANEL RESET)
Press the button on the touch
panel.
With the unit off, press and
hold the "Wifi" button for 10
seconds. When the unit
beeps, it means the reset has
been successful.
NB:
The configuration must be
done within 2 minutes. If it
does not happen within 2
minutes, repeat the reset
operation.
REMOTE CONTROL WITH WIFI
BUTTON
Direct the remote control towards
the unit.
With the remote control off, press
the "Mode" + "Wifi" buttons
simultaneously for 1 second.
When the unit beeps, it means
that the reset has been
successful.
NB:
The configuration must be done
within 2 minutes. If it does not
happen within 2 minutes, repeat
the reset operation..
REMOTE CONTROL WITHOUT WIFI
BUTTON (MODE and TURBO)
Direct the remote control towards
the unit.
Press the "Mode" + "Turbo"
buttons simultaneously for 10
seconds. After the unit has twice
produced an acoustic signal, this
will mean that the reset has been
successful.
NB:
The configuration must be done
within 2 minutes. If it does not
happen within 2 minutes, repeat
the reset operation
Alternatively, after setting and resetting the air conditioner, click on Add appliance manually in
the upper right corner to select the Wi-Fi network to associate.

V 10/19
59
Select the desired network and continue the configuration.
After performing the electrical reset of the unit and entering the information, perform a search for the
unit (Search appliance) and continue the configuration.

V 10/19
60
Configuration of the main functions
In the Homepage click on the device you wish to control and access the operating interface of it.
1. Select, operating mode, temperature and fan speed.
- Mode
2. Temperature for each mode: just slide your finger on the indicated temperature
3. Ventilation speed for each mode: just slide your finger on the fan symbol (the
adjustment possibilities vary depending on the mode)

V 10/19
61
4. Set advanced functions
Click Function (Func) in the lower left corner of the interface to enter the advanced settings.
X-FAN fucntion Vertical flap swinging Horizontal flap swinging
(if available)
Sleep function Light on indoor unit display Temperature unit conversion

V 10/19
62
Swing setting
Click Up & down swing to turn the swing function on or off. Click the arrow in the lower right
corner of the icon to go to the next screen and set the swing level.
List of Preselections
Click Timer. Then click + and make adjustments.
Other functions
1. Homepage menu
Click on the profile picture in the upper left corner of the homepage and set each
menu function.
This manual suits for next models
6
Table of contents
Other Argo Air Conditioner manuals

Argo
Argo AEI1G50EMX/BB User manual

Argo
Argo Misse13DCI User manual

Argo
Argo ASMI50HG Manual

Argo
Argo ECOWALL DUAL 14000 UE N Operating manual

Argo
Argo ASS36PH Manual

Argo
Argo FCR518CL Operating manual

Argo
Argo CHARM DUBBEL 9000 UI User manual

Argo
Argo CHARM Series User manual

Argo
Argo KENNY EVO User manual

Argo
Argo POLIFEMO FINN User manual
Popular Air Conditioner manuals by other brands

Frigidaire
Frigidaire FAC064K7A2 Factory parts catalog

Frigidaire
Frigidaire FRS09PYW1 installation guide

York
York F2FP040H06 User's information manual

Daikin
Daikin FTKS50EV1B Operation manual

Olimpia splendid
Olimpia splendid maeStro Pro Instructions for installation, use and maintenance

GOETTL
GOETTL GH UNITS User's information manual