Ariston DEOS s Series User manual

DEUMIDIFICATORE
DEHUMIDIFIER / DÉSHUMIDIFICATEUR / DESHUMIDIFICADOR
DESUMIDIFICADOR / ONTVOCHTIGER
ENTFEUCHTER ΧA5H>:¢AH2¢ΧA5H>:¢AH2¢6
MANUALE D’USO
USER MANUAL
DEOS 16s - 20s
TIMER
TURBO
FUNZIONAMENTO
IN CONTINUO
CONTINUOUS
OPERATION
CONTROLLO
ELETTRONICO
ELECTRONIC
LAVANDERIA
LAUNDRY FILTRO ANTIODORE
FILTER CLEANING
ELEVATA
SILENZIOSITÀ
SUPER SILENT

2

3
ITALIANO .................................................................................................................................................. 4
ENGLISH ..................................................................................................................................................12
FRANÇAIS............................................................................................................................................. .20
ESPAÑOLAS...........................................................................................................................................28
PORTUGUÊS .........................................................................................................................................36
NEDERLANDS .......................................................................................................................................44
GERMAN ................................................................................................................................................ 52
ČESKÁ..................................................................................................................................................... 60
SLOVAŠKI................................................................................................................................................68

4
IT
Egregio Signore,
desideriamo ringraziarLa per aver preferito nel suo acquisto un nostro deumidificatore.
Siamo certi di averLe fornito un prodotto tecnicamente valido.
Questo libretto è stato preparato per informarLa, con avvertenze e consigli, sul suo uso corretto e la sua manutenzione
per poterne apprezzare tutte le qualità.
Conservi con cura questo libretto per ogni ulteriore consultazione.
Il nostro servizio tecnico di zona rimane a Sua completa disposizione per tutte le occorrenze.
Distinti saluti.
Nonostante l’accurata attenzione avuta nella pubblicazione di questo libretto, qualche errore potrebbe essere sfuggito ai
nostri servizi di verifica.
Vi preghiamo pertanto di comunicarci eventuali inesattezze riscontrate al fine di migliorare il nostro servizio.
PRODOTTO CONFORME ALLA DIRETTIVA EU 2012/19/EU- D.Lgs.49/2014
ai sensi dell’art. 26 del Decreto Legislativo 14 marzo 2014, n. 49 “Attuazione della direttiva 2012/19/UE
sui rifiuti di apparecchiature elettriche ed elettroniche (RAEE)”
Il simbolo del cassonetto barrato riportato sull’apparecchiatura o sulla sua confezione indica che il
prodotto alla fine della propria vita utile deve essere raccolto separatamente dagli altri rifiuti.
L’utente dovrà, pertanto, conferire l’apparecchiatura giunta a fine vita agli idonei centri comunali di
raccolta differenziata dei rifiuti elettrotecnici ed elettronici.
In alternativa alla gestione autonoma è possibile consegnare l’apparecchiatura che si desidera smal-
tire al rivenditore, al momento dell’acquisto di una nuova apparecchiatura di tipo equivalente.
Presso i rivenditori di prodotti elettronici con superficie di vendita di almeno 400 m2è inoltre pos-
sibile consegnare gratuitamente, senza obbligo di acquisto, i prodotti elettronici da smaltire con
dimensioni inferiori a 25 cm.
L’adeguata raccolta differenziata per l’avvio successivo dell’apparecchiatura dismessa al riciclaggio,
al trattamento e allo smaltimento ambientalmente compatibile contribuisce ad evitare possibili effetti
negativi sull’ambiente e sulla salute e favorisce il reimpiego e/o riciclo dei materiali di cui è composta
l’apparecchiatura.

5
IT
NORMA RISCHIO
Non eettuare operazioni che implichino l’apertura
dell’apparecchio.
Folgorazione per presenza di componenti sotto tensione.
Lesioni personali per ustioni per presenza di componenti surriscaldati o per
ferite per presenza di bordi e protuberanze taglienti.
Assicurarsi che gli impianti a cui deve connettersi
l’apparecchiatura siano conformi alle normative vigenti. Folgorazione per contatto con conduttori sotto tensione
Non avviare o spegnere l’apparecchio inserendo
o staccando la spina del cavo di alimentazione
elettrica.
Folgorazione per danneggiamento del cavo o della spina o
della presa
Non danneggiare/modificare/riscaldare il cavo di ali-
mentazione nè appoggiare su di esso oggetti pesanti Folgorazione per presenza di fili scoperti sotto tensione.
Non lasciare oggetti sull’apparecchio. Lesioni personali per la caduta dell’oggetto a seguito di vibrazioni
Non salire sull’apparecchio. Lesioni personali per la caduta dall’apparecchio
Non eettuare operazioni di pulizia dell’apparecchio
senza aver prima spento l’apparecchio, staccato la
spina o disinserito l’interruttore dedicato.
Folgorazione per presenza di componenti sotto tensione.
Non dirigere il flusso dell’aria verso piani di
cottura o stufe a gas.
Esplosioni, incendi o intossicazioni per eusso gas dagli
ugelli di alimentazione. Fiamme spente dal flusso d’aria.
Non inserire le dita nelle bocchette di uscita
aria e nelle griglie di aspirazione aria.
Folgorazione per presenza di componenti sotto tensione.
Lesioni personali per tagli.
Non bere l’acqua di condensa. Lesioni personali per intossicazione.
Nel caso si avverta odore di bruciato o si veda
del fumo fuoriuscire dall’apparecchio, togliere
l’alimentazione elettrica, aprire le finestre ed
avvisare il tecnico.
Lesioni personali per ustioni o inalazioni fumi.
Assicurare una suciente ventilazione della stanza in
cui è installato il deumidificatore se è presente anche
un apparecchio a combustione
Carenza di ossigeno
Non azionare l’unità nei pressi di sostanze pericolose
e gas infiammabili o corrosivi rischio incendio, lesioni, esplosioni
Se il cavo di alimentazione è danneggiato esso deve
essere sostituito dal costruttore o dal suo servizio di
assistenza tecnica o comunque da una persona con
qualifica similare,in modo da prevenire ogni rischio.
Folgorazione per contatto con conduttori sotto tensione
Non esporsi al flusso dell’aria per lungo tempo Problemi di salute
Non utilizzare insetticidi, solventi o detersivi
aggressivi per la pulizia dell’apparecchio. Danneggiamento delle parti in materiale plastico o verniciate.
Non utilizzare l’apparecchio per scopi diversi
da quello di un normale uso domestico.
Danneggiamento dell’apparecchio per sovraccarico di funzionamento.
Danneggiamento degli oggetti indebitamente trattati.
Non fare utilizzare l’apparecchio da bambini o
persone inesperte. Danneggiamento dell’apparecchio per uso improprio.
Non dirigere il flusso dell’aria verso oggetti di
valore, piante o animali.
Danneggiamento o deperimento per eccessivo freddo/caldo,
umidità, ventilazione.
Assicurarsi che l’apparecchio sia collegato ad un ecace impianto di terra
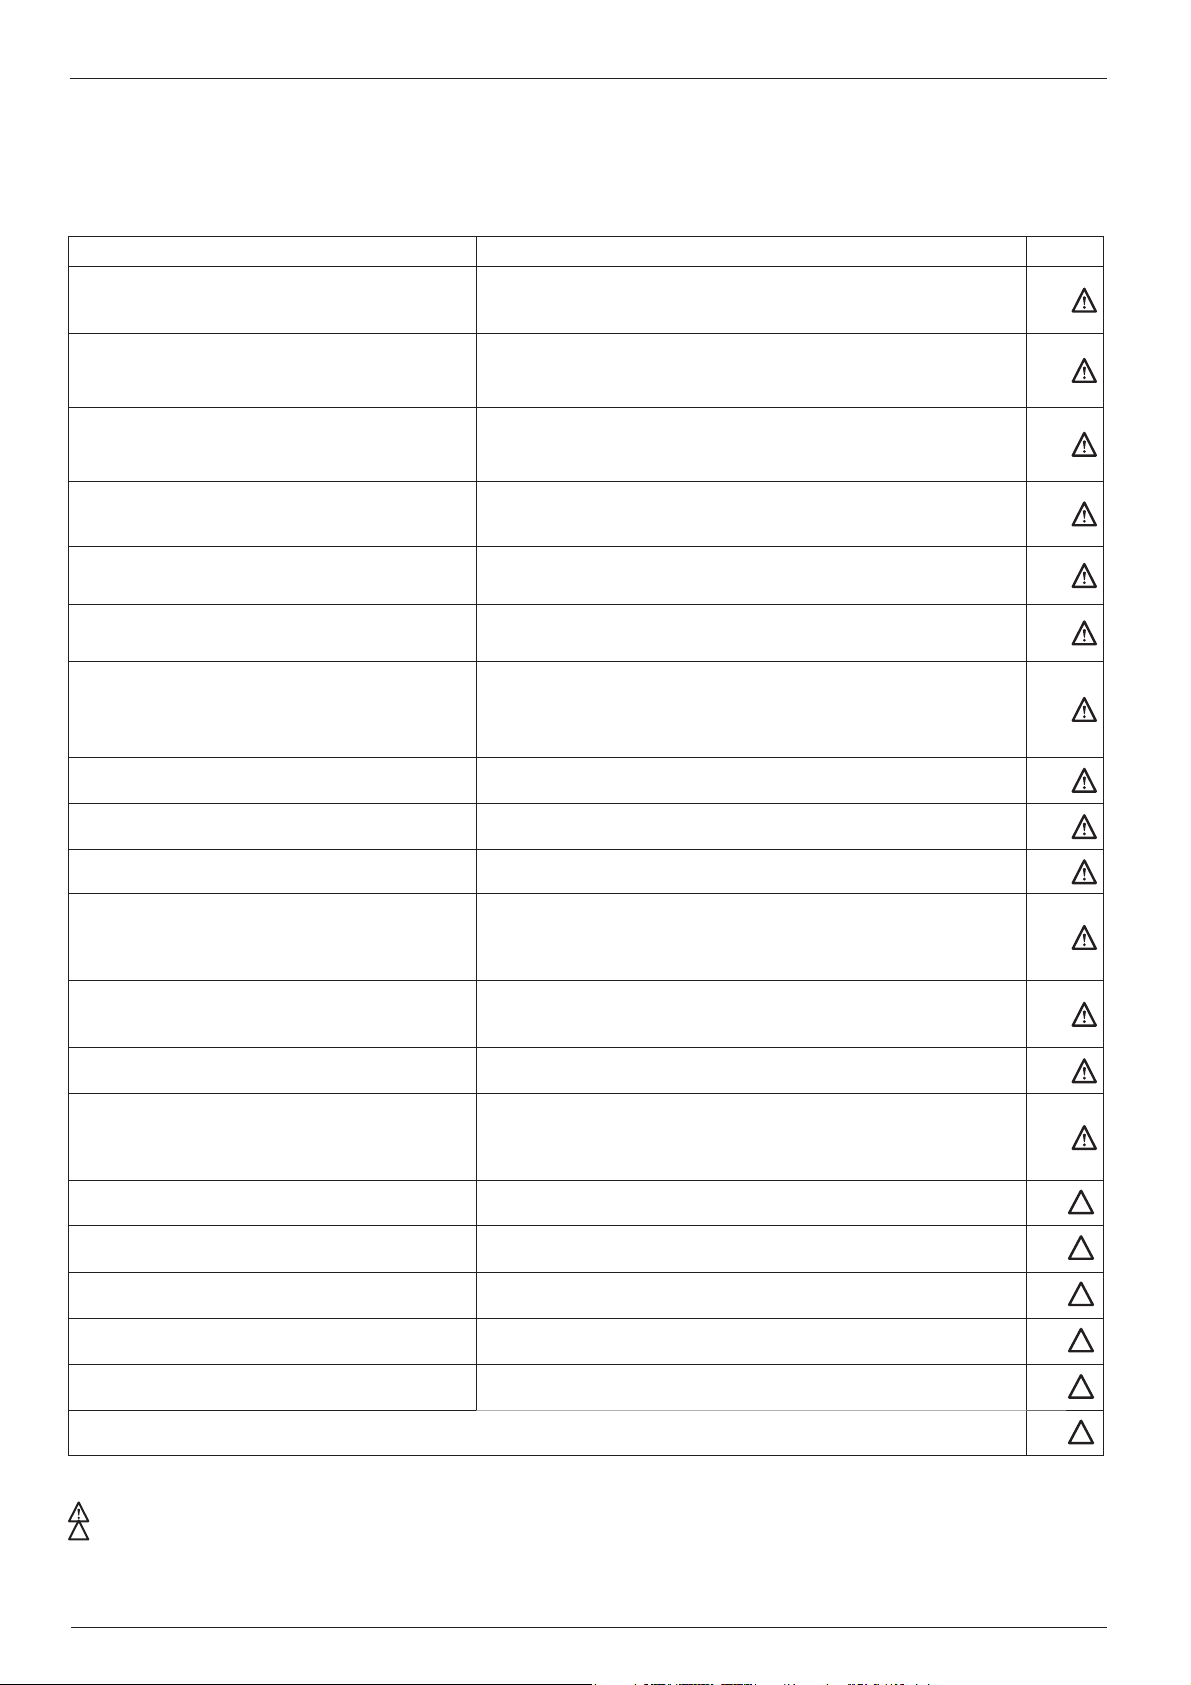
NORME DI SICUREZZA
CONSERVARE E CONSULTARE ATTENTAMENTE IL PRESENTE LIBRETTO
IN QUANTO TUTTE LE AVVERTENZE FORNISCONO INDICAZIONI IMPORTANTI PER LA SICUREZZA
NELLE FASI DI INSTALLAZIONE, USO E MANUTENZIONE.
Legenda Simboli:
Il mancato rispetto dell’avvertenza comporta rischio di lesioni, in determinate circostanze anche mortali, per le persone.
Il mancato rispetto dell’avvertenza comporta rischio di danneggiamenti, in determinate circostanze anche gravi, per oggetti, piante o animali.

6
IT
Non tentare mai di operare personalmente manutenzioni che implichino l’apertura della macchina: la presenza di elementi
sotto tensione e del gas contenuto nel circuito frigorifero, rendono particolarmente pericolose queste operazioni. Contat-
tare sempre un servizio di Assistenza tecnica specializzato.
ATTENZIONE
Staccare sempre la spina prima di qualsiasi operazione.
Non far entrare acqua nella griglia superiore. Non ostacolare il flusso dell’aria.
Non utilizzare mai il deumidificatore all’aperto.
Non usare in luoghi con presenza di vapori corrosivi o sostanze pericolose.
Non appoggiare nessun oggetto sopra l’apparecchio.
Prima di rimuovere l’apparecchio assicurarsi che la tanica raccolta condensa sia vuota.
Non tirare il cavo elettrico per spegnere l’apparecchio.
Non aprire mai la carrozzeria del deumidificatore.
Dopo aver spento l’apparecchio attendere qualche minuto prima di riaccenderlo.
Non utilizzare l’apparecchio su superfici inclinate
Non utilizzare prolunghe per il cavo di alimentazione elettriche
IMPORTANTE
- Non accendere e spegnere continuamente l’unità e non inclinarla. Se l’unità non si accende scollegare la spina e richie-
dere l’assistenza del rivenditore locale.
- Non spruzzare insetticidi o altre sostanze chimiche per evitare deformazioni alla struttura in plastica.
- Questo deumidificatore è utilizzabile esclusivamente per uso domestico:
ogni altro uso deve essere considerato improprio.
Attenzione il deumidificatore non funziona con temperatura inferiore a 5°C o superiore a 35°C.
ASSISTENZA POST-VENDITA
In caso di necessità, rivolgersi per informazioni al proprio rivenditore o al servizio assistenza del produttore.
MANUTENZIONE
A volte può essere presente della sporcizia nel deumidificatore dopo averlo utilizzato per varie stagioni, riducendo l’ef-
ficienza. E’ importante svuotare periodicamente l’acqua di condensa accumulata nell’unità e si raccomanda di eseguire
periodicamente le operazioni di manutenzione e di rivolgersi al proprio rivenditore locale per l’assistenza.
AVVERTENZE E INFORMAZIONI

7
IT
L’UMIDITÀ DELL’ARIA
Una certa quantità di vapore acqueo è sempre presente nell’aria: la capacità
dell’aria di contenere vapore è tanto maggiore quanto più elevata è la sua
temperatura.
Ad esempio, alla temperatura di 26˚C il massimo contenuto di umidità è di 21,4
g di vapore per ogni kg di aria, mentre a 30˚C il massimo contenuto di umidità
è di 27,2 g di vapore per ogni kg di aria. In realtà i massimi contenuti di umidità
costituiscono dei casi estremi che non si verificano alle nostre latitudini. In tali
condizioni l’aria viene detta “satura” (ossia essa non è più in grado di conte-
nere ulteriore umidità) e il vapore acqueo inizia a condensare. Si definisce
“umidità relativa” il rapporto che intercorre tra il contenuto eettivo di umidità
nell’aria e il massimo possibile a quella determinata temperatura.
Ad esempio, se alla predetta temperatura di 26˚C il contenuto eettivo di umi-
dità è di 10,7 g di vapore per ogni kg di aria, l’umidità relativa sarà di:
10,7 x 100
= 50%
21,4
L’umidità relativa viene sempre espressa in valore percentuale (%). Oltre che
per cause naturali, negli ambienti chiusi il contenuto di umidità dell’aria può au-
mentare per eetto delle persone presenti, per le attività che si svolgono ecc.
Un’umidità eccessiva o un’umidità troppo ridotta sono, per opposte ragioni,
nocive per l’organismo umano e, perciò, da evitare. Compressore
evaporatore condensatore
Tanica
Aria
asciutta
Aria
umida
NOZIONI SULL’UMIDITÀ
DESCRIZIONE DEL PRODOTTO
MANIGLIA
TANICA
RACCOGLI
CONDENSA
FILTRO HEPA
GRIGLIA
INGRESSO ARIA
CAVO DI ALIMENTAZIONE
RUOTE
USCITA SCARICO
CONDENSA
IN CONTINUA
PANNELLO DI CONTROLLO
GRIGLIA USCITA ARIA

8
IT
PANNELLO DI CONTROLLO
ATTENZIONE
Non intervenire sul selettore con le mani bagnate (rischio di lesioni personali per folgorazione).
Non avviare o spegnere l’apparecchio inserendo o staccando la spina del cavo di alimentazione di corrente (rischio di lesioni
personali per folgorazione).
Non esporsi per molto tempo al flusso diretto dell’aria ( rischio di lesioni personali per sensibilizzazione cutanea).
2
14
1. TASTO ON/OFF
Premere per accendere e spegnere il deumidificatore. L’indicatore a sinistra del tasto ON/OFF rimane acceso quando l’unità
è in funzione e non è illuminato quando l’unità e spenta.
2. TASTO MODALITÀ
Premere per selezionare la modalità di funzionamento desiderata tra MODALITA’ STANDARD e MODALITA’ IN CONTINUA.
MODALITA’ STANDARD: l’unità lavora fino al raggiungimento dell’umidità desiderata.
MODALITA’ IN CONTINUA: l’unità lavora alla massima deumidificazione fino al riempimento della tanica.
In questa modalità i tasti di controllo “+” e “-” non sono abilitati (indicatore “cont” acceso).
3. Tasto TIMER
Premere per impostare il ritardo di accensione quando l’unità è spenta o il ritardo di spegnimento, quando l’unità è accesa.
L’indicatore alla sinistra del tasto timer si illumina.
Premere o tenere premuti i tasti di controllo “+” e “-” per impostare il ritardo desiderato: gli incrementi sono di 30 min (0,5
ore) tra 0 e 10 ore, mentre di 1 ora tra 10 e 24 ore.
Riportare il ritardo a 0.0 o spegnere l’unità per cancellare la funzione timer.
4. Tasto TURBO
Premere per selezionare la velocità di ventilazione desiderata tra normale e funzione lavanderia (l’indicatore si accende).
5. TASTI DI IMPOSTAZIONE UMIDITÀ.
Il livello di umidità relativa desiderata può essere impostato da un minimo di 35% a un massimo di 80%, con incrementi del
5% ad ogni pressione dei tasti di controllo “+” e “-”. Quando viene raggiunta l’umidità impostata, il compressore si arresta e
la ventola continua a girare per 3 minuti. I tasti di impostazione umidità sono disabilitati nella modalità in continua.
6. DISPLAY.
In modalità standard, il display visualizza il livello di umidità desiderata mentre la si imposta con i tasti. Una volta impostata,
il display passa a visualizzare la percentuale di umidità relativa nella stanza. In modalità in continua, il display visualizza la
percentuale di umidità relativa nella stanza.
AUTORESTART
Questa funzione permette al deumidificatore, in caso di black-out elettrico, di ripartire con le ultime impostazioni memorizzate.
FUNZIONE ANTICONGELAMENTO
Previene il congelamento dell’evaporatore aumentando la vita del deumidificatore migliorandone il risparmio energetico. Quando è
attiva, la ventola conitnua a girare mentre il compressore si ferma e il dislpay mostra la scritta “P1”.
BLOCCO TANICA PIENA
Il deumidificatore si arresta quando la tanica di raccolta condensa è piena oppure non è posizionata correttamente, il
display mostra la scritta “P2” e si accende l’indicatore “full”.
IMPORTANTE: Quando il compressore si arresta, è necessario attendere 3 minuti prima che riprenda il funzionamento.
35
6

9
IT
SCARICO CONDENSA
Il deumidificatore ha la possibilità di scaricare l’acqua di condensa in
due modi dierenti:
1. SCARICO IN TANICA
L’acqua di condensa viene raccolta direttamente nella tanica posta nel-
la parte inferiore del deumidificatore. Quando quest’utlima è piena, la
macchina arresta il funzionamento automaticamente, si accende la spia
di tanica piena e il display visualizza “P2”
OPERAZIONI PER LO SVUOTAMENTO DELLA TANICA:
- Estrarre leggermente la tanica utilizzando le maniglie ai lati (fig. A).
- Estrarre completamente la tanica facendo attenzione a non far ca-
dere l’acqua di condensa
- Non appoggiare la tanica a terra; essendo la sua base irregolare
potrebbe cadere causando il versamento dell’acqua.
- Scaricare l’acqua.
- Riposizionare la tanica nell’apposita sede. Il deumidificatore ripren-
derà a funzionare automaticamente
ATTENZIONE:
- Non rimuovere il galleggiante (presente all’interno della tanica)
durante le operazioni di svuotamento dell’acqua.
- Riposizionare correttamente la tanica (dopo averla svuotata).
- L’errato posizionamento della tanica potrebbe impedire l’avvio
del deumidificatore. Verificare che la spia di sicurezza tanica pie-
na sia spenta. Si consiglia, prima di togliere la tanica, di dare dei
colpetti sulla parte alta del deumidificatore così da permettere
all’acqua di scendere completamente all’interno della tanica.
Non è da escludere che dopo aver tolto la tanica possano cade-
re alcune gocce d’acqua.
- Prima di eettuare qualsiasi operazione sull’apparecchio assi-
curarsi di avere tolto l’alimentazione.
2. DRENAGGIO IN CONTINUA
Consente di scaricare l’acqua di condensa senza che quest’ultima si
raccolga all’interno della tanica. E’ particolarmente adatta nel caso in
cui vi sia la necessità di far funzionare il deumidificatore per un lungo
periodo di tempo, senza possibilità di svuotare ripetutamente la tanica.
ISTRUZIONI
- Rimuovere il tappo di gomma dal foro di destra posto sul retro dell’u-
nità. (fig.B)
- Collegare un tubo (non incluso) di diametro interno 10 mm al foro
(fig.C). Fare in modo che l’altra estremità del tubo finisca in un punto
di raccolta acqua che si trovi al di sotto del livello del foro di scarico
- Accendere l’unità.
fig.A
fig.B
fig.C

10
IT
PICCOLA MANUTENZIONE
Prima di qualsiasi operazione di pulizia, staccare la spina o di-
sinserire l’interruttore automatico.
1. PULIZIA DEL DEUMIDIFICATORE
- Pulire il deumidificatore utilizzando un panno inumidito con
acqua tiepida (non più di 40°C) e sapone neutro. Non usare
solventi o detergenti aggressivi
- Non spruzzare acqua direttamente sull’unità
2. PULIZIA DELLA TANICA
Pulire la tanica di raccolta condensa con regolarità (2-3 setti-
mane), in modo da prevenire la formazione di mue e batteri.
Utilizzare acqua e detergenti non aggressivi.
3. PULIZIA DEI FILTRI
Filtro antipolvere
Per un buon rendimento del deumidificatore, la pulizia del
filtro è essenziale (da eseguire almeno ogni 30 giorni).
- Estrarre la griglia posteriore sollevando la parte inferiore e
poi farla scivolare verso il basso fig.E.
- Rimuovere il filtro dalla griglia e pulirlo con aspirapolvere o
lavarlo con acqua tiepida e detersivo neutro.
- Asciugarlo bene (non lasciarlo esposto al sole)
- Rimettere il filtro con la griglia in posizione.
Filtro antiodore
(rimuove cattivi odori e composti organici volatili)
- Estrarre il filtro antiodore dall’apposita sede sul filtro antipol-
vere.
- Sostituitre il filtro ogni 24 mesi.
AVVERTENZA
Non utilizzare il deumidificatore senza il filtro antipolvere
MANUTENZIONE DI FINE STAGIONE
1. Eliminare l’acqua di condensa eventualmente presente nella
tanica
2. Pulire l’unità, la tanica e il filtro antipolvere.
3. Coprire l’unità per evitare il deposito di polvere.
4. Riporre il deumidificatore in luogo asciutto e ben ventilato.
CONSIGLI PER IL POSIZIONAMENTO
Vi consigliamo, per un buon funzionamento del deumidificato-
re, di rispettare le distanze come indicato nella fig.D.
Posizionare il deumidificatore su una superficie stabile, liscia e
orizzontale.
L’apparecchio può essere trasportato tramite l’uso delle rotelle.
Prima di un trasporto, togliere l’alimentazione all’apparecchio e
svuotare la tanica raccogli condensa.
40 cm
30 cm
30 cm
30 cm
30 cm
fig.D
fig.E

11
IT
SE IL DEUMIDIFICATORE NON FUNZIONA
PRIMA DI RICHIEDERE L’INTERVENTO DEL SERVIZIO ASSISTENZA EFFETTUARE
I CONTROLLI ILLUSTRATI DI SEGUITO:
PROBLEMA CAUSA RIMEDIO
L’unità non si avvia premendo il tasto ON/
OFF
1) La spina non è ben inserita
2) L’interrruttore generale non è inserito
3) La spia tanica piena è accesa
4) La tanica è piena o non inserita corretta-
mente
1) Inserire la spina correttamente
2) Verificare l’interrruttore generale
3) Svuotare la tanica
4) Riposizionare correttamente la tanica
L’unità non riesce a deumidificare la stan-
za sucientemente
1) L’ingresso o l’uscita dell’aria sono
ostruiti (tende, oggetti, pareti...)
2) Il livello di umidità impostato non è su-
cientemente basso
3) Finestre e porte della stanza non sono
chiuse
4) La temperatura ambiente è troppo bassa
(inferiore a 5°C) o alta ( superiore a 35°C)
5) Il flitro dell’aria è intasato
1) Liberare ingresso e uscita dell’aria
2) Regolare opportunamente il livello di umidità
3) Chiudere finestre e porte
5) Pulire il filtro dell’aria
L’unità è molto rumorosa 1) Il filtro dell’aria è intasato
2) L’unità è inclinata
3) La superficie di appoggio non è piana
1) Pulire il filtro dell’aria
2) 3) Riposizionare l’unità
Il display mostra la scritta "P1" Funzione di anticongelamento attiva Attendere che la procedura di sbrinamento si con-
cluda. La scritta "P1" scomparirà automaticamente
Il display mostra la scritta "P2" Tanica piena Svutare la tanica e riposizionarla correttamente
Il display mostra la scritta "E1" Il sensore di umidità è scollegato o in corto
circuito
Contattare il servizio di assistenza tecnica
Il display mostra la scritta "E2" Il sensore di temparatura è scollegato o in
corto circuito
Contattare il servizio di assistenza tecnica
SCHEDA PRODOTTO
Tipo di apparecchio Deumidificatore
Marchio del fornitore ARISTON
DEOS 16s DEOS 20s
Deumidificazione(1) litri/giorno 16 20
Potenza assorbita(1) W 312 379
Pressione sonora(1) dB(A) 42 42
Tipo refrigerante R134A R134A
GWP(2) kgCO2 eq. 1430 1430
Temperatura di esercizio °C 5/35 5/35
Capacità tanica litri 3 3
Alimentazione e numero di fasi Hz - V - Ph 50-230-1 50-230-1
Tipologia compressore Rotativo Rotativo
Portata d’aria massima m3/h 150 150
Carica standard refrigerante kg 0,12 0,13
Dimensioni mm 345x501x257 345x501x257
Peso (netto/lordo) kg 12,1/13,6 12,2/13,7
(1) relativa a condizioni di funzionamento 30°C e 80% umidità relativa
(2) La perdita di refrigerante contribuisce al cambiamento climatico. In caso di rilascio nell’atmosfera, i refrigeranti con un potenziale di
riscaldamento globale (GWP) più basso contribuiscono in misura minore al riscaldamento globale rispetto a quelli con un GWP più
elevato. Questo apparecchio contiene un fluido refrigerante con un GWP di 1300. Se 1 kg di questo fluido refrigerante fosse rilascia-
to nell’atmosfera, quindi, l’impatto sul riscaldamento globale sarebbe 1300 volte più elevato rispetto a 1 kg di CO2 , per un periodo
di 100 anni. In nessun caso l’utente deve cercare di intervenire sul circuito refrigerante o di disassemblare il prodotto. In caso di
necessità occorre sempre rivolgersi a personale qualificato.

12
GB
Dear Customer,
We would like to thank you for purchasing one of our dehumidifiers.
We are confident in having supplied you with a technically sound product.
This booklet contains some suggestions and precautions for operating the appliance correctly and performing mainte-
nance, so that you can fully appreciate its features.
Store this booklet in a safe place for further reference.
Our nearest technical assistance centre remains at your disposal for any need you may have.
Yours faithfully.
Despite the utmost care taken in publishing this booklet, some errors may nonetheless have been overlooked by our
proof-reading department.
We therefore kindly ask you to report to us any mistakes you may notice, in order to help us improve our service.
THIS PRODUCT CONFORMS TO EU DIRECTIVE 2012/19/EU
The barred dustbin symbol appearing on the appliance indicates that the product must be dis-
posed of separately from household waste once it reaches the end of its lifespan, and transferred
to a waste disposal site for electric and electronic equipment, or returned to the dealer when pur-
chasing a new appliance of the same kind.
The user is responsible for delivering the decommissioned appliance to a suitable waste disposal
site.
Proper separated collection of the decommissioned appliance and its subsequent eco-compatible
recycling, treatment and disposal helps to prevent negative eects on the environment and human
health, besides encouraging reuse of the materials comprising the product.
For further details on the available waste collection systems, contact your local waste disposal of-
fice, or the dealer from which the product was purchased.

13
GB
RULE RISK
Do not perform any operations that involve opening
the appliance.
Electrocution due to exposure to live components.
Personal injury caused by burns due to overheated components, or
wounds caused by sharp edges or protrusions.
Make sure that the systems to which the appliance
should be connected comply with the applicable
regulations.
Electrocution due to exposure to live wires.
Do not start or stop the appliance simply by plugging it
into the mains electricity socket or unplugging it.
Electrocution through contact with a damaged cable or plug,
or socket.
Do not damage/modify/heat the power cable or place
heavy objects on top of it. Electrocution due to non-insulated live wires.
Do not leave any objects on top of the appliance. Personal injury due to objects falling as a result of vibrations.
Do not climb onto the appliance. Personal injury due to the appliance falling.
Do not attempt to clean the appliance without first turn-
ing it o and unplugging it or switching the dedicated
switch o.
Electrocution due to exposure to live components.
Do not direct the air flow towards gas hobs or gas
stoves.
Explosions, fires or intoxication due to the discharge of gas from supply
nozzles. Flames extinguished by the air flow.
Do not place your fingers in the air outlets or in the air
inlet grilles.
Electrocution due to exposure to live components.
Personal injury from cuts.
Do not drink the condensate water. Personal injury from poisoning.
If you notice a burnt smell or see smoke coming out of
the device, disconnect it from the power supply, open
all windows and contact the technician.
Personal injury from burns or fume inhalation.
Ensure that there is sucient ventilation in the room
in which the dehumidifier is installed if a combustion
appliance is also located there.
Lack of oxygen.
Do not operate the unit in the presence of hazardous
substances and flammable or corrosive gases. Risk of fire, injury, explosion.
If the power cable is damaged, it must be replaced by
the manufacturer or by the relevant technical assis-
tance service, or – at all events – by a suitably qualified
technician, in order to prevent potential risks.
Electrocution due to exposure to live wires.
Avoid prolonged exposure to the air flow. Health issues.
Do not use any insecticides, solvents or aggressive
detergents to clean the appliance. Damage to plastic or painted parts.
Do not use the appliance for any purpose other than
normal domestic use.
Damage to the device caused by operation overload. Damage to objects
caused by improper use.
Do not allow children or inexperienced persons to
operate the appliance. Damage to the appliance caused by improper use.
Do not direct the air flow towards valuable items, plants
or animals. Damage or deterioration due to excessive cold/heat, humidity, ventilation.
Make sure that the appliance is connected to an ecient earthing system.
SAFETY RULES
READ THIS MANUAL CAREFULLY AND STORE IT SAFELY, AS IT CONTAINS IMPORTANT INFORMATION
FOR SAFE INSTALLATION, USE AND MAINTENANCE OF YOUR NEW APPLIANCE.
Symbol legend:
Failure to comply with this warning implies the risk of injury to persons, which in some circumstances may be fatal.
Failure to comply with this warning implies the risk of damage – even serious damage in some circumstances – to property and plants or harm to animals.

14
GB
Never attempt to personally perform maintenance interventions that imply opening the machine: the presence of charged
components and the gas contained in the refrigeration circuit make these operations particularly dangerous. Always con-
tact a specialised technical assistance centre.
CAUTION
Always unplug the appliance prior to eecting any operation.
Prevent water from entering through the upper grille. Do not obstruct the air flow.
Never use the dehumidifier outdoors.
Do not use the appliance in places where corrosive vapours or dangerous substances are present.
Do not place objects on top of the appliance.
Before removing the appliance, make sure that the condensate collector tank is empty.
Do not pull on the power cable to turn the appliance o.
Never open the dehumidifier body.
After turning the appliance o, wait a few minutes before turning it back on.
Do not use the appliance on inclined surfaces.
Do not use extensions for the power cable.
IMPORTANT
- Do not turn the appliance on and o continuously and avoid tilting it. If the appliance does not switch on, unplug it from
the socket and contact the local dealer for assistance.
- Do not spray insecticides or other chemical substances onto the appliance as they may cause warping of the plastic
structure.
- This dehumidifier is exclusively designed for domestic use: any other use must be regarded as improper use.
Warning: the dehumidifier does not operate at temperatures below 5°C or above 35°C.
AFTER-SALES ASSISTANCE
If necessary, contact your dealer or the manufacturer’s technical assistance centre for further information.
MAINTENANCE
Dirt may sometimes build up in the dehumidifier after it has been used for several seasons, resulting in a loss of eciency.
It is important to regularly empty the condensate water deposited in the appliance and periodically perform maintenance
operations; contact the local dealer for technical assistance.
PRECAUTIONS AND INFORMATION

15
GB
AIR HUMIDITY
A certain amount of water vapour is always present in the air: the air's capacity
to withhold water vapour increases with its temperature.
For example, at a temperature of 26°C, the maximum humidity content is 21.4
g of water vapour per kg of air, while at 30°C, the maximum humidity content
is 27.2 g of water vapour per kg of air. In actual fact, the maximum humidity
contents constitute extreme cases which do not occur at our latitudes. In these
conditions, air is said to be 'saturated' (i.e. it cannot contain any more humidity)
and the water vapour begins to condense. 'Relative humidity' refers to the ratio
between the air's actual humidity and the maximum possible humidity content
at that particular temperature.
For example, if said temperature were to be 26°C, the actual humidity content
would be 10.7 g of water vapour for each kg of air, and the relative humidity
would be:
10.7 x 100
= 50%
21.4
Relative humidity is always expressed as a percentage value (%). Apart from
natural causes, the air's humidity in enclosed spaces can increase due to the
number of people present, the activities being performed, etc. Both too little
and too much humidity are harmful to the human body, for opposite reasons,
and should thus be avoided. Compressore
evaporatore condensatore
Tanica
Aria
asciutta
Aria
umida
HUMIDITY CONCEPTS
PRODUCT DESCRIPTION
evaporator condenser
Dry air
Moist
air
Collection
tank
Compressor
HANDLE
CONDENSATE
COLLECTION
TANK
HEPA FILTER.
AIR INLET GRILLE
POWER CABLE
CONTINUOUS
CONDENSATE
DISCHARGE
OUTLET
CONTROL PANEL
AIR OUTLET GRILLE
WHEELS

16
GB
CONTROL PANEL
CAUTION
Do not touch the selector with wet hands (risk of personal injury due to electrocution).
Do not start or stop the appliance by simply plugging it into the power socket or unplugging it (risk of personal injury due to
electrocution).
Avoid prolonged direct exposure to the air flow (risk of personal injury due to sensitisation of the skin).
1. ON/OFF BUTTON
Press to switch the dehumidifier on and o. The indicator light to the left of the ON/OFF button remains lit when the appliance
is functioning and unlit when the appliance is o.
2. MODE BUTTON
Press to select the desired operating mode: STANDARD MODE or CONTINUOUS MODE. STANDARD MODE: the appliance
functions until the desired humidity level is reached.
CONTINUOUS MODE: the appliance functions at the maximum dehumidification level until the tank fills up.
In this mode, the '+' and '-' control buttons are not enabled ('cont' indicator on).
3. TIMER button
Press to set the start delay when the appliance is o, or the switch-o delay when it is on. The indicator light to the left of the
timer button will light up.
Press or hold the '+' and '-' control buttons to set the desired delay: 30 min (0.5 hours) increments occur between 0 and 10
hours, and 1-hour increments between 10 and 24 hours.
Restore the delay to 0.0 or switch o the appliance to cancel the timer function.
4. TURBO button
Press to select the desired ventilation speed between normal and laundry room function (the indicator light turns on).
5. HUMIDITY SETTING BUTTONS
The desired relative humidity level can be set to between 35% (minimum) and 80% (maximum), with 5% increments each time
the '+' and '-' control buttons are pressed. When the set humidity level is reached, the compressor stops and the fan contin-
ues to turn for 3 minutes. The humidity setting buttons are disabled in the continuous mode.
6. DISPLAY
In the standard mode, the display visualises the desired level of humidity while it is being set with the buttons. Once set, the
display will visualise the percentage of relative humidity in the room. In continuous mode, the display will visualise the per-
centage of relative humidity in the room.
AUTO-RESTART
This function enables the dehumidifier to restart, after a blackout, from the last stored settings.
ANTI-FROST FUNCTION
Prevents the evaporator from frosting, thereby extending the dehumidifier's life and enhancing energy saving. When this function is ac-
tive, the fan continues to turn while the compressor stops and 'P1' appears on the display.
TANK FULL STOPPAGE
The dehumidifier stops when the condensate collection tank is full or incorrectly positioned. 'P2' will appear on the display
and the 'full' indicator light turns on.
IMPORTANT: When the compressor stops, it is necessary to wait 3 minutes before it restarts.
2
14
35
6

17
GB
CONDENSATE DISCHARGE
The dehumidifier can discharge the condensate water in two dierent
ways:
1. DISCHARGE INTO TANK
The condensate water falls directly in the tank located in the lower sec-
tion of the dehumidifier. When the tank fills up, the machine automati-
cally stops functioning, the full tank indicator light switches on and 'P2'
appears on the display.
PROCEDURE FOR EMPTYING THE TANK:
- Pull out the tank slightly using the appropriate handles on the sides
(Fig. A).
- Pull the tank out fully while being careful not to spill the condensate
water.
- Do not place the tank on the ground as its irregular underside may
cause the water to spill out.
- Empty out the water.
- Put the tank back into its housing. The dehumidifier will automatically
start functioning again.
WARNING:
- Do not remove the float (located inside the tank) when emptying
out the water.
- Make sure to put the tank properly back into its housing (after
having emptied it).
- Incorrect positioning of the tank may prevent the dehumidifier
from starting. Check that the full tank safety indicator light is o.
Before removing the tank, it is advisable to tap the top part of the
dehumidifier a few times to ensure that all the water has fallen
into the tank. A few drops of water may nonetheless drip down
once the tank has been pulled out.
- Before undertaking any operation on the appliance, make sure
that the power supply has been disconnected.
2. CONTINUOUS DRAINAGE
Allows for discharging the condensate water without letting it fall into
the collection tank. This function is particularly useful when the dehu-
midifier must be operated for long periods, making it dicult to empty
the tank continuously.
INSTRUCTIONS
- Remove the rubber cap from the right-hand outlet located on the
rear of the appliance (Fig. B).
- Connect the hose (not included) with 10 mm internal diameter to the
outlet (Fig.C). Make sure that the other end of the hose terminates at
a water collection point lying lower than the discharge outlet.
- Switch the appliance on.
fig.A
fig.B
fig.C

18
GB
BASIC MAINTENANCE
Before cleaning the appliance, unplug it and disengage the au-
tomatic switch.
1. CLEANING THE DEHUMIDIFIER
- Clean the dehumidifier using a cloth dampened in lukewarm
water (no more than 40°C) and neutral soap. Do not use sol-
vents or aggressive detergents.
- Do not spray water directly onto the appliance.
2. CLEANING THE TANK
Clean the condensate collection tank regularly (every 2-3
weeks) in order to prevent mould and bacteria build-up. Use
water and non-aggressive detergents.
3. CLEANING THE FILTERS
Dust filter
Cleaning the filter regularly (to be performed at least every
30 days) is essential to ensure optimal dehumidifier perfor-
mance.
- Remove the rear grille by raising the lower part and sliding it
out downwards (Fig. E).
- Remove the filter from the grille and clean it using a vacuum
cleaner or wash it with lukewarm water and neutral deter-
gent.
- Dry it thoroughly (do not leave it exposed to sunlight).
- Put the filter and grille back in place.
Anti-odour filter
(removes bad odours and volatile organic compounds)
- Remove the anti-odour filter from its appropriate housing on
the dust filter.
- Replace the filter every 24 months.
WARNING
Do not use the dehumidifier without the dust filter.
END-OF-SEASON MAINTENANCE
1. Remove any condensate water present in the tank.
2. Clean the appliance, tank and dust filter.
3. Cover the appliance to protect it against dust.
4. Store the dehumidifier in a dry and well-ventilated place.
POSITIONING TIPS
For the correct operation of your dehumidifier, we advise you to
observe the distances shown in Fig. D.
Position the dehumidifier on a stable, smooth and horizontal
surface.
The appliance can be moved using the wheels. Before mov-
ing the appliance, disconnect the power supply and empty the
condensate collection tank.
40 cm
30 cm
30 cm
30 cm
30 cm
fig.D
fig.E

19
GB
IN CASE THE DEHUMIDIFIER MALFUNCTIONS
BEFORE CONTACTING THE TECHNICAL ASSISTANCE CENTRE, PERFORM THE FOLLOWING CHECKS:
PROBLEM CAUSE SOLUTION
The appliance does not start by pressing
the ON/OFF button.
1) The plug is not properly inserted.
2) The main switch is not properly inserted.
3) The tank full indicator light is lit.
4) The tank is either full or not properly in-
serted.
1) Insert the plug correctly.
2) Check the main switch.
3) Empty the tank.
4) Put the tank properly back into place.
The appliance is not able to dehumidify
the room enough.
1) The air inlet or outlet are obstructed (by
curtains, objects, walls, etc.).
2) The set humidity level is not low enough.
3) The windows and doors of the room are
not closed.
4) The room temperature is either too low
(lower than 5°C) or too high (above 35°C).
5) The air filter is clogged.
1) Free the air inlet and outlet.
2) Appropriately adjust the humidity level.
3) Close all windows and doors.
5) Clean the air filter.
The appliance is very noisy. 1) The air filter is clogged.
2) The appliance is inclined.
3) The appliance is resting on a non-flat sur-
face.
1) Clean the air filter.
2) 3) Reposition the appliance.
'P1' appears on the display. Anti-frost function active. Wait until the defrosting function ends. 'P1' will dis-
appear automatically.
'P2' appears on the display. Tank full. Empty the tank and put it correctly back in place.
'E1' appears on the display. The humidity sensor is disconnected or has
short-circuited.
Contact the technical assistance service.
'E2' appears on the display. The temperature sensor is disconnected or
has short-circuited.
Contact the technical assistance service.
PRODUCT TECHNICAL SHEET
Type of appliance Dehumidifier
Supplier brand ARISTON
DEOS 16s DEOS 20s
Dehumidification(1) litres/day 16 20
Power consumption(1) W 312 379
Sound pressure(1) dB(A) 42 42
Type of refrigerant R134A R134A
GWP(2) kgCO2 eq. 1430 1430
Operating temperature °C 5/35 5/35
Tank capacity litres 3 3
Power supply and no. of phases Hz - V - Ph 50-230-1 50-230-1
Type of compressor Rotativo Rotativo
Maximum air flow rate m3/h 150 150
Standard refrigerant charge kg 0,12 0,13
Dimensions mm 345x501x257 345x501x257
Weight (net/gross) kg 12,1/13,6 12,2/13,7
(1) Relative to operation at 30°C and 80% relative humidity.
(2) Refrigerant loss contributes to climate change. In case of their release into the atmosphere, refrigerants with lower global warming
potential (GWP) have less impact on global warming compared to refrigerants with a higher GWP. This appliance contains a refriger-
ant fluid with a GWP of 1,300. In other words, if 1 kg of this refrigerant fluid were released into the atmosphere, the impact on global
warming would be 1,300 times greater compared to 1 kg of CO2, over a period of 100 years. In no case whatsoever must the user
attempt to intervene on the refrigerant circuit or dismantle the product. In case of need, please contact a qualified professional.

20
FR
Cher Monsieur,
nous tenons à vous remercier de nous avoir accordé la préférence lors de l’achat de votre déshumidificateur.
Nous sommes certains de vous avoir fourni un produit techniquement valable.
Ce mode d’emploi a spécialement été conçu pour vous aider, par des renseignements et des conseils, à l’utiliser correc-
tement et à assurer son entretien afin que vous puissiez apprécier à plein toutes ses qualités.
Conservez-le avec soin pour le consulter en cas de besoin.
Notre service après-vente est à votre entière disposition pour toute éventualité.
Veuillez agréer, Monsieur, nos salutations distinguées.
Malgré le soin apporté à la réalisation de ce livret, quelque erreur pourrait avoir échappé à nos services de contrôle.
Nous vous prions par conséquent de bien vouloir nous signaler les inexactitudes que vous seriez amené à constater pour
nous permettre d’améliorer notre service.
CE PRODUIT EST CONFORME À LA DIRECTIVE EU 2012/19/EU
Le symbole de la poubelle barrée d'une croix, appliqué sur l'appareil, indique que le produit en fin
de vie, ne doit pas être jeté avec les déchets ménagers, mais déposé dans un point de collecte
approprié pour appareils électriques et électroniques ou être remis au commerçant lors de l'achat
d'un nouvel appareil équivalent.
Il relève de la responsabilité de l’utilisateur de déposer l'appareil en fin de vie dans les points de
collecte appropriés.
Une collecte sélective appropriée pour acheminer l'appareil usagé au recyclage, au traitement et à
une mise au rebut respectueuse de l'environnement contribue à éviter des eets nocifs sur l'envi-
ronnement et sur la santé et favorise la réutilisation des matériaux composant le produit.
Pour de plus amples renseignements sur les systèmes de collecte diérenciée, s'adresser au ser-
vice municipal compétent ou au magasin où l'achat a été eectué.
This manual suits for next models
2
Table of contents
Languages:
Other Ariston Dehumidifier manuals